Safe Surfer makes it easy to install an effective porn blocker on your home Wi-Fi. Along with protecting your privacy, we also use our behind-the-scenes technology to block porn and other harmful online content. This guide will efficiently walk you through how to install protection.
Before we get started, it’s good to know that installing protection on your home Wi-Fi can sometimes be tricky. In addition, if you have a wireless broadband connection (rather than a fibre or copper-based connection), it’s unlikely that these instructions will work. If you get stuck, check out our protection apps! Our custom-built apps feature our best protection technology. They install protection directly onto devices (Android, iPhone and iPad, Windows, Mac), and are a great way to block porn and apps for devices on the go. The apps enable you to set custom block settings and monitor the online activity of your loved ones. We can also prevent protection from being uninstalled (and block filter workarounds) in various cases. Otherwise, let’s get started!
Step 1: Find the login details
We have various tailor-made guides available for modems and routers provided by different Internet service providers worldwide:
- ASUS
- eero
- Google Nest/Wi-Fi
- Netcomm
- NETGEAR
- Nokia
- TP-Link Deco
- Spark NZ
- Starlink
- One NZ
- 2degrees NZ
- And other manufacturers
Can’t see your service provider or manufacturer above? The instructions that follow are the general steps we take to install protection.
Some modern Wi-Fi network brands support changing the network settings from an app on your smartphone. You’ll be looking for a menu called “DNS” (or as detailed below). Otherwise, your home router will likely have the login details printed on a sticker. This sticker can usually be found on the rear or the bottom of the modem. Sometimes these details can be hidden behind a sliding card.
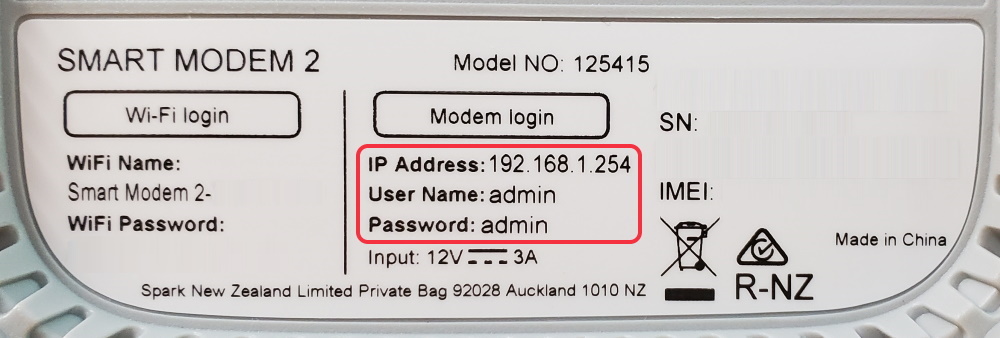
For this particular modem, the login details are the following:
- IP address: 192.168.1.254
- Username: admin
- Password: admin
If you can’t find the details, check the user manual. This can usually be found online by searching for the model and its default login details. You could also contact your Internet service provider (ISP) for assistance on how to change the DNS settings on your modem.
Pro tip: If you get stuck, please feel free to open the chat bubble on this page and chat with us! Send us the model of your modem, and we can help you with the following installation steps.
Step 2: Install DNS
Open your modem app, or enter the IP address you found into the top search bar of a web browser (such as Google Chrome or Firefox).

Enter the login details when asked.
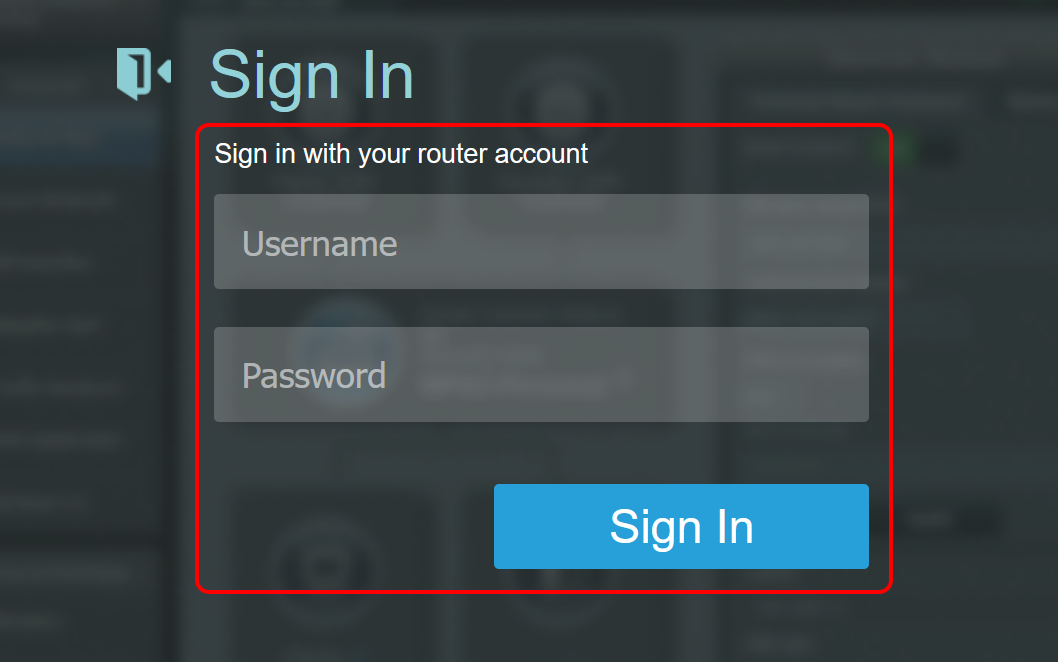
Once you’re logged in, you’ll be looking for a section that lets you change your DNS settings. Ideally, you’ll want to do this in the WAN (or Internet) menu, but sometimes it can only be done in the LAN menu.
Find and open the WAN/Internet menu.
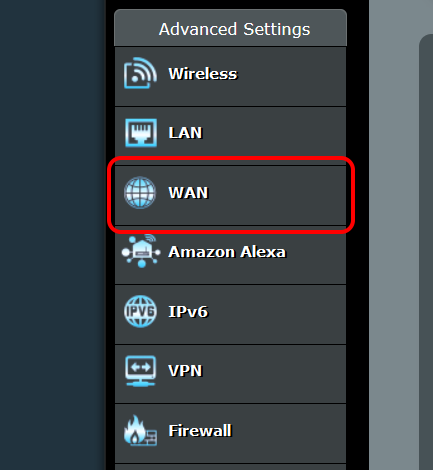
You’ll be looking for a section where you can set what’s called static (or manual) IPv4 (and sometimes also IPv6) DNS server addresses.
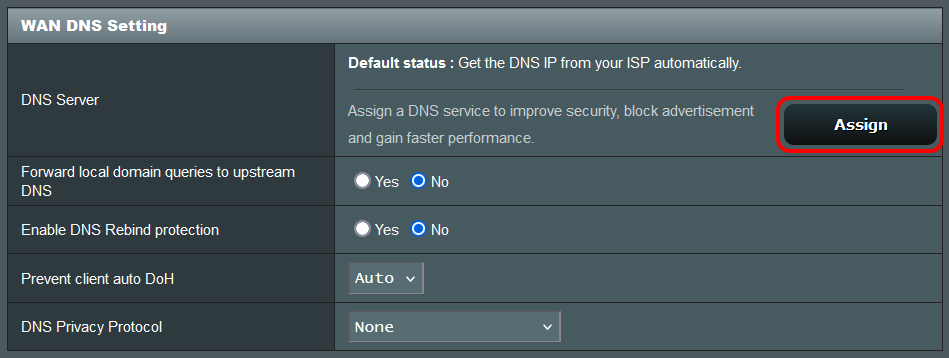
Inside this section, there will hopefully be a place to enter static IPv4 (and possibly IPv6) DNS server settings. If you find them, enter in the following information (which will connect your Wi-Fi to our filtering servers, instead of using the default DNS servers from your Internet service provider):
- Primary DNS (IPv4): 4.150.168.57
- Secondary DNS (IPv4): 104.197.28.121
- Primary IPv6 DNS (if applicable): 2603:1030:7:7::3b
- Secondary IPv6 DNS (if applicable): 2600:1900:4000:524c:8000:1::
Save the changes. Once you’ve done this, you can skip ahead to the Verify protection step.

If you couldn’t find anything, you can also check the LAN menu for a DHCP section that might contain settings for static DNS. Find and open the LAN menu.
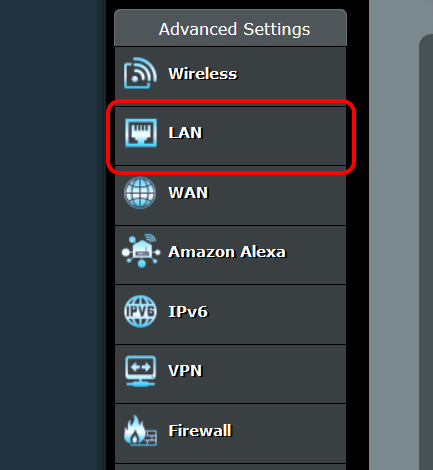
Inside the LAN menu, find the DHCP (or DHCP server) section.

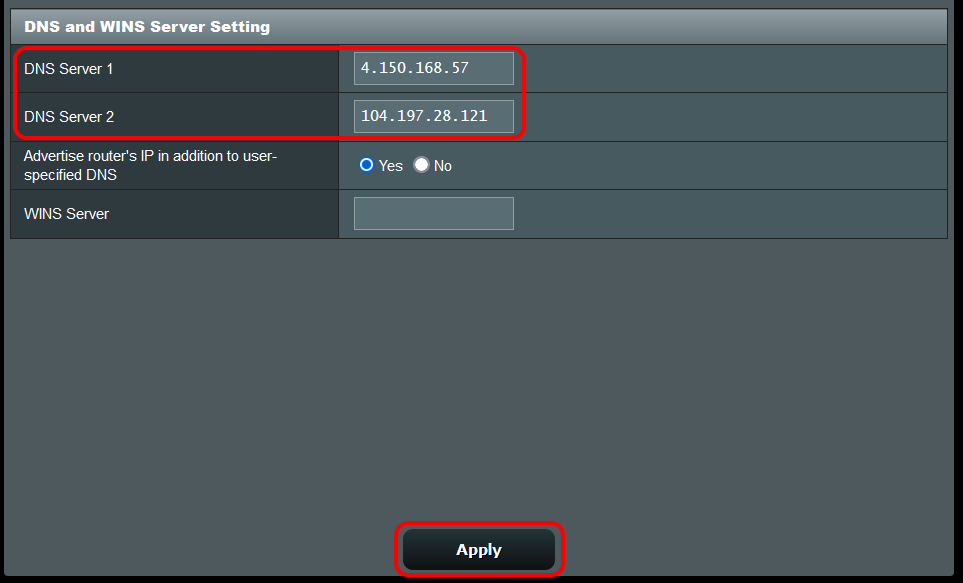
Inside this section, there will hopefully be a place to enter static IPv4 (and possibly IPv6) DNS server settings. If you find them, enter in the following information:
- Primary DNS (IPv4): 4.150.168.57
- Secondary DNS (IPv4): 104.197.28.121
- Primary IPv6 DNS (if applicable): 2603:1030:7:7::3b
- Secondary IPv6 DNS (if applicable): 2600:1900:4000:524c:8000:1::
Save the changes. Once you’ve done this, you’ll need to restart the Wi-Fi system, and at least one device connected to it (so that you can test the filtering in the next step).
Verify protection
Verify the protection installation by visiting ExampleAdultSite.com inside a browser app (such as Google Chrome, Microsoft Edge, or Safari). This is a safe website designated for testing if pornographic websites are being blocked. This site should be blocked. If we’re blocking something, you’ll usually see a blank connection error page.
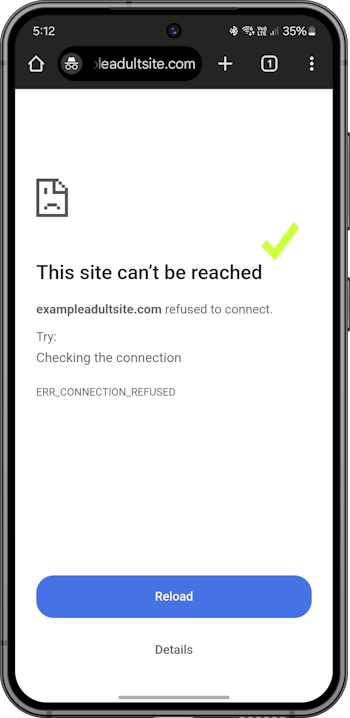
If you have any Apple devices (that is, iPhones, iPads, or Macs), you will also need to enable the Limit Adult Websites setting on those devices to disable the Private Browsing Mode feature for Safari. This feature ignores the Safe Surfer filtering received from your home router. You can find out how to fix this as follows:
- For each iPhone and iPad device, navigate to the Settings app > Screen Time > Content & Privacy Restrictions (and enable this feature if it’s not already turned on) > App Store, Media, Web & Games (on older devices, this menu is called Content Restrictions) > Web Content > set to Limit Adult Websites. Once you’re done, navigate back to the Screen Time main menu, which will save the changes.
- For each Mac device, navigate to the System Settings app > Screen Time > Content & Privacy (and enable this feature if it’s not already turned on) > App Store, Media, Web & Games (on older devices, this menu is called Content Restrictions) > under Web Content, set Access to Web Content to Limit Adult Websites, then click the Done button at the lower-right corner. Once you’re done, navigate back to the Screen Time main menu, which will save the changes. Open the Safari app > click the Safari text on the left-hand side of the menu bar (at the top of the screen) > click the Quit option. Repeat this process for every user account on the Mac.
Step 3: Get protection apps for best parental controls experience
Check out our protection apps! Our custom-built apps feature our best technology. They install protection directly onto devices (Android, iPhone and iPad, Windows, Mac, and Chromebook), and are a great way to block porn and apps for devices on the go. The apps enable you to set custom block settings and monitor the online activity of your loved ones. We can also prevent protection from being uninstalled (and block filter workarounds) in various cases.

Protection complete
Great work! The devices connected to this home router should now be protected. Visit our easy-to-use online dashboard to start monitoring traffic and blocking content via our apps with an affordable Pro Surfer subscription.
The Safe Surfer team works hard to provide families worldwide with the best protection possible from porn. We block hundreds of thousands of pornographic websites through our live database.
If you would like to protect a different kind of device, visit our Getting Started guide.
