It’s easy with Safe Surfer to install an effective porn blocker on a Mac device. Along with protecting your privacy, we use our behind-the-scenes technology to block porn and other harmful online content. Let’s get started with installing protection.
Pro tip: you can find the latest version of this guide on our help desk by clicking this link.
Step 1: Install protection
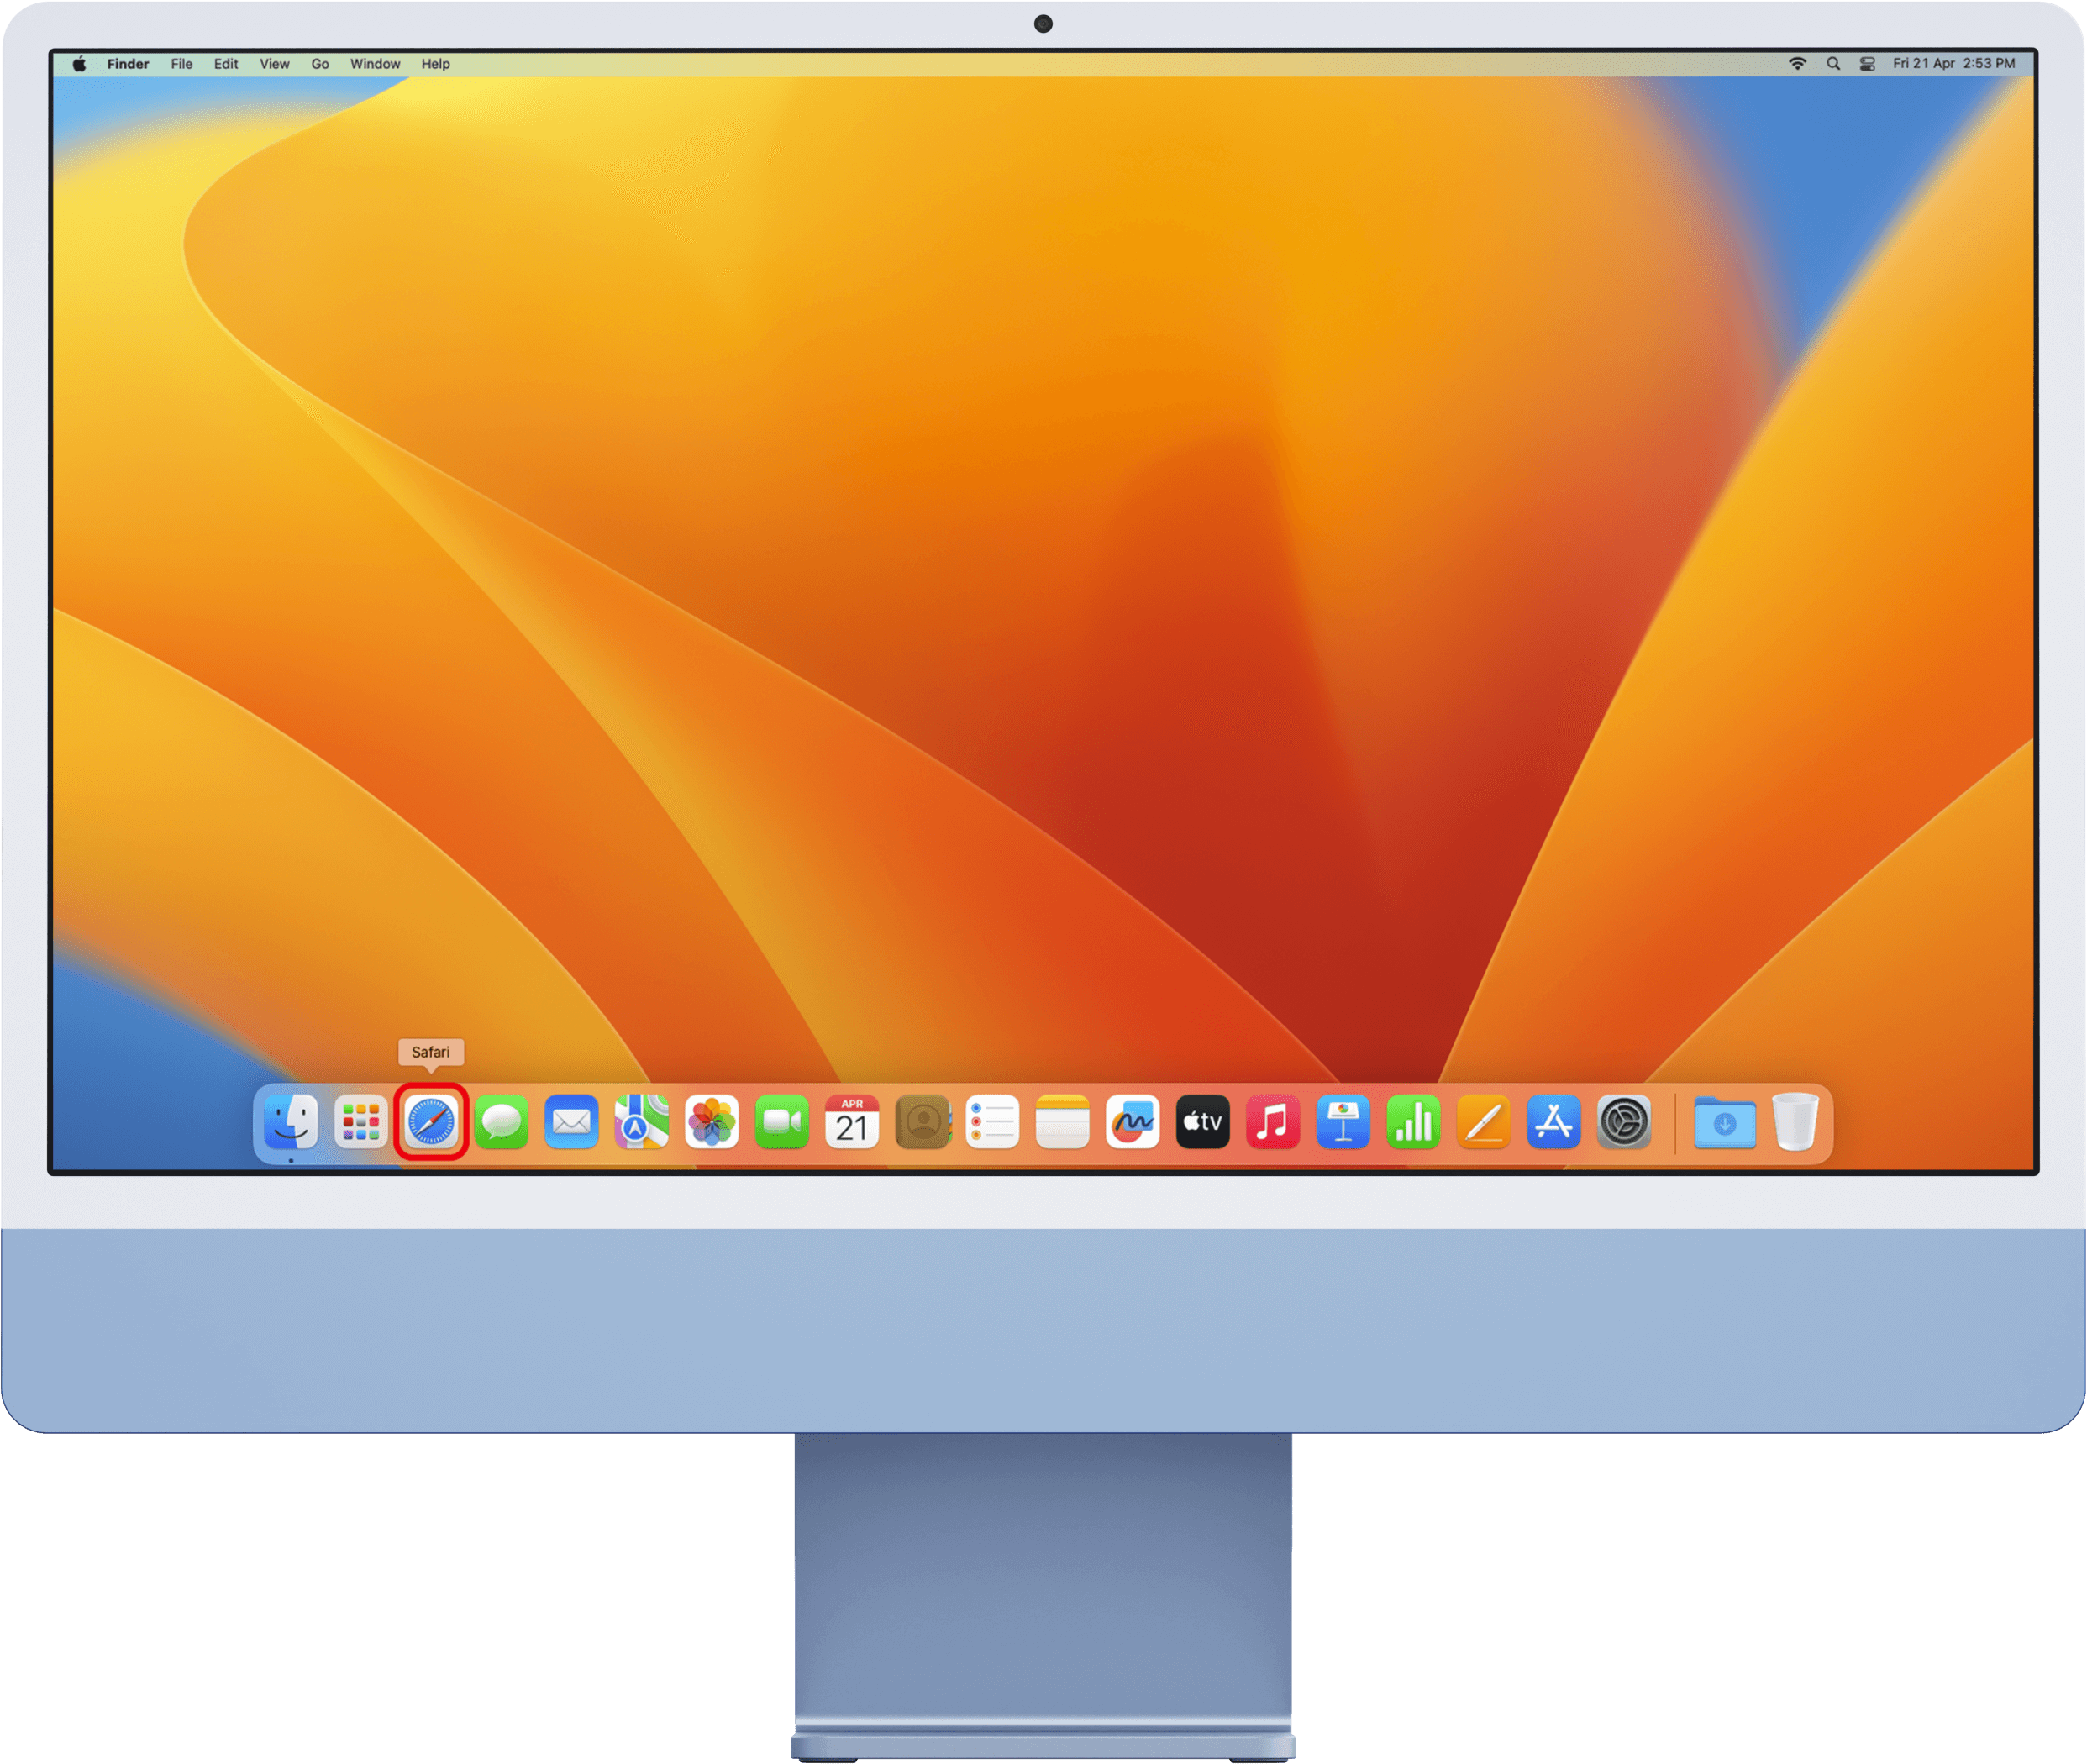
On the device to be protected, click the Safari app on the dock.
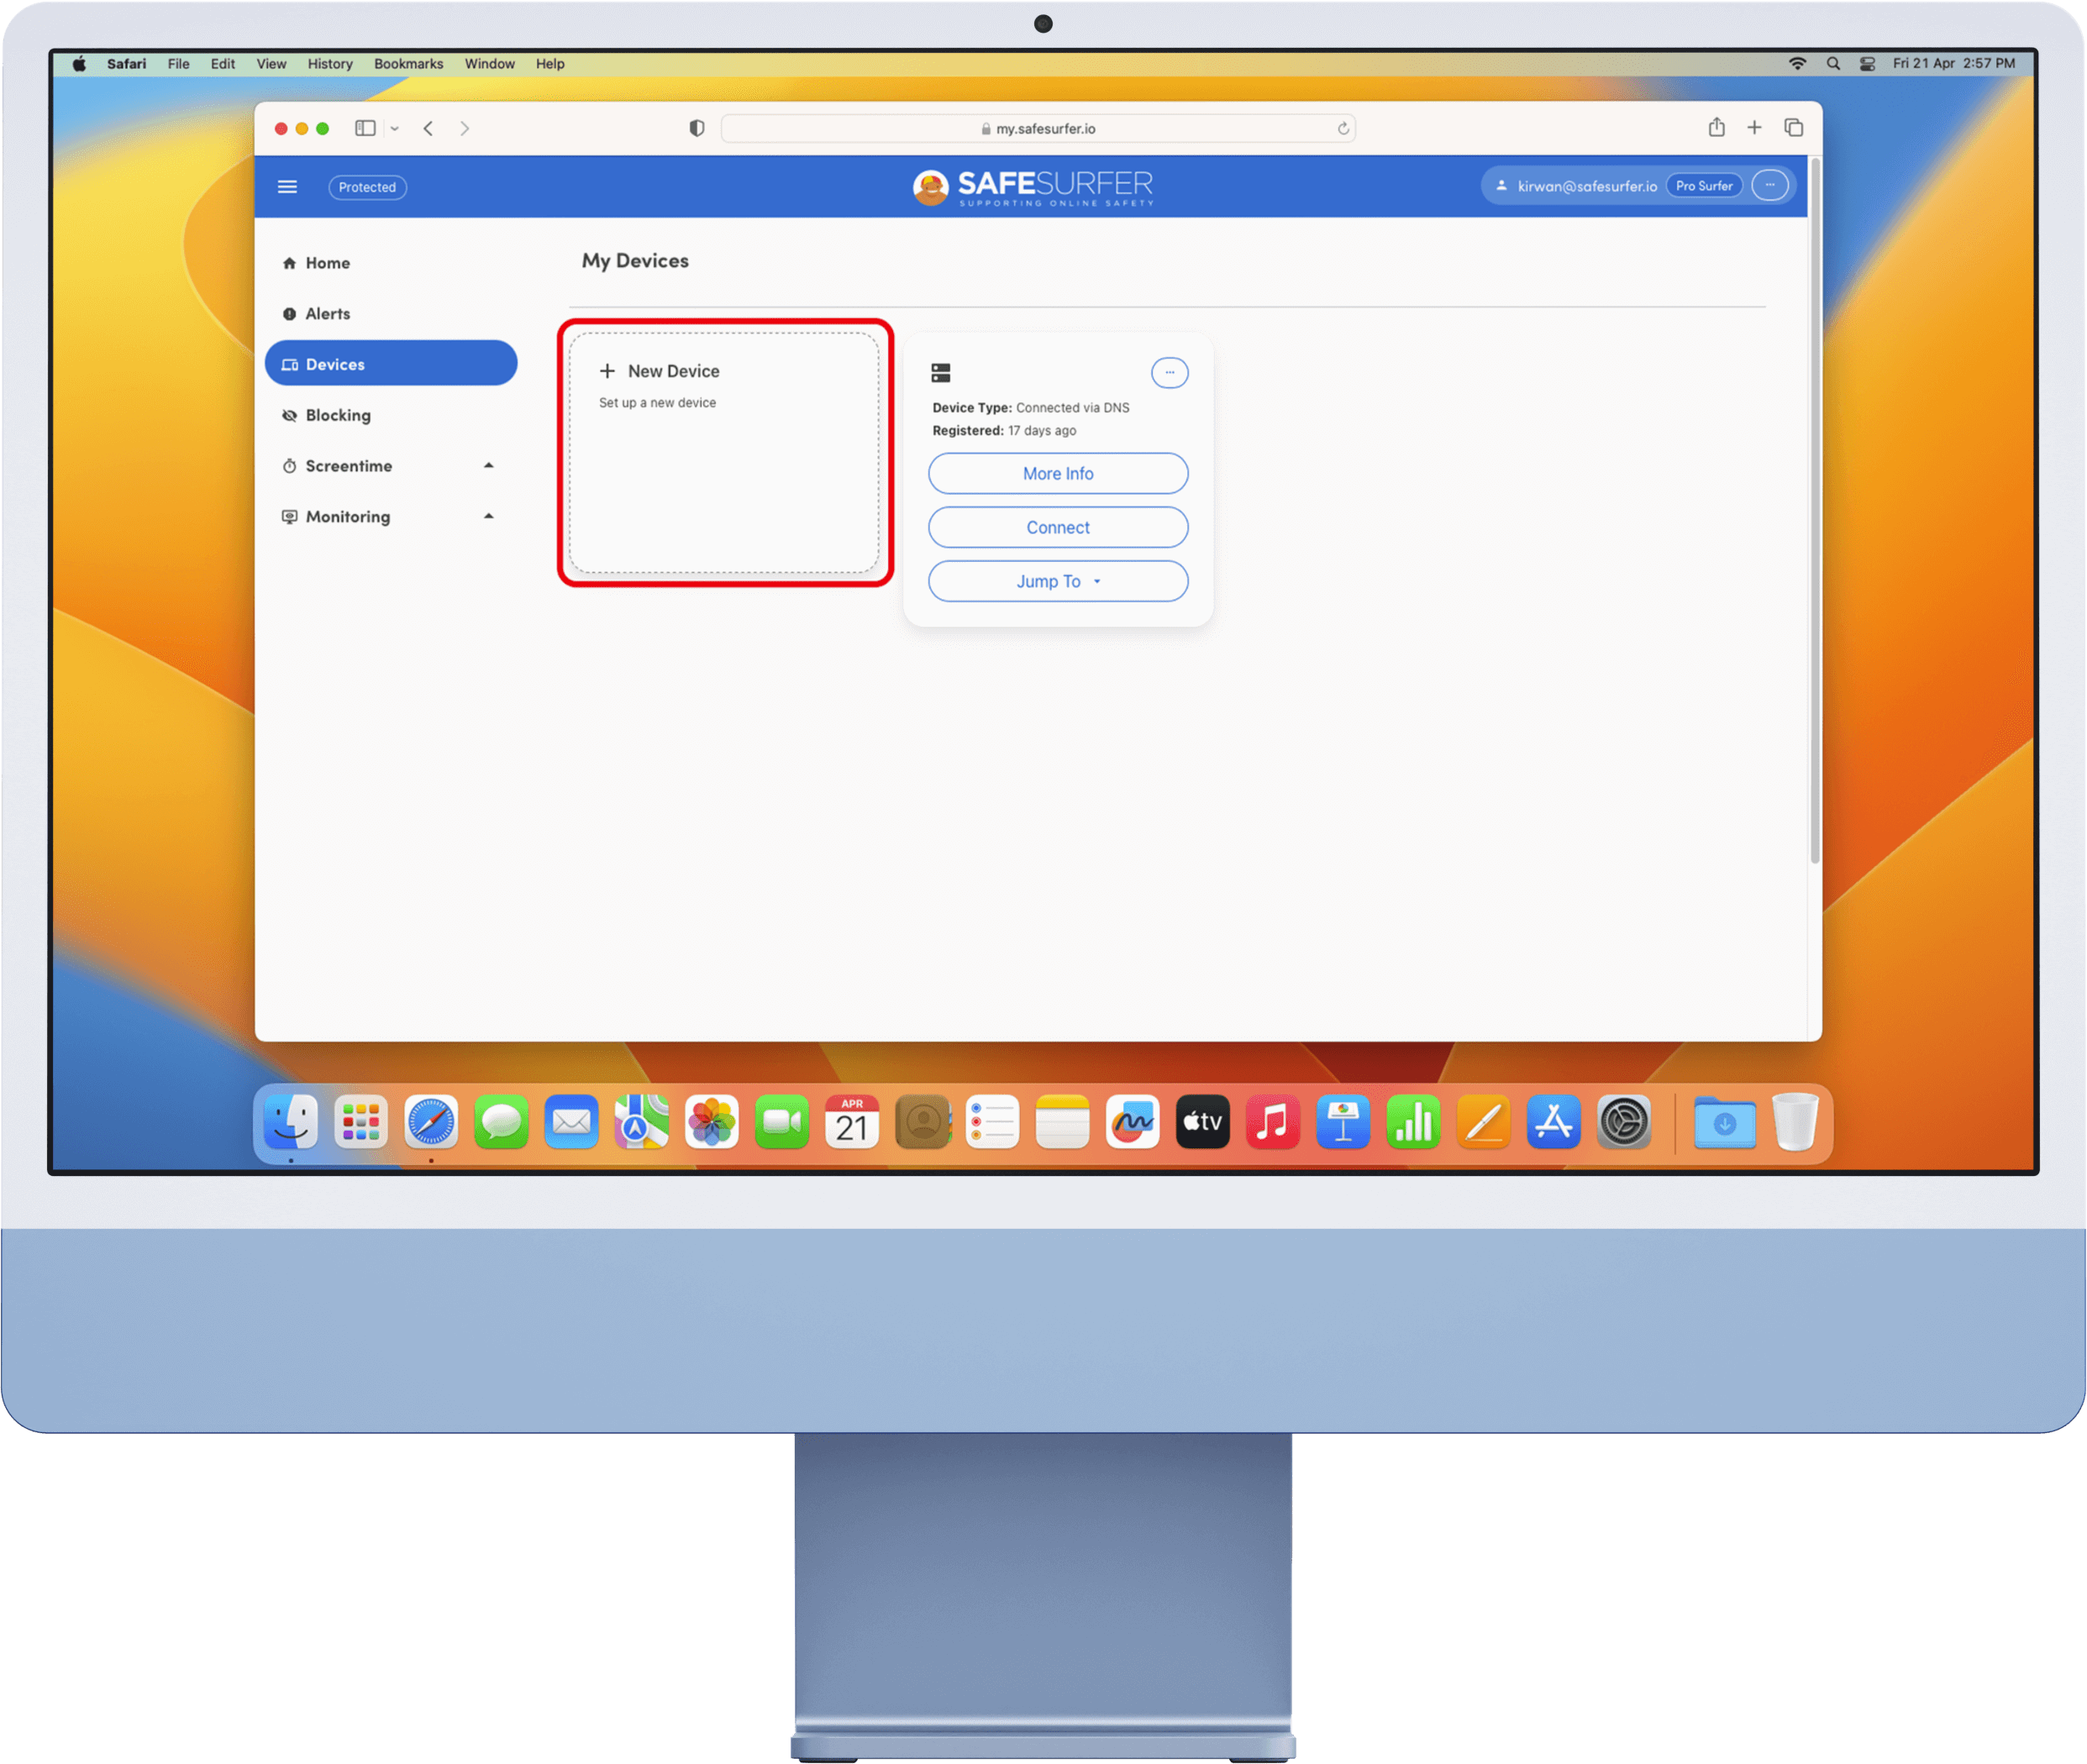
Visit the Safe Surfer dashboard and log in to your account. Click the Devices menu on the left-hand sidebar. Click the “+ New Device” button.
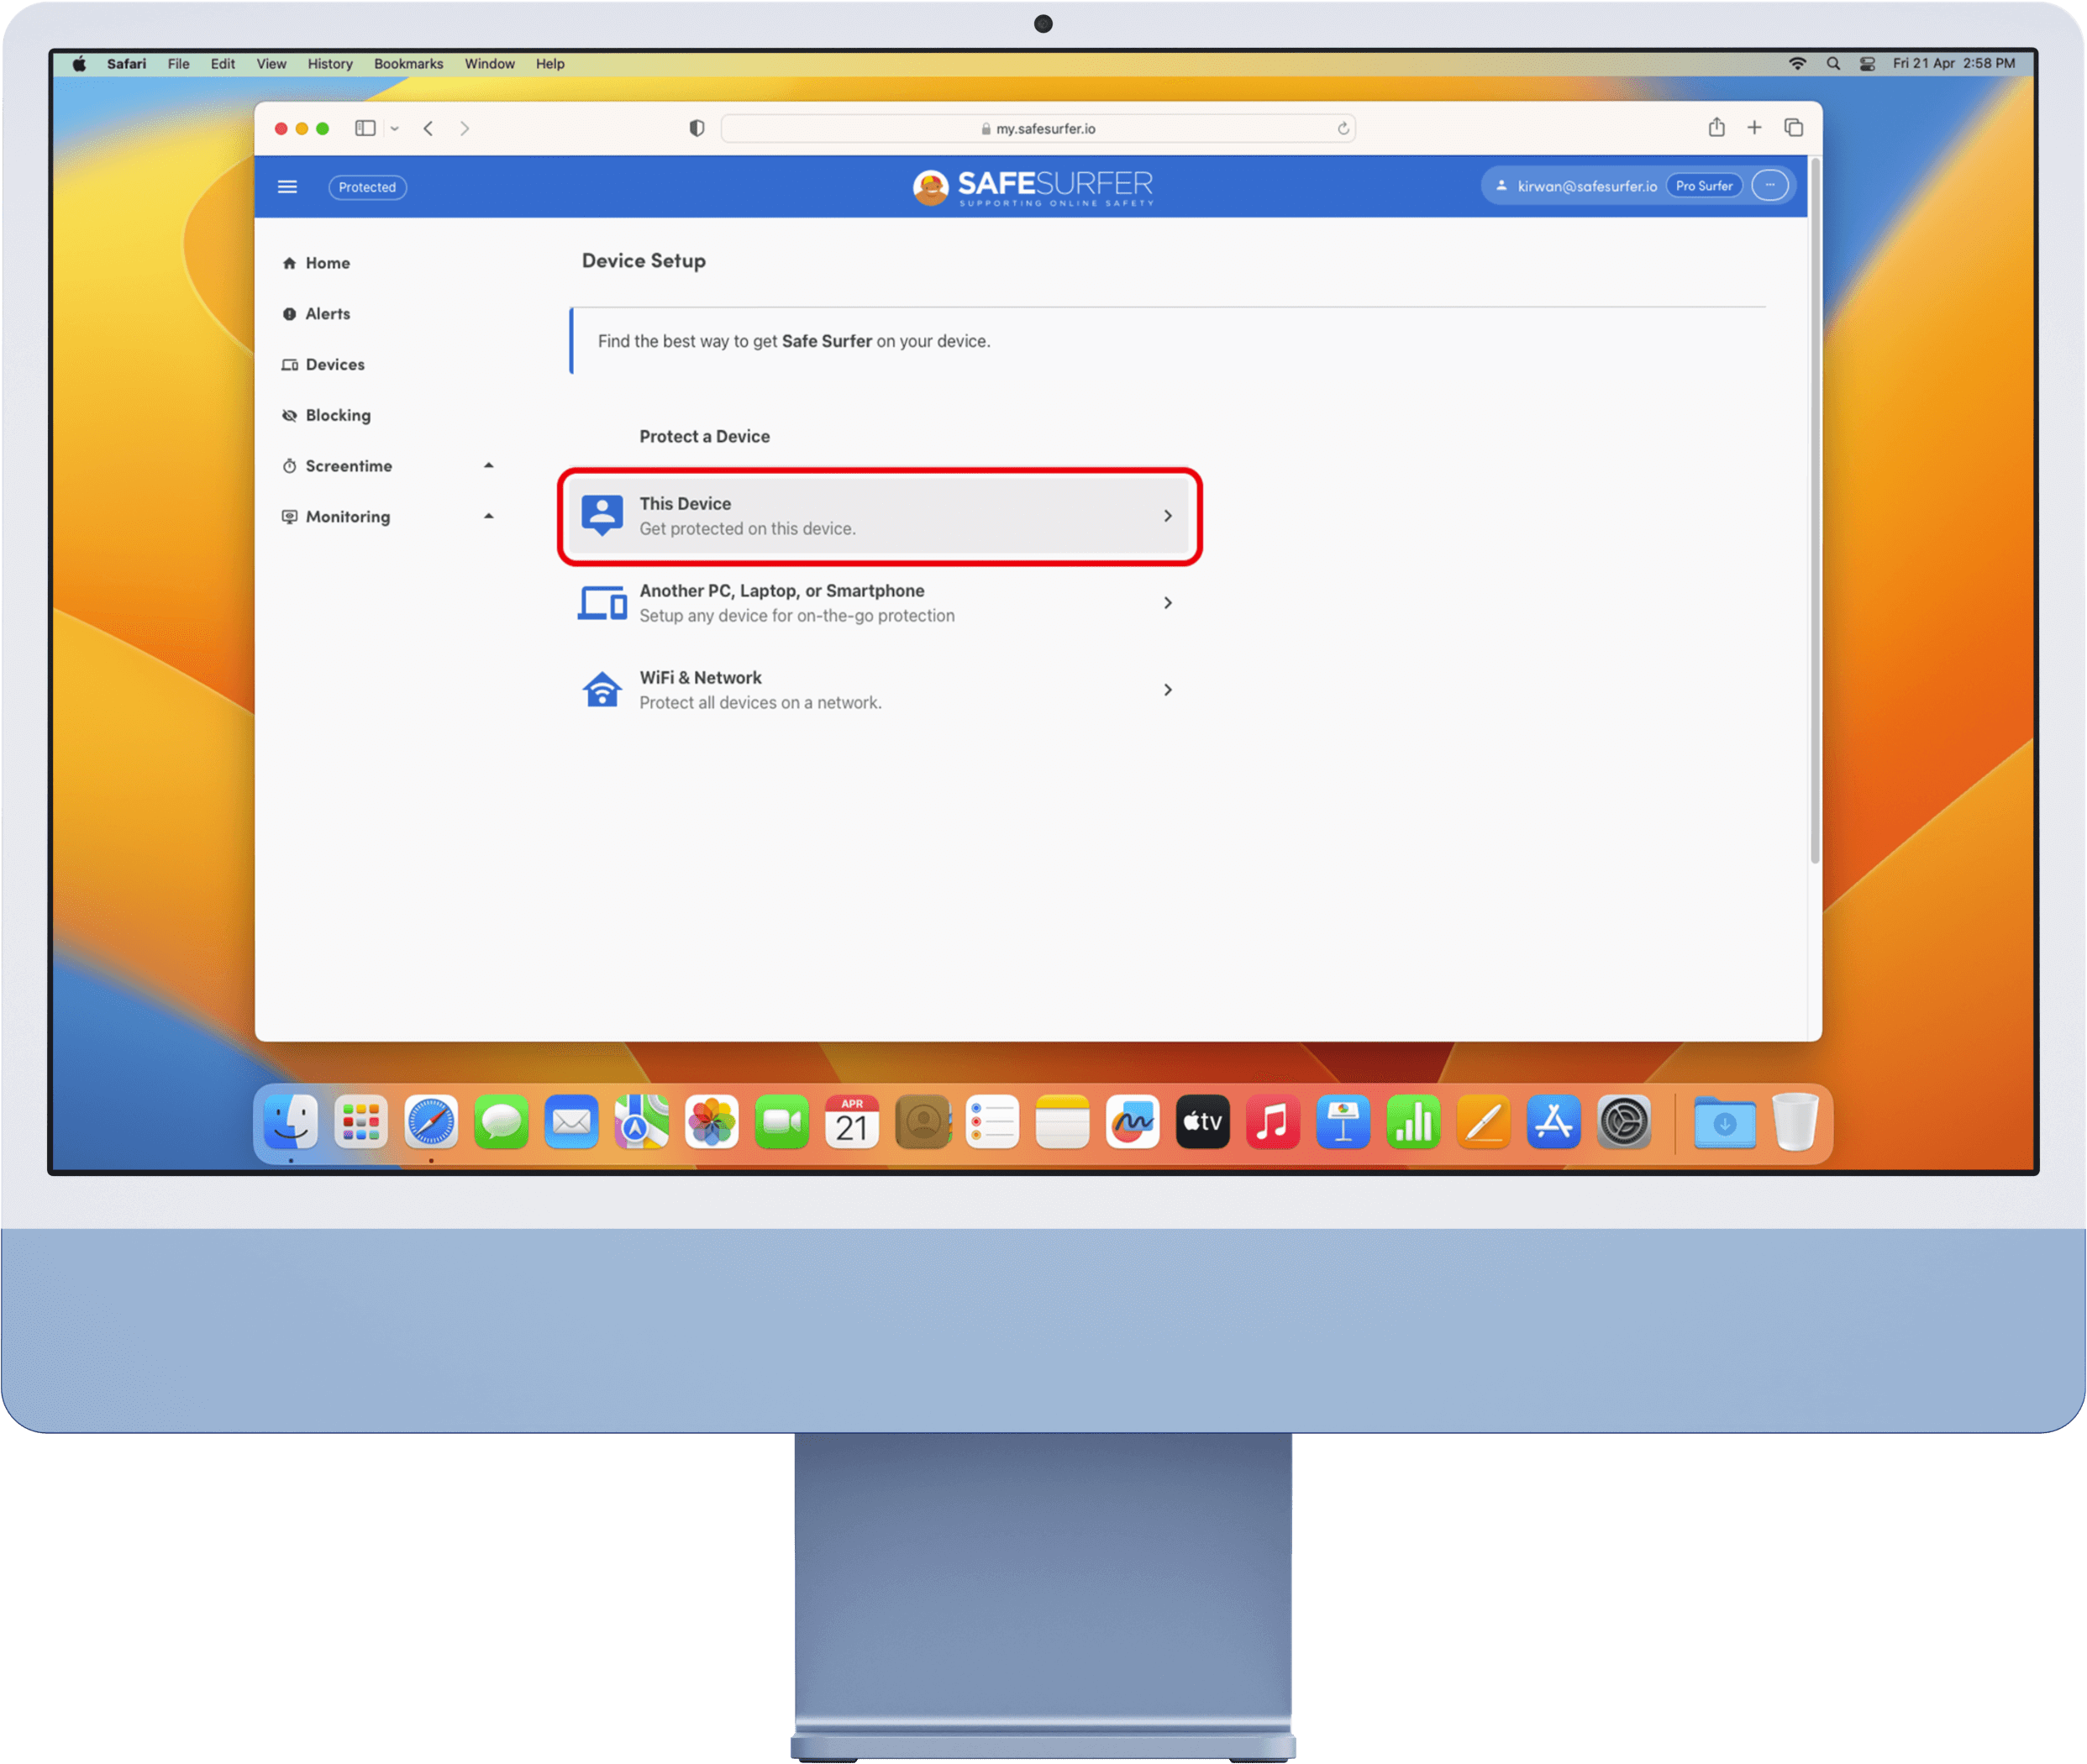
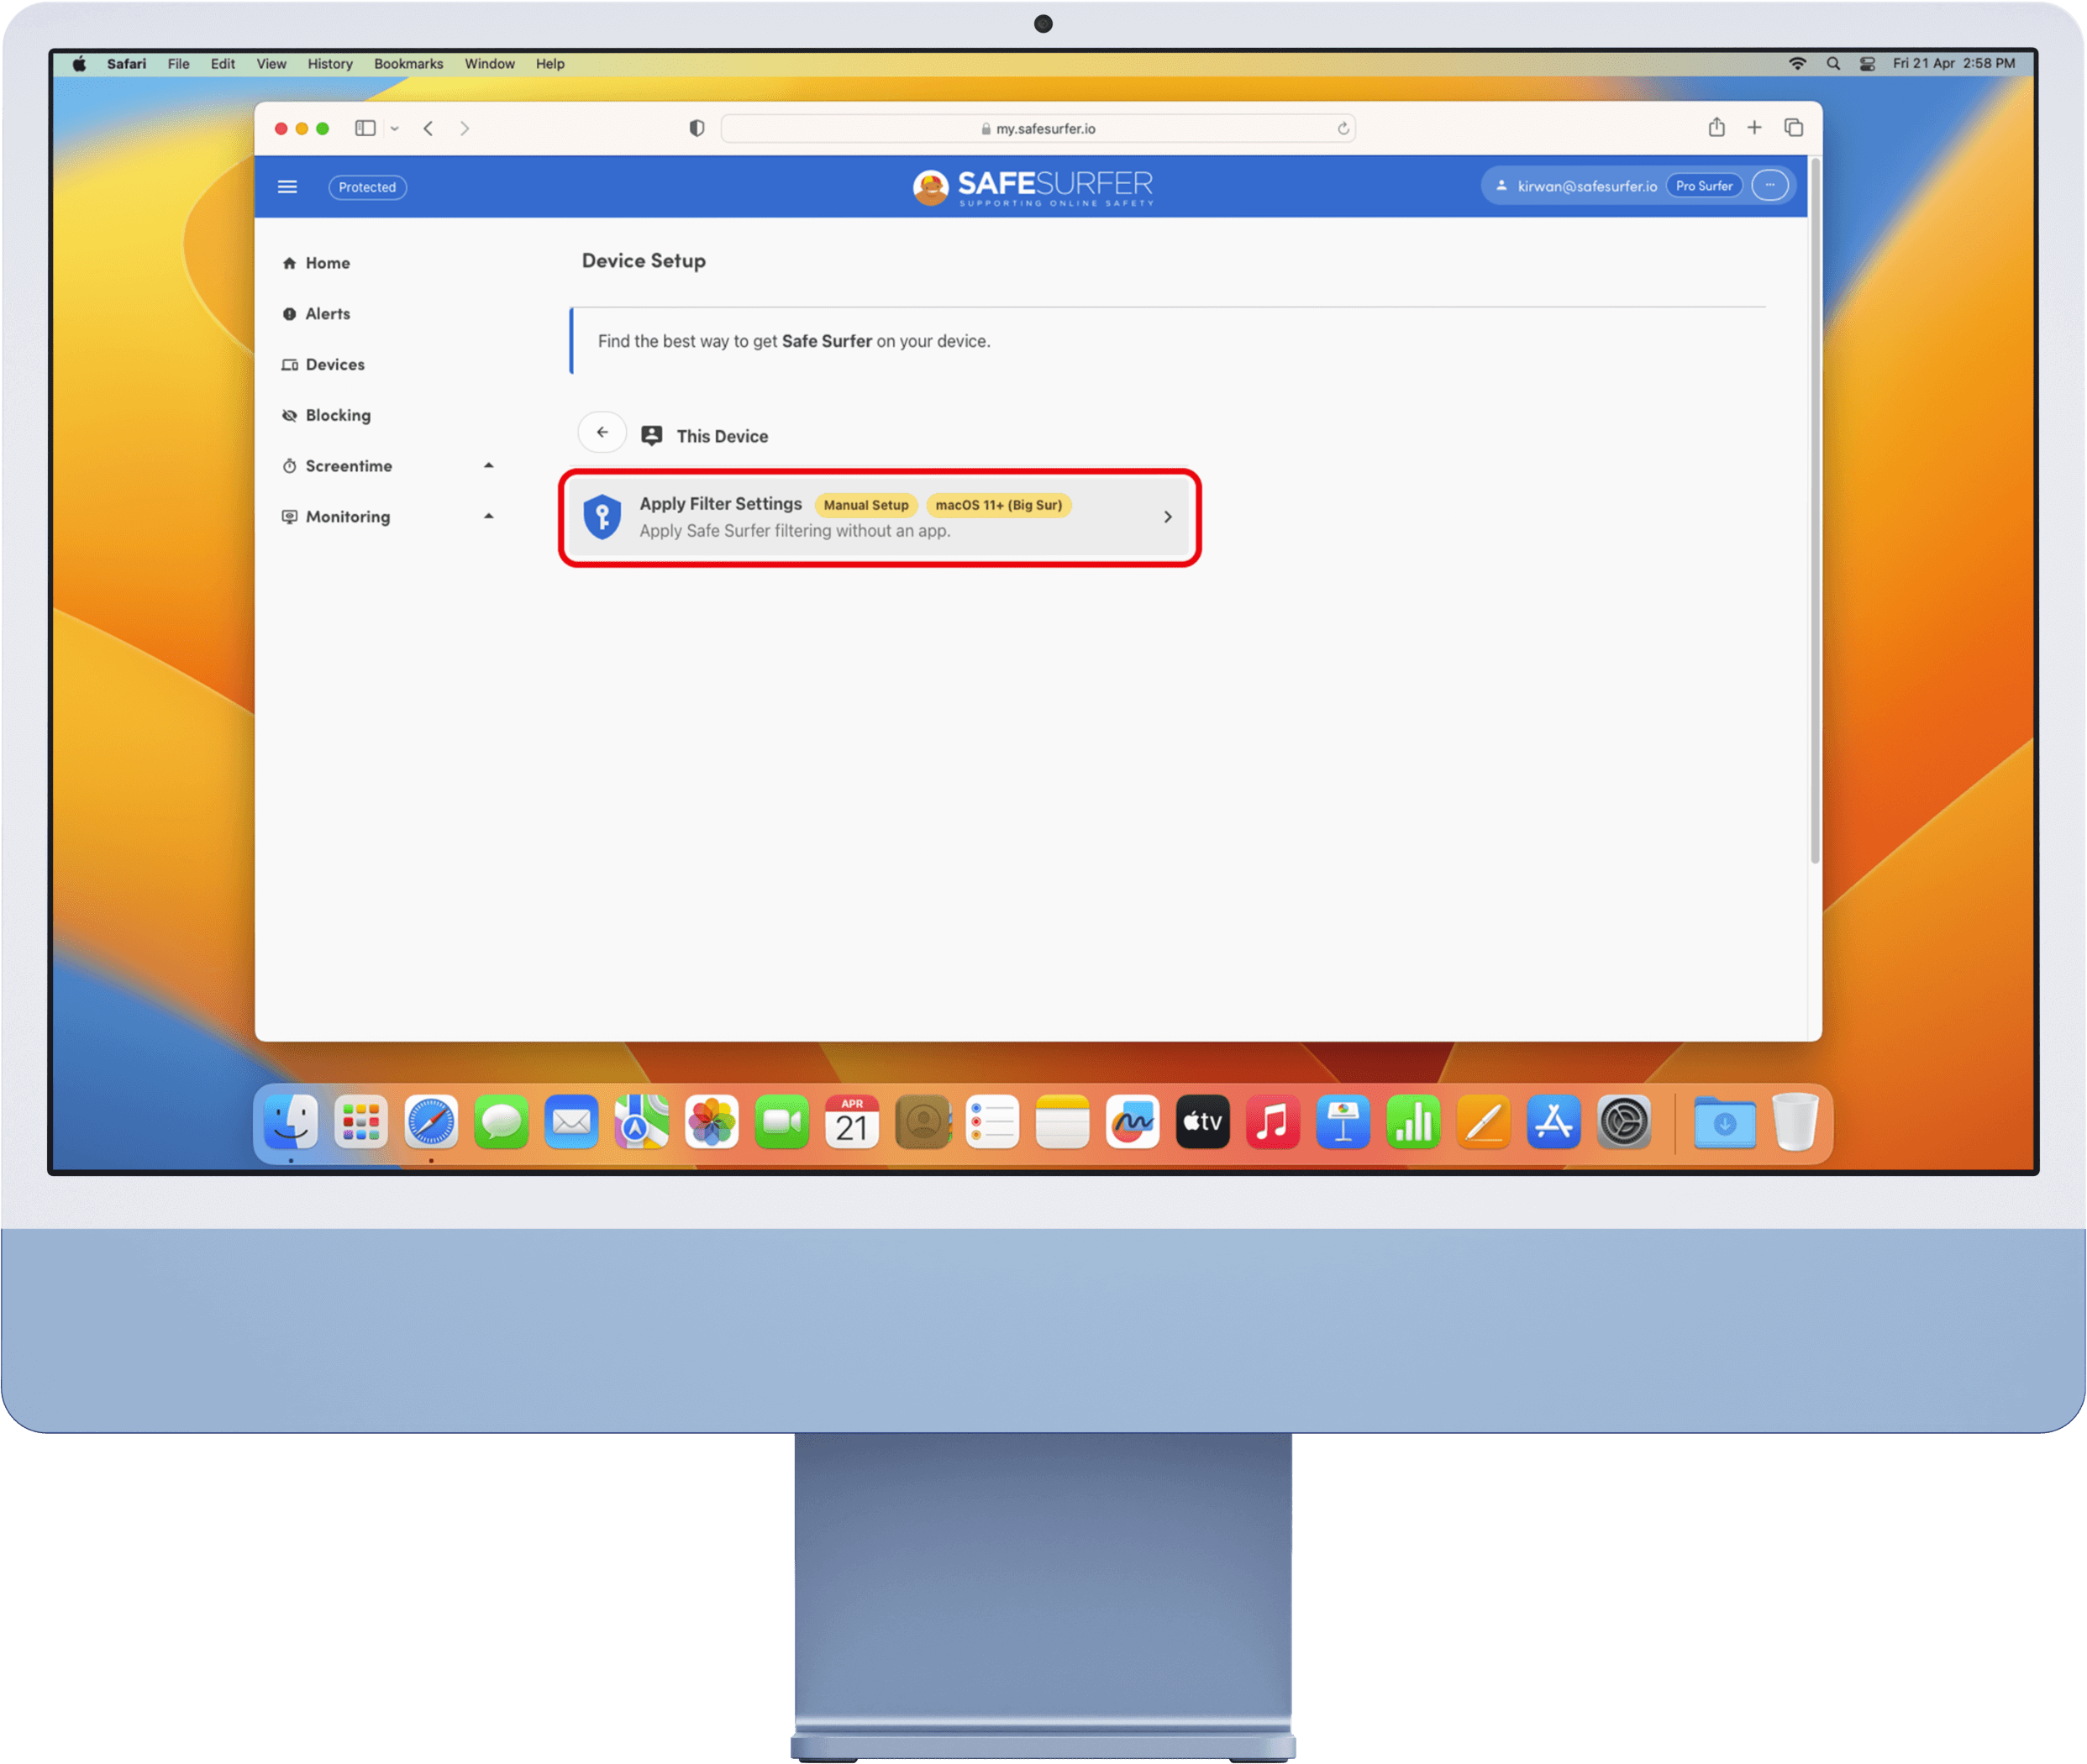
Click “This device”.
Click “Apply filter settings”.
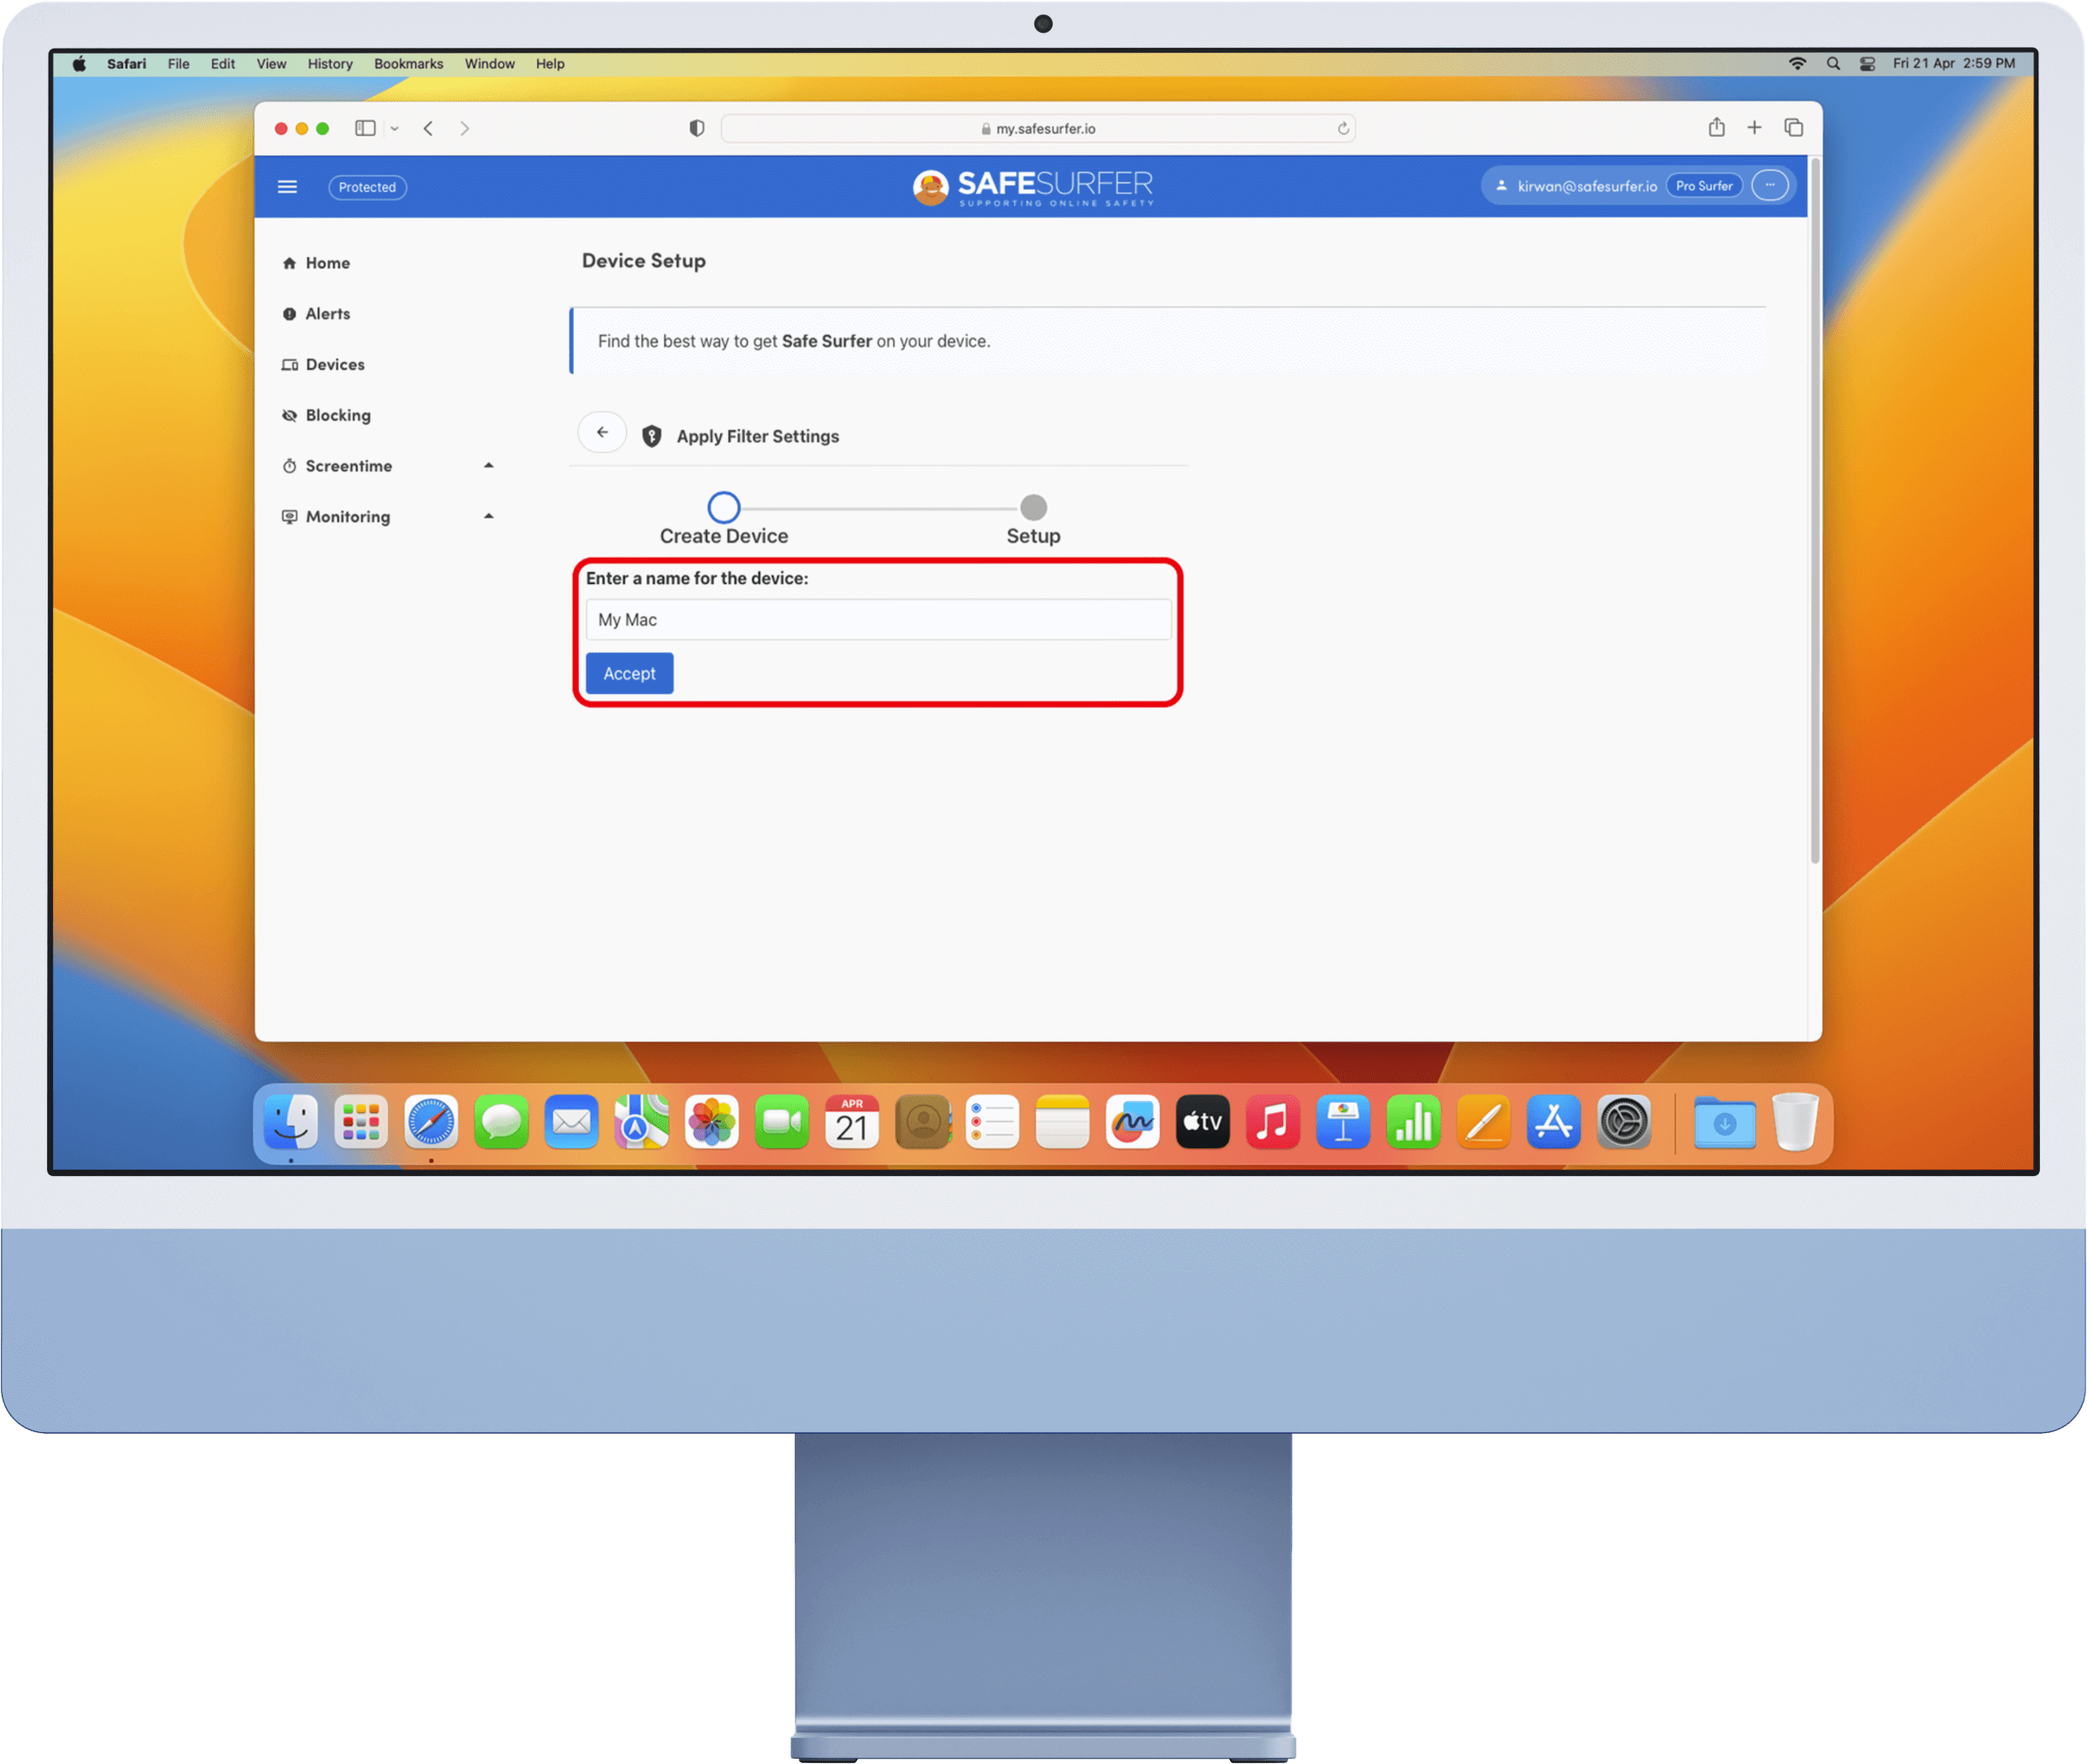
Enter a name for this Mac, then click the Accept button.
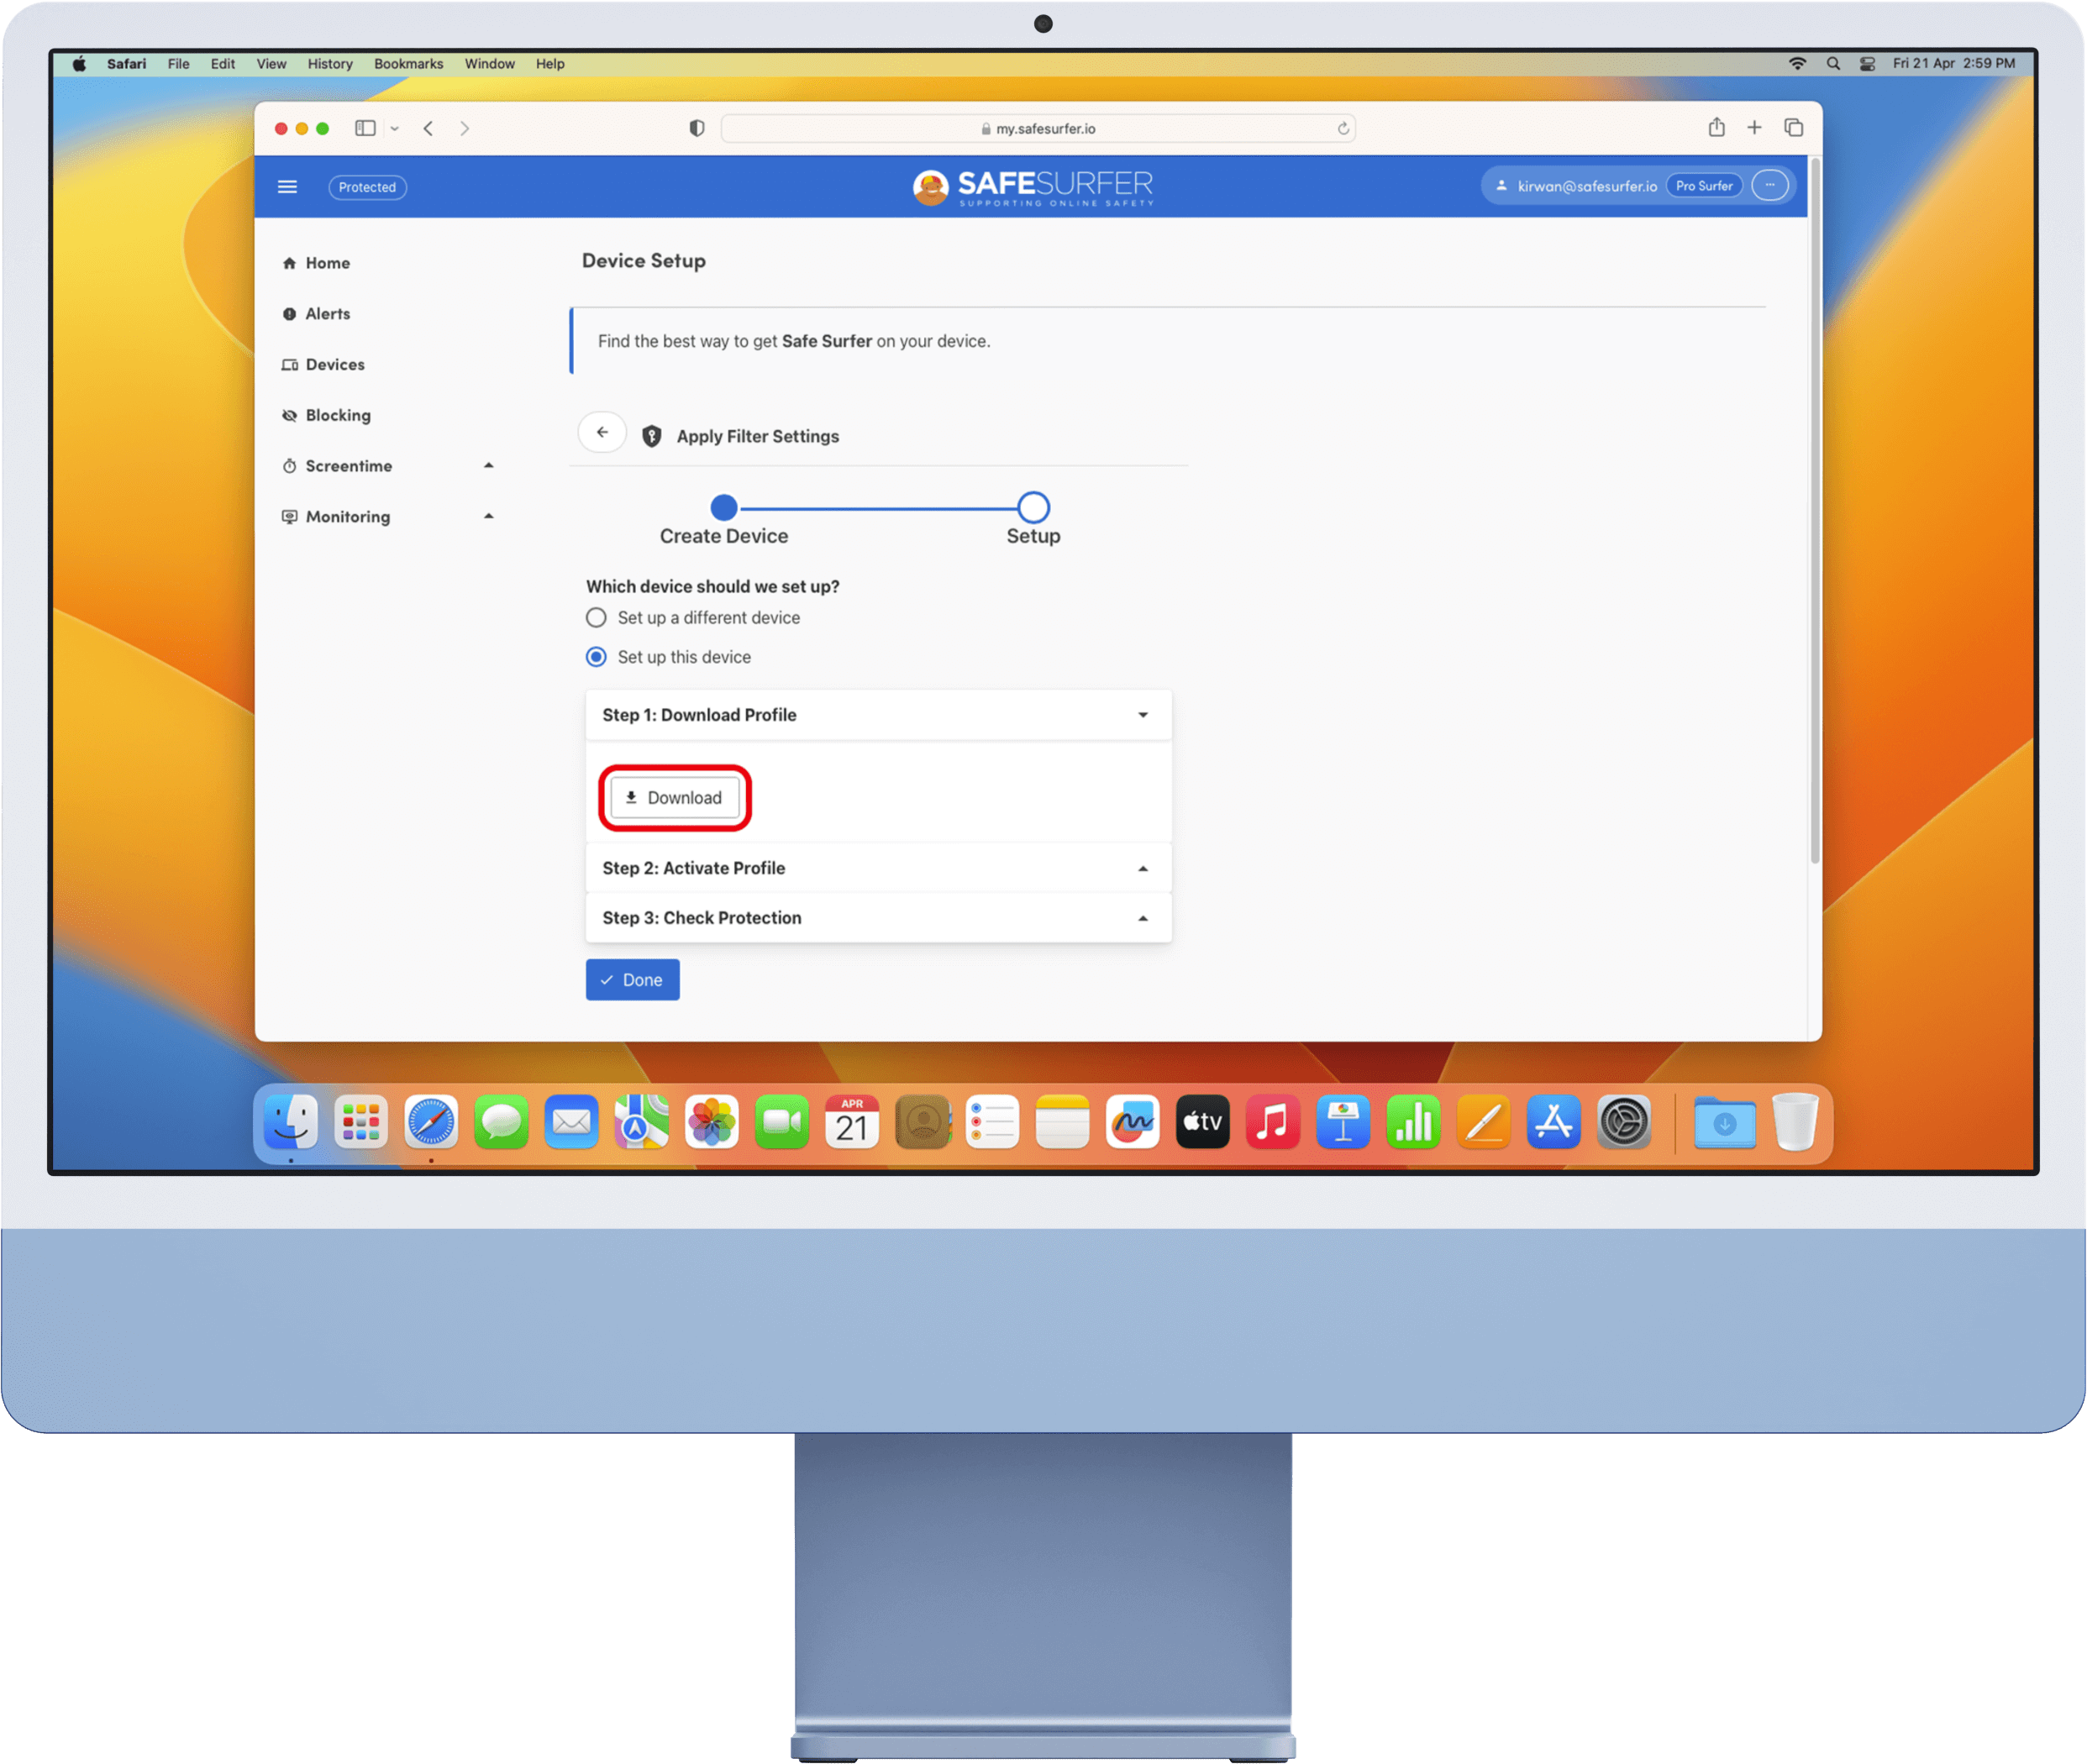
Under “Step 1: Download profile”, click the “Download” button.
Click the Allow button.

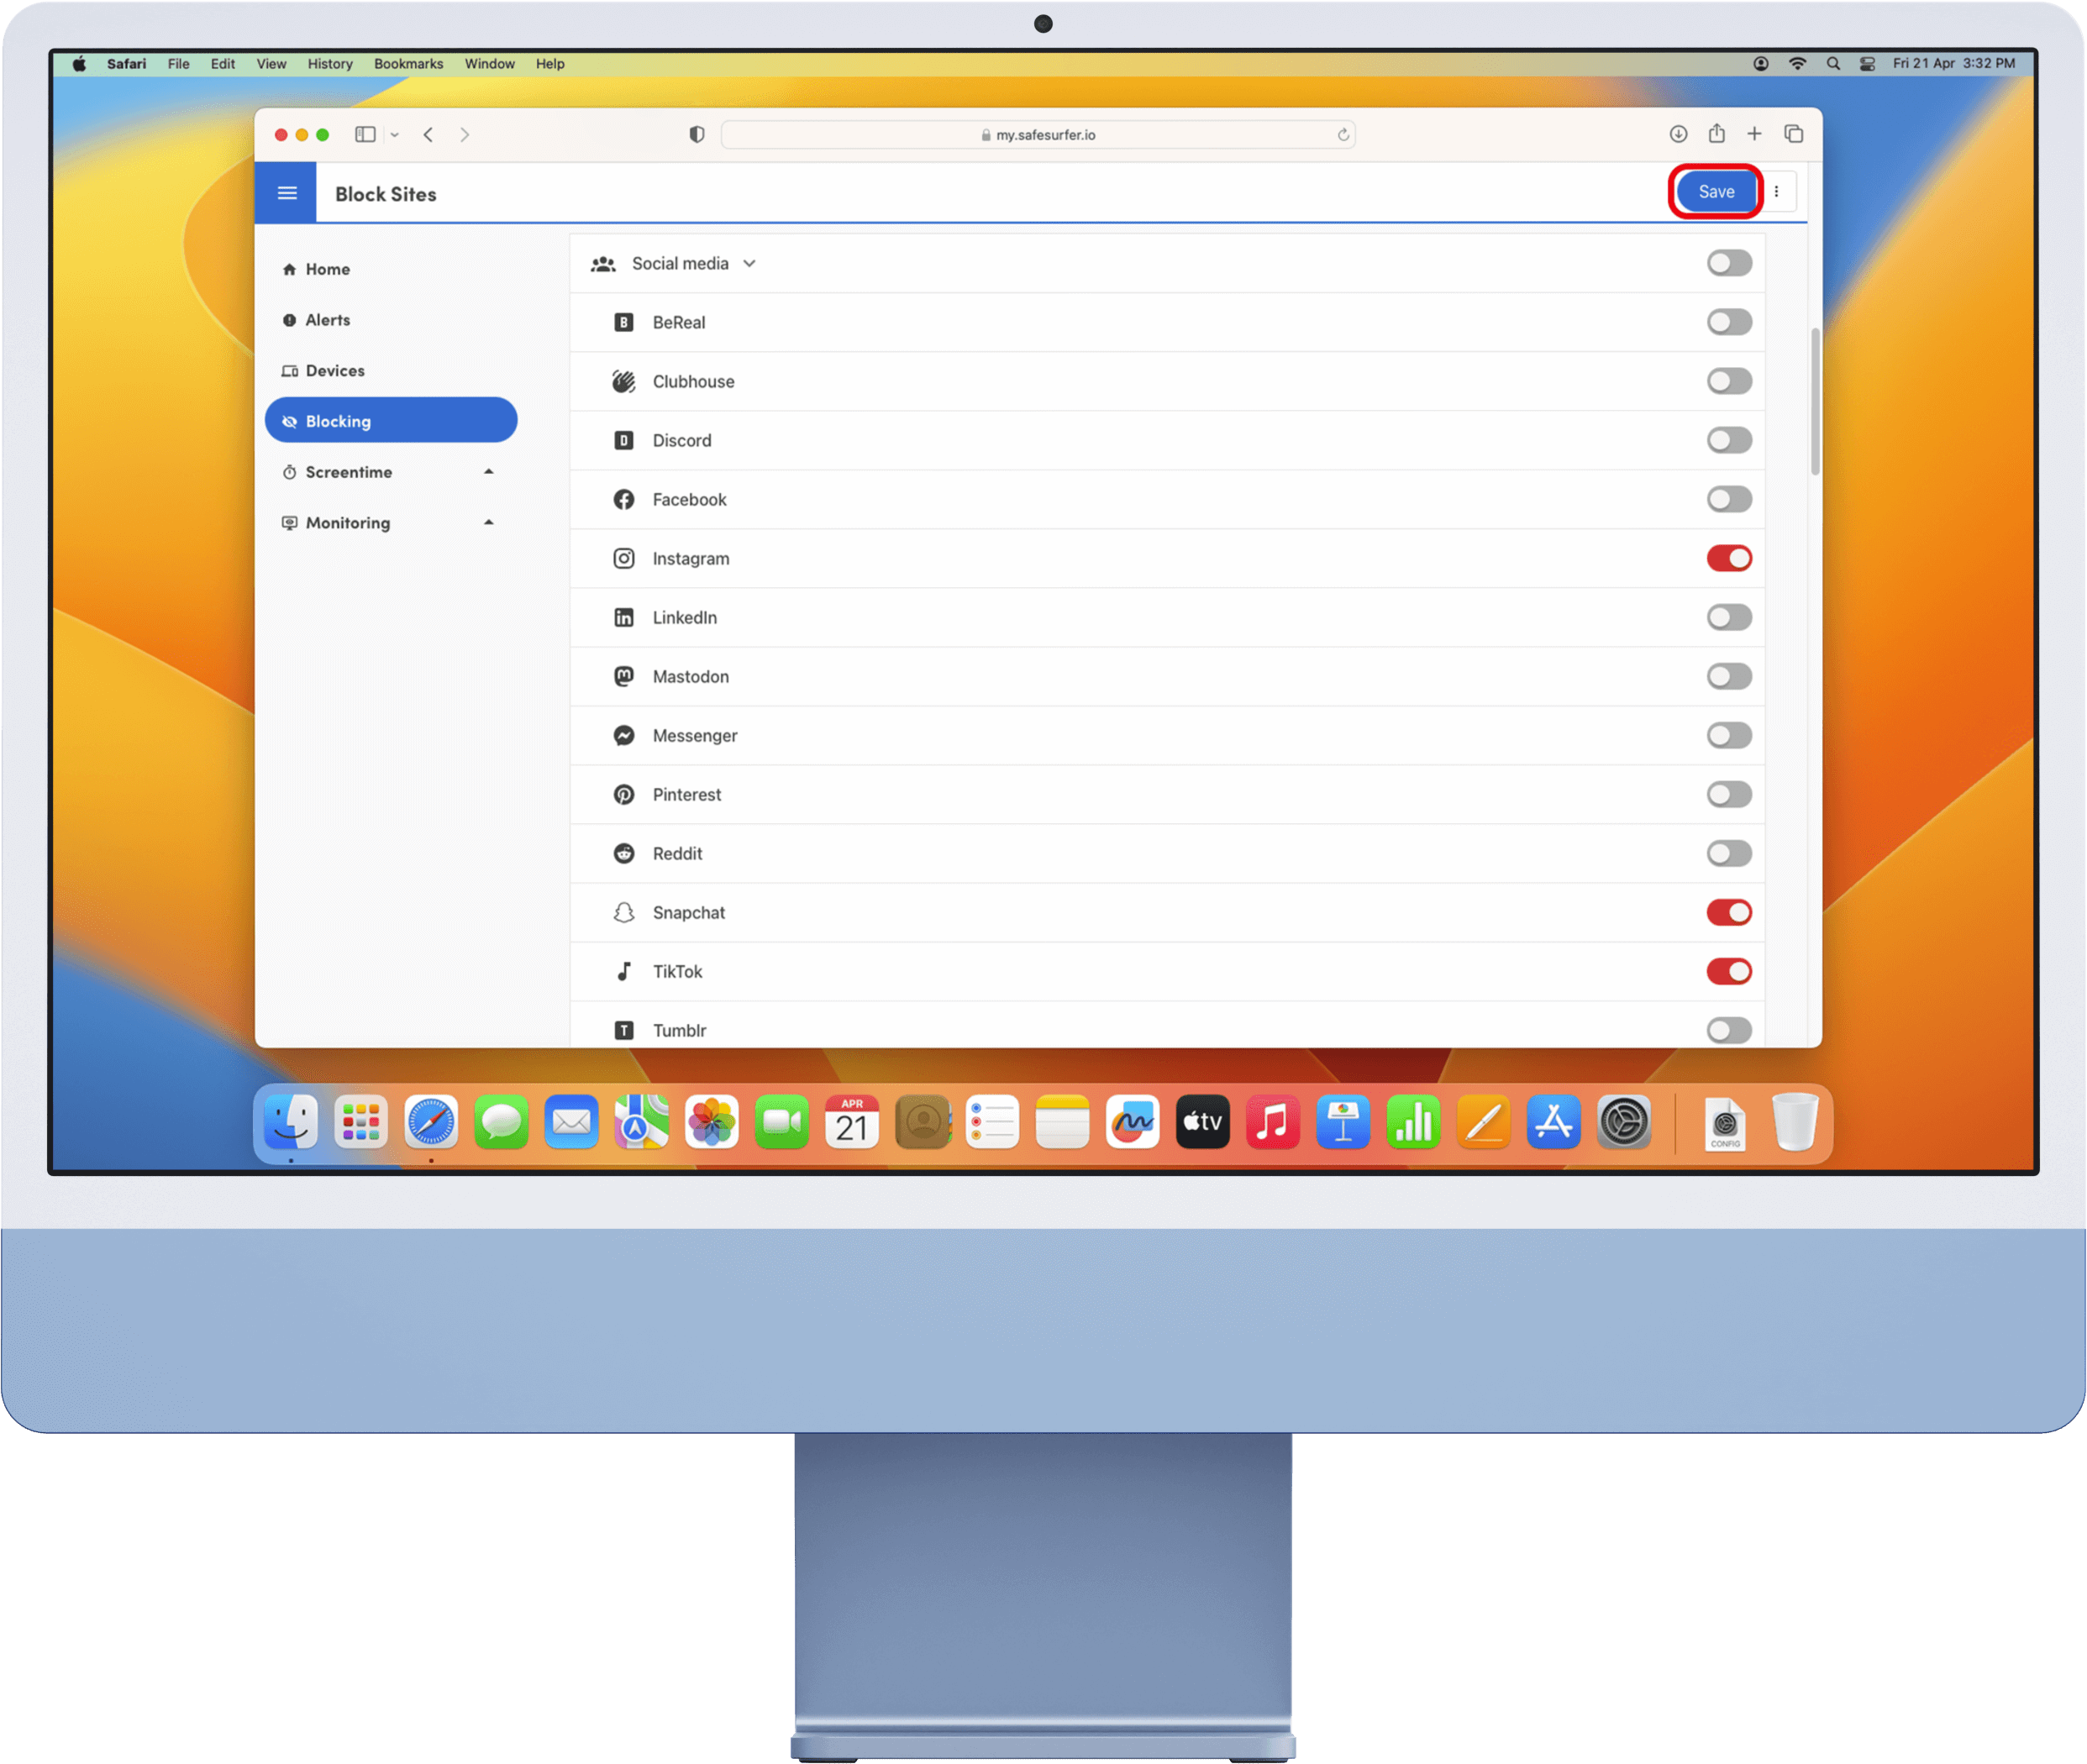
Click the Blocking menu on the left-hand sidebar. Click the blue bubble list, then click the device listing for this Mac.
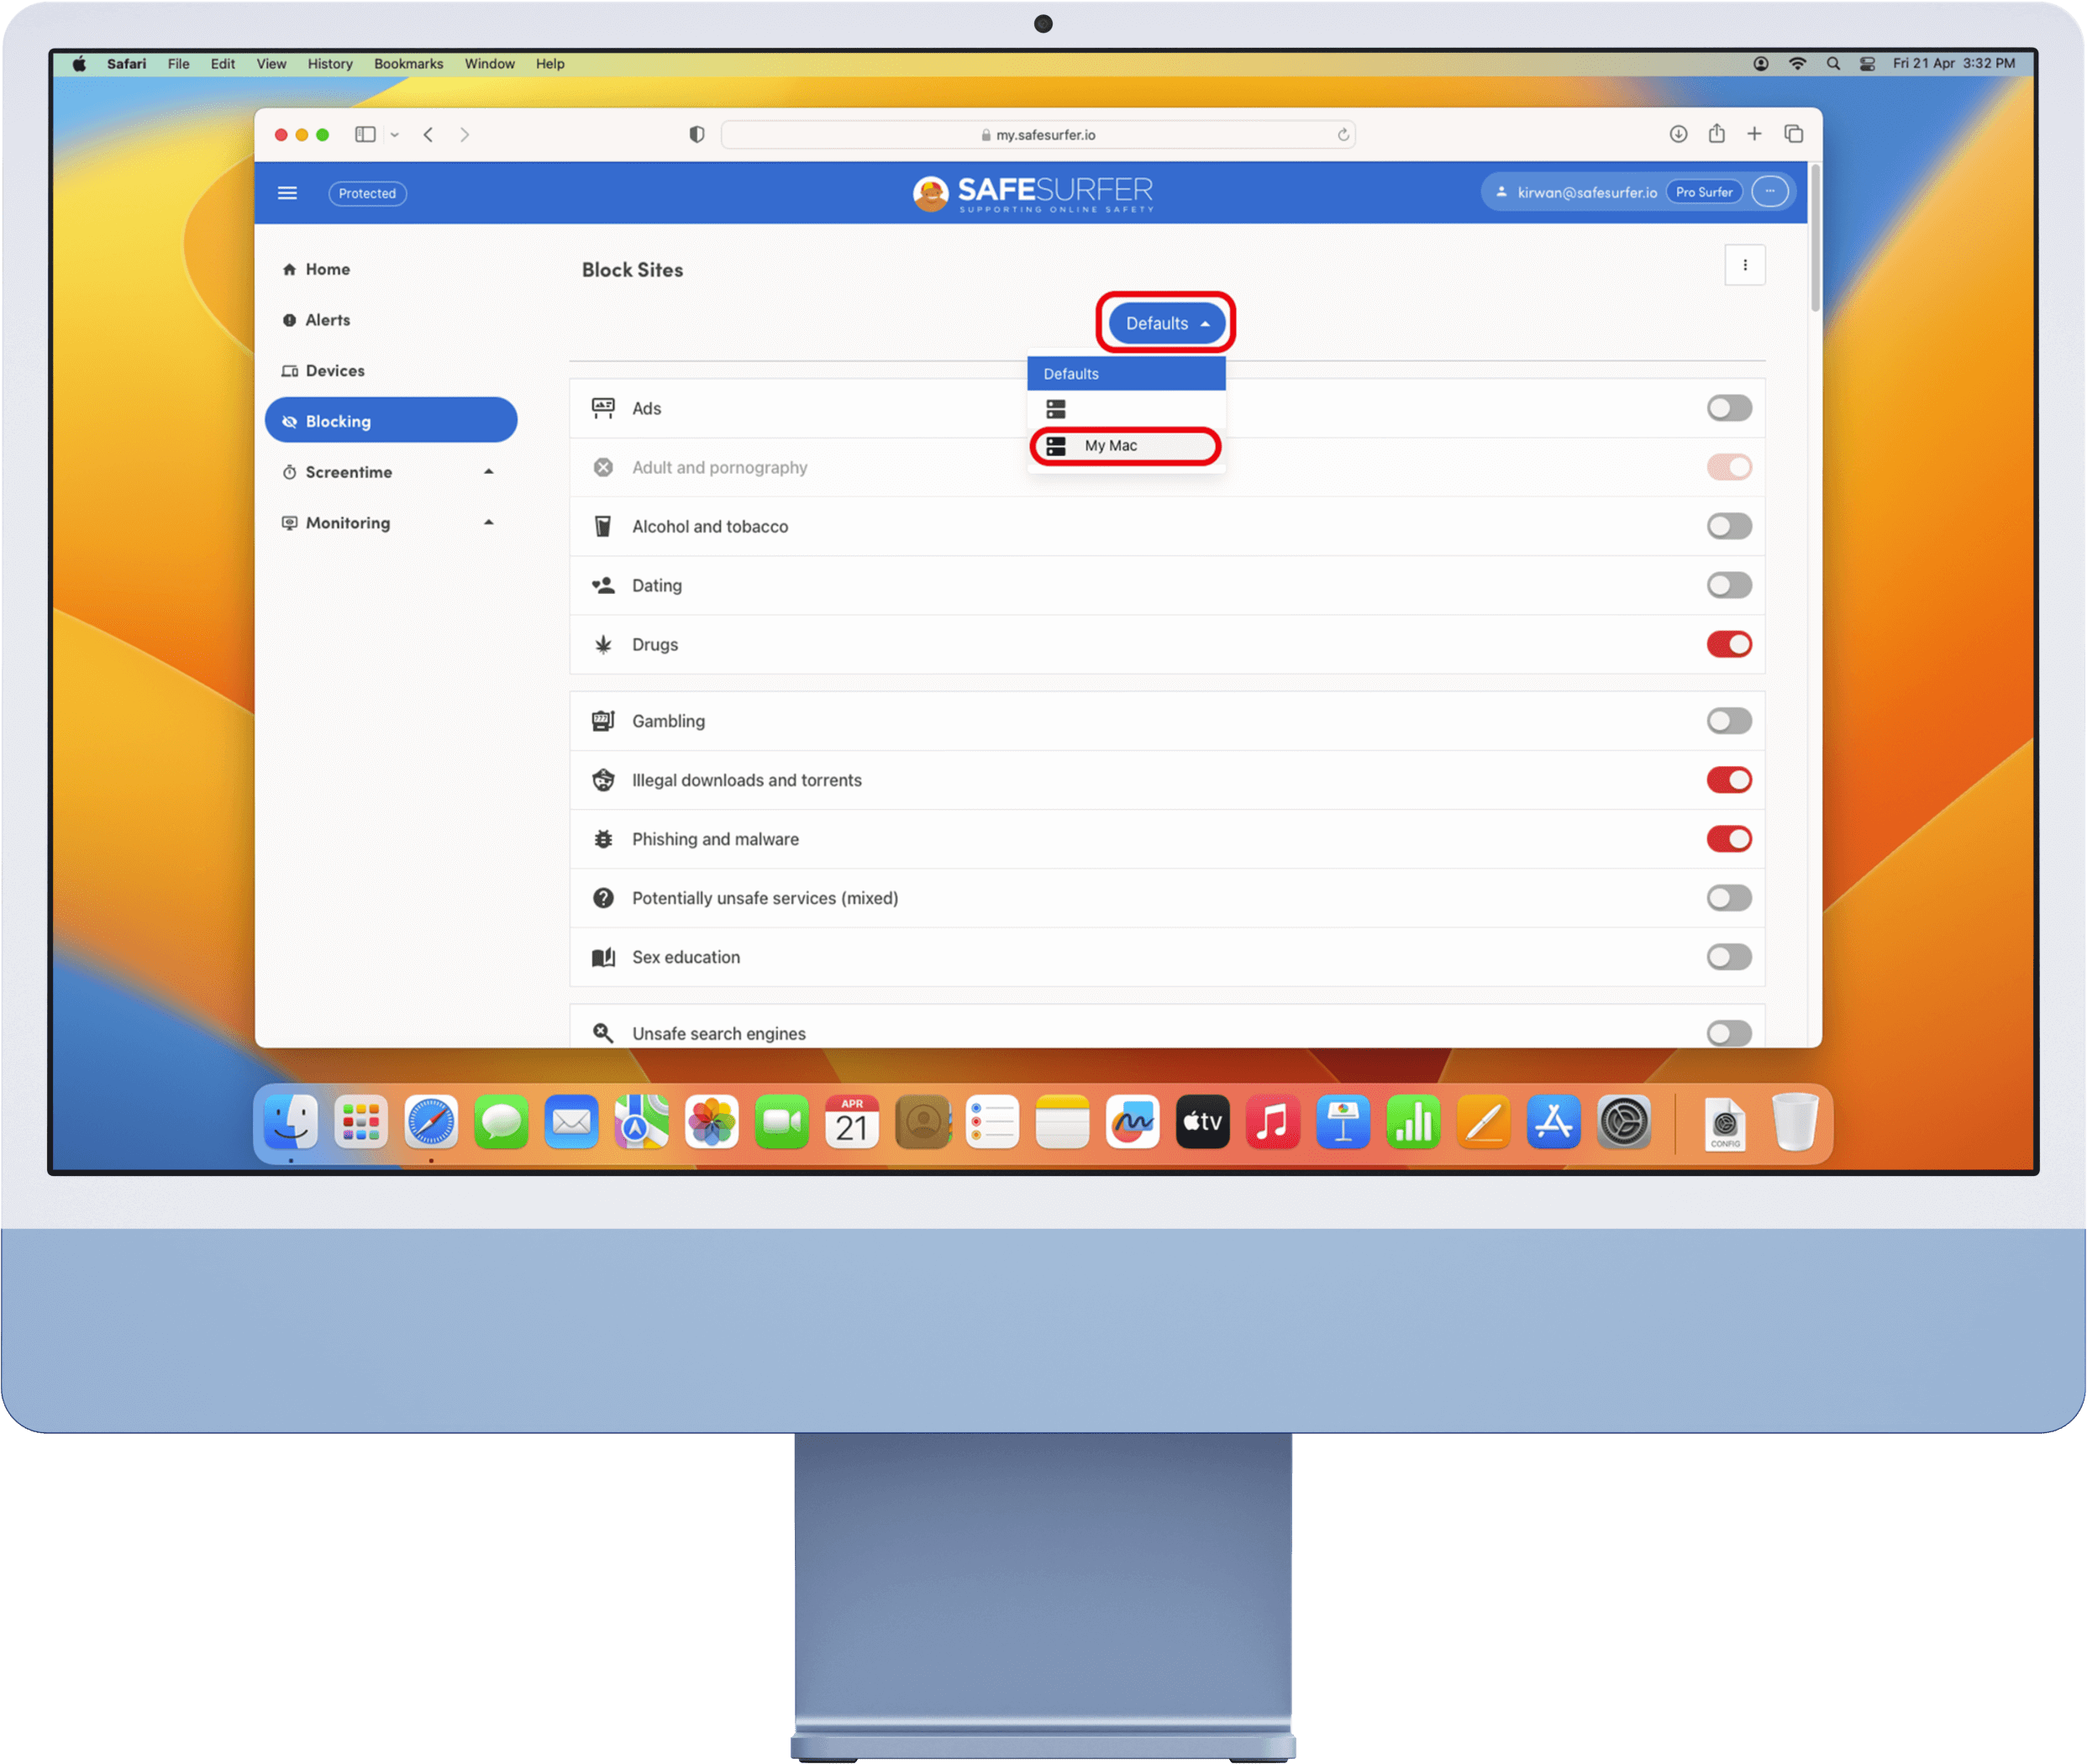
Click the switches to either block or unblock categories—grey means not blocked, and red means blocked. Once you’re done, click the Save button at the upper-right corner. You might need to scroll to the top of the list for the Save button to appear.
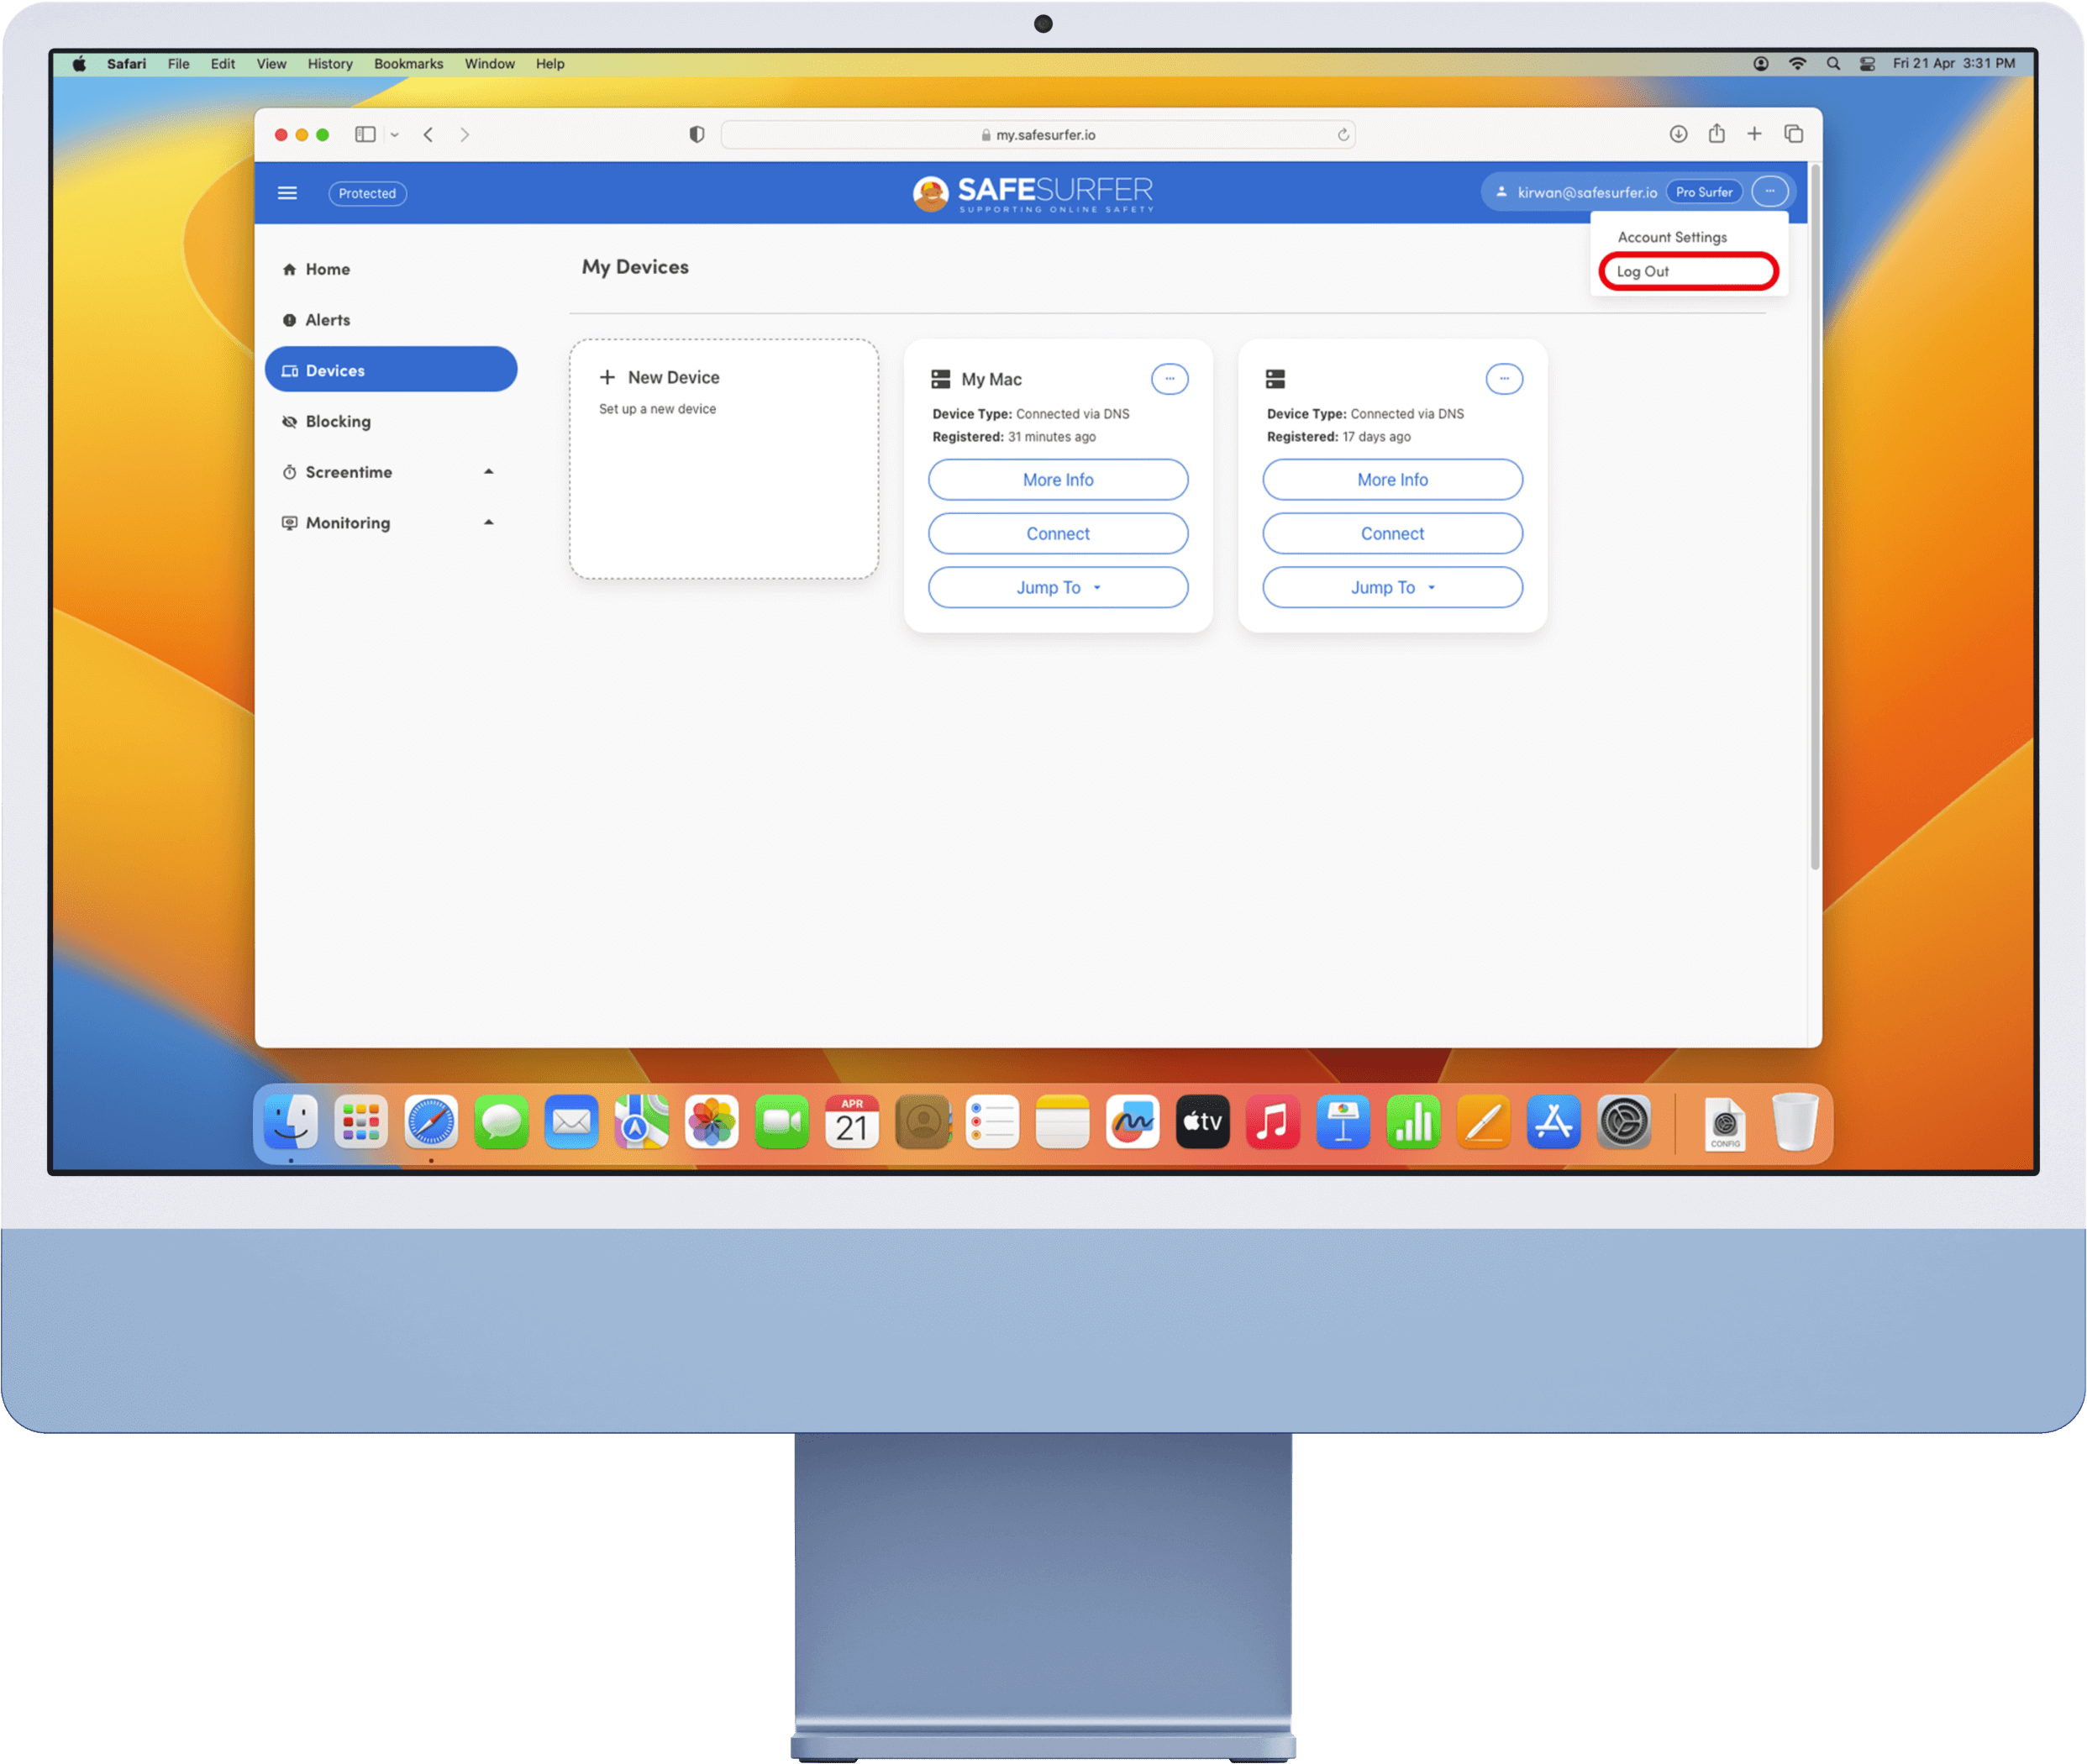
At the upper-right corner of the dashboard’s title bar, click the three dot icon. Click the Log Out button. You can now close out of Safari.
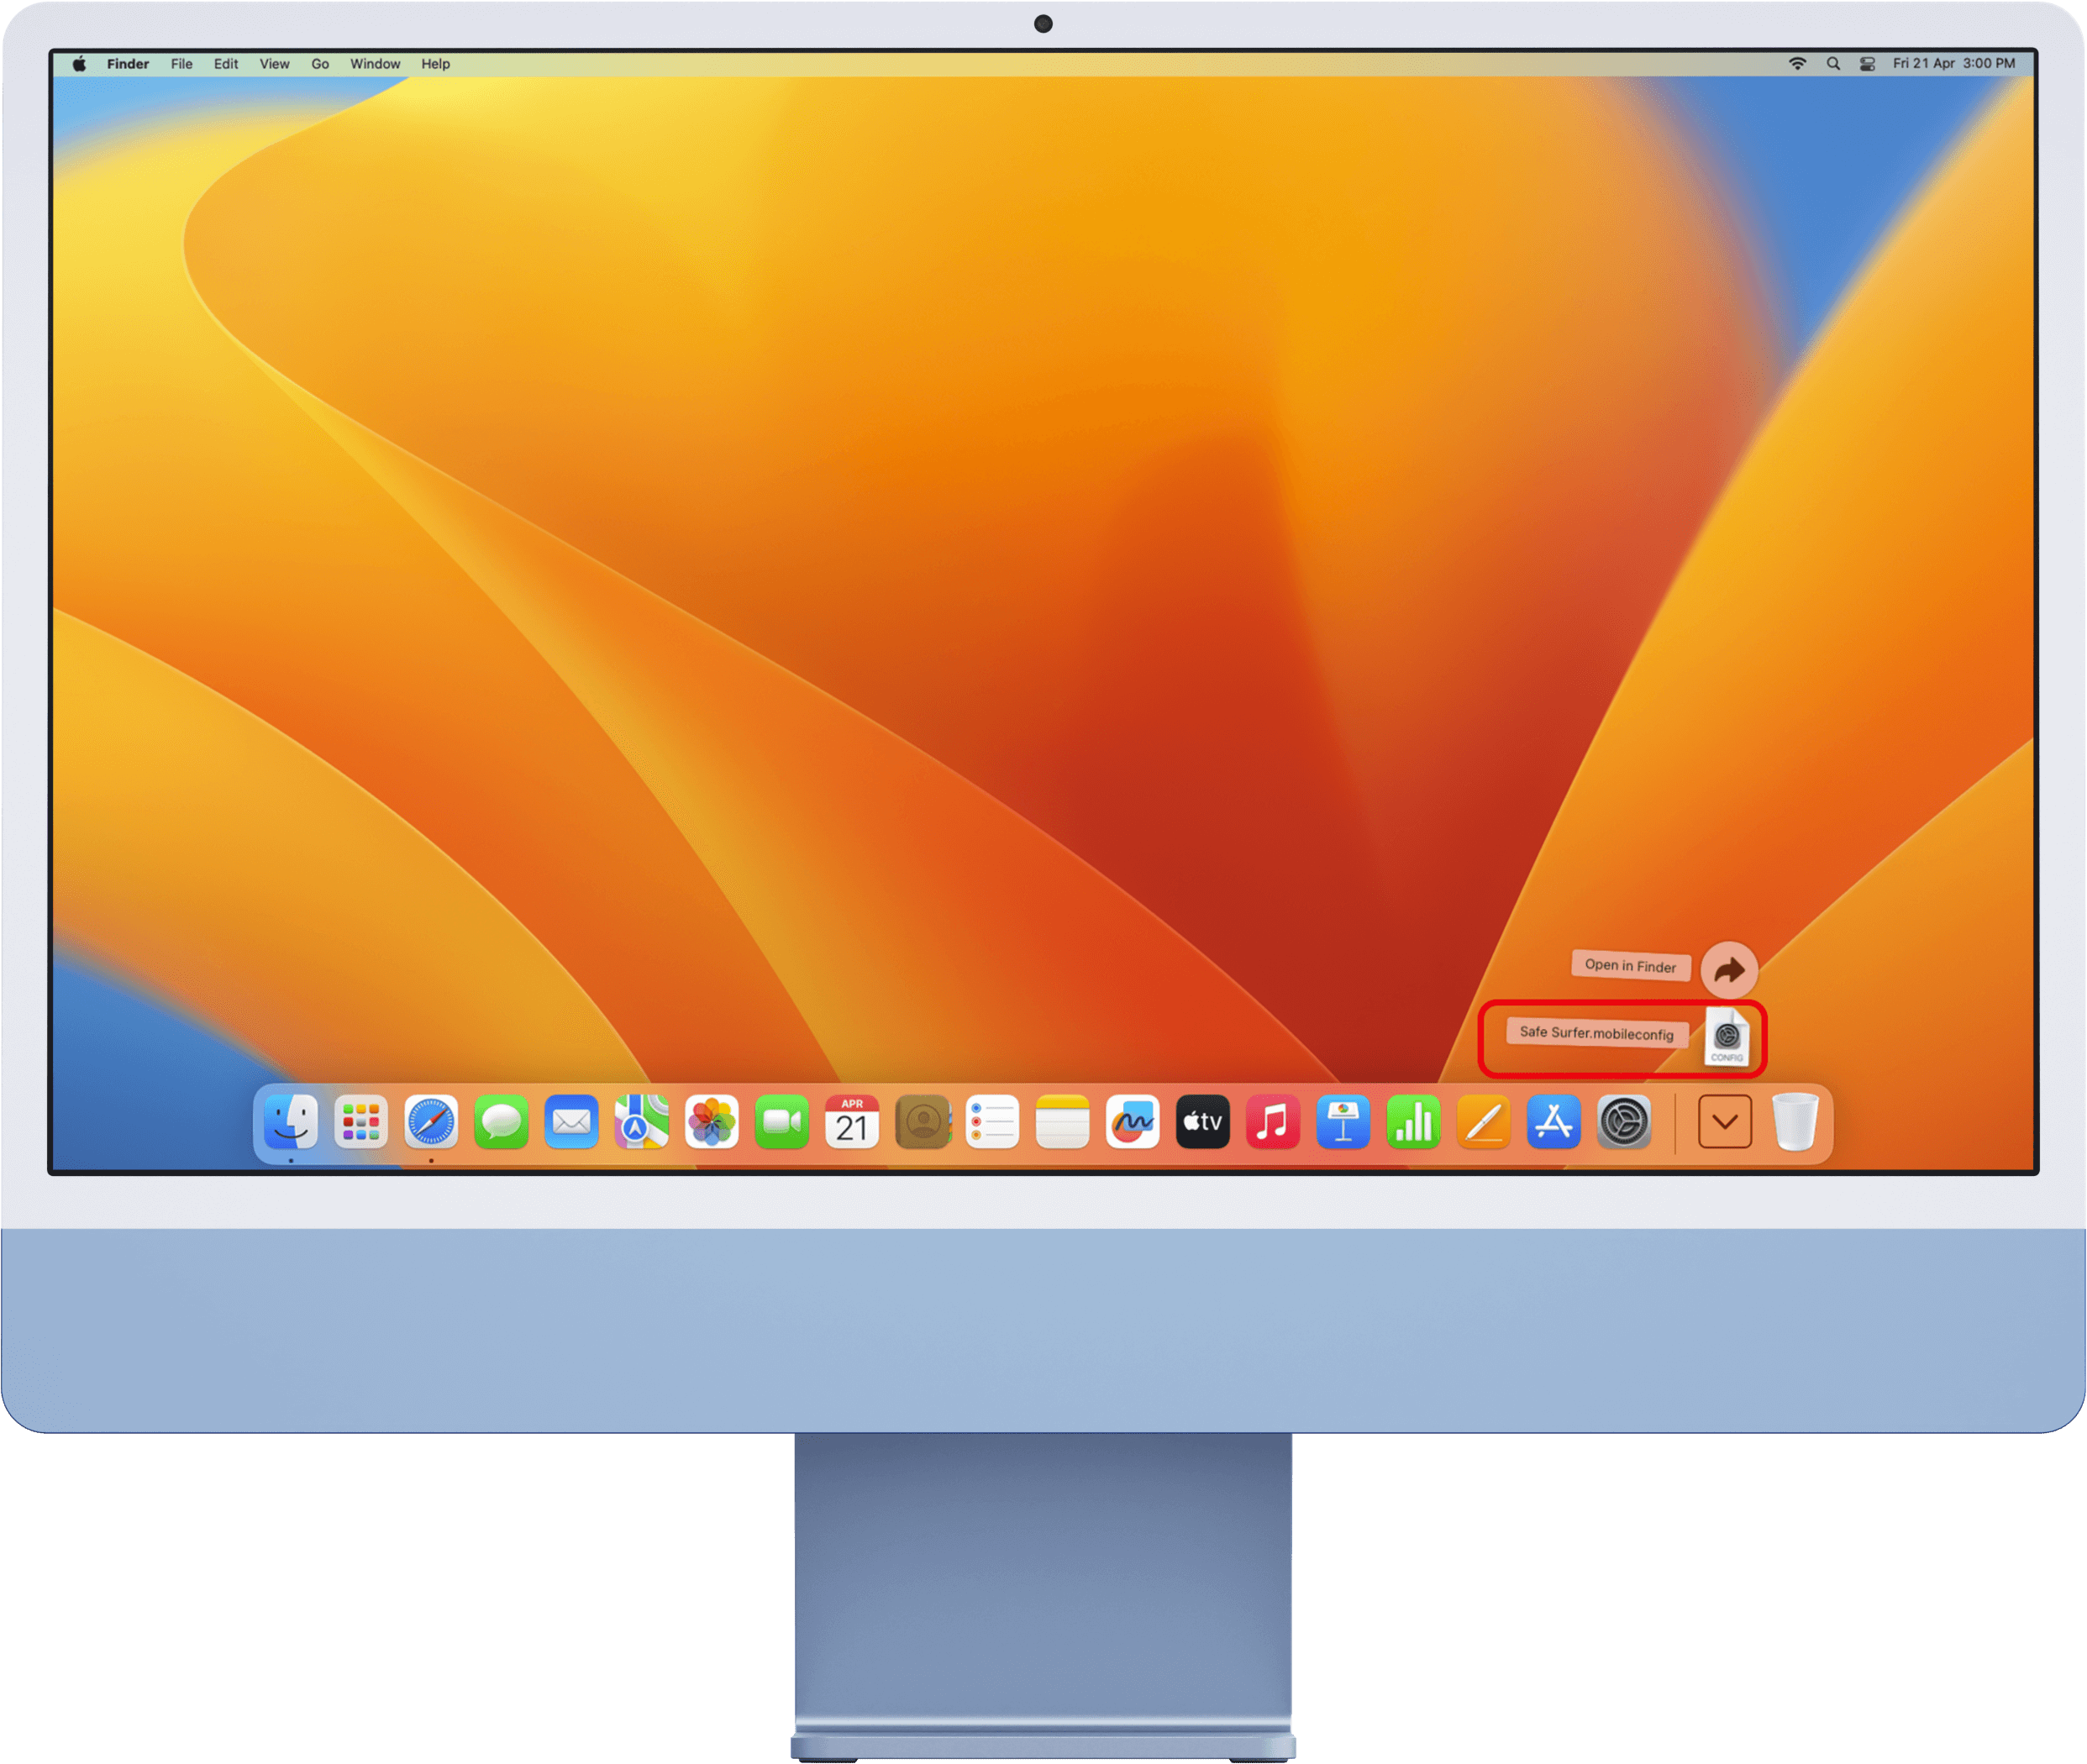
Click the Downloads section on the dock.

Inside the Downloads section, click the “Safe Surfer.mobileconfig” file.
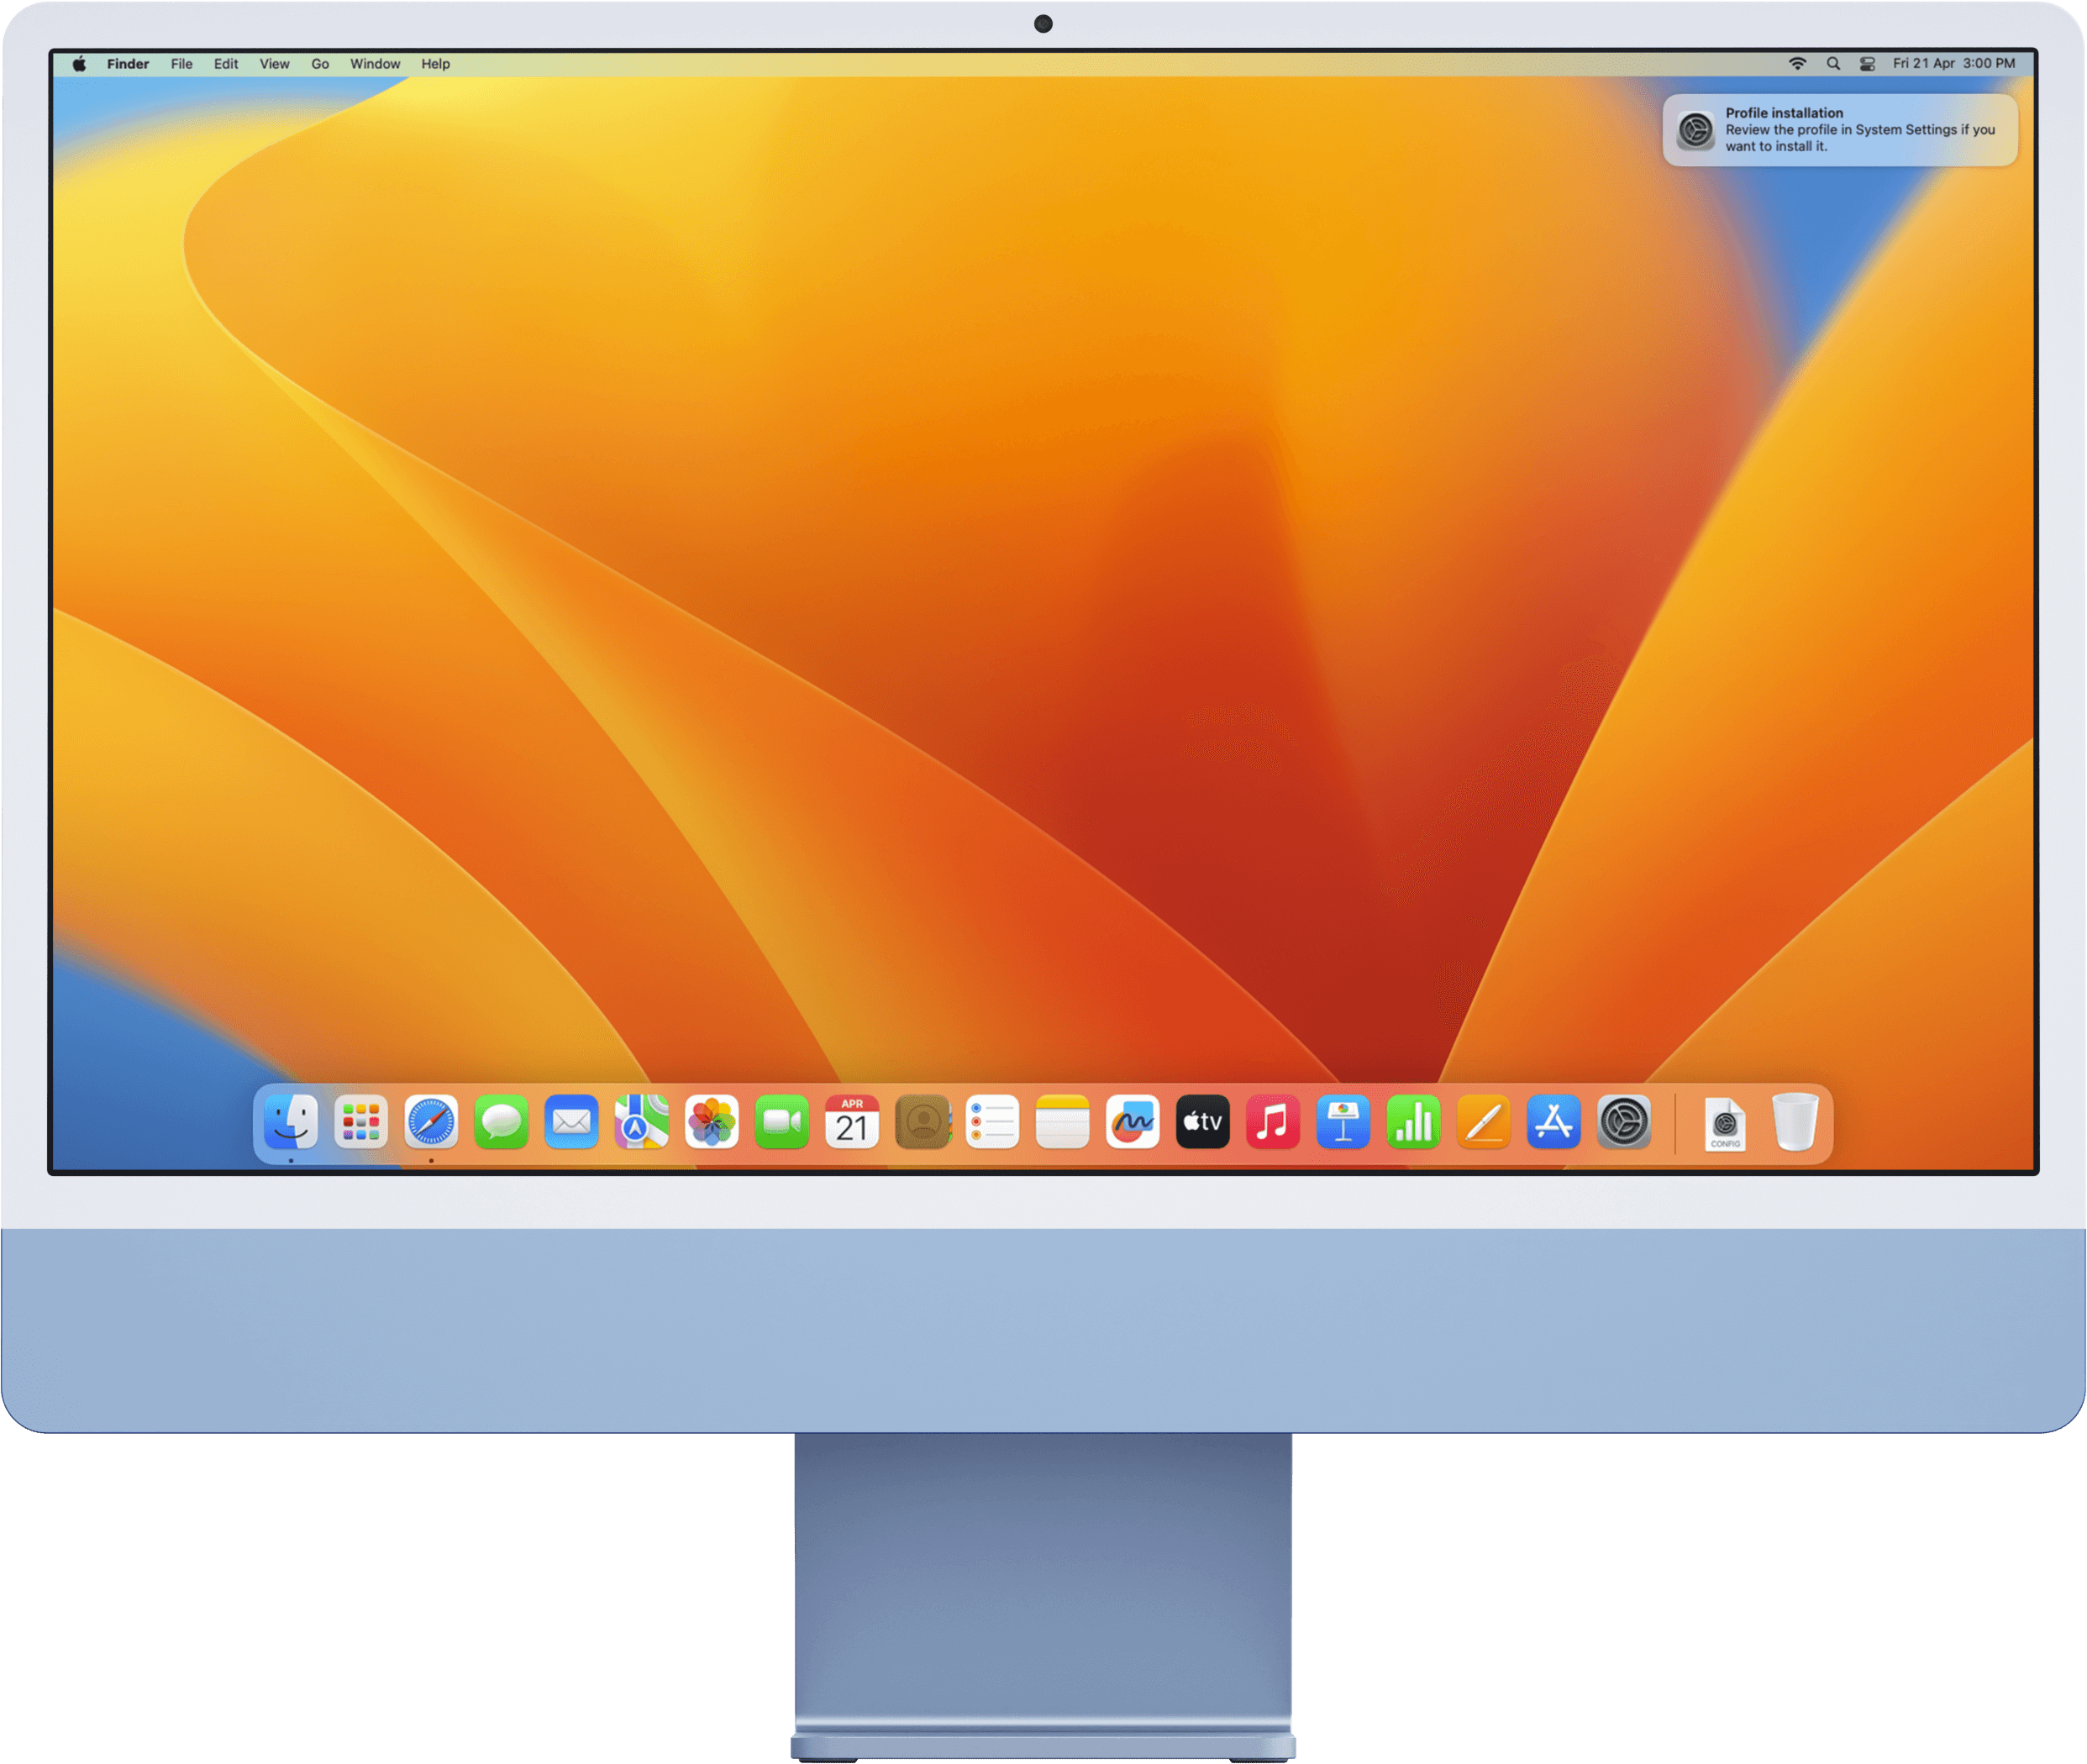
The Mac will inform you that the filter profile is available for installation in the System Settings app.
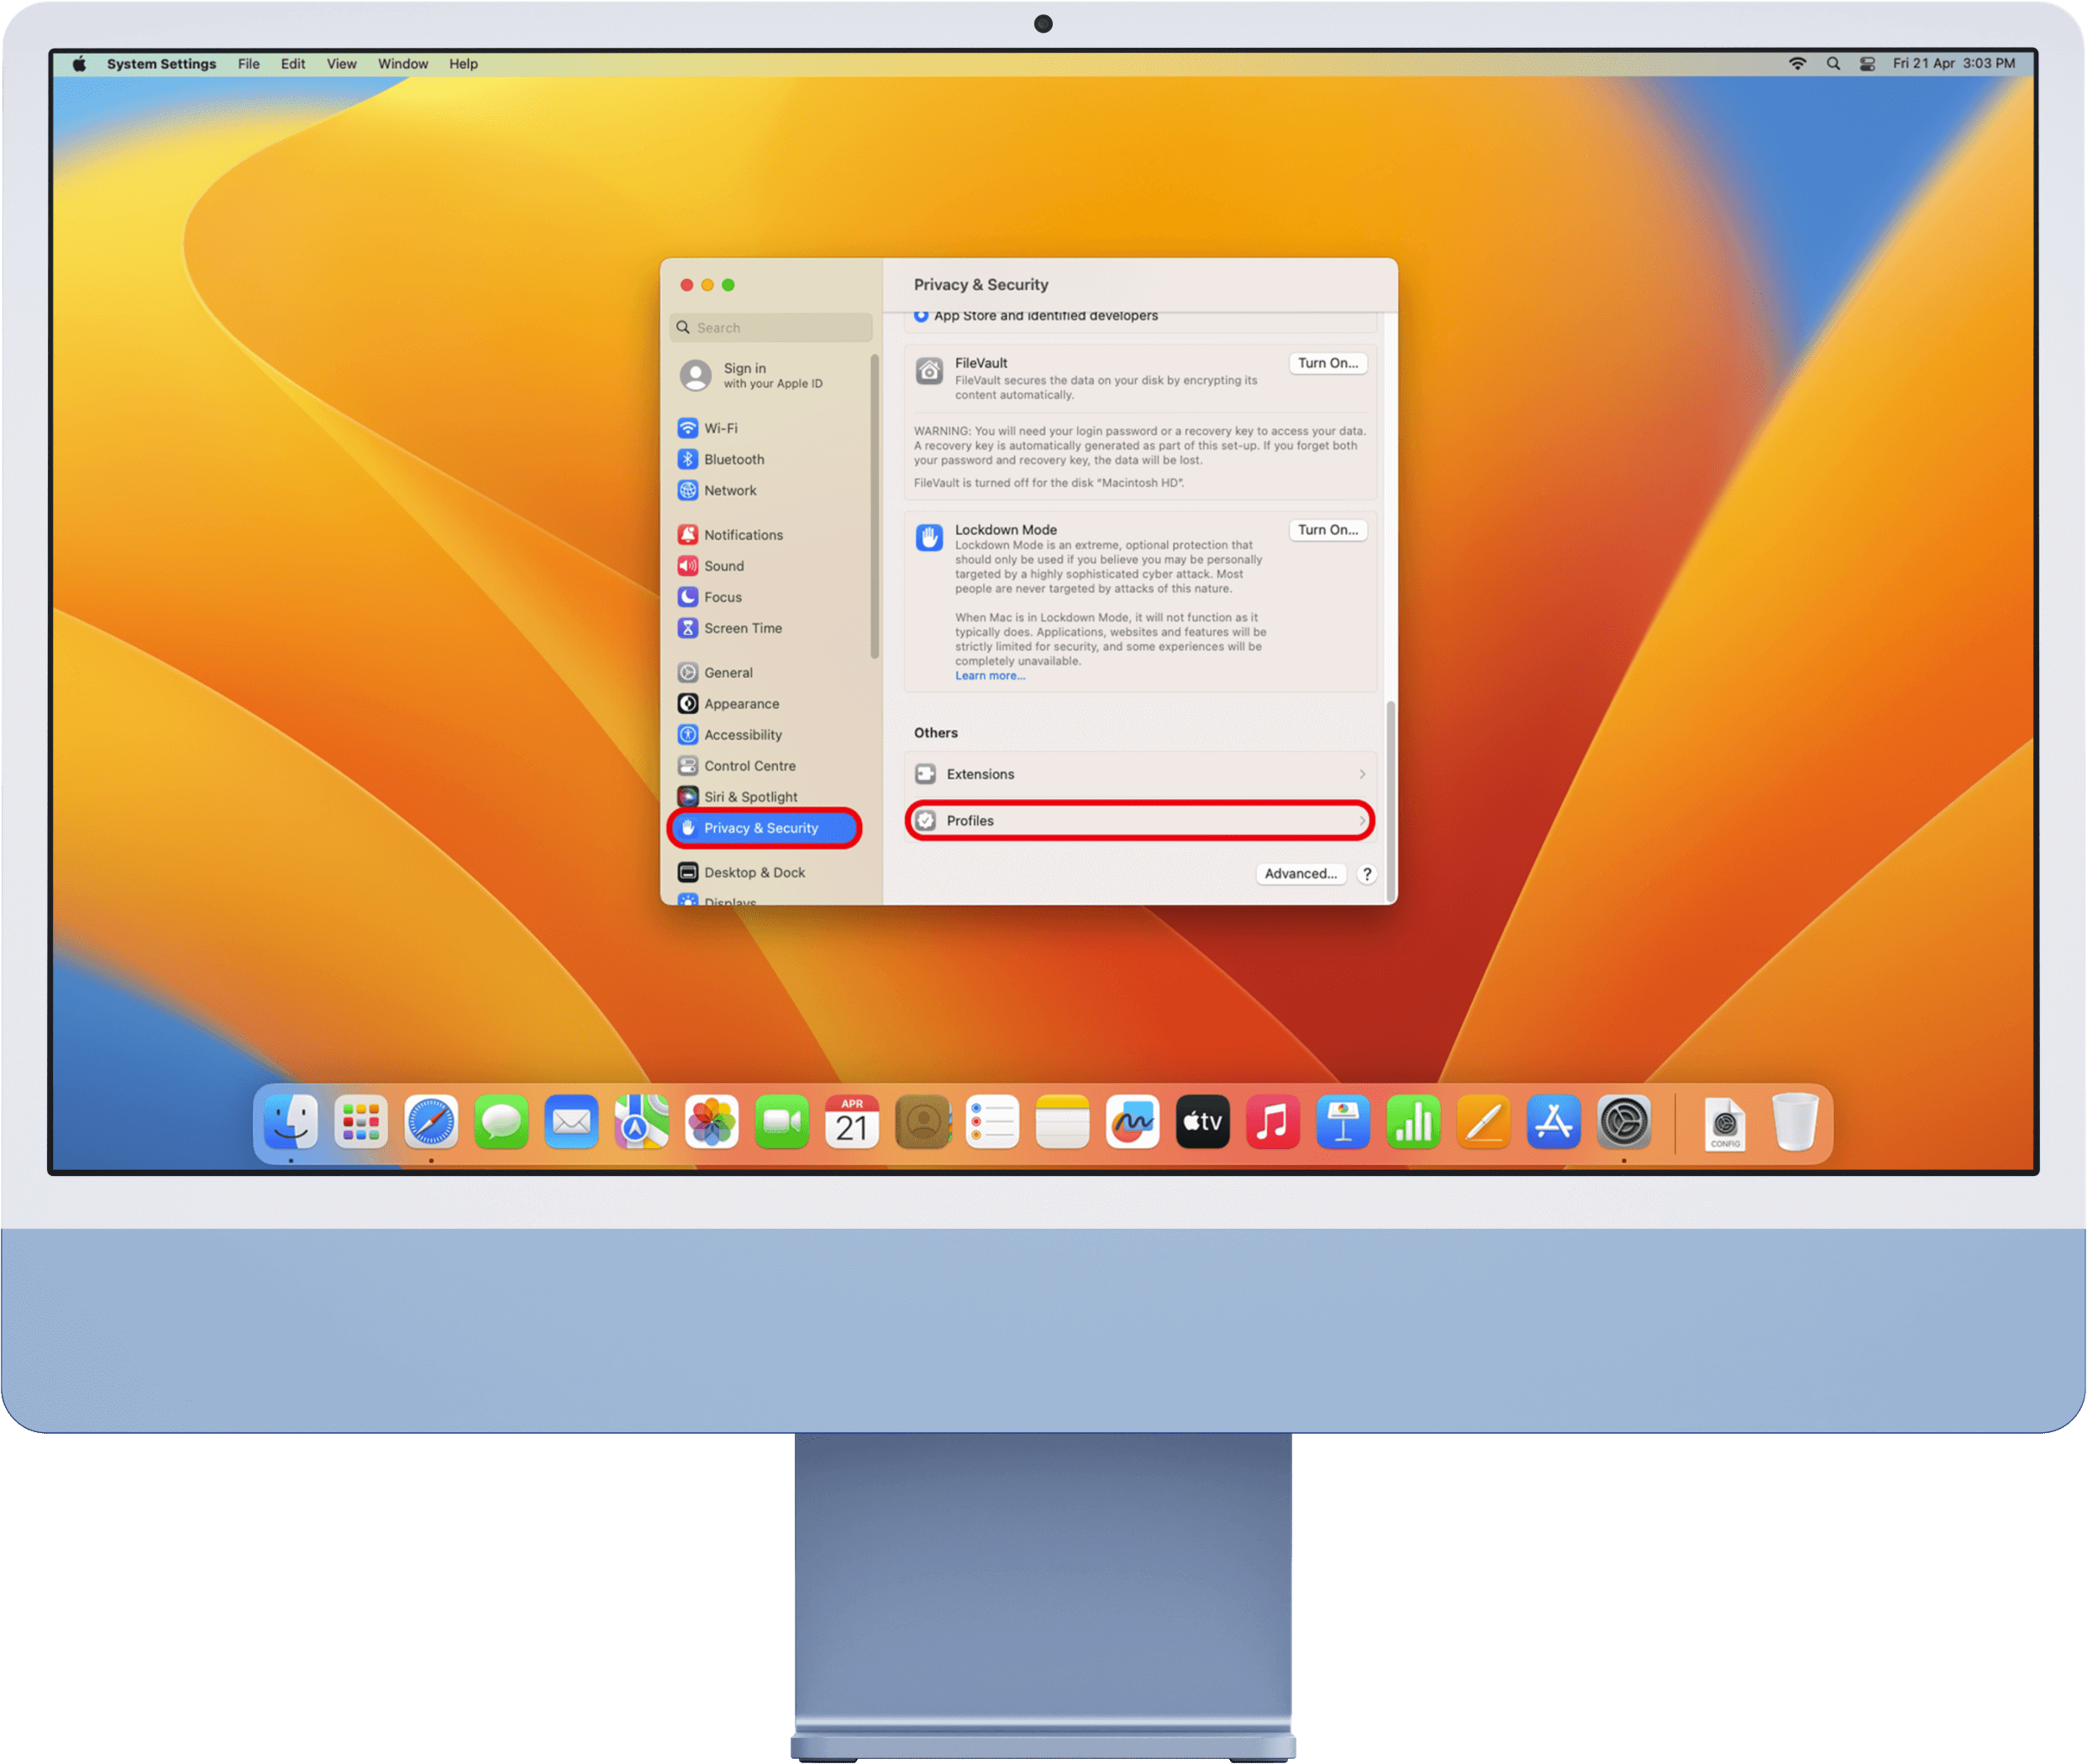
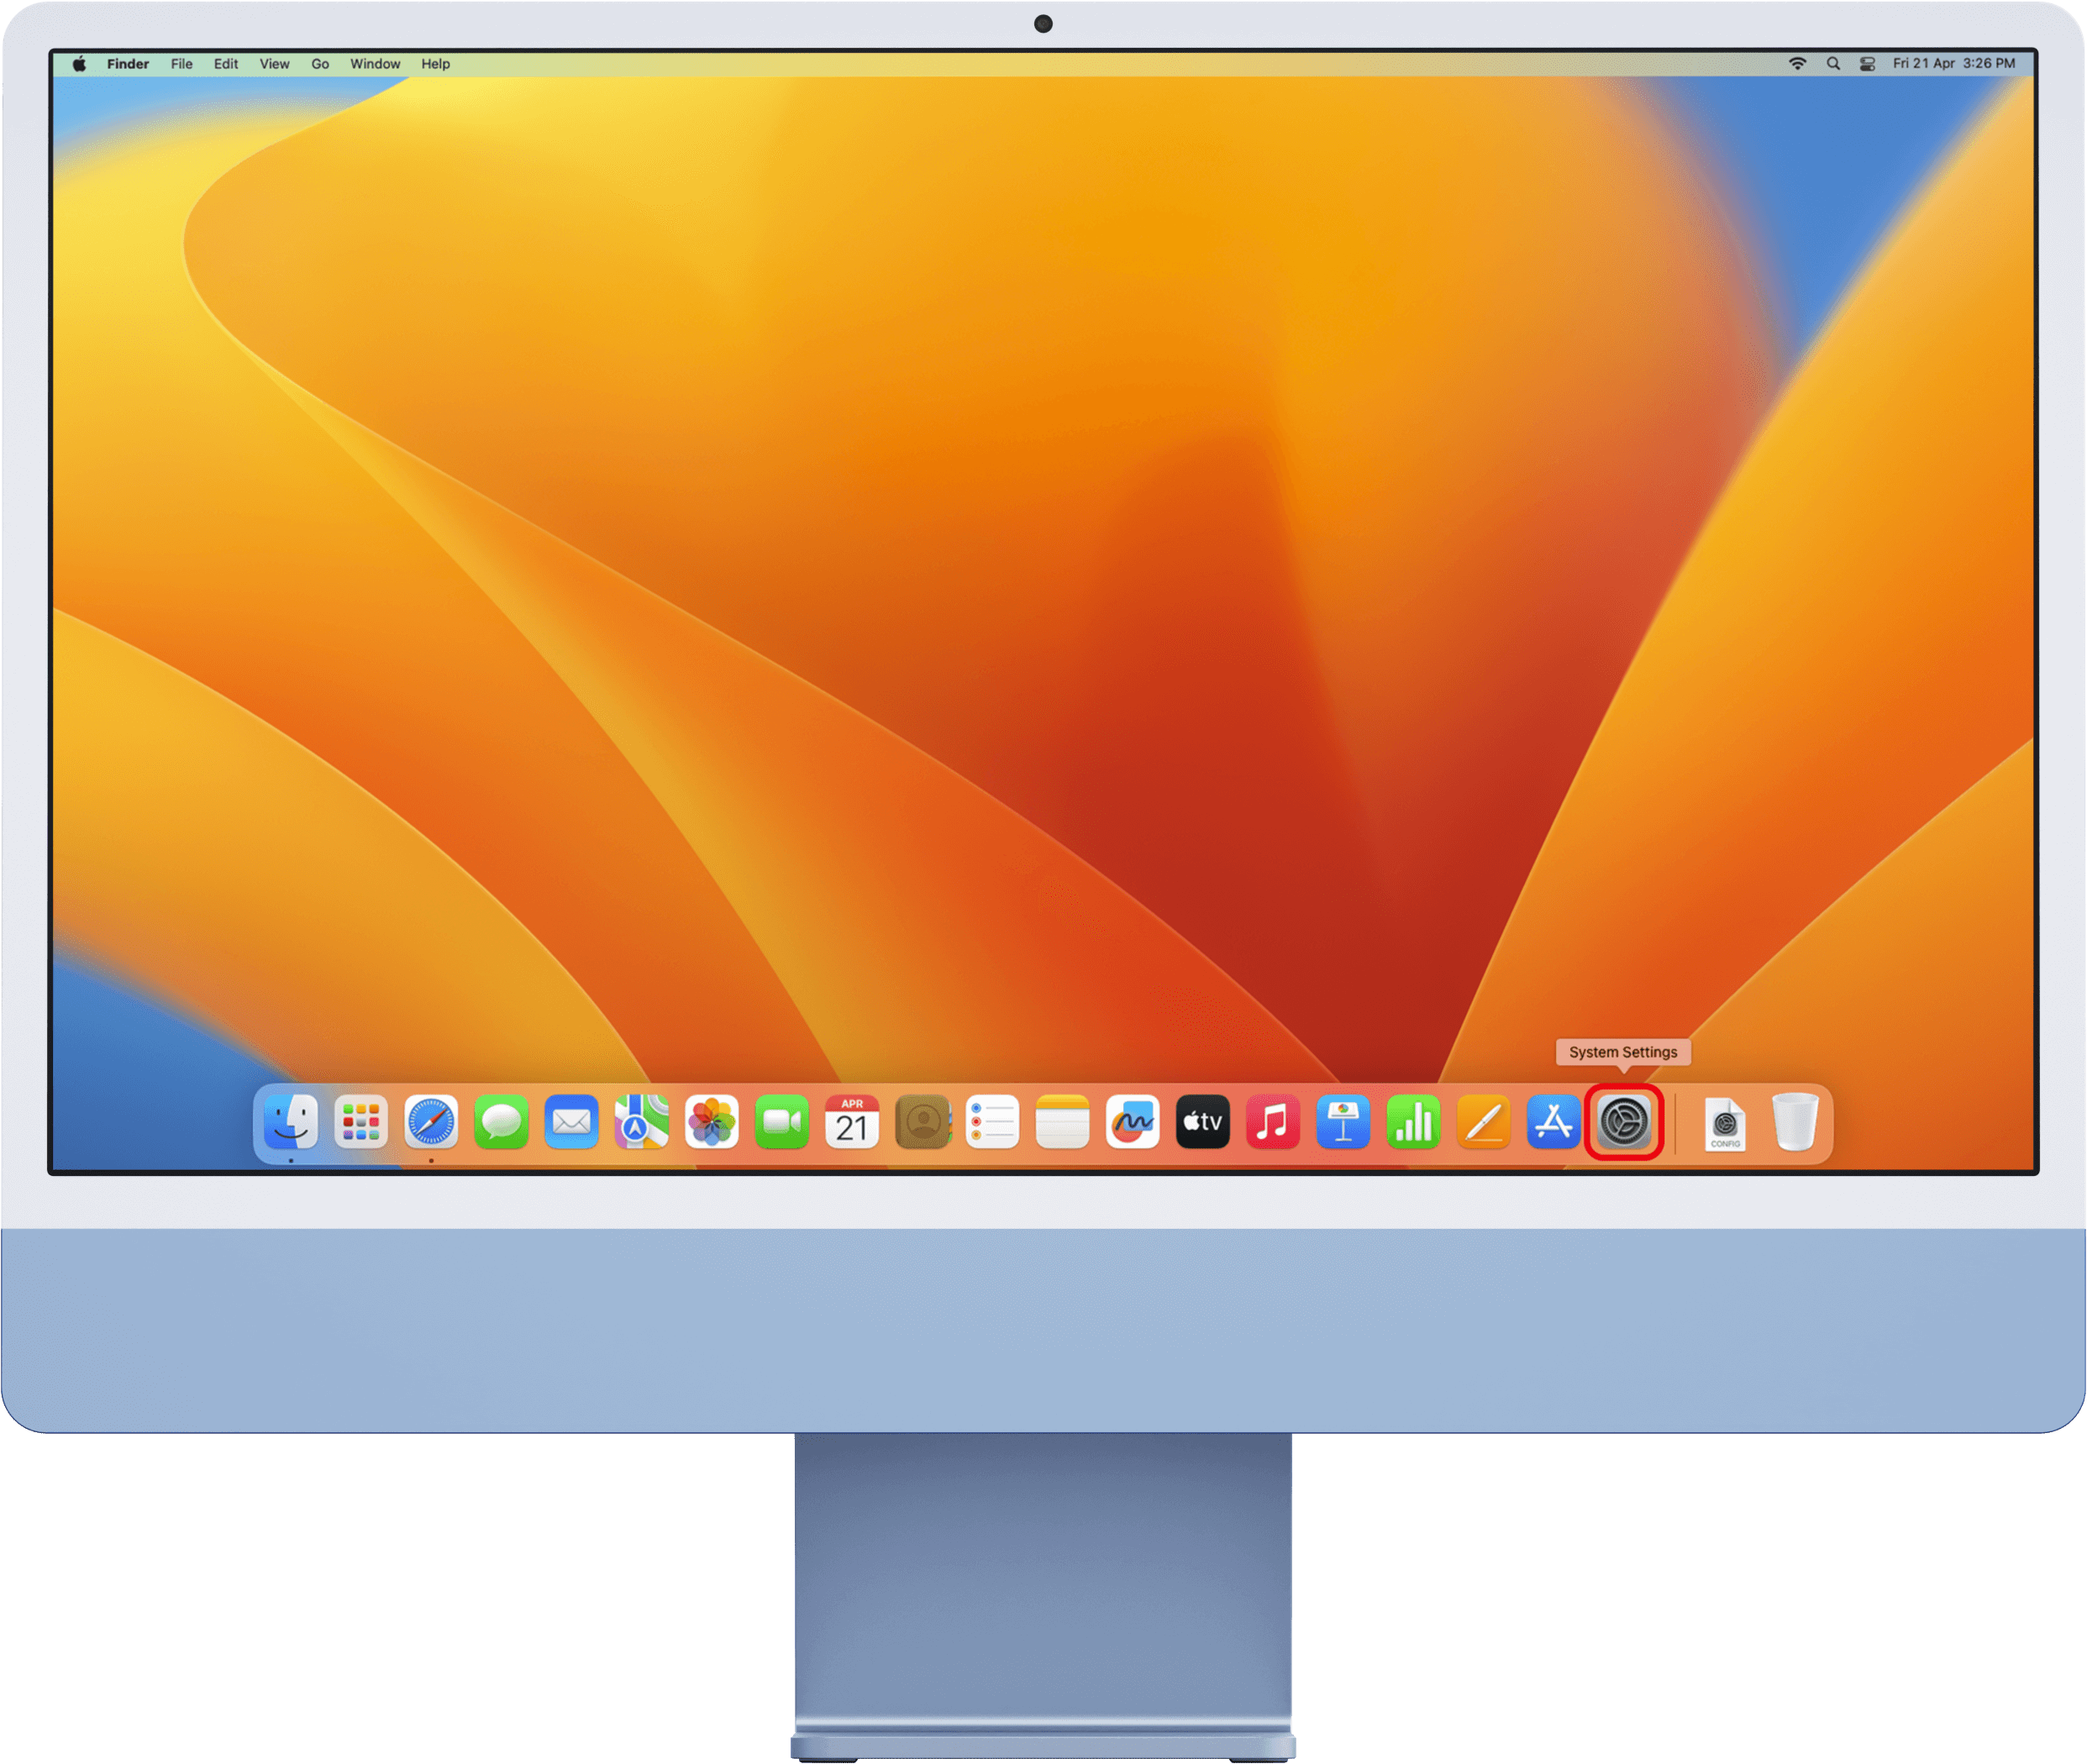
Click the System Settings app on the dock. If you can’t find it on the dock, click the Spotlight (magnifying glass) icon at the upper-right corner of the screen, type “system settings”, then click the result for the System Settings app.

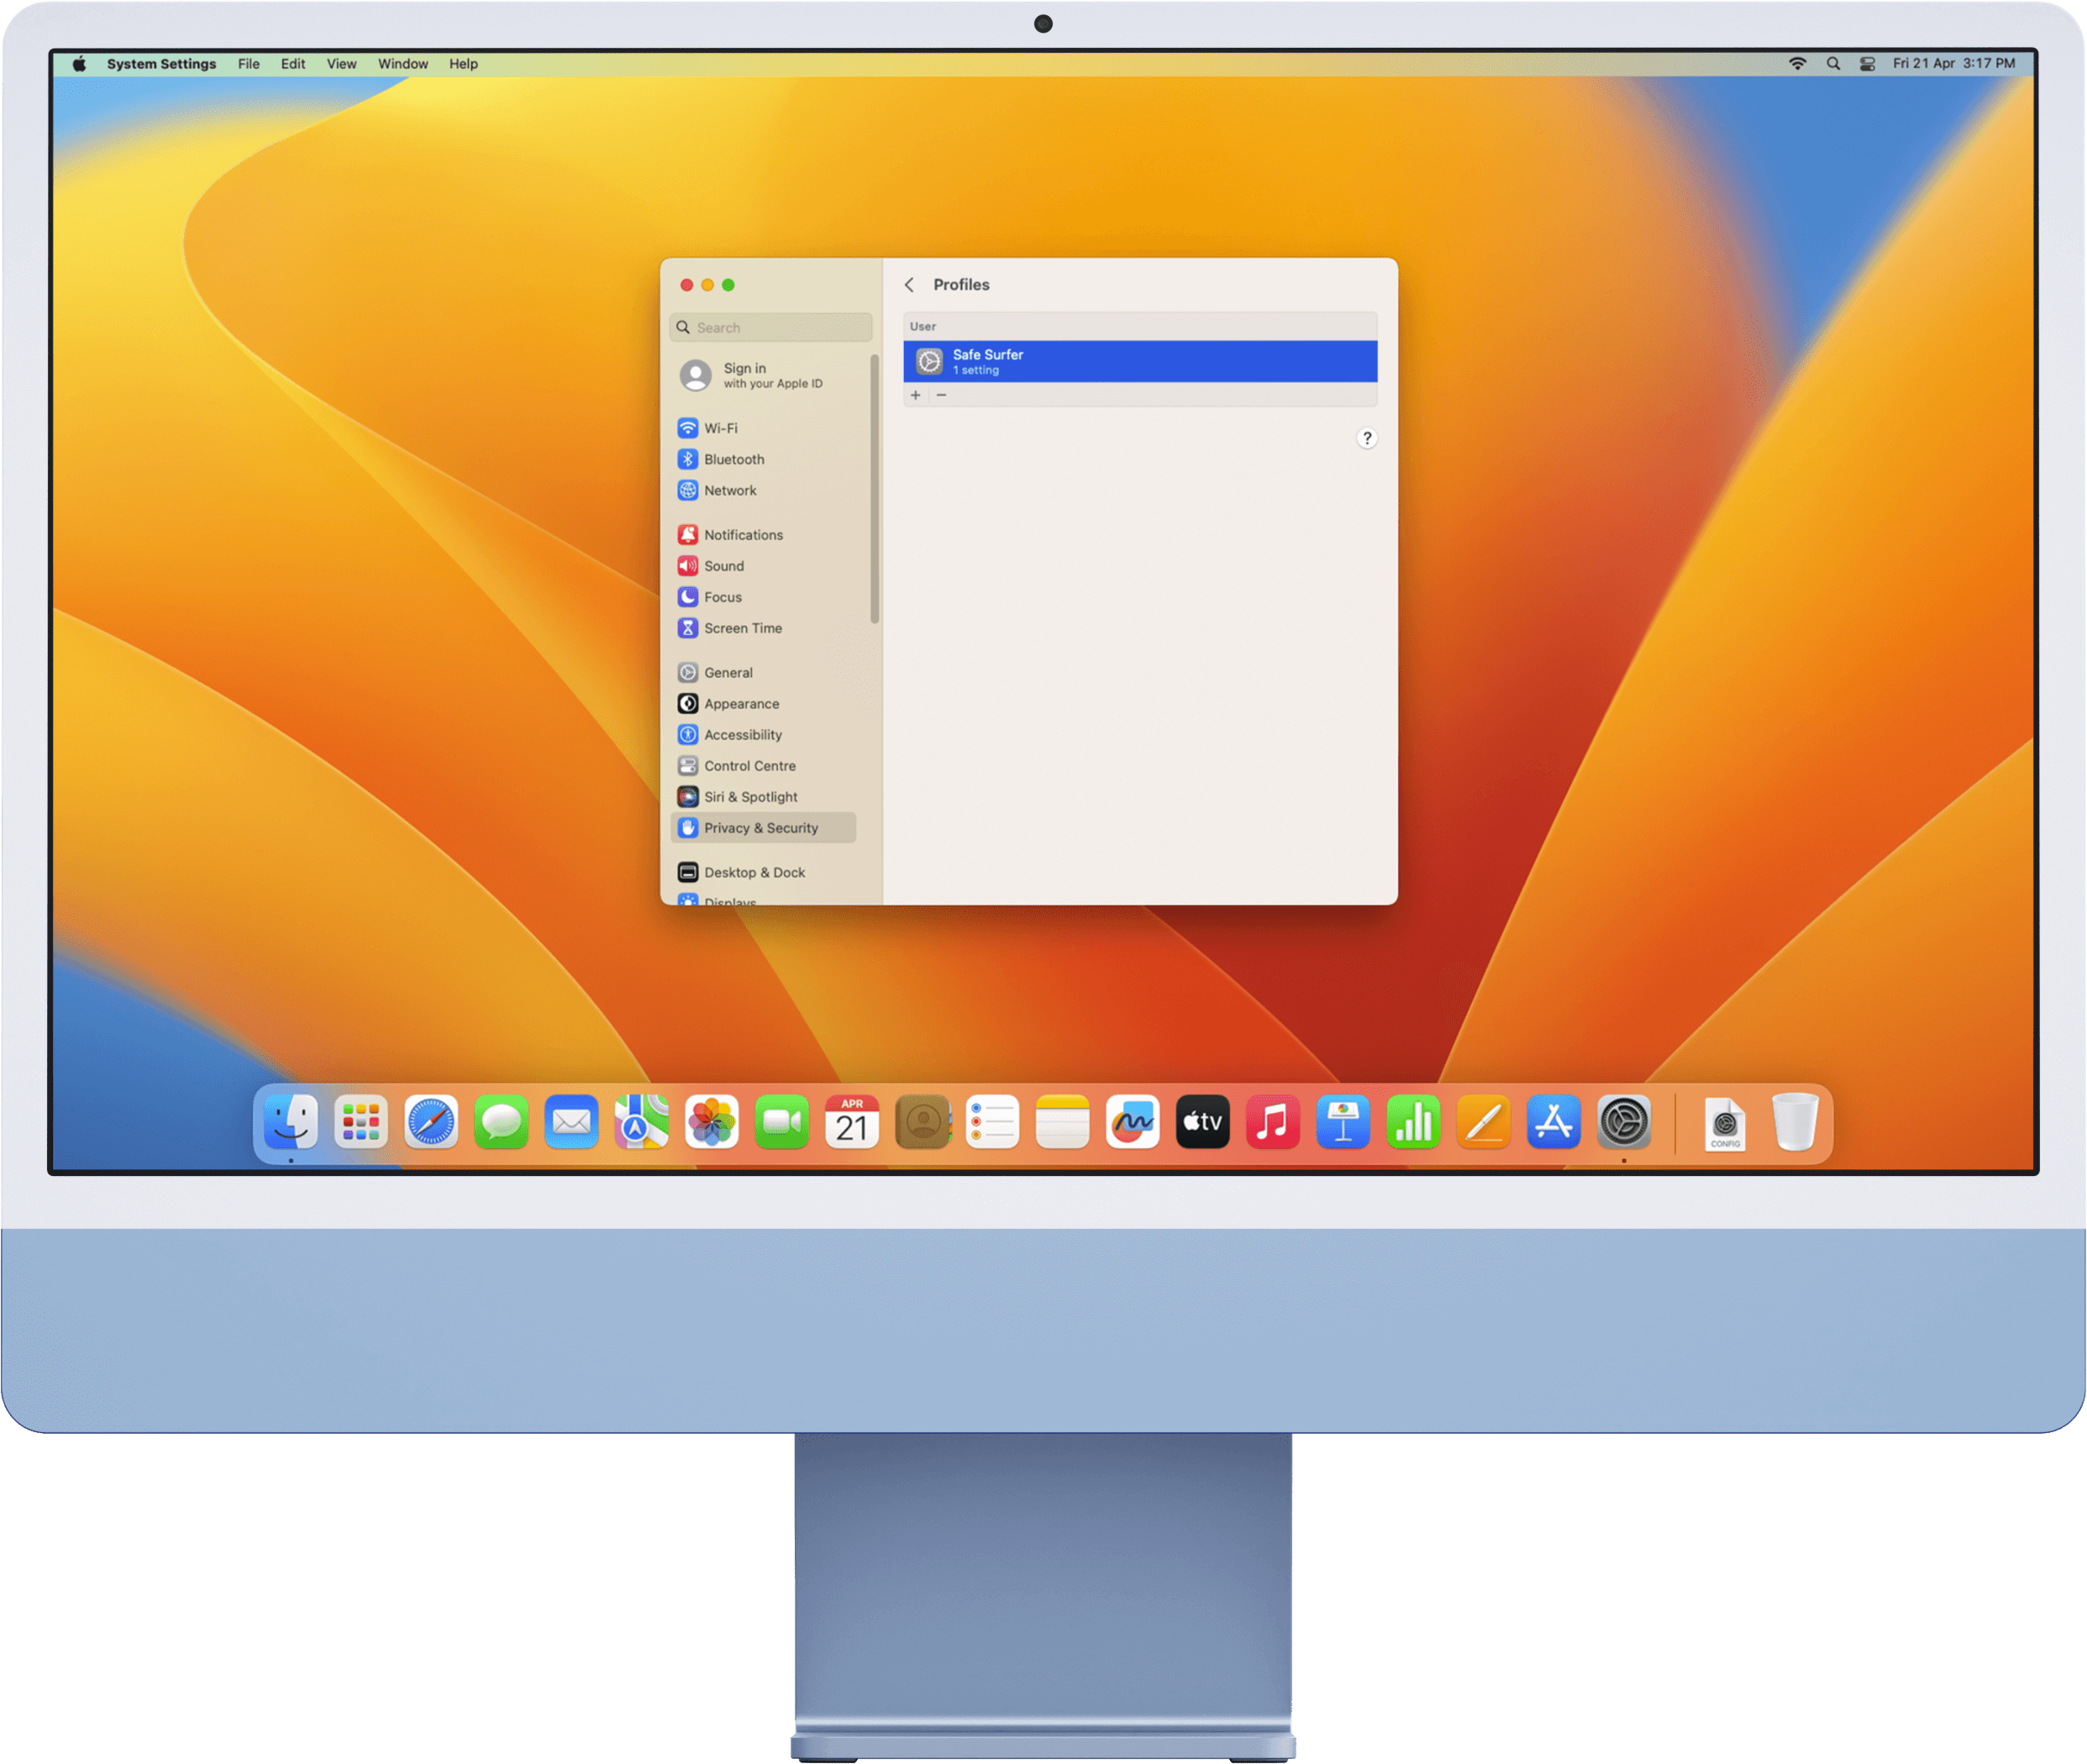
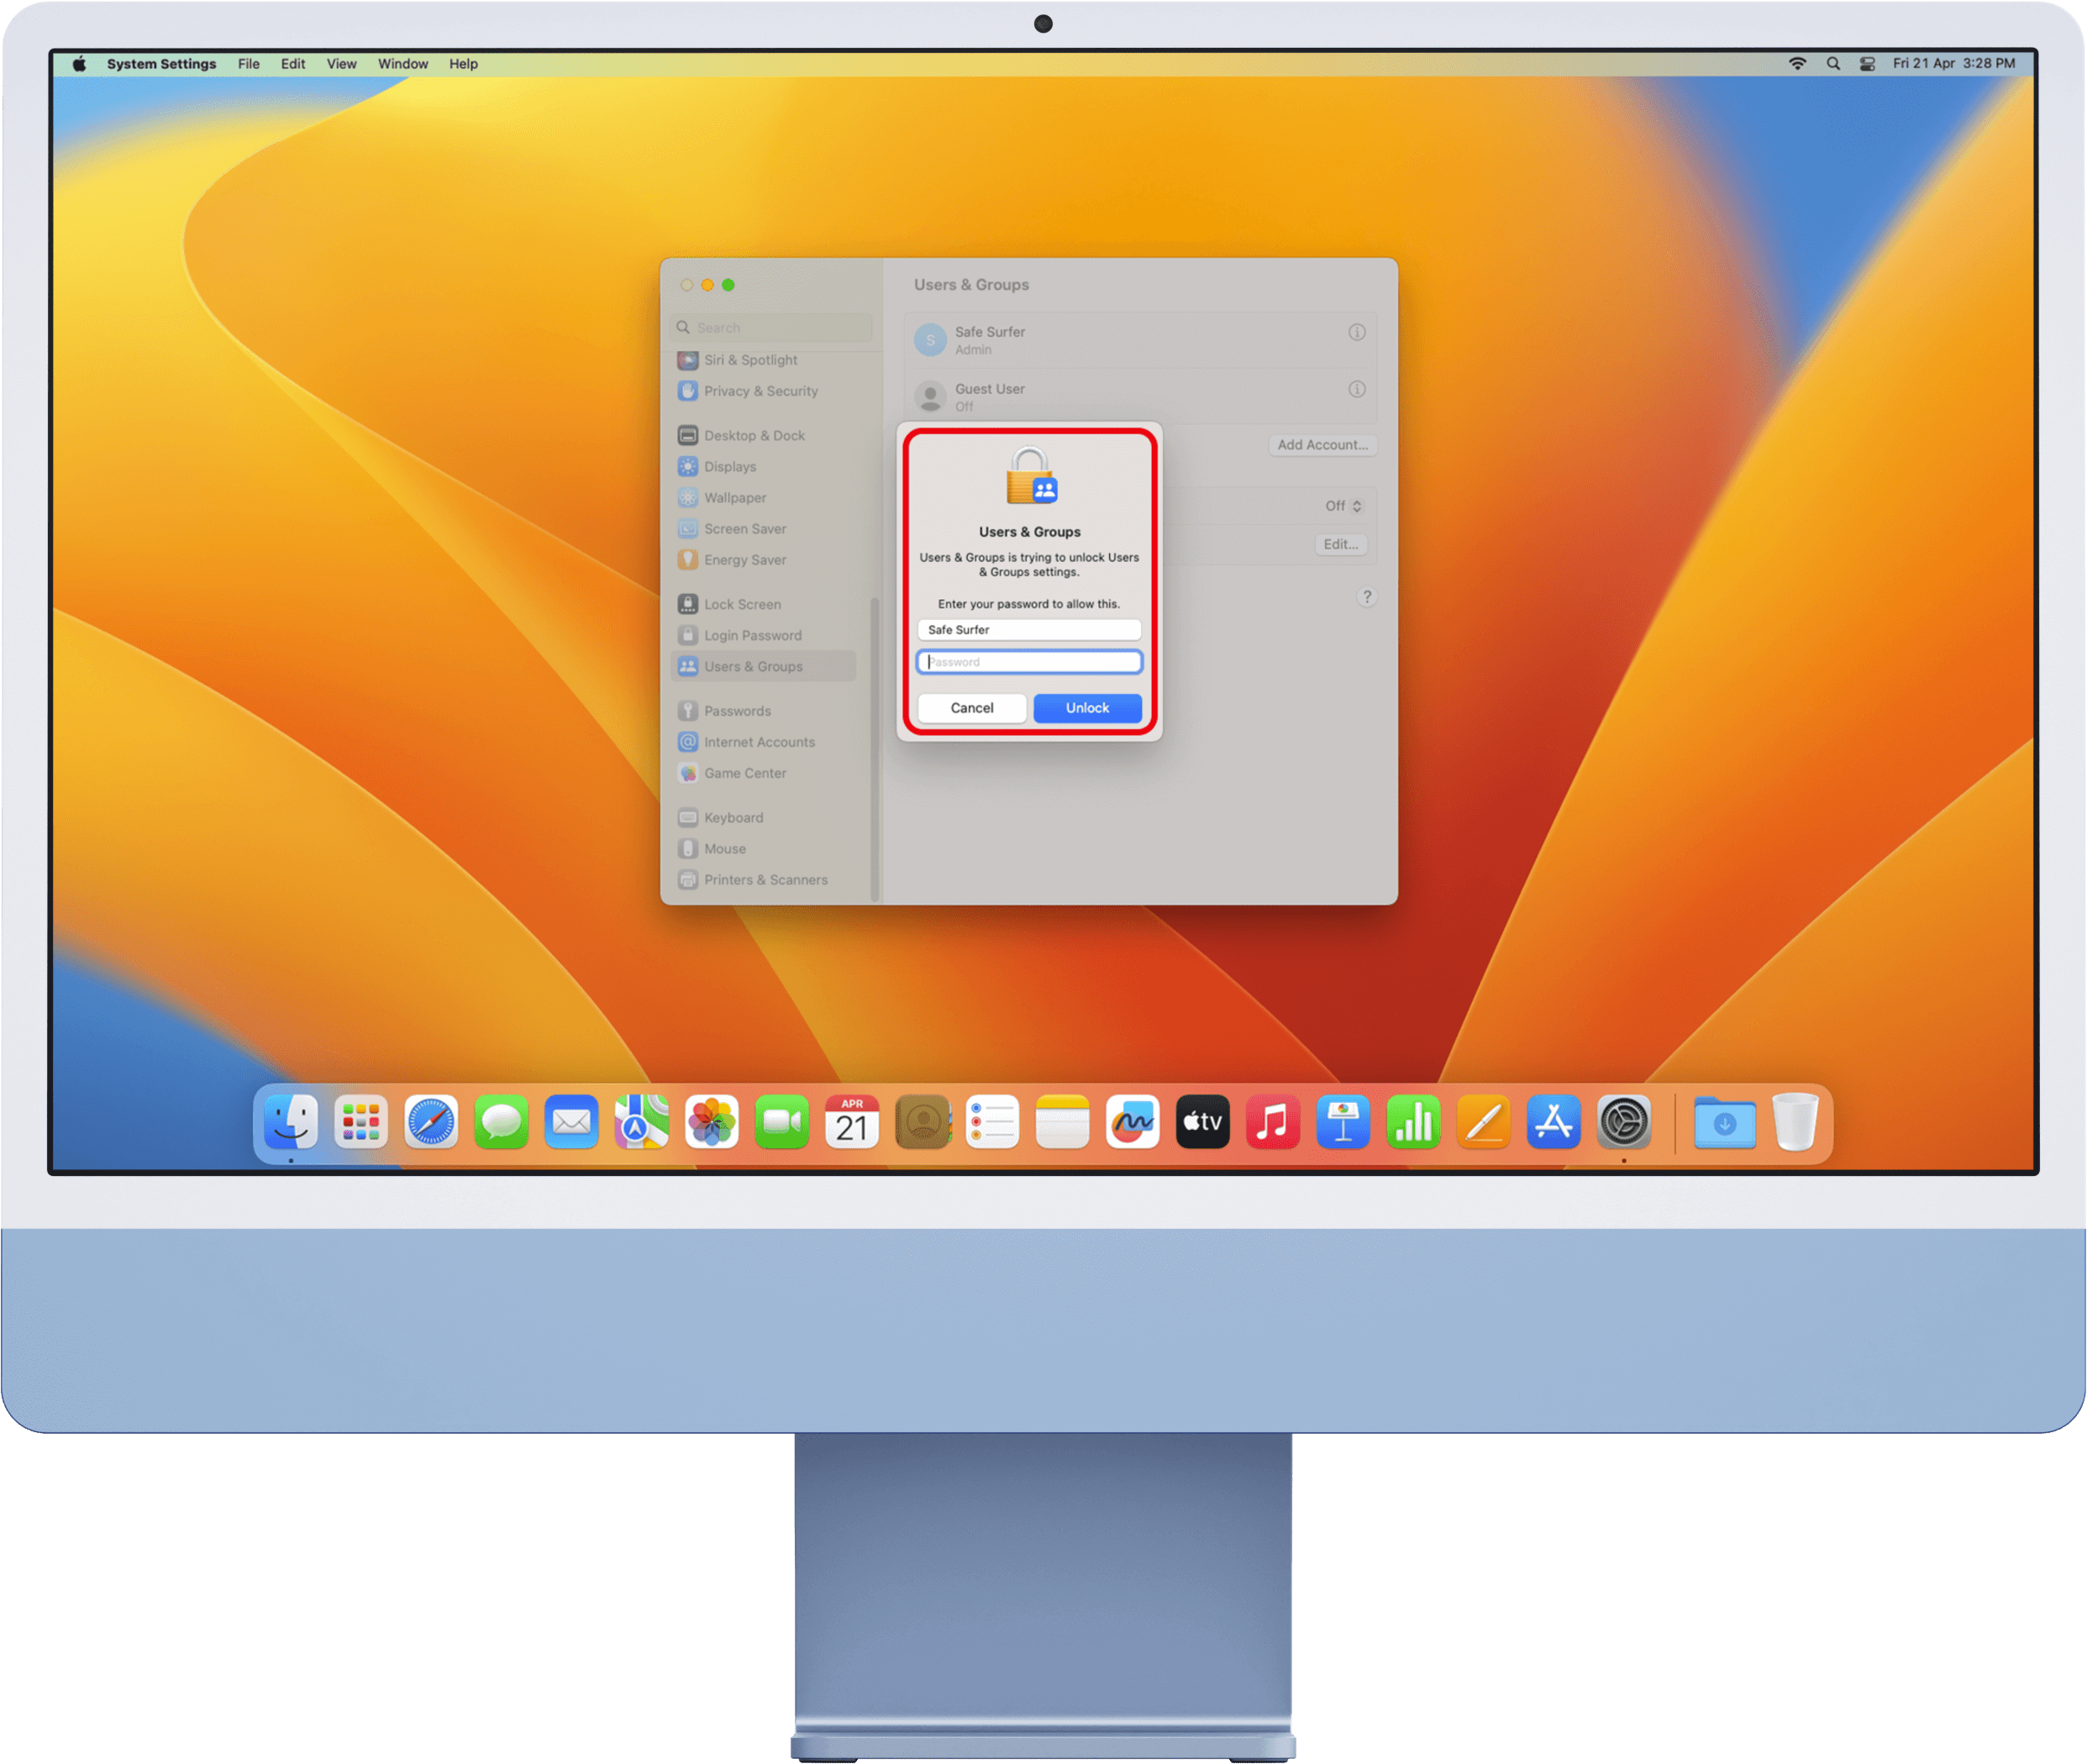
Click the Privacy & Security menu on the left-hand sidebar. Scroll down to the Others section, then click the Profiles menu.
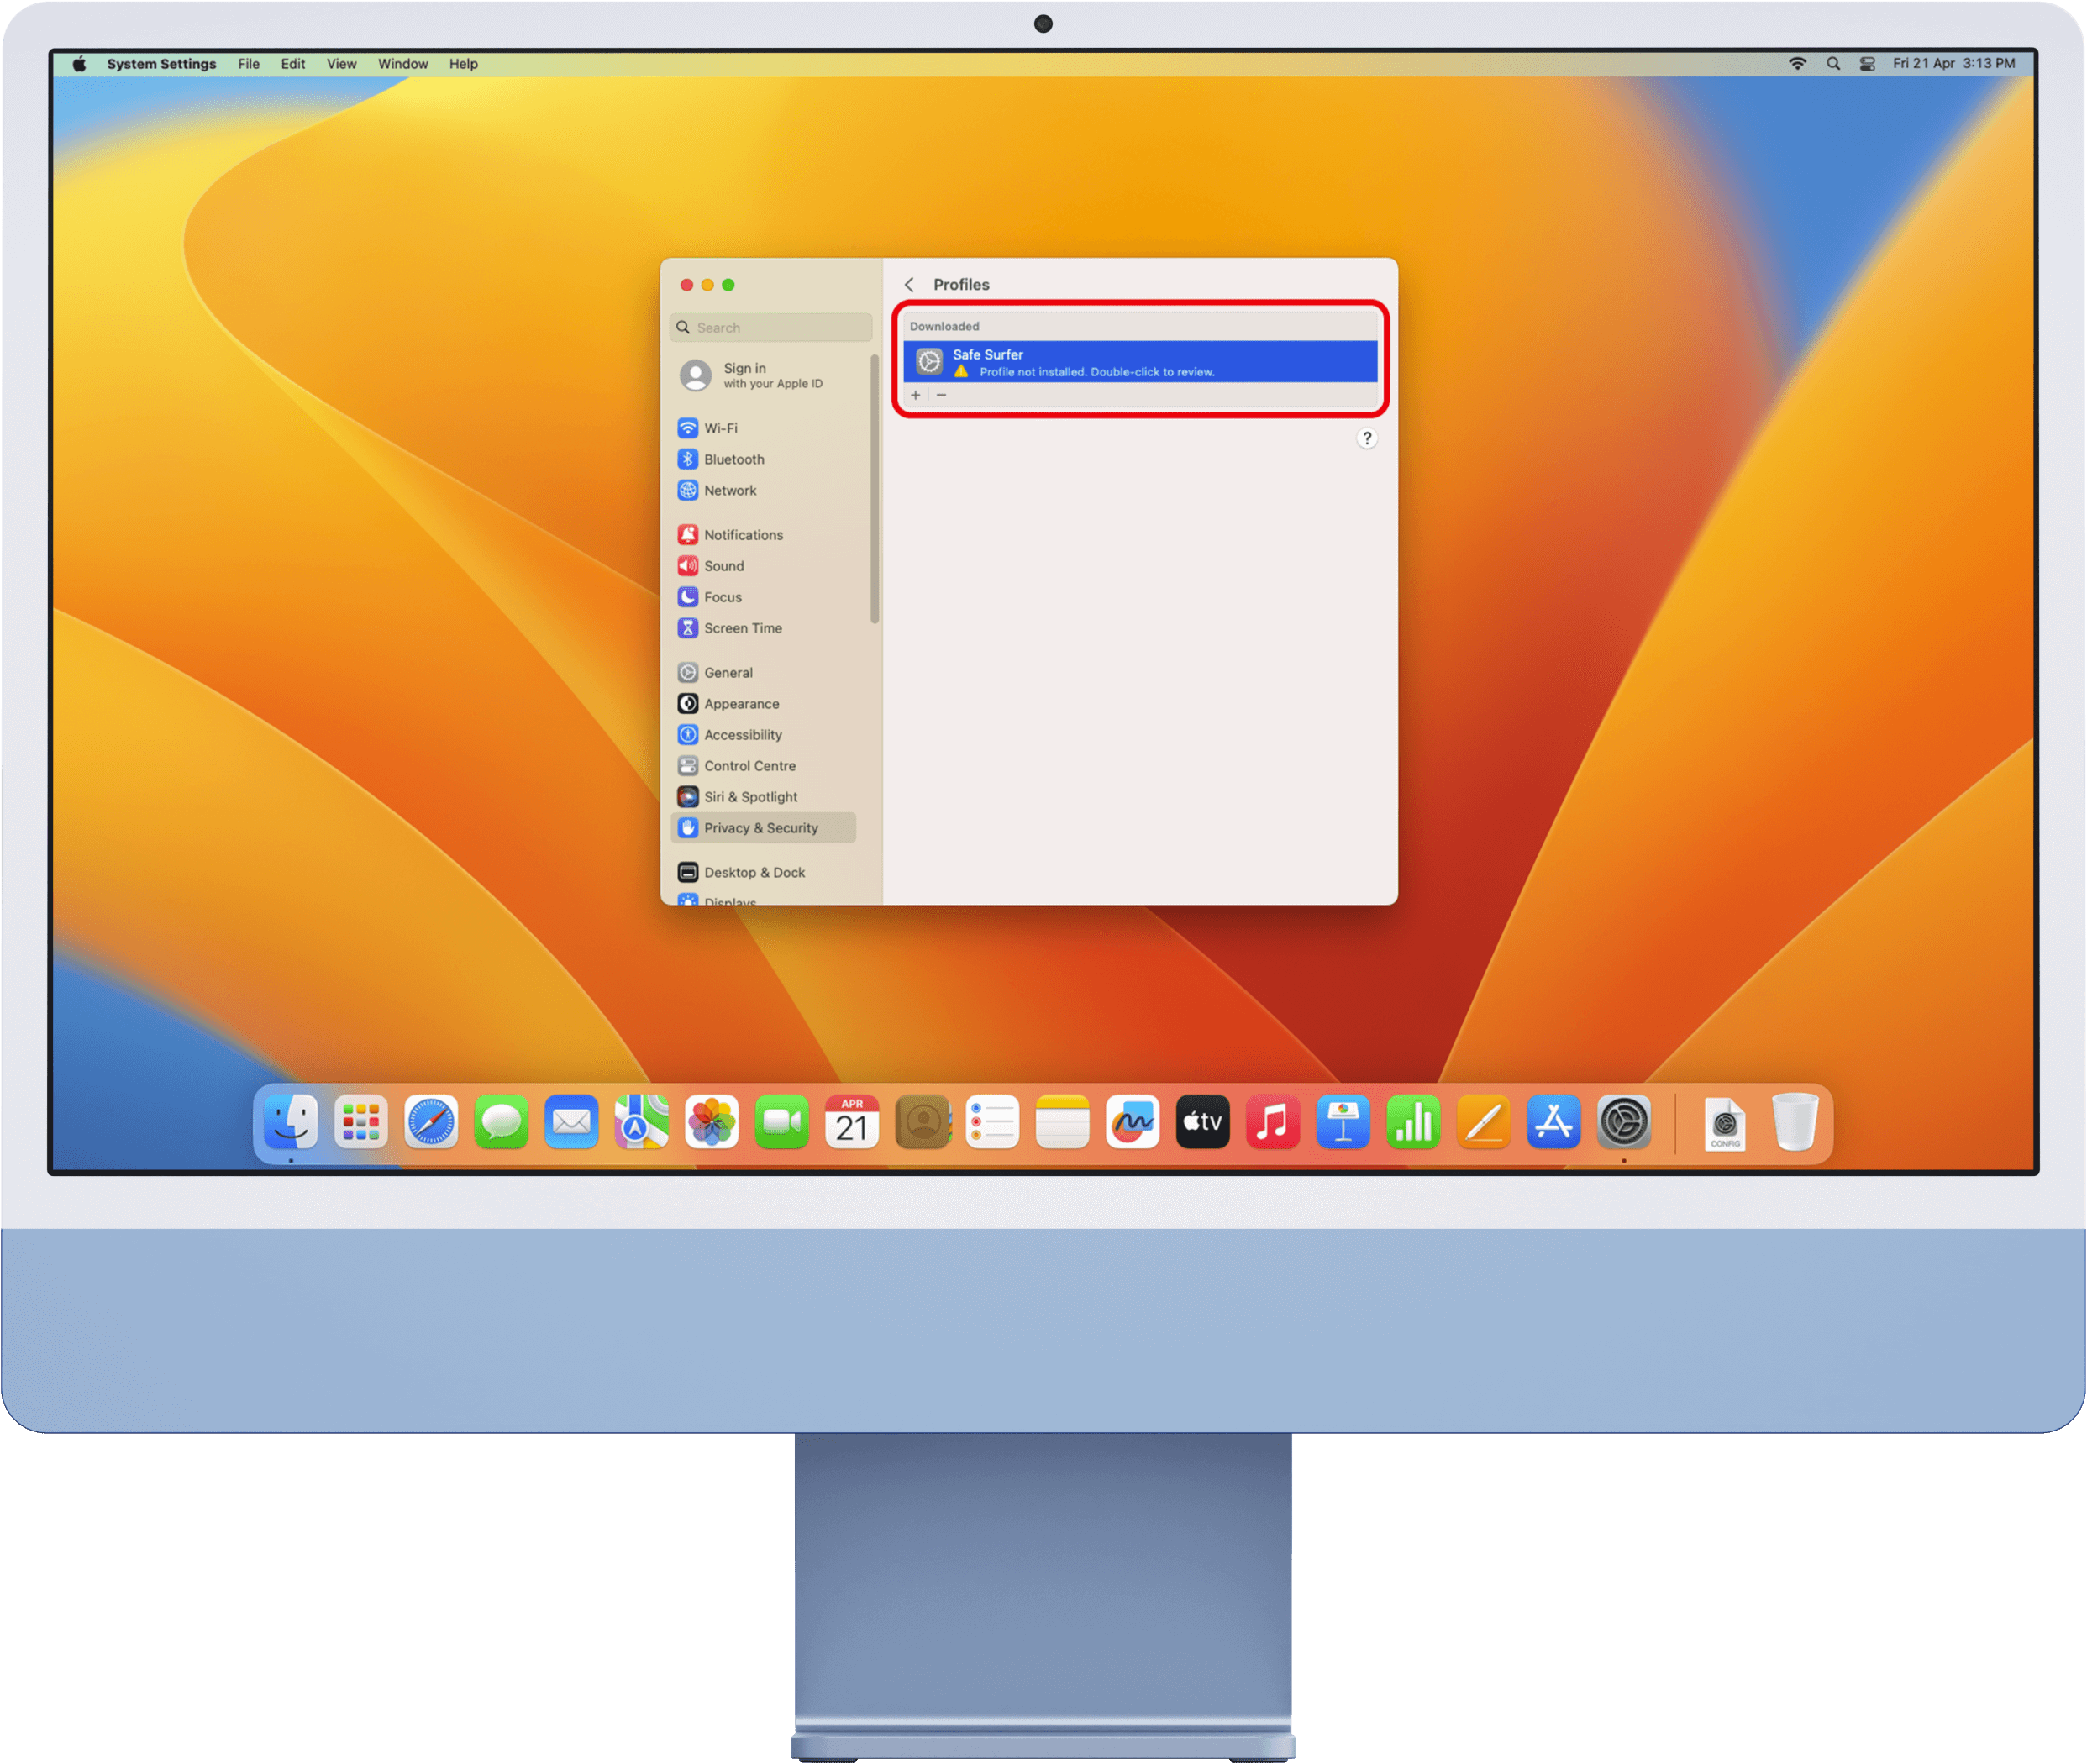
Double-click the Safe Surfer profile listing, which is currently pending installation.
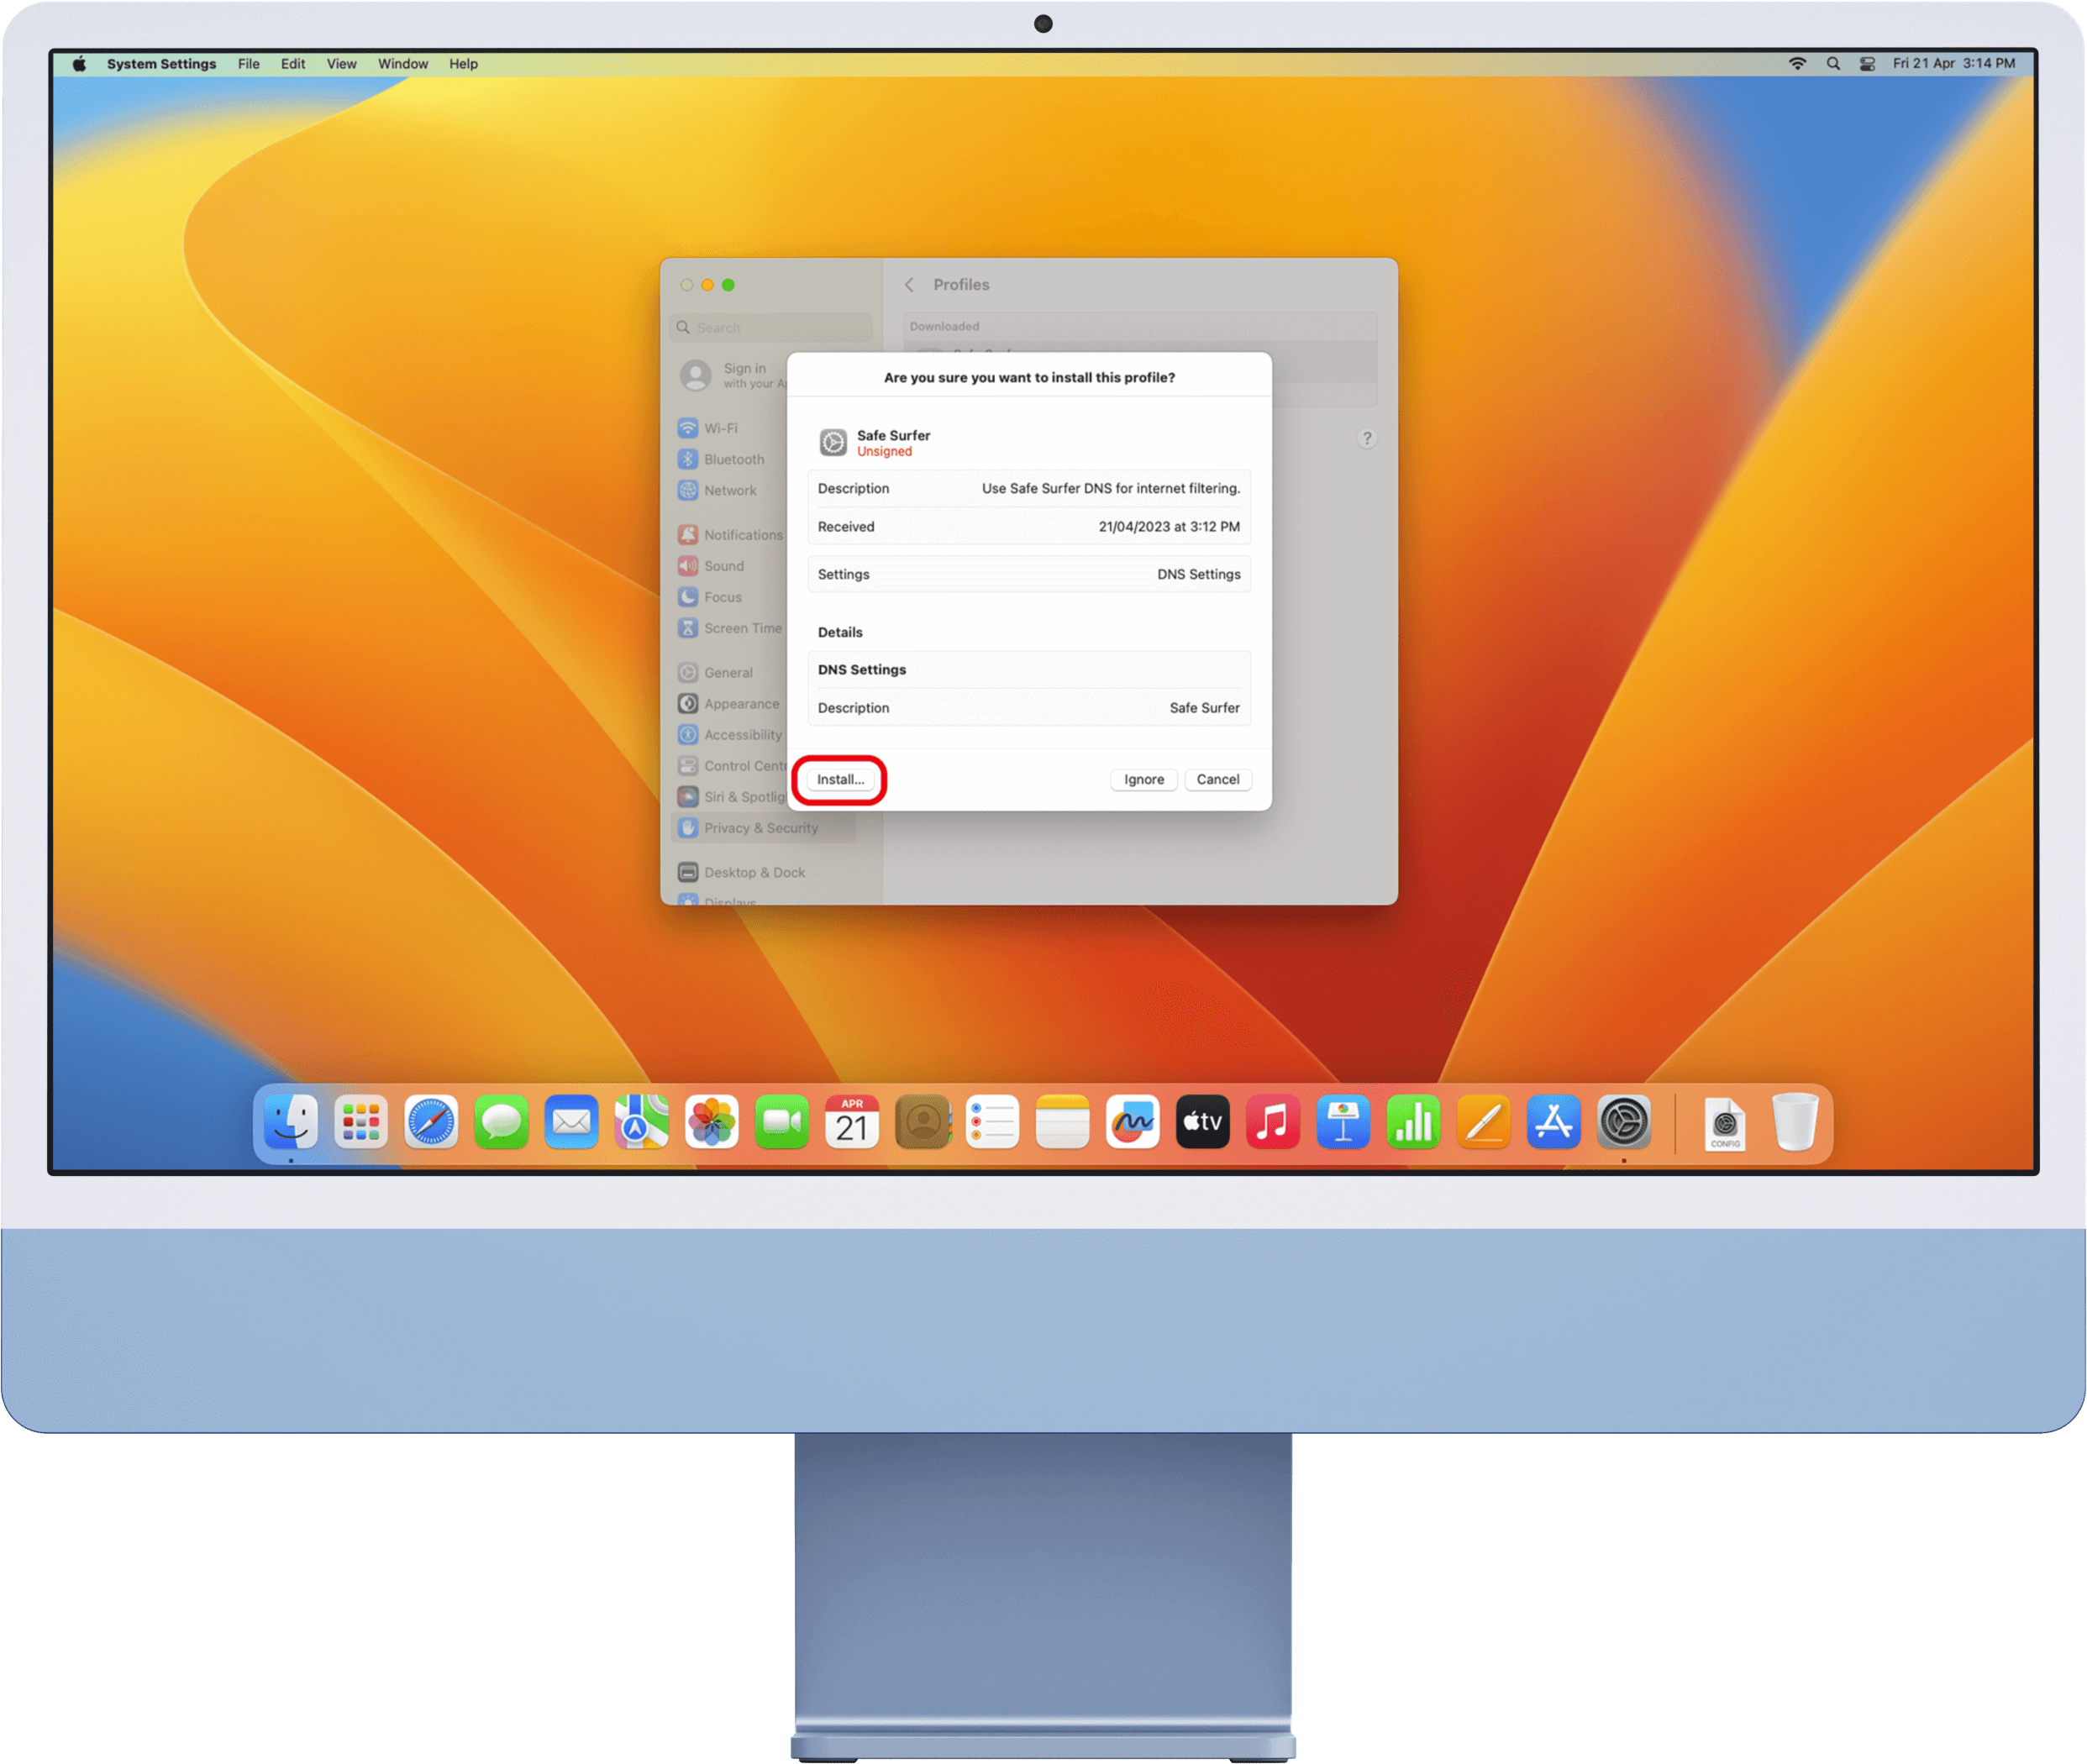
Click the Install button at the lower-left corner. The warning that this profile is “Unsigned” can be safely ignored, as the profile has been downloaded from the official Safe Surfer dashboard website.
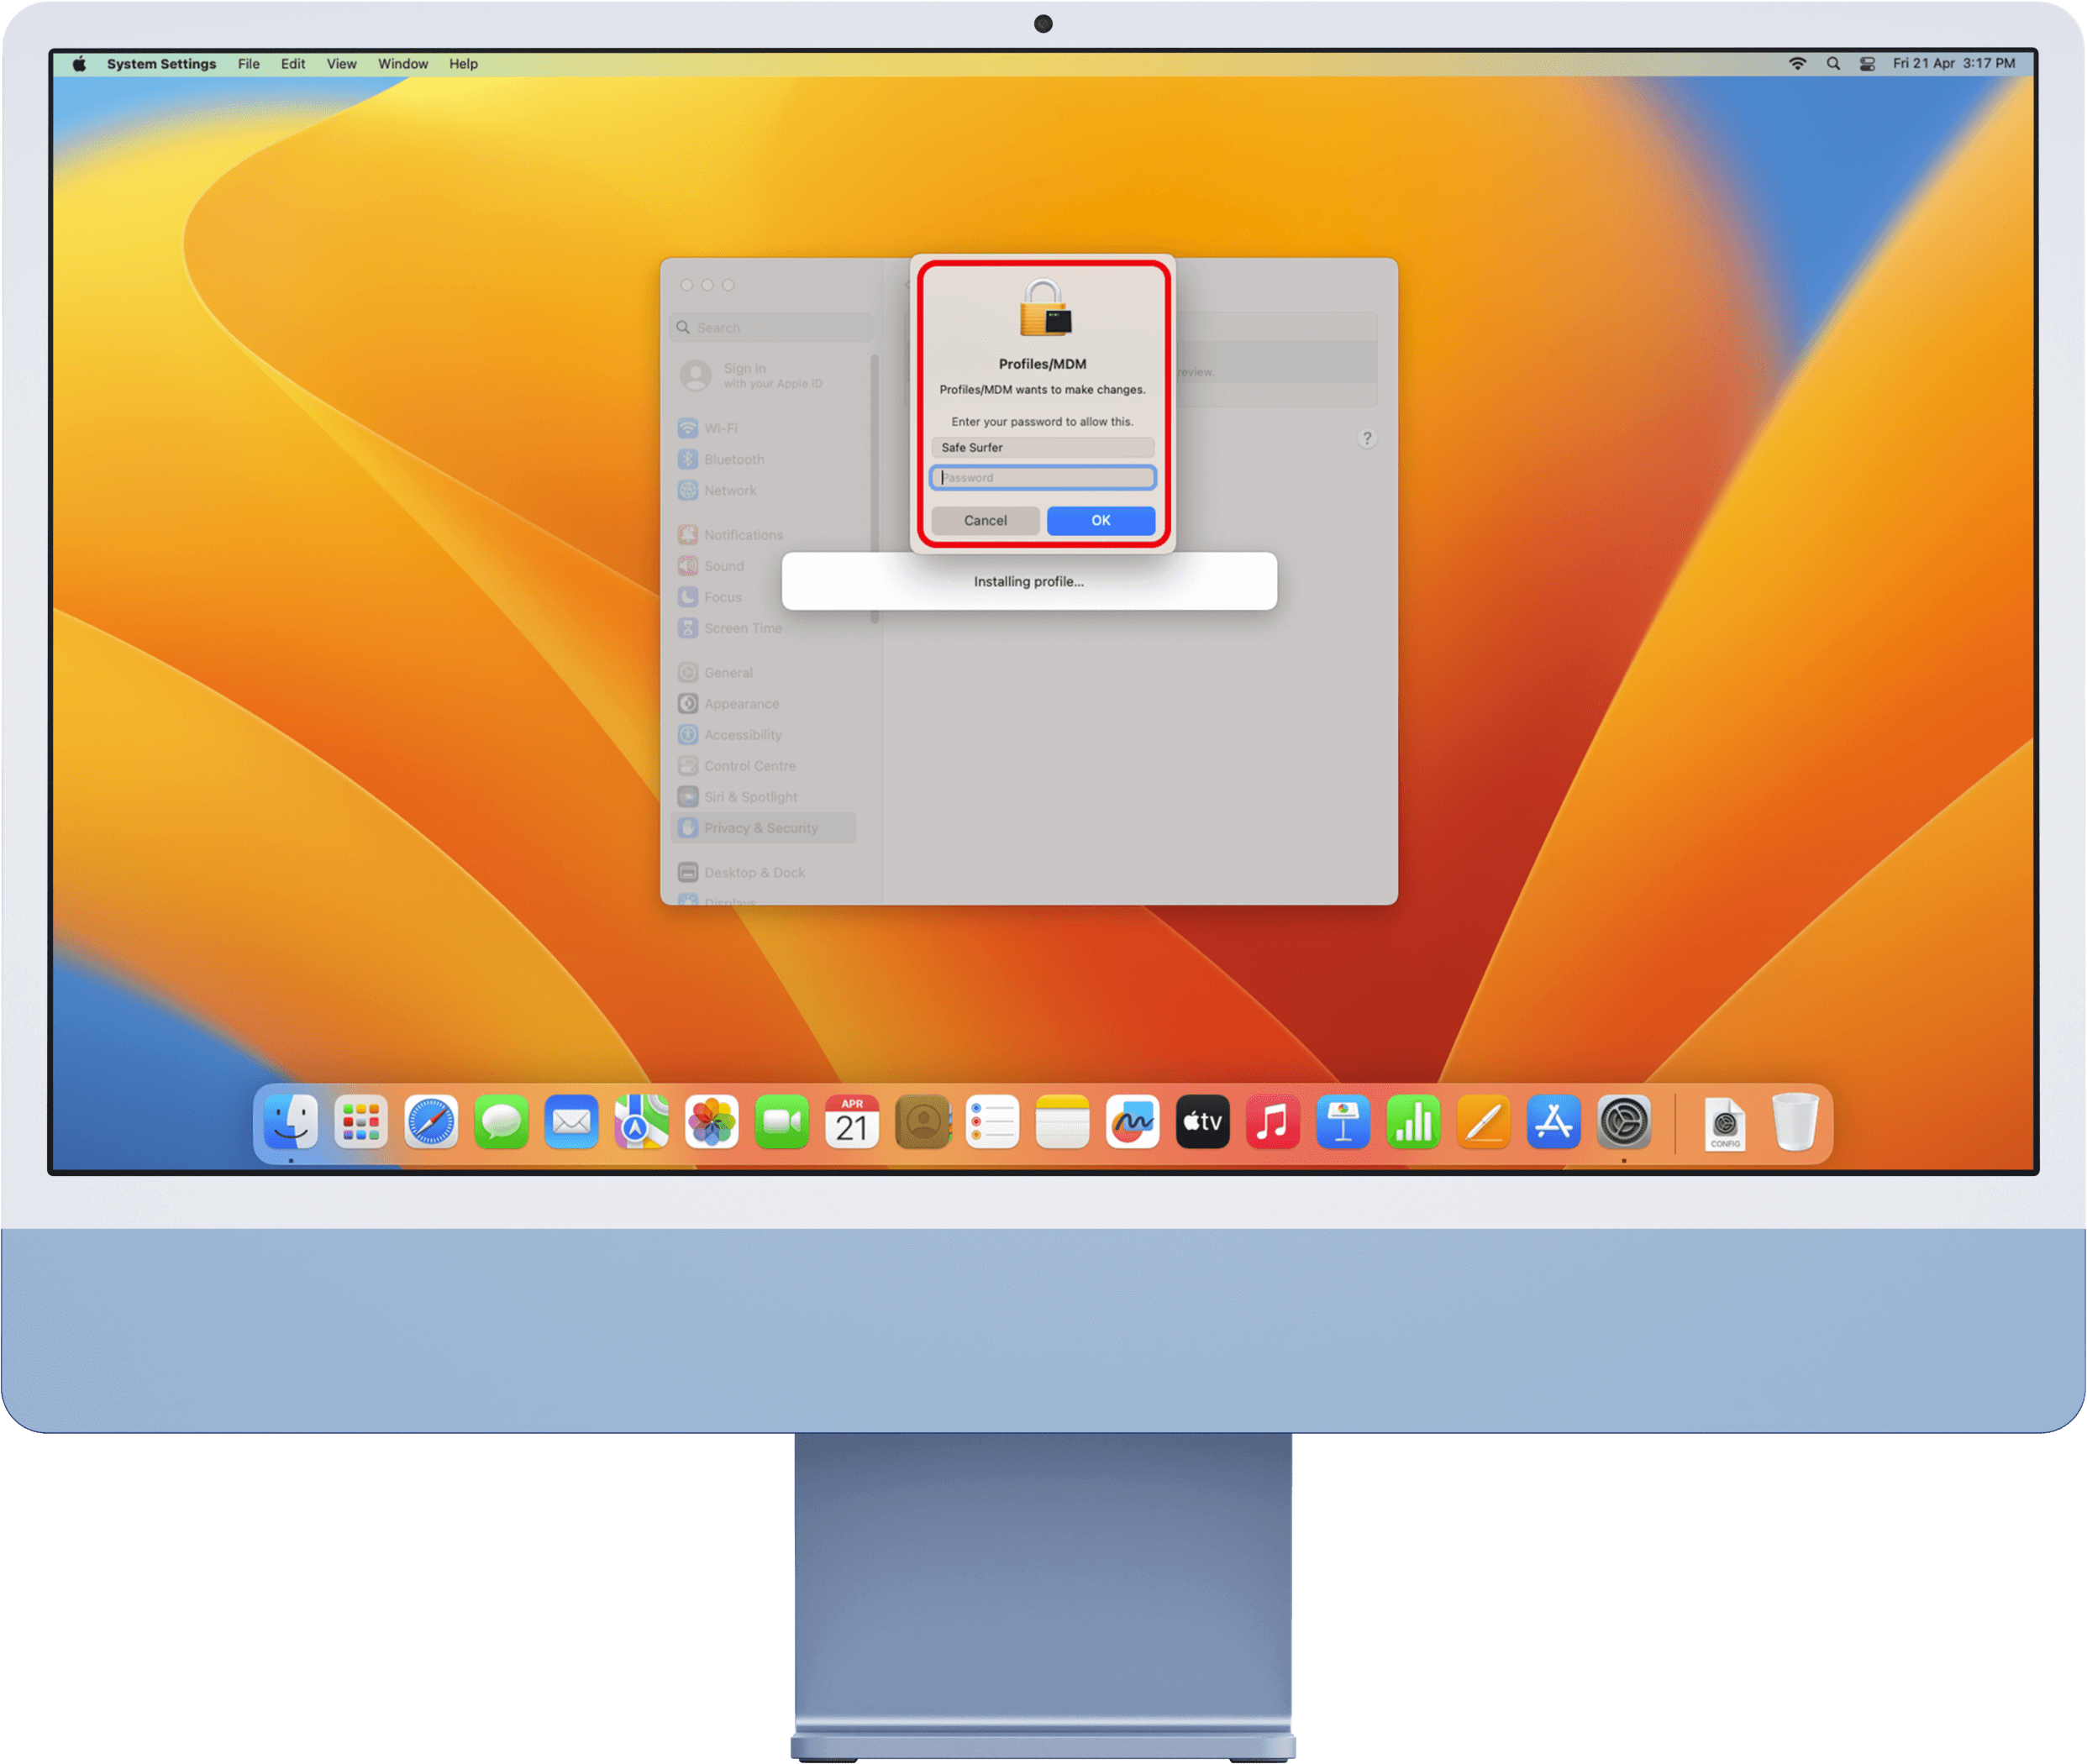
Click the Install button.

Enter the password of the user account currently logged in to this Mac.
This device is now protected, but there’s still a little more we need to do for the best experience. Drag the “Safe Surfer.mobileconfig” file from the Downloads section on the dock into the Bin. Click the Bin, then control-click the file > Delete Immediately > Delete.
Supported web browsers
The following web browsers are fully supported by Safe Surfer:
- Safari (which comes with the Mac)
- Google Chrome (after changing a setting)
- Firefox
If other web browsers are installed (such as Opera or Brave), they might need to be uninstalled as they may ignore the filter installation.
Google Chrome settings change
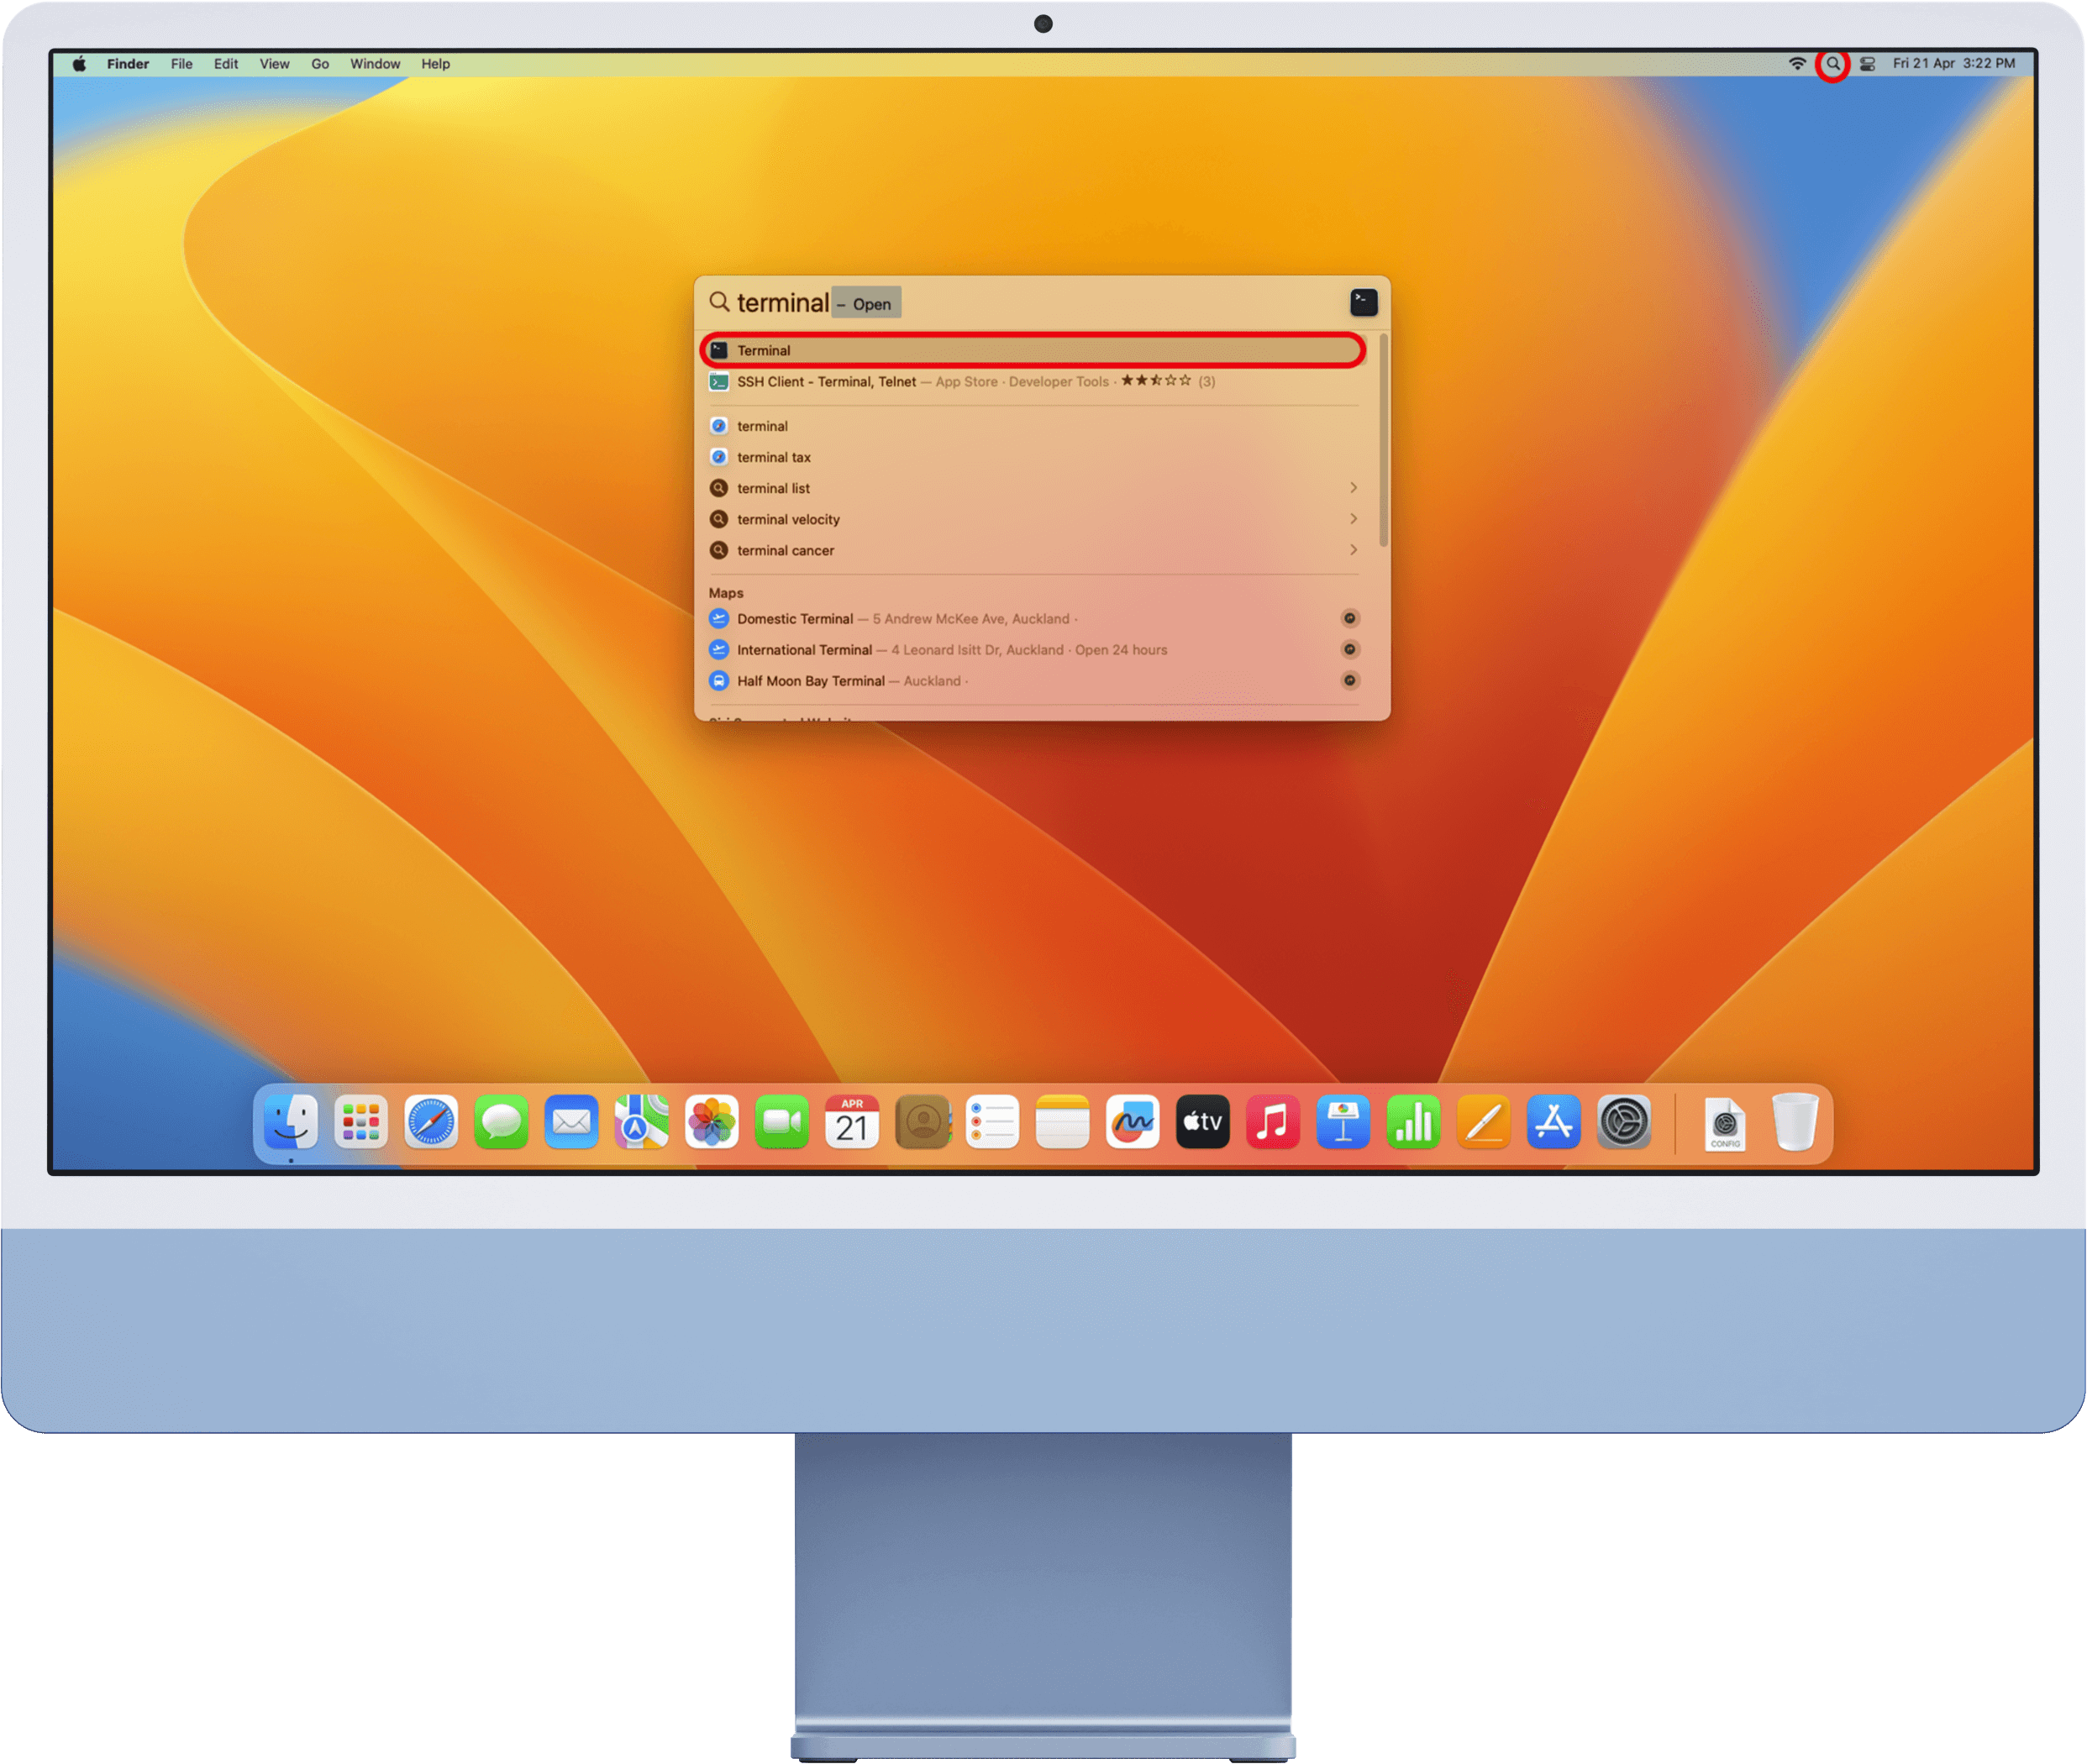
Before performing the following steps, fully quit the Google Chrome app by opening it, then click Google Chrome > Quit on the menu bar (at the top of the screen). Click the Spotlight (magnifying glass) icon at the upper-right corner of the screen, type “terminal”, then click the result for the Terminal app.
Highlight and then copy all of the following text:
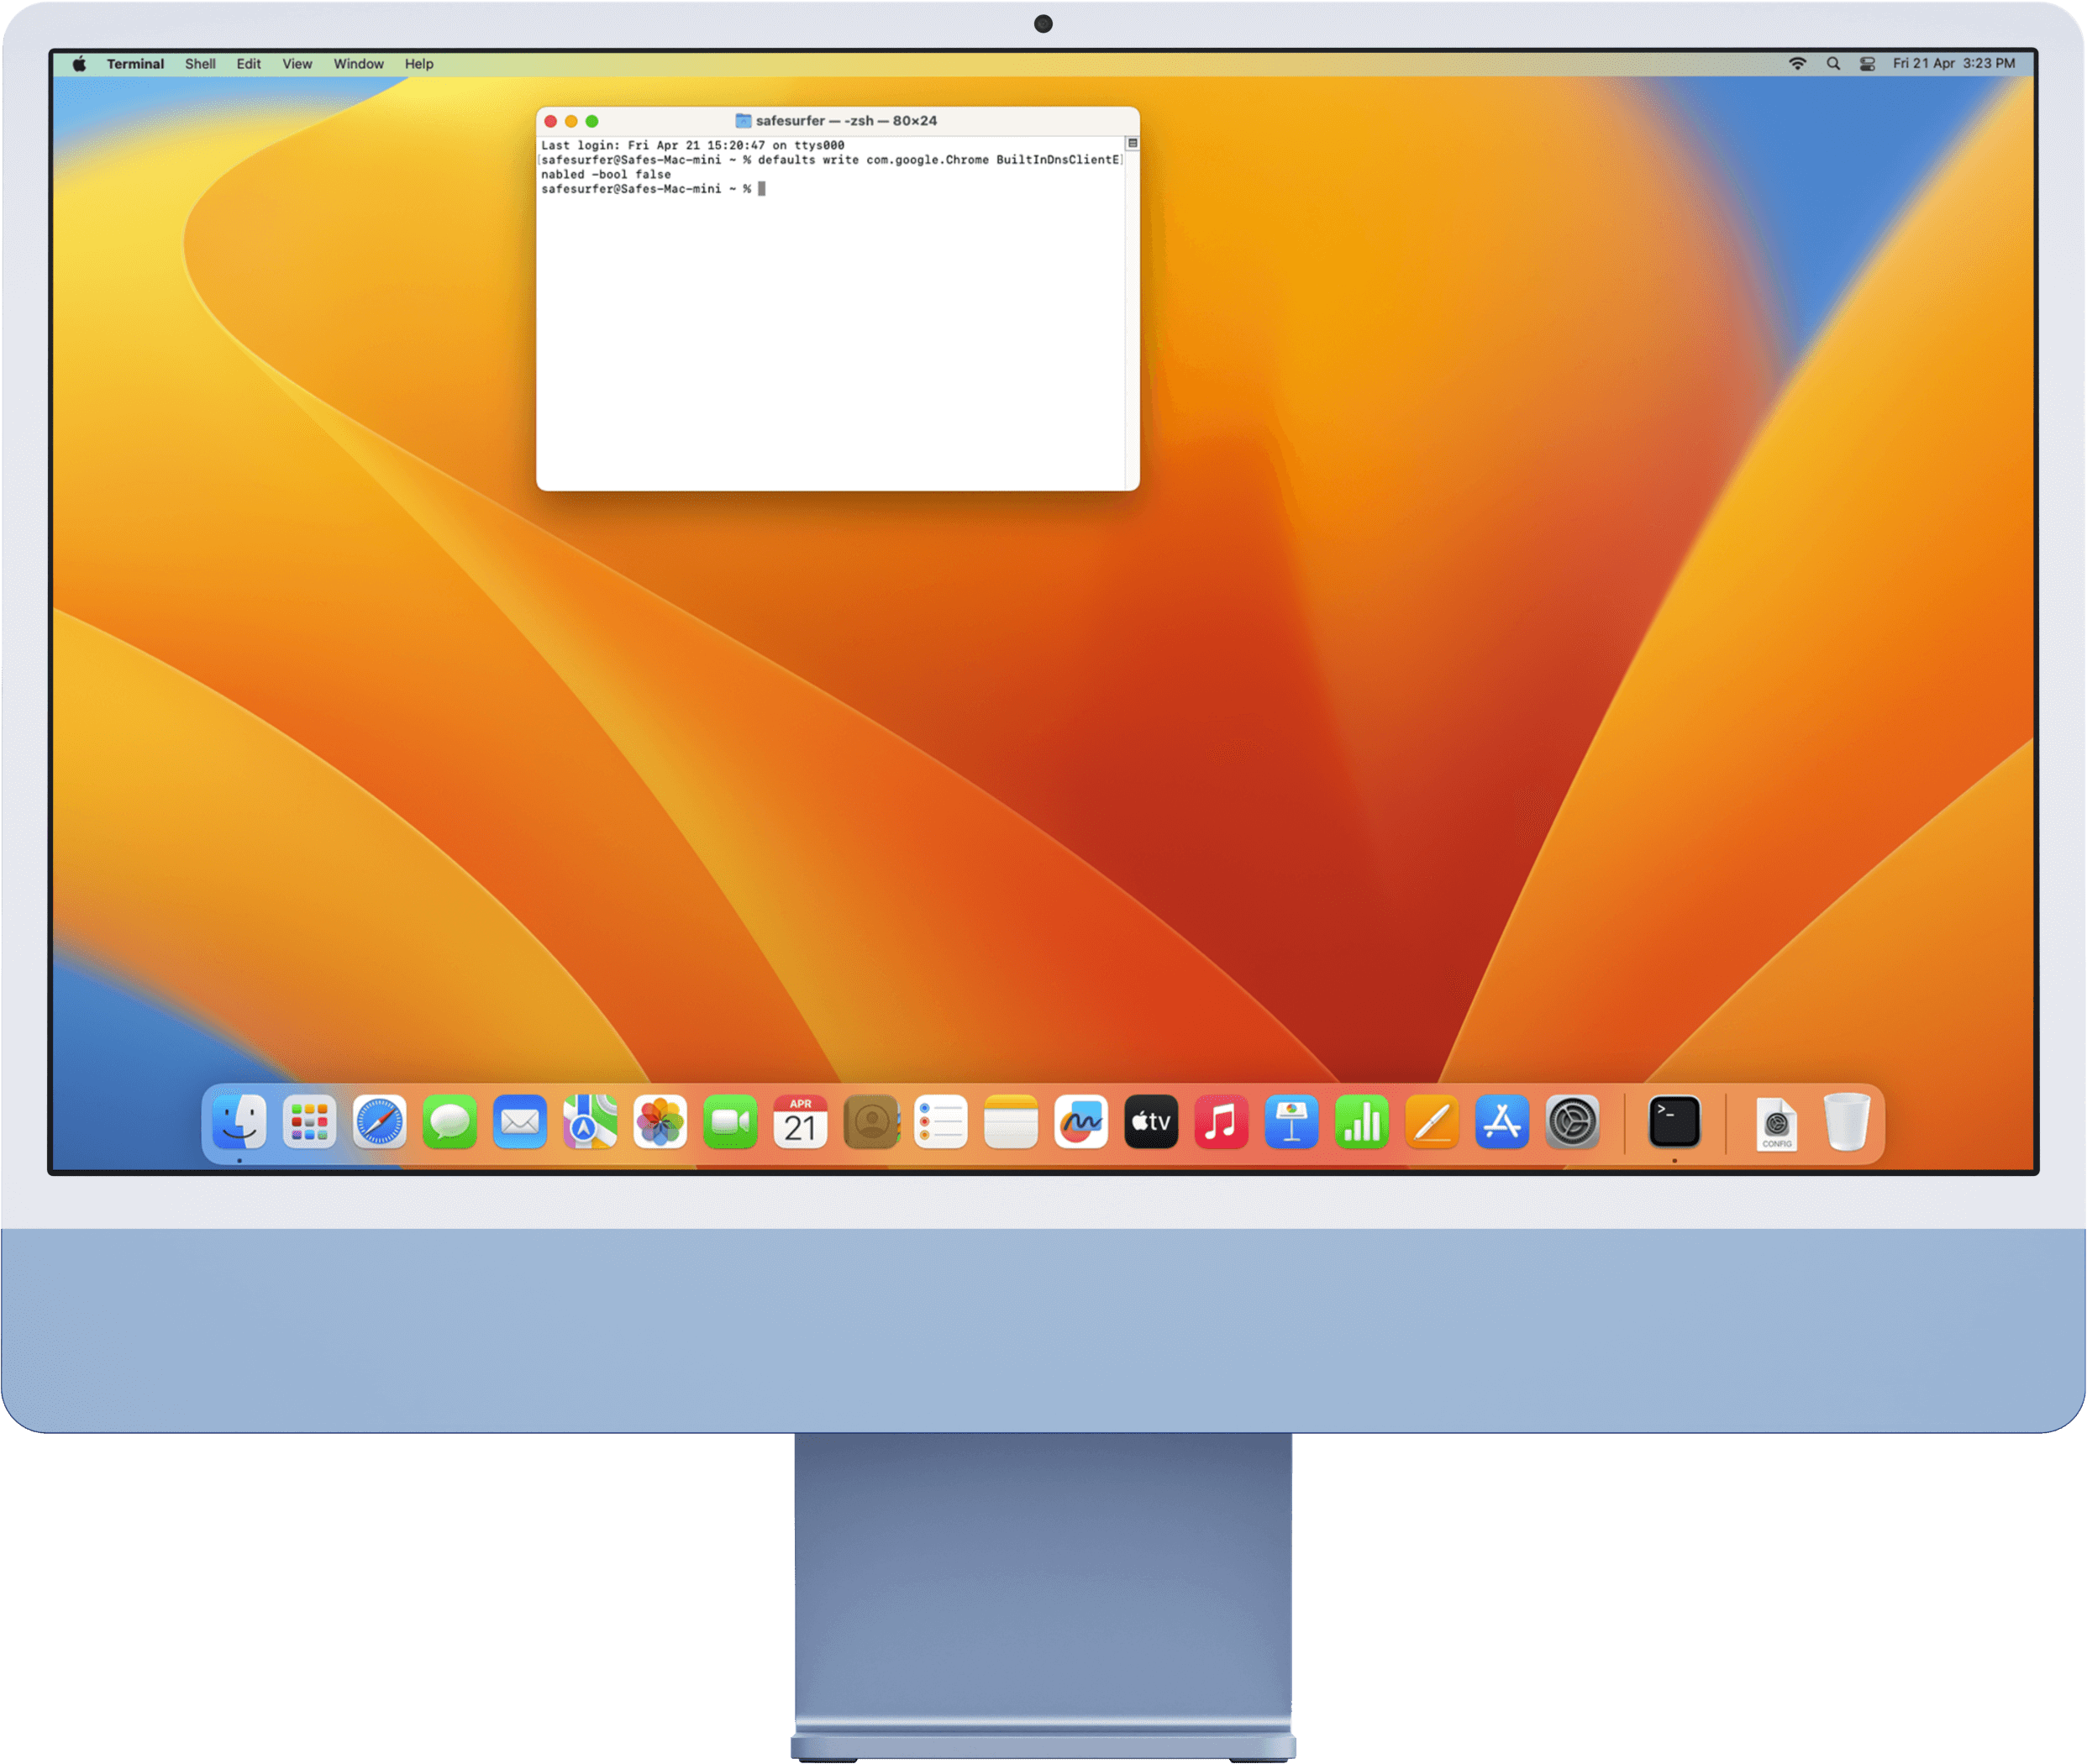
defaults write com.google.Chrome BuiltInDnsClientEnabled -bool false
Once you’ve done this, click the Terminal app window. Click Edit > Paste on the menu bar (at the top of the screen).

Press the Enter key to execute the command. You can now close out of the Terminal app.
Step 2: Change important user account settings
Next we will ensure that the Mac user account your child uses will have only standard-level permissions on this device. This means that they will not be able to remove the filter profile installation without the password of a device administrator (being you). We will now go through the steps to make a new administrator account, then we will set the account your child uses to have standard-level permissions.
Click the System Settings app on the dock.
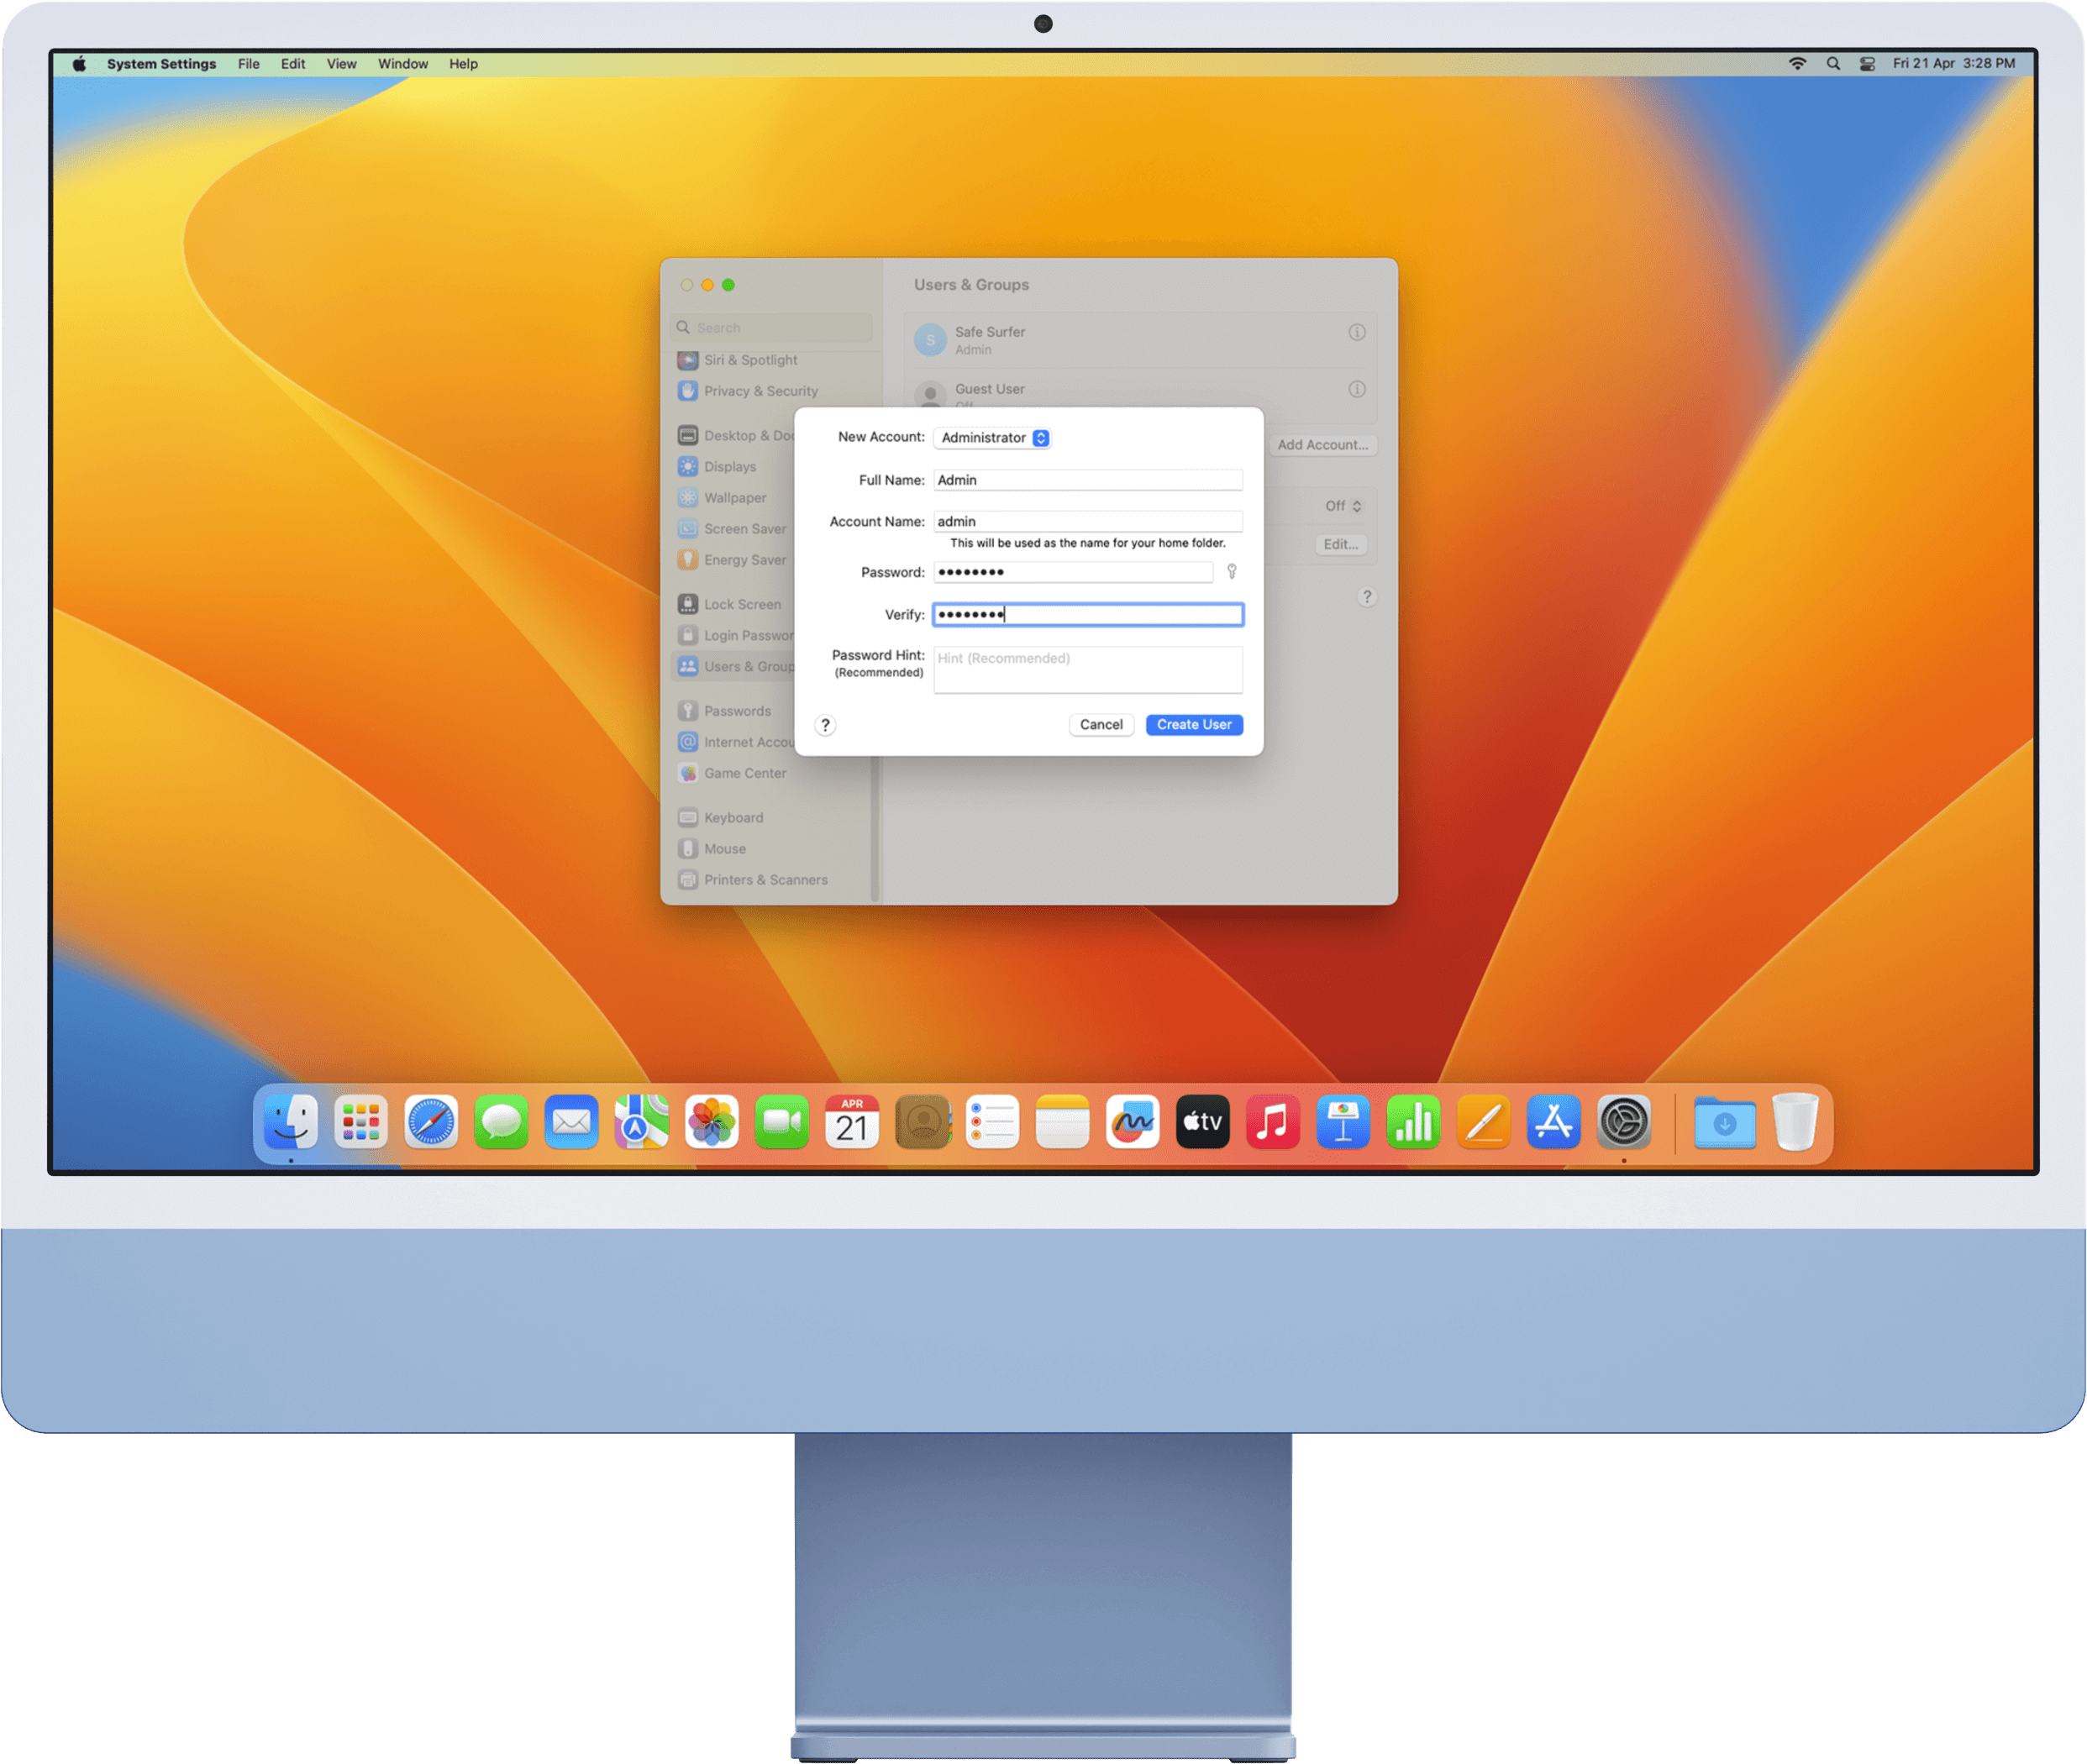
Click the Users & Groups menu on the left-hand sidebar, then click the Add Account button.

Enter the password of the user currently logged in to this Mac.
Fill in the details as follows:
- New Account: Administrator
- Full Name: Admin
- Account name: admin
Use a password that only you know. Click the Create User button.
There should now be an account called “Admin” alongside the other user accounts. We now need to remove administrator permissions for other applicable user accounts on this Mac.

Click the Apple logo icon at the upper-left corner of the screen, then click Log Out.
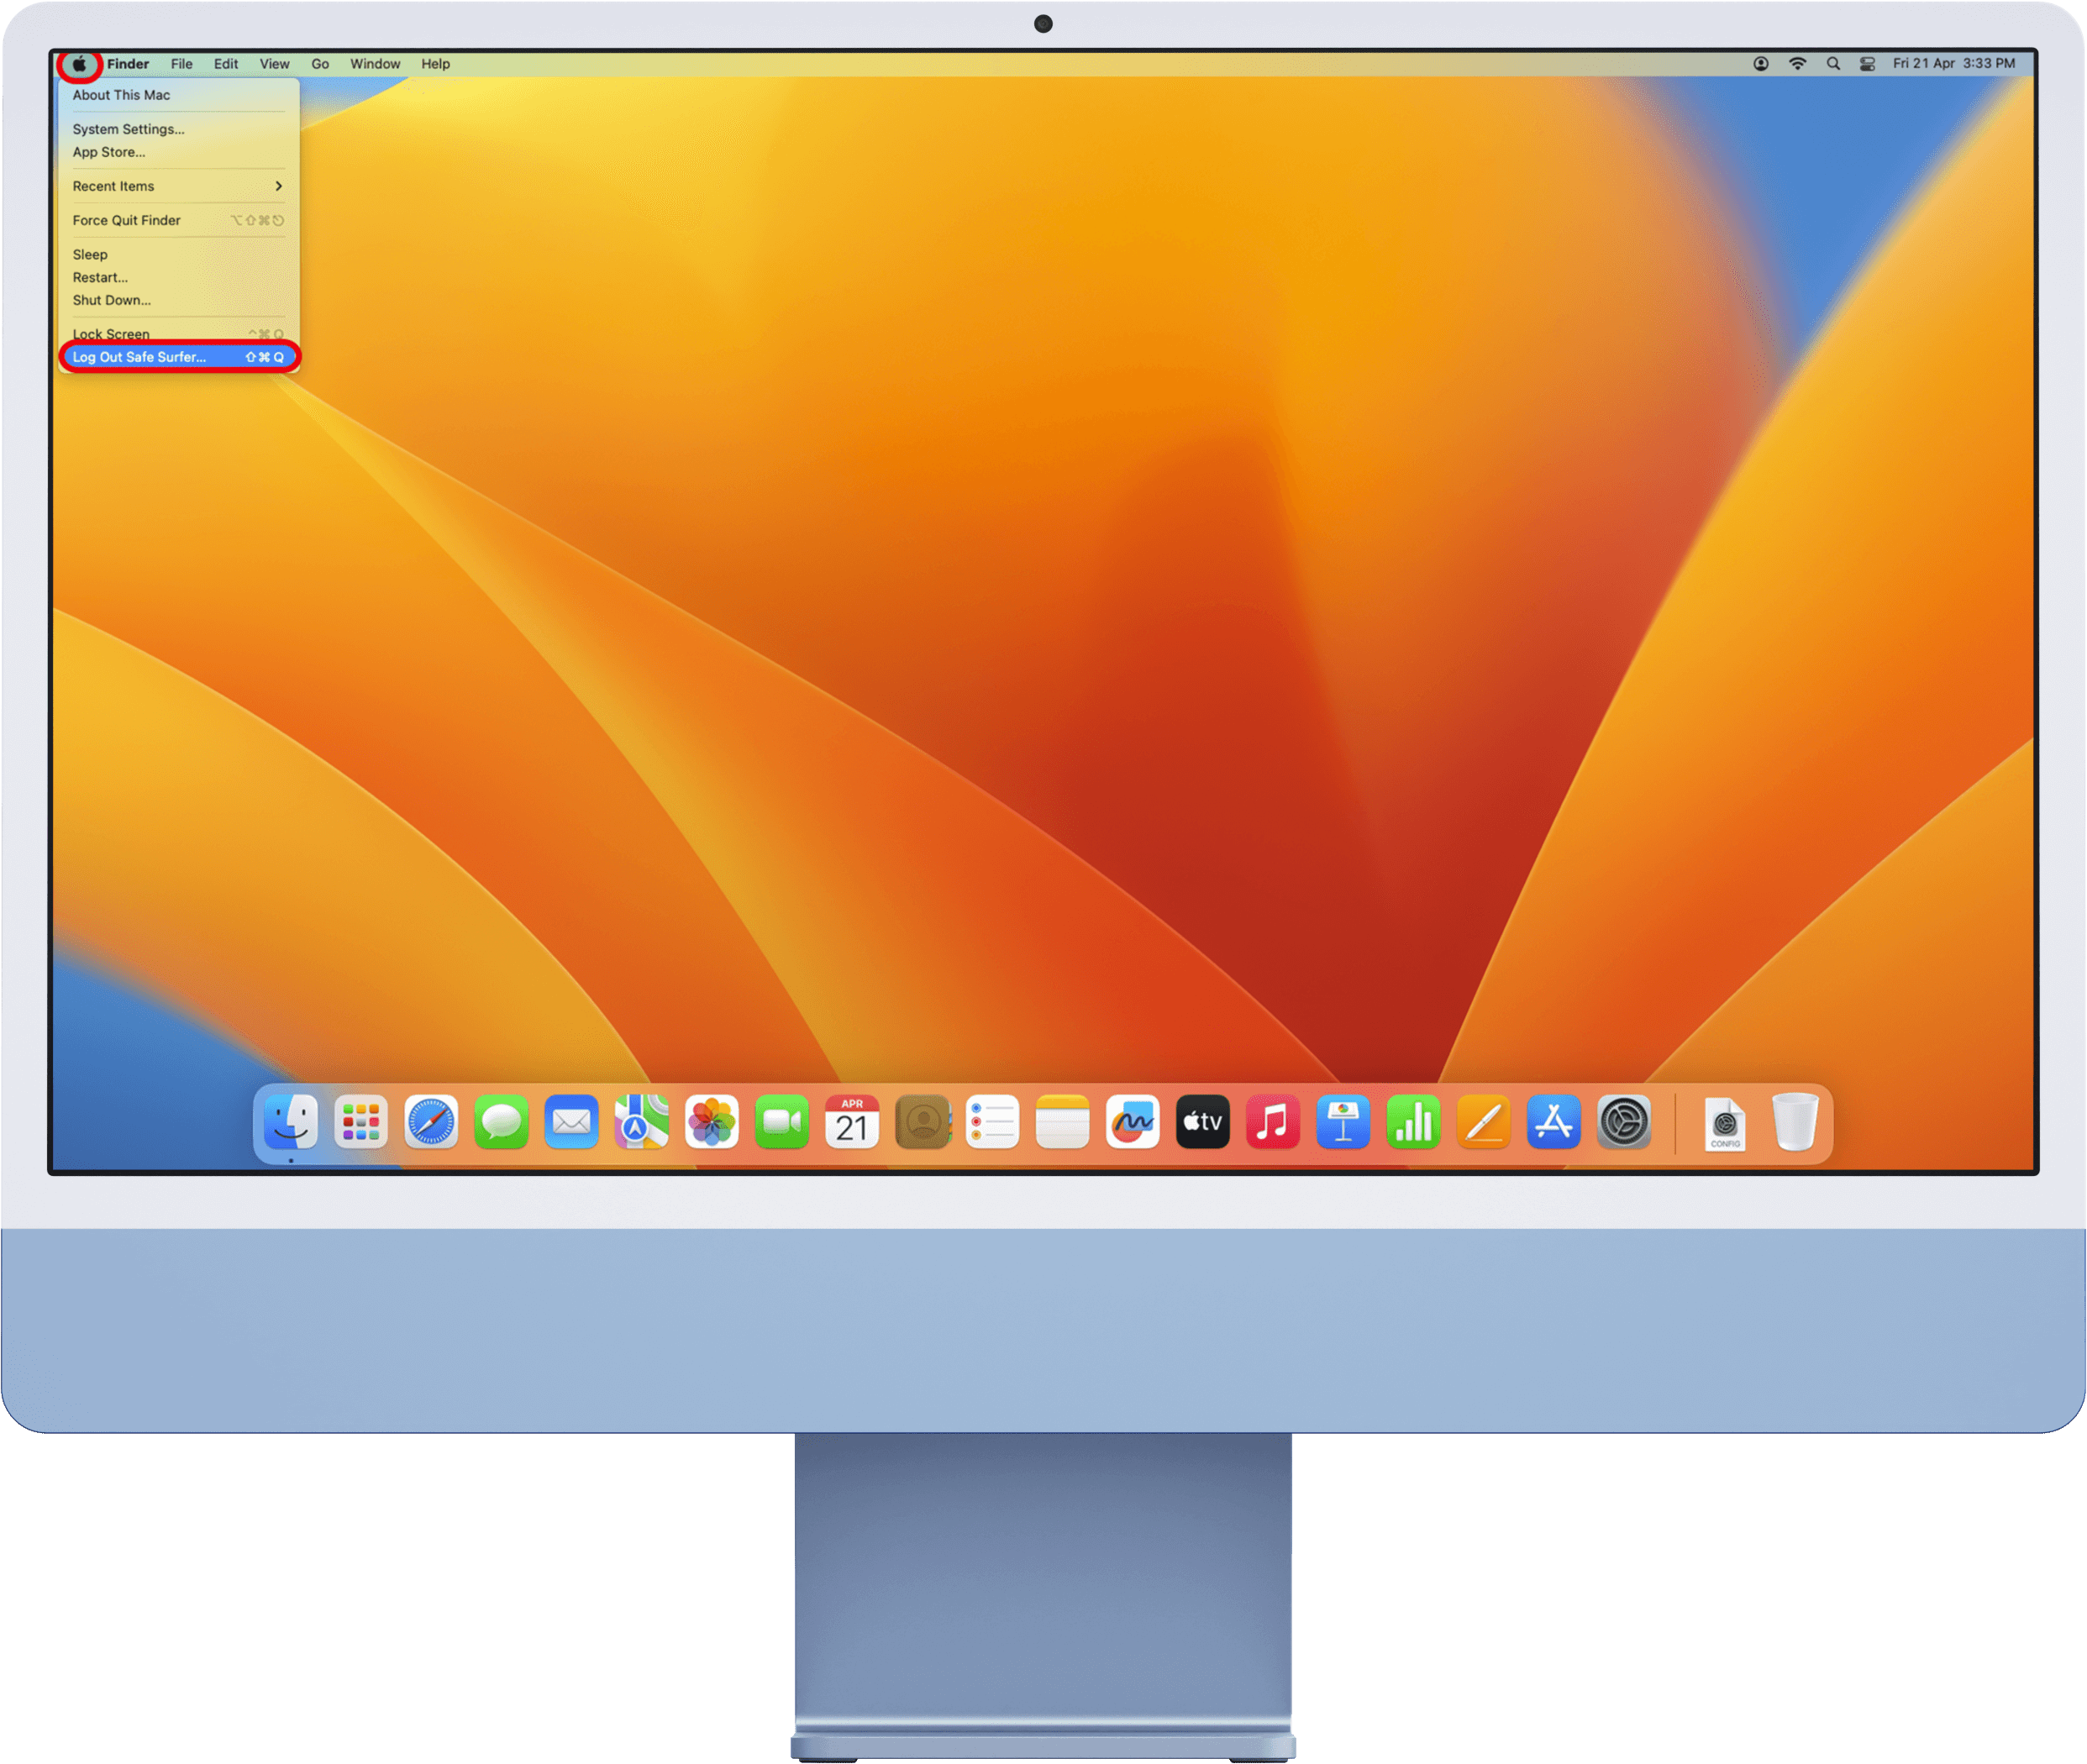
Click the Log Out button.

Log in to the Admin account.

Click the System Settings app on the dock.

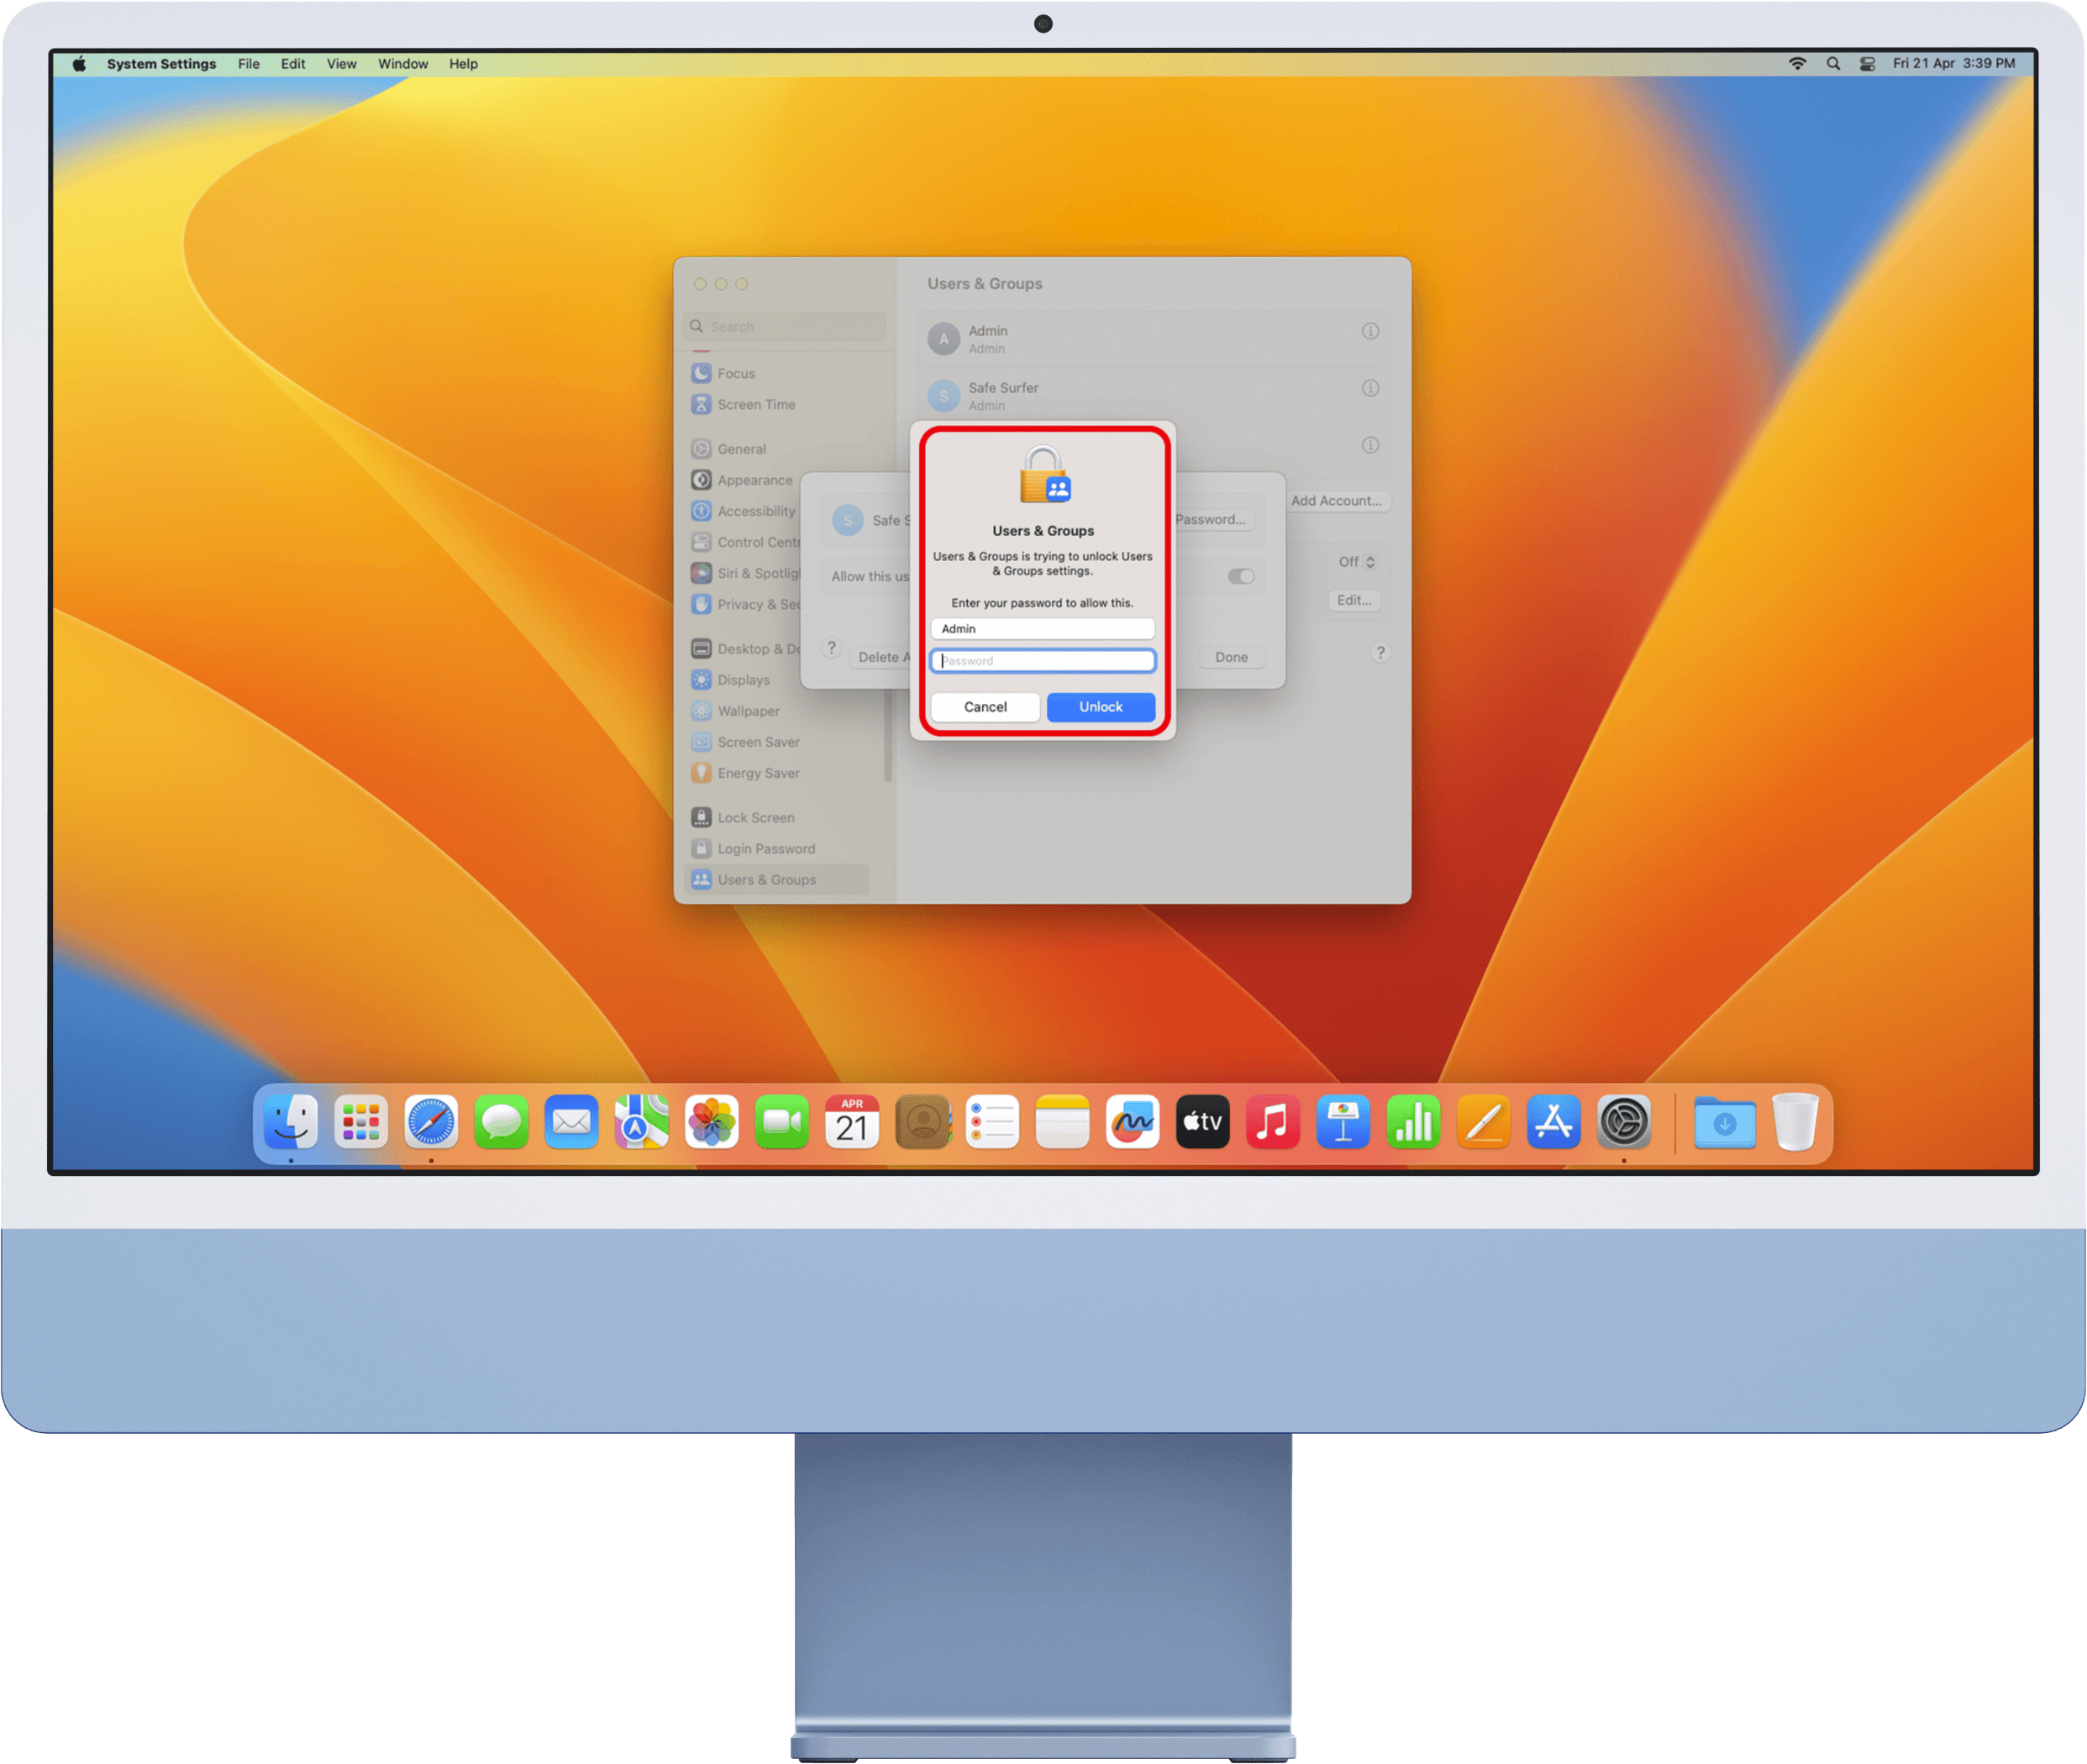
Click the Users & Groups menu on the left-hand sidebar, then click the “i” icon found next to your child’s user account.
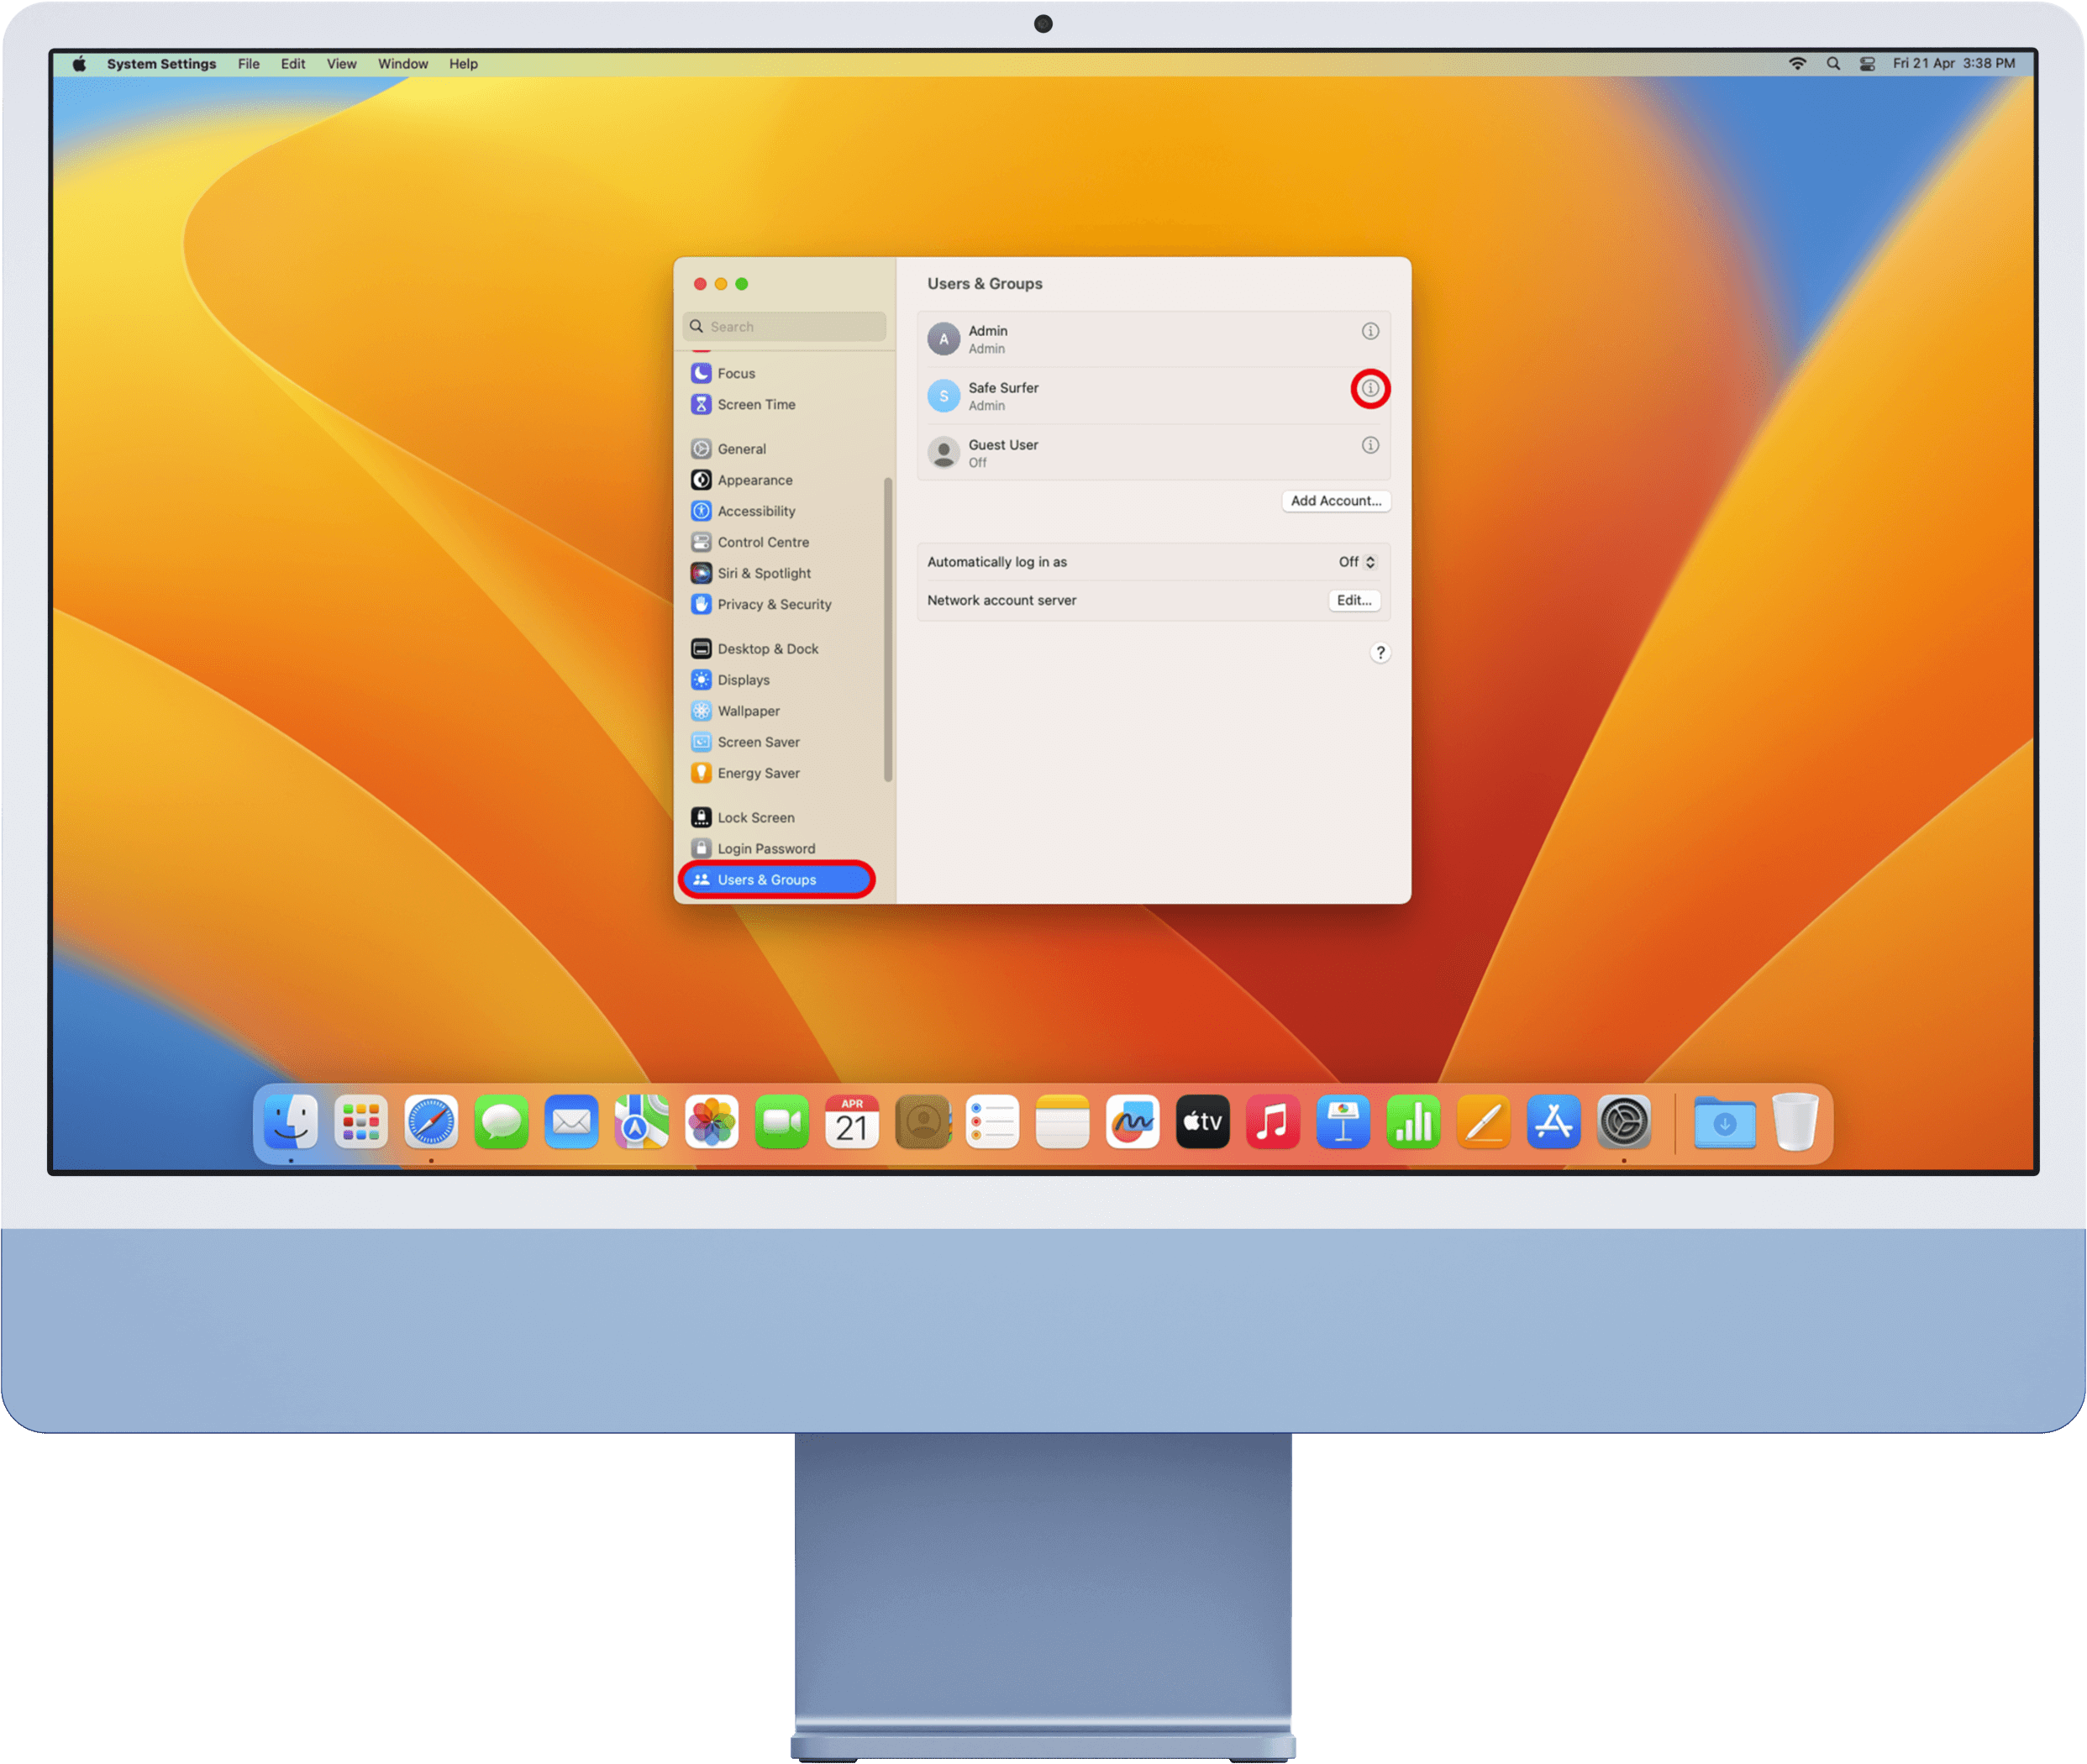
Click the switch found next to “Allow this user to administer this computer” (to turn it off).

Enter the password of the Admin account, the click the Unlock button.
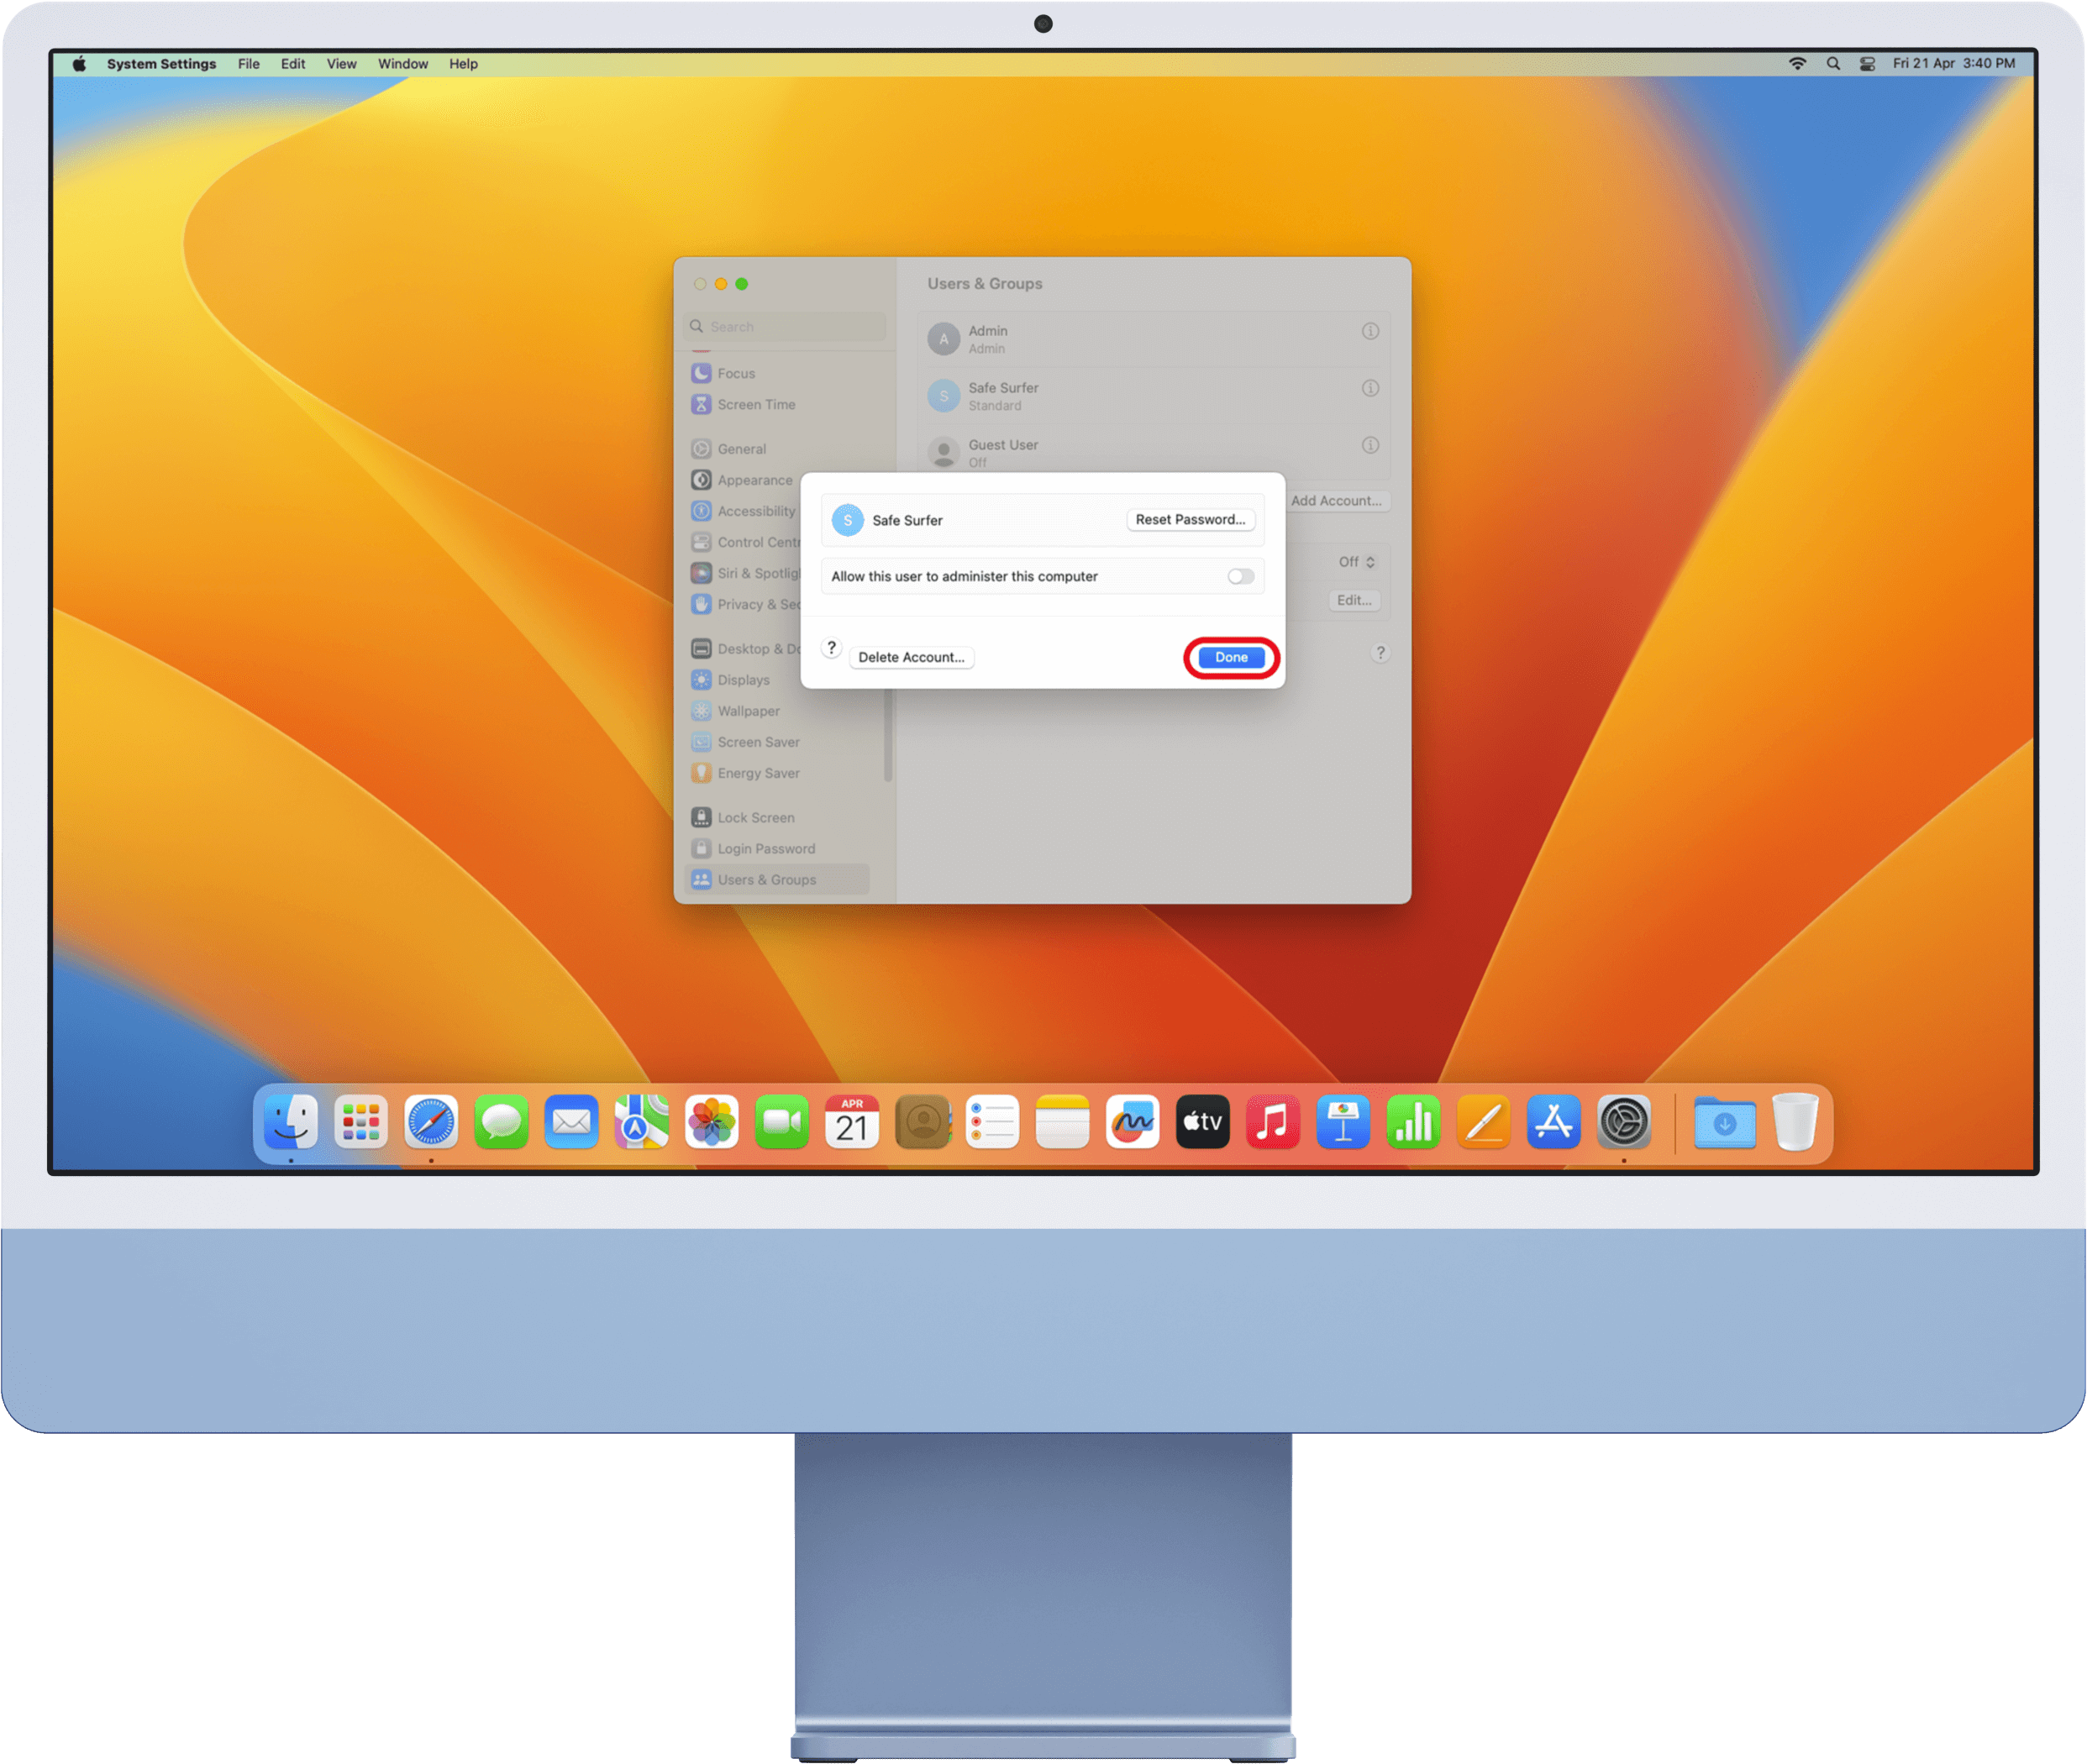
Click the OK button.

Click the Done button. Repeat the account type change for any other applicable user accounts.
Click the Apple logo icon at the upper-left corner. Click the Restart button.
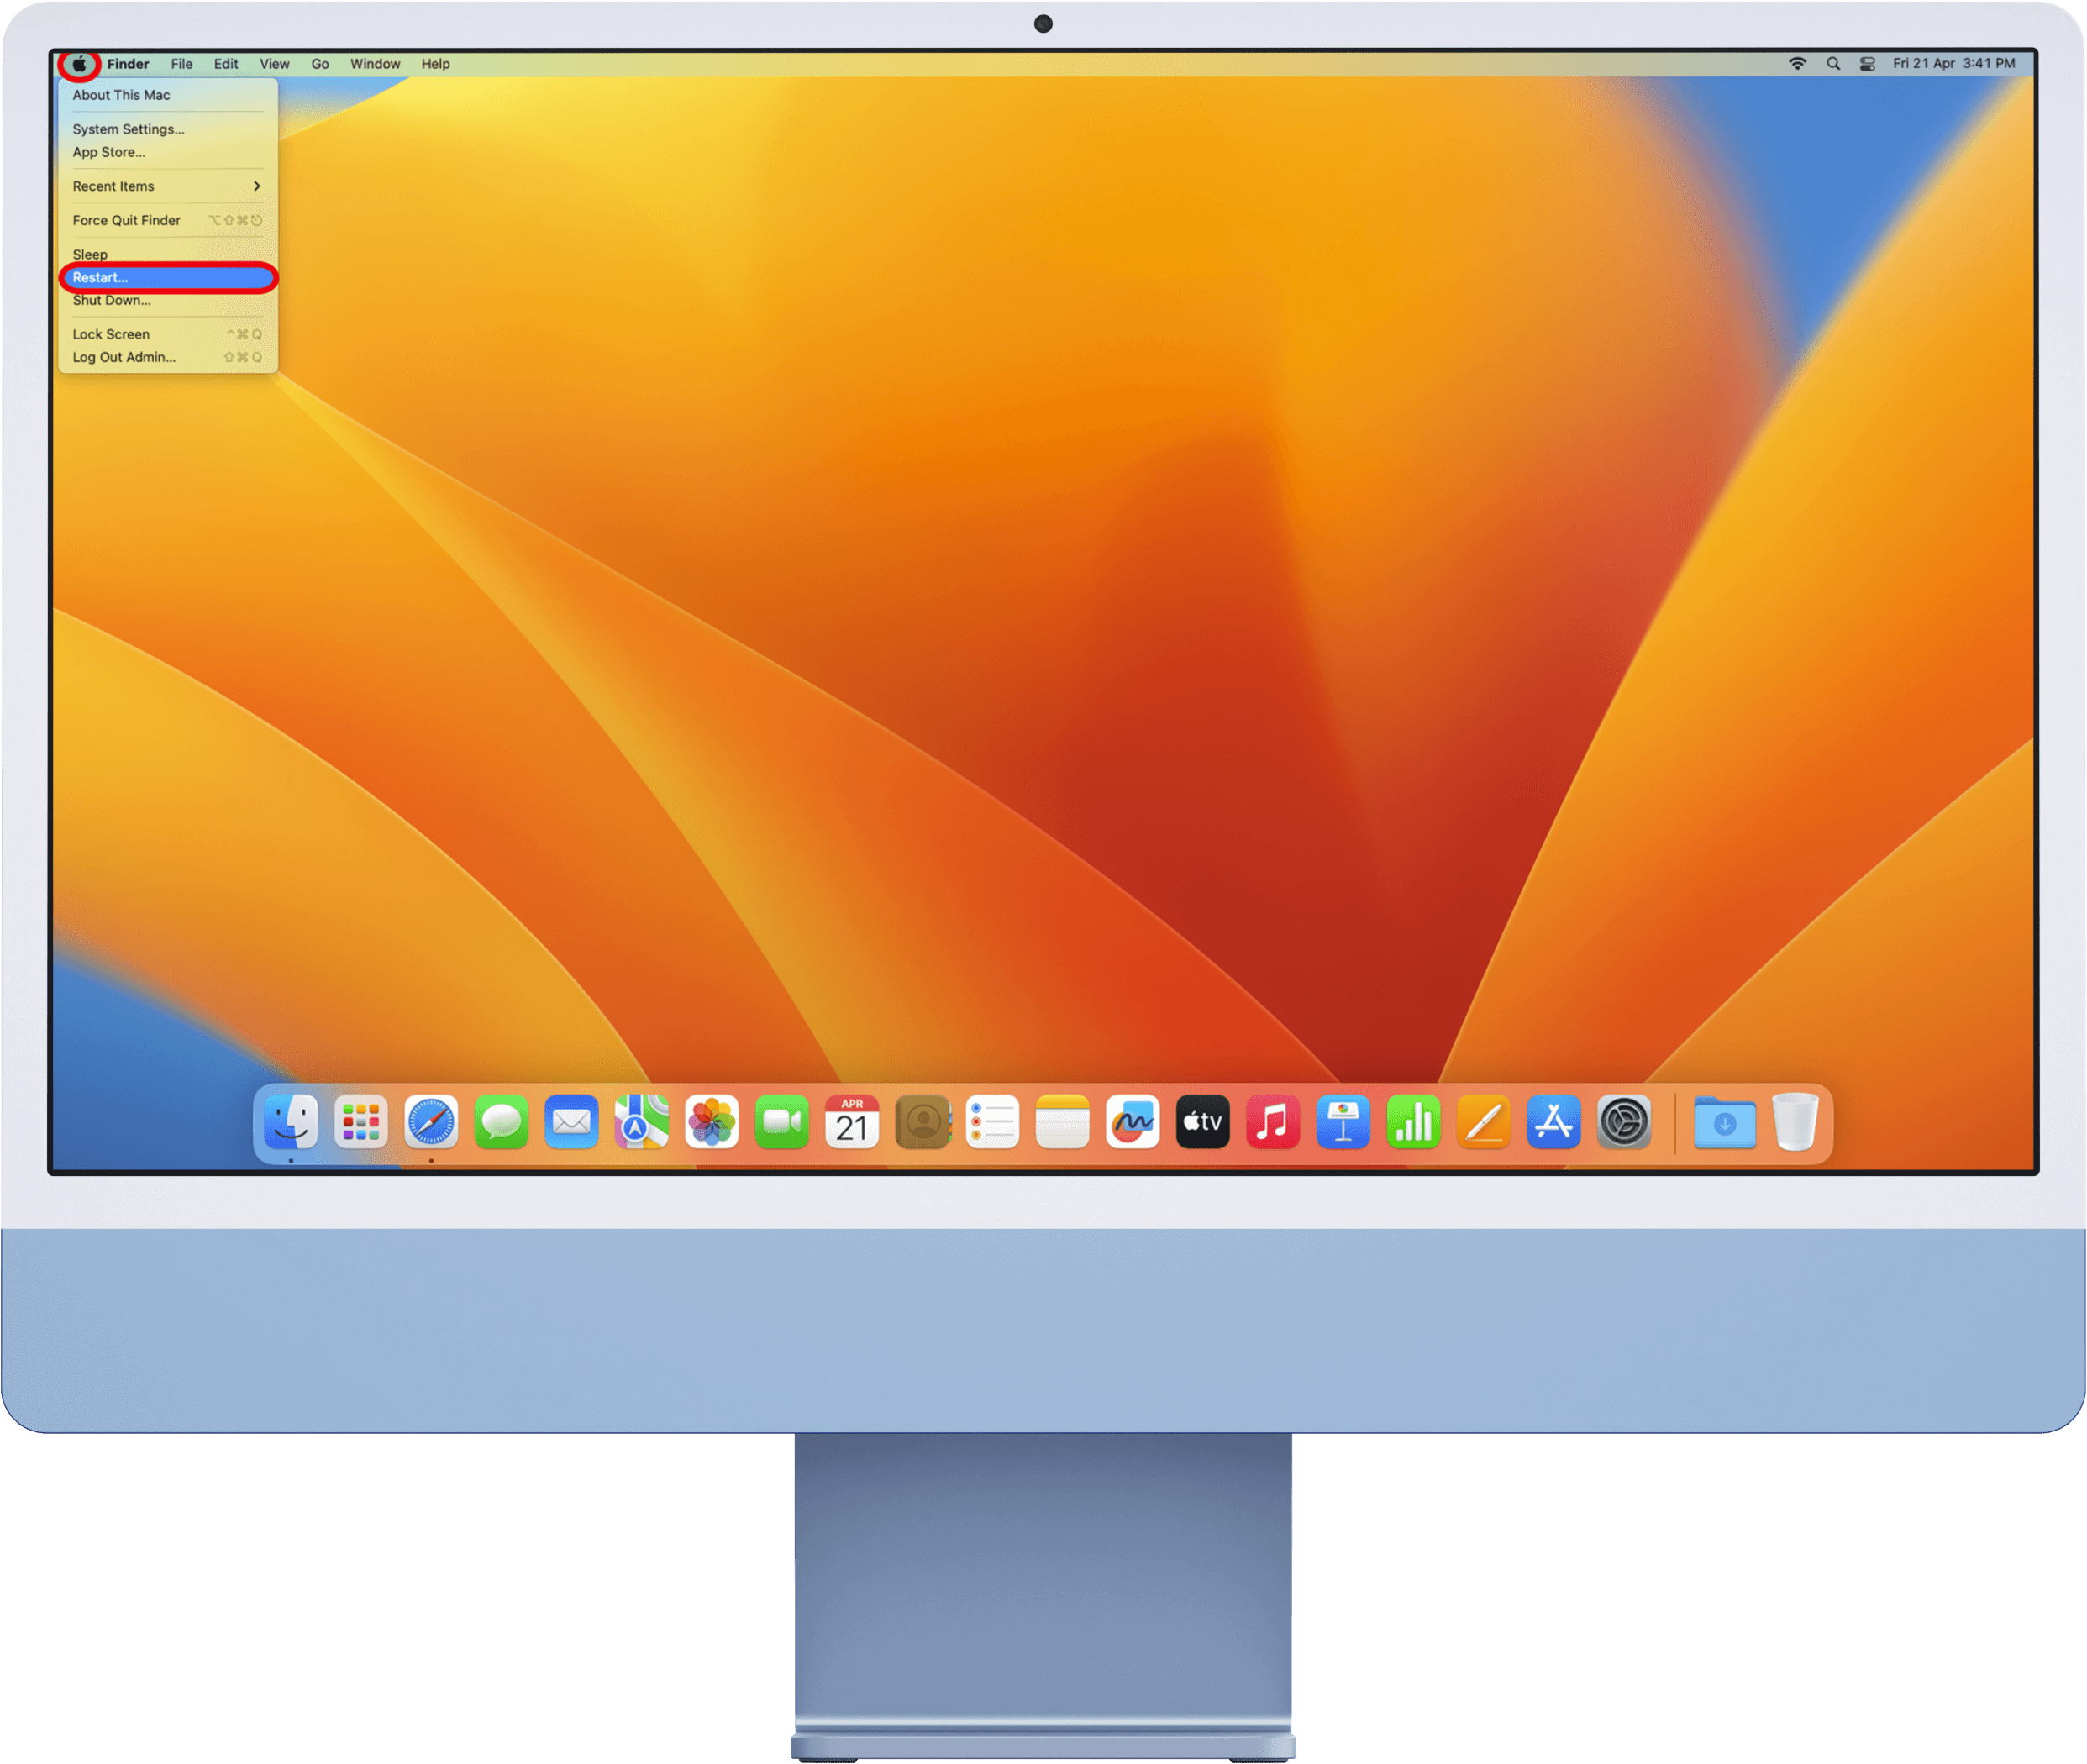
Click the Restart button.

Step 3: Change Apple allowed content settings
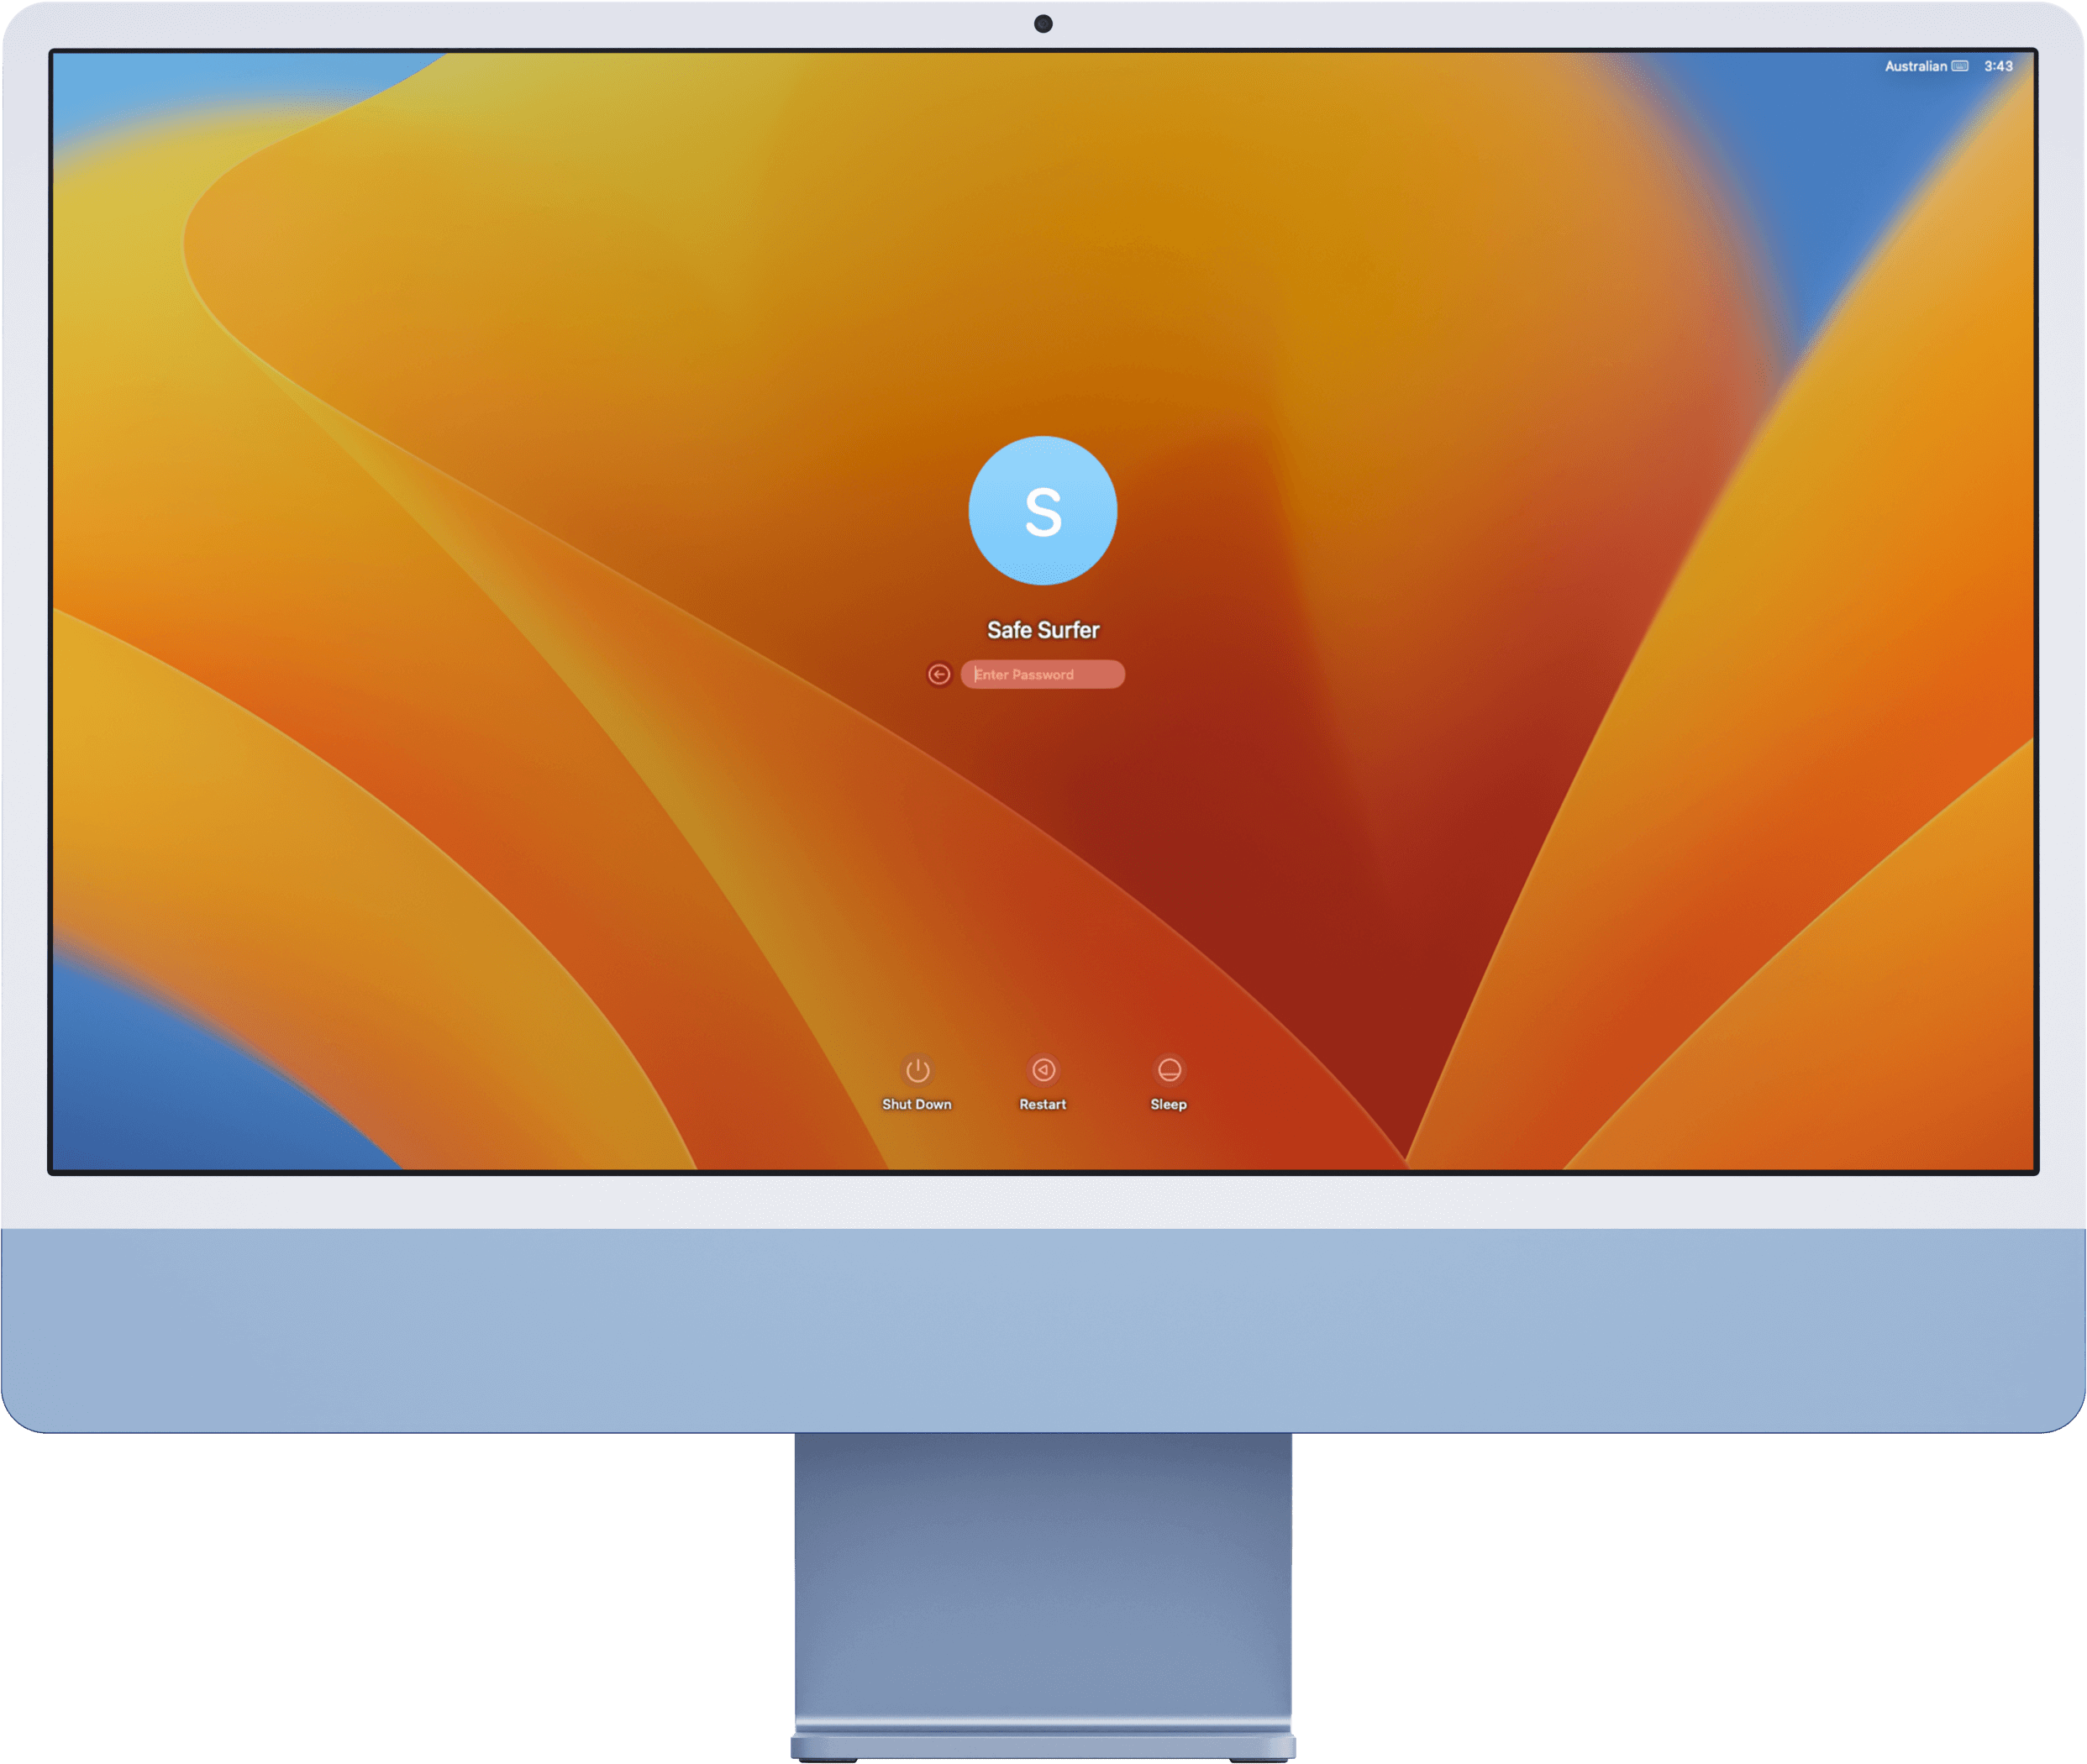
You’ll need to repeat this step for all applicable user accounts. Log in to your child’s user account.
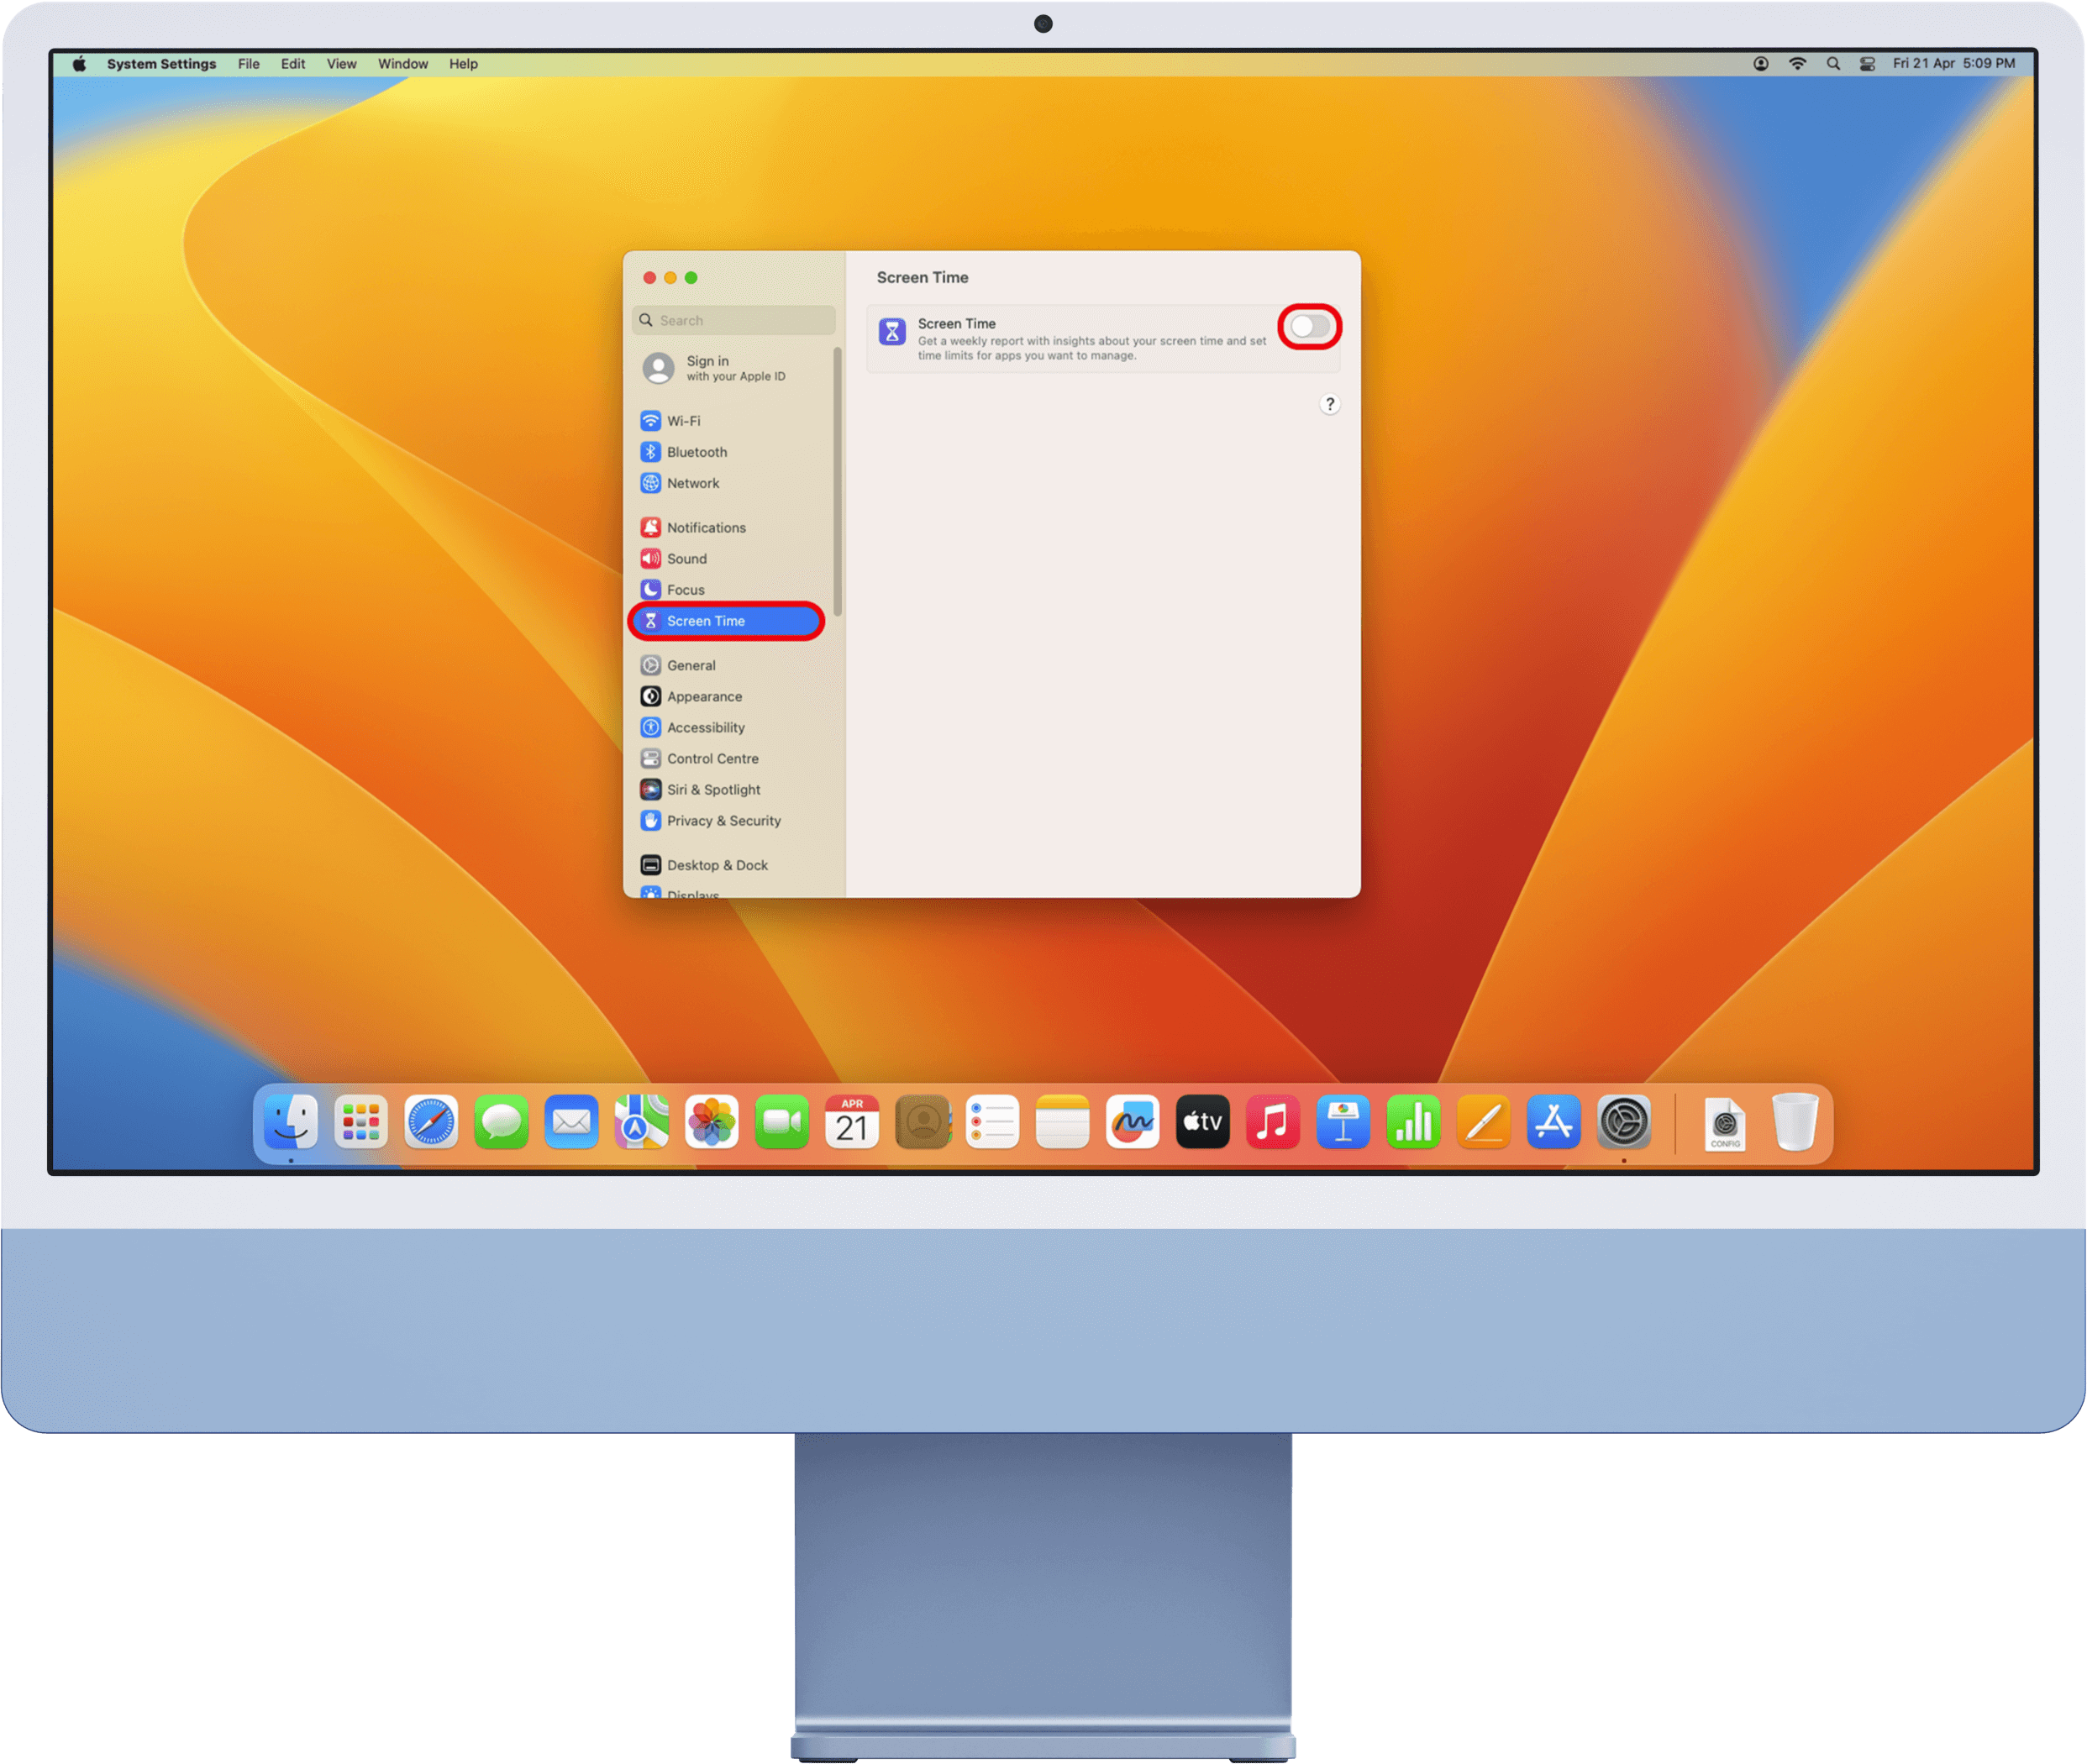
Click the System Settings app on the dock.

Click the Screen Time menu on the left-hand sidebar, then click the switch found next to Screen Time (to turn it on).
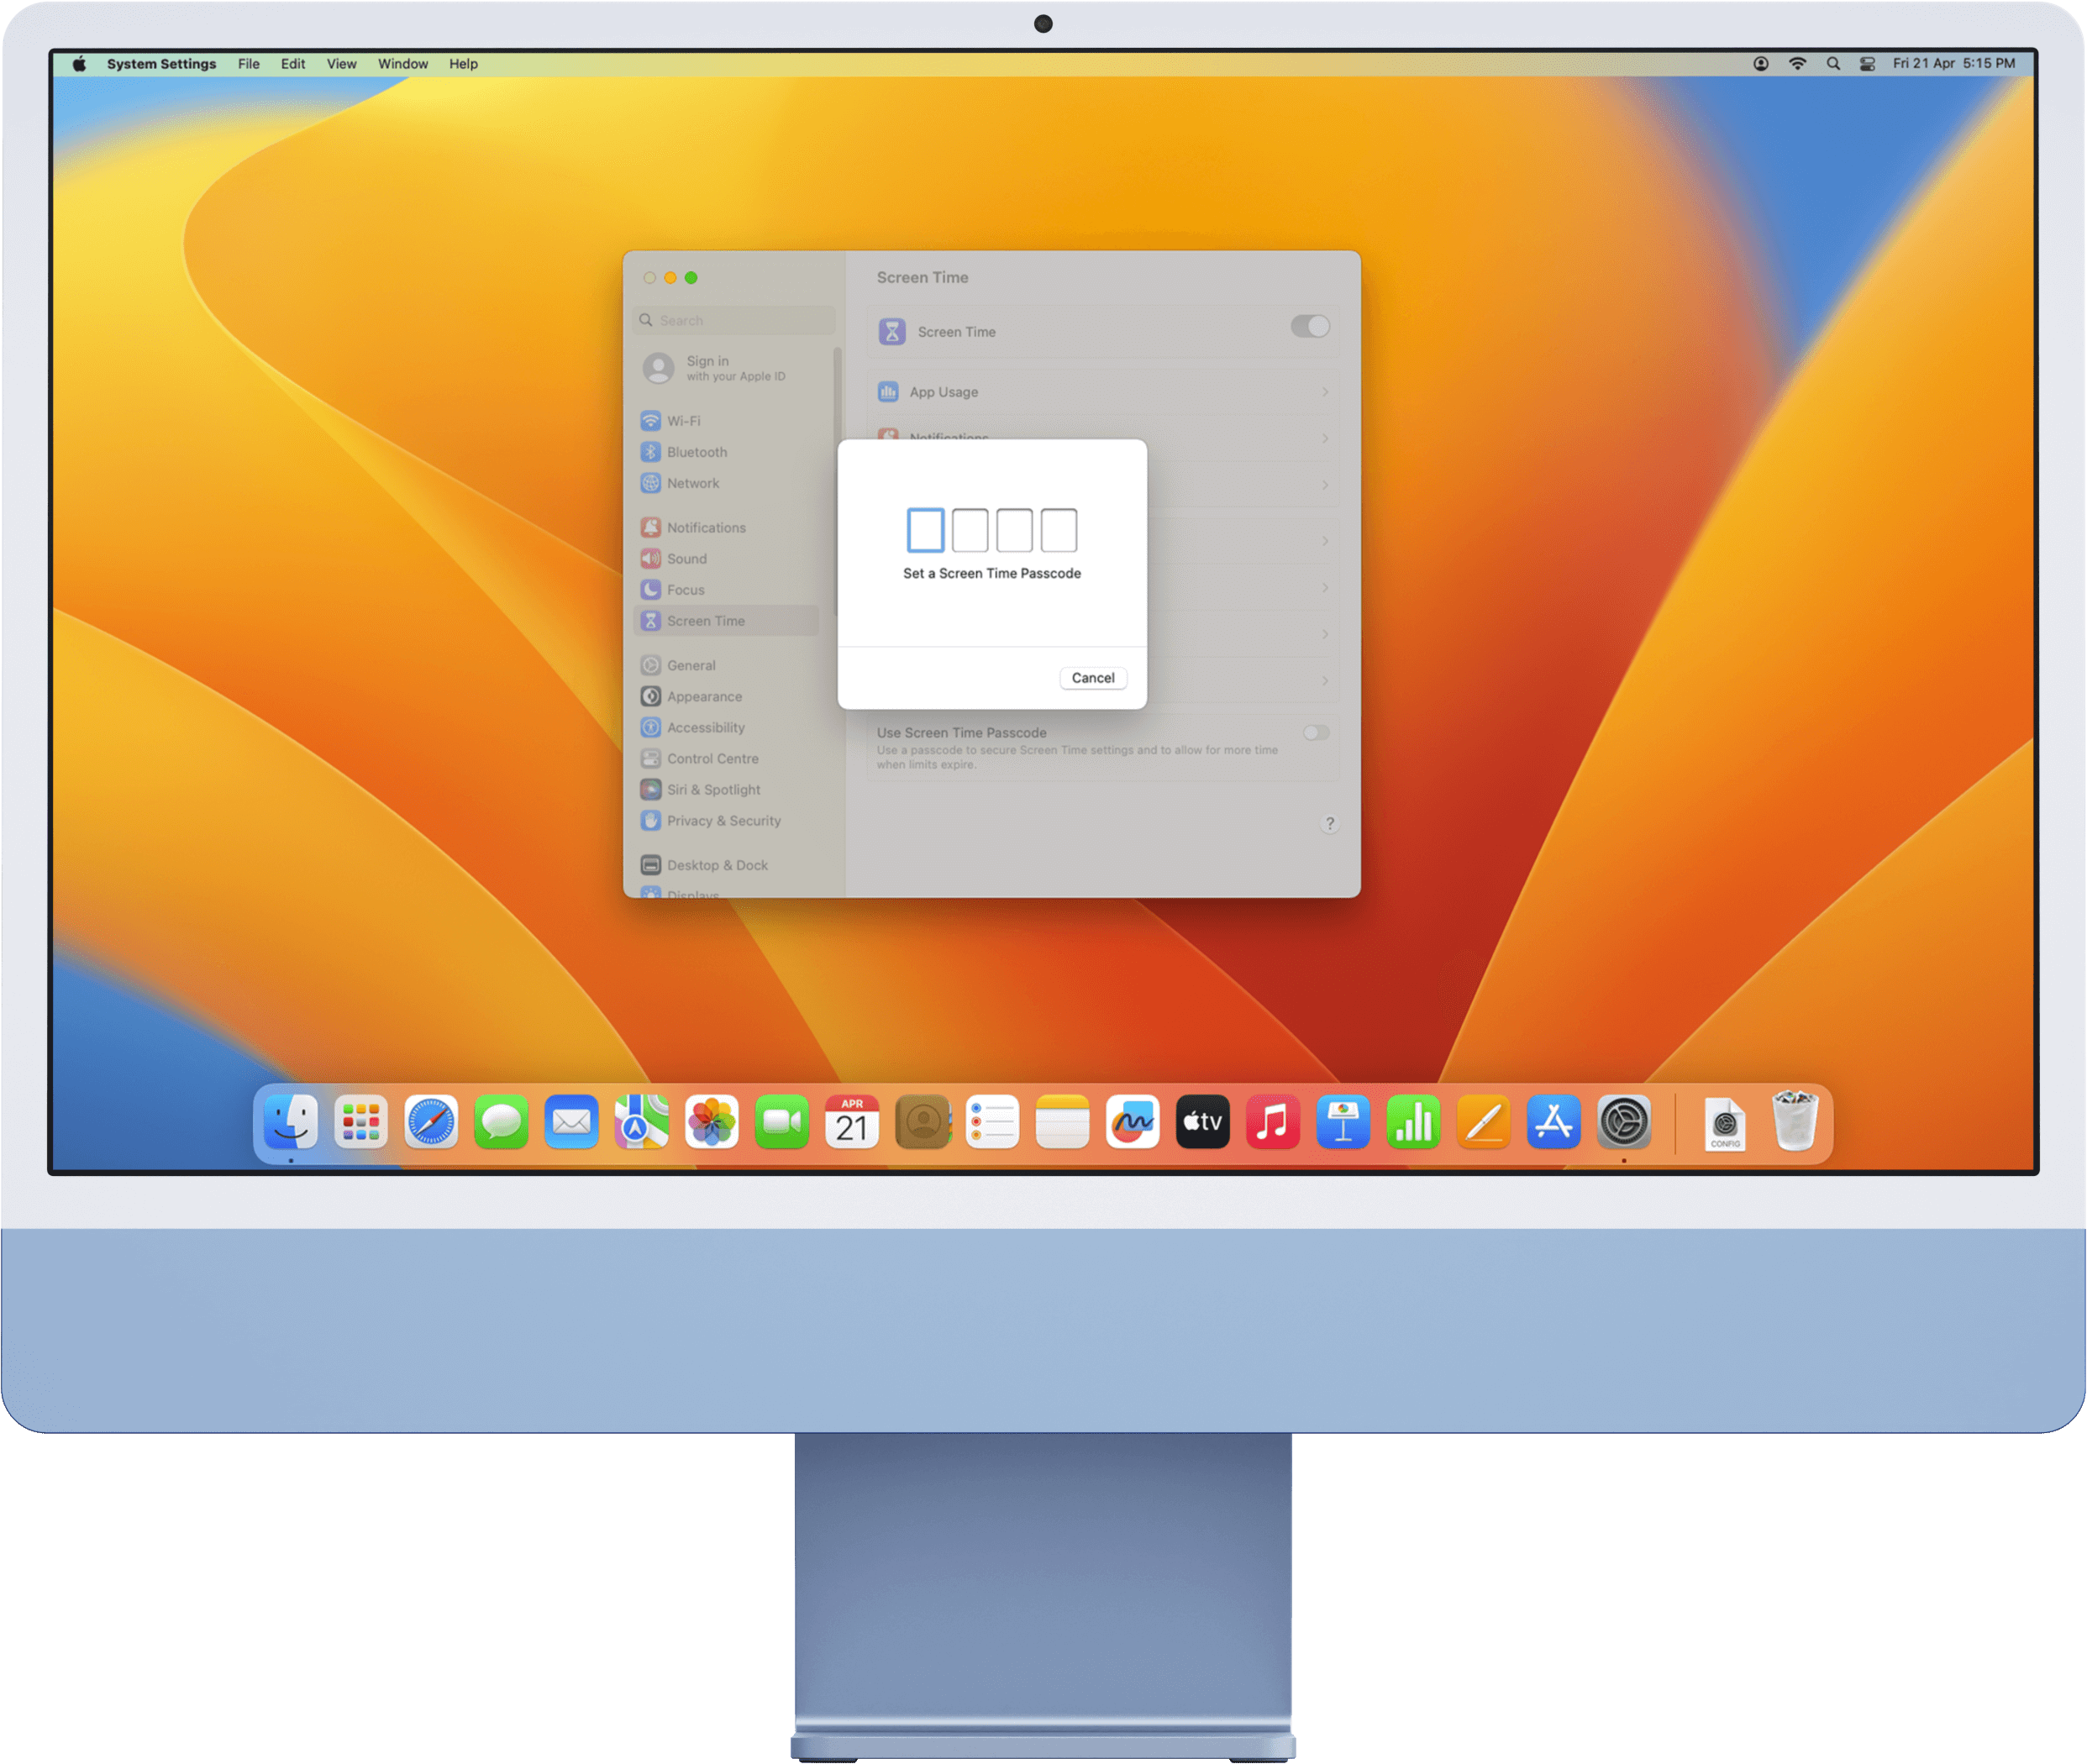
Click the switch found next to Use Screen Time Passcode.

Set a passcode for Screen Time. If you are offered to save the passcode with an Apple ID, click the Skip button.
Click the Content & Privacy menu.
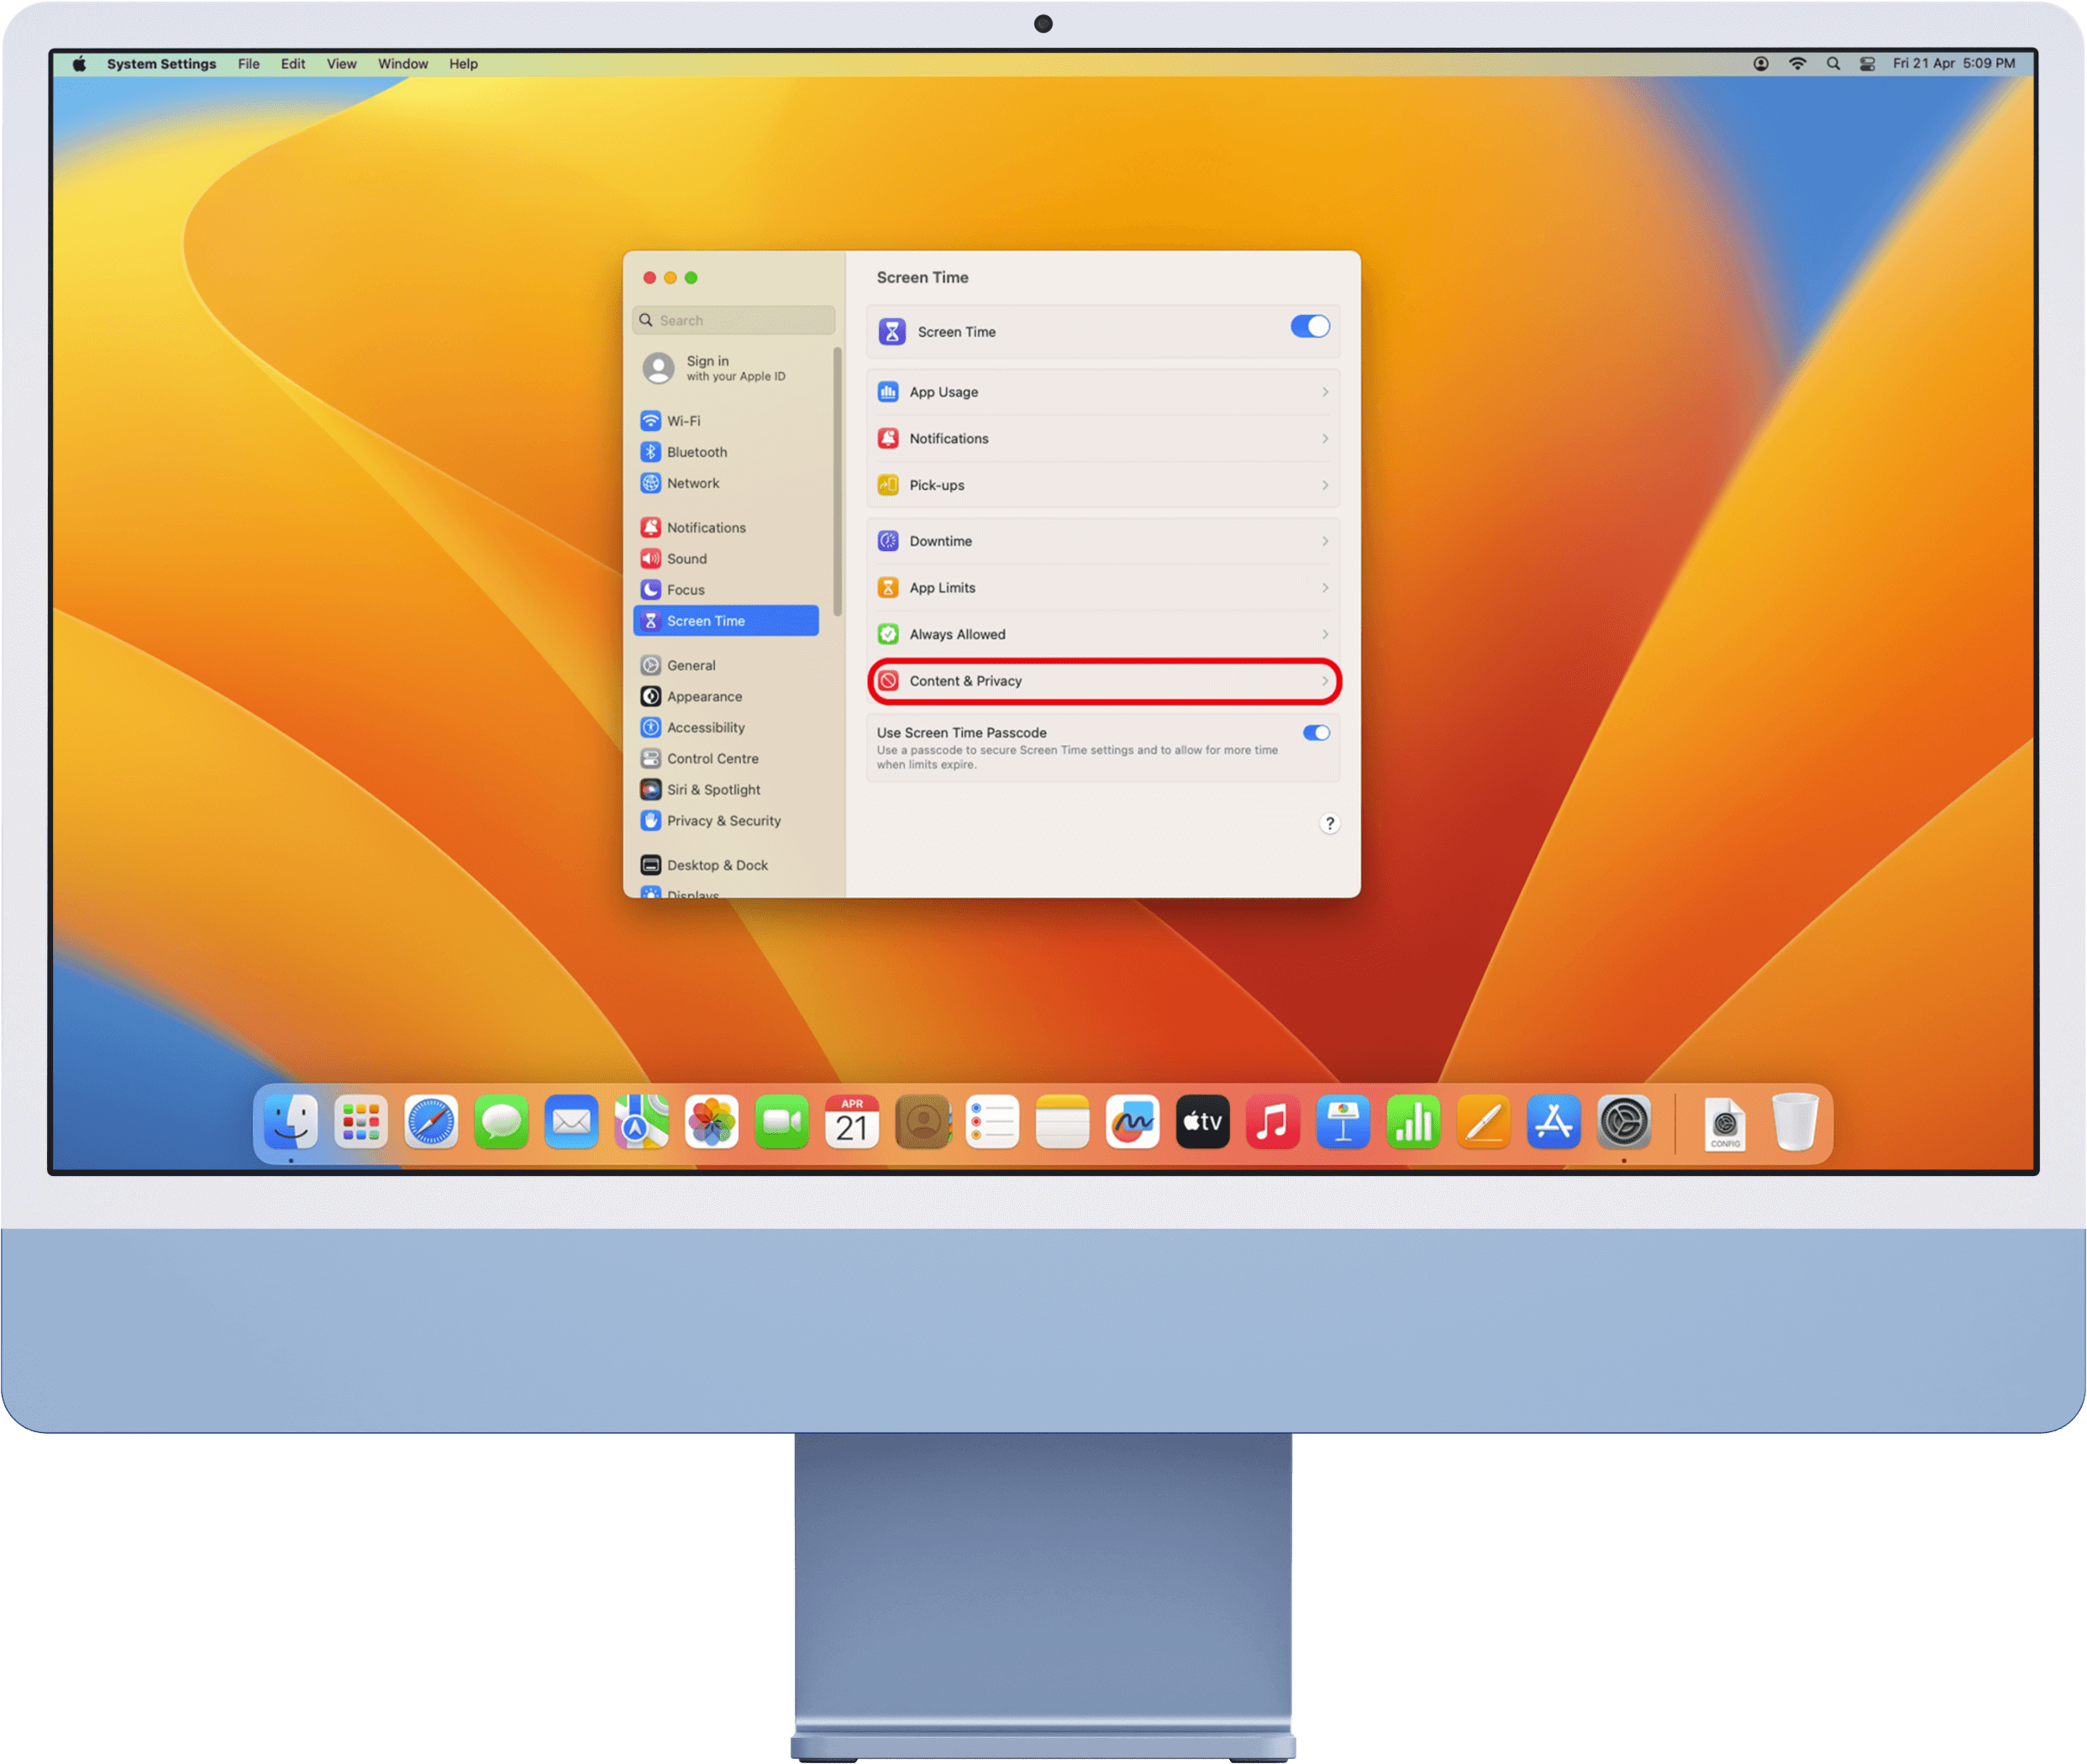
Click the switch found next to Content & Privacy.

Click the Store Restrictions menu.
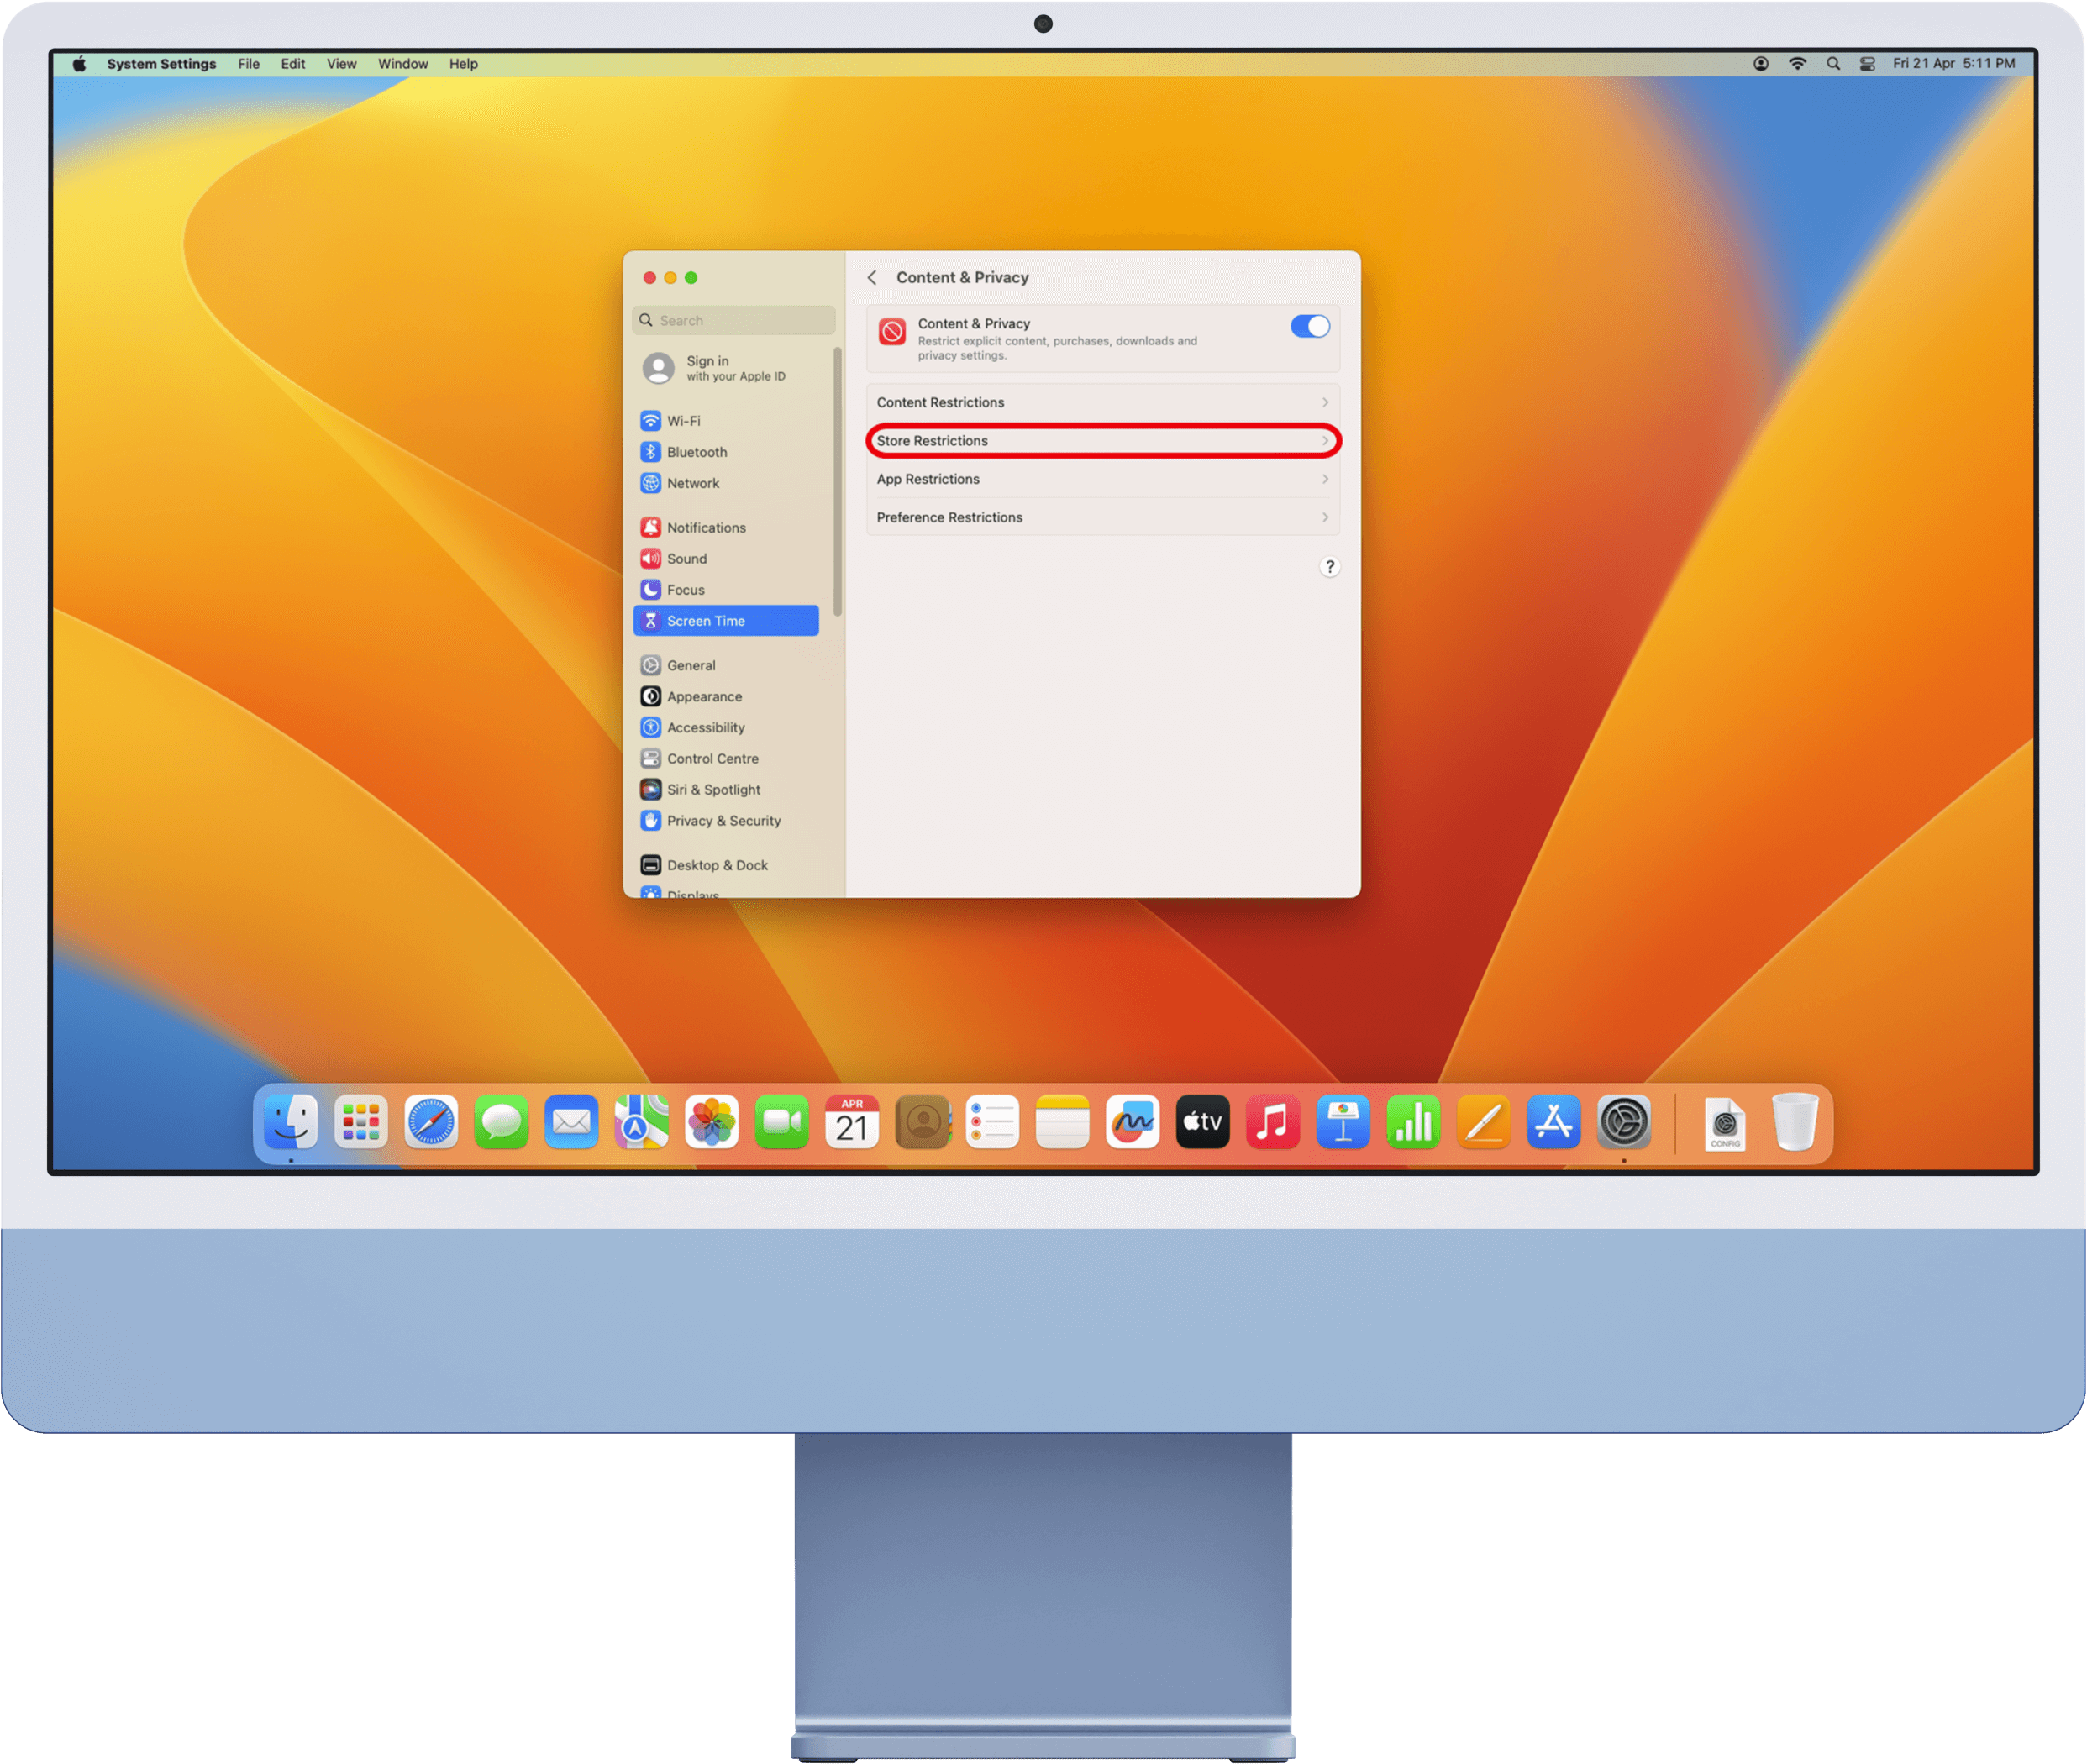
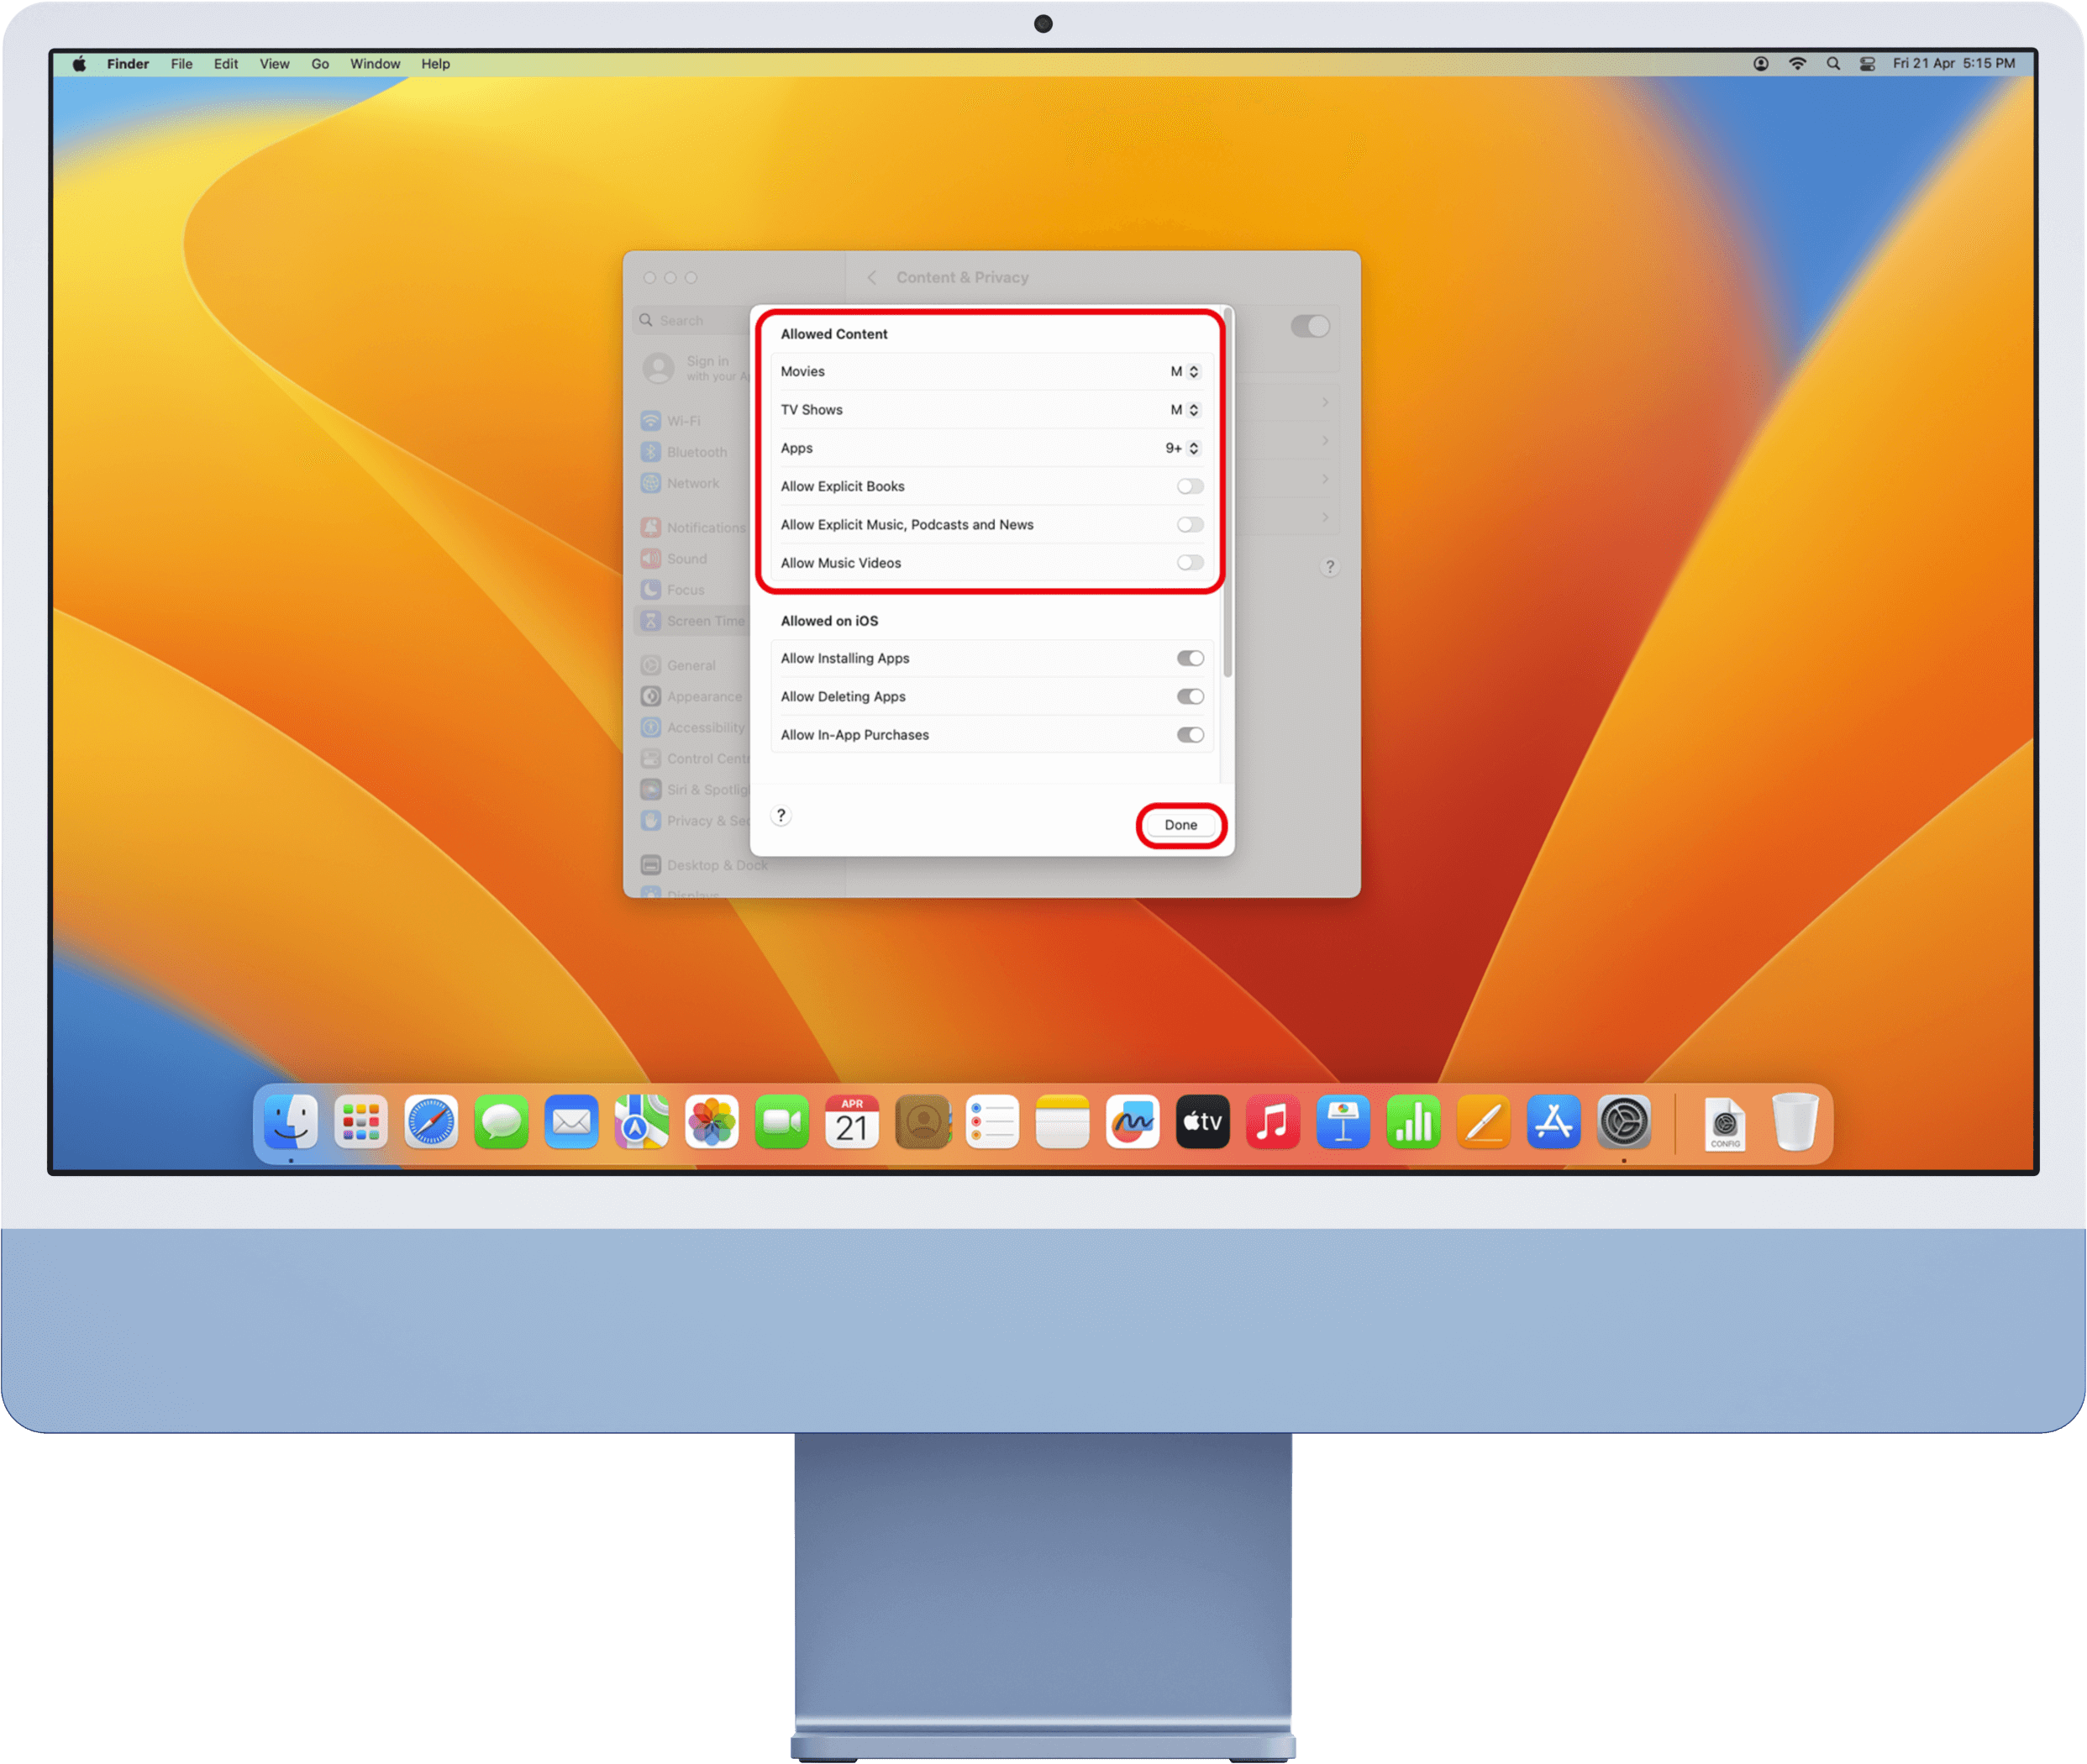
Allowed Content
We suggest using the following options:
- Movies: M (that is, PG-13 or the equivalent for your region) or Off
- TV Shows: M (that is, PG-13 or the equivalent for your region) or Off
- Apps: 12+ (Highly recommended, as this can help prevent filter workarounds from being used.)
- Disable the option for Allow Explicit Books
- Disable the option for Allow Explicit Music, Podcasts and News
Once you’ve made the changes, click the Done button.
Step 4: Verify protection
Visit the Safe Surfer website and check the protection bubble at the top of the page to verify that this device is protected.

To see blocking in action, try visiting ExampleAdultSite.com. This is a safe website for testing if pornographic websites are being blocked. This website should be blocked.
Protection complete
Great work! This device is now fully protected. To start monitoring protected devices, visit our easy-to-use online dashboard.
If you ever need to uninstall protection, simply delete the Safe Surfer profile in System Settings > Profiles > highlight the “Safe Surfer” profile listing > click the “–” button to uninstall the profile. These changes can only be made by user accounts that hold administrator permissions.
If you have any other Apple Mac devices you would like to protect, simply start again from the top of the guide. If you would like to protect a different kind of device, visit our Guides page.
Disclaimer: Safe Surfer Limited is in no way associated with Apple Inc.