
Let’s make installing your new Safe Surfer Wi-Fi Lifeguard router a breeze. This guide will efficiently walk you through how to do so.
Step 1: Install the hardware
Once you have opened the packaging, four items can be found inside the box:
- Wi-Fi Lifeguard router
- 12 V switching (that is, international) power supply
- AU/NZ snap-in adapter
- Ethernet cable

Snap the power adapter into the power supply. Plug the supply into a power source, then plug the cable end into the Lifeguard DC 12 V power socket. After a moment, the front power light will begin to fade in and out.

Plug one end of the Ethernet cable into the Lifeguard WAN port.
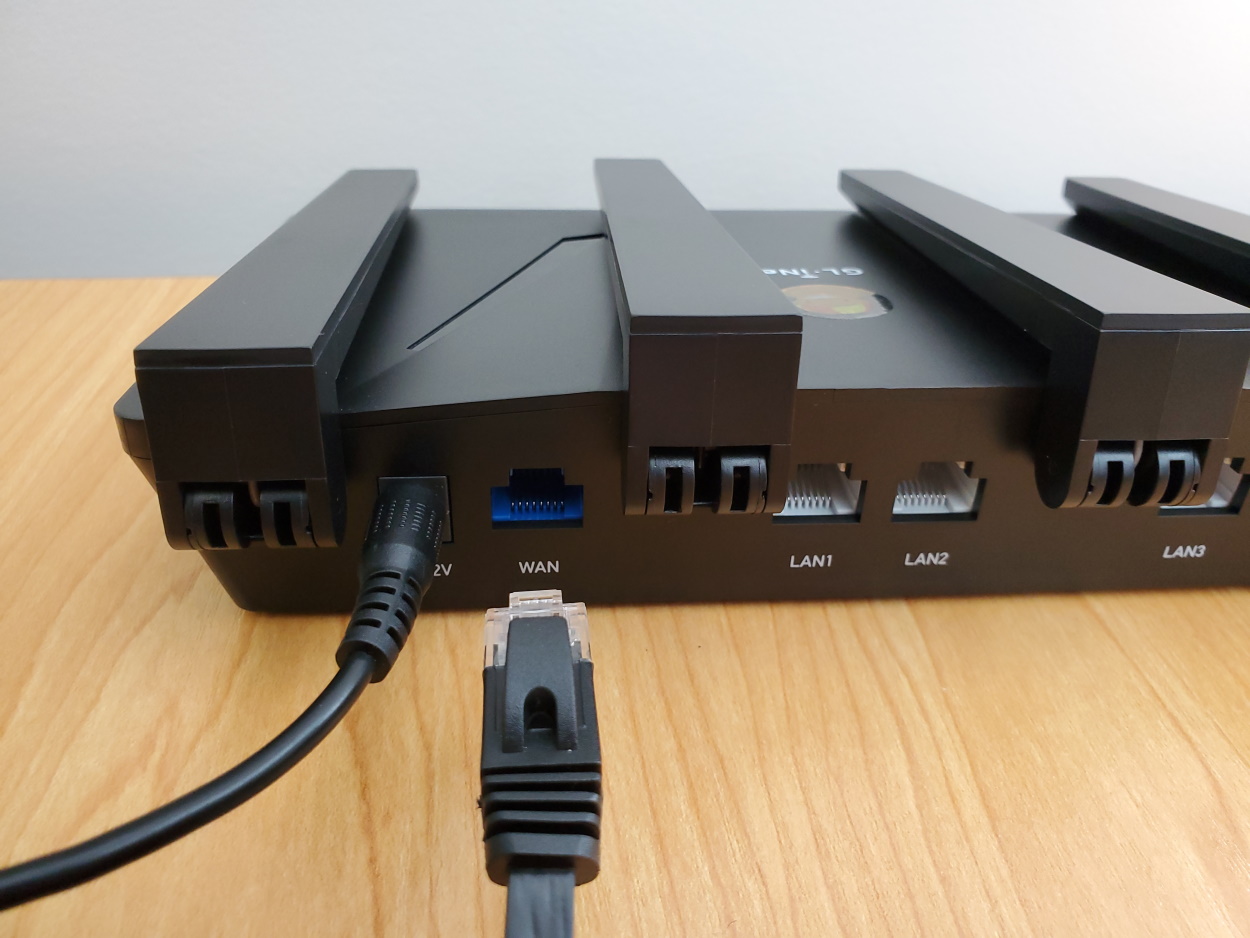
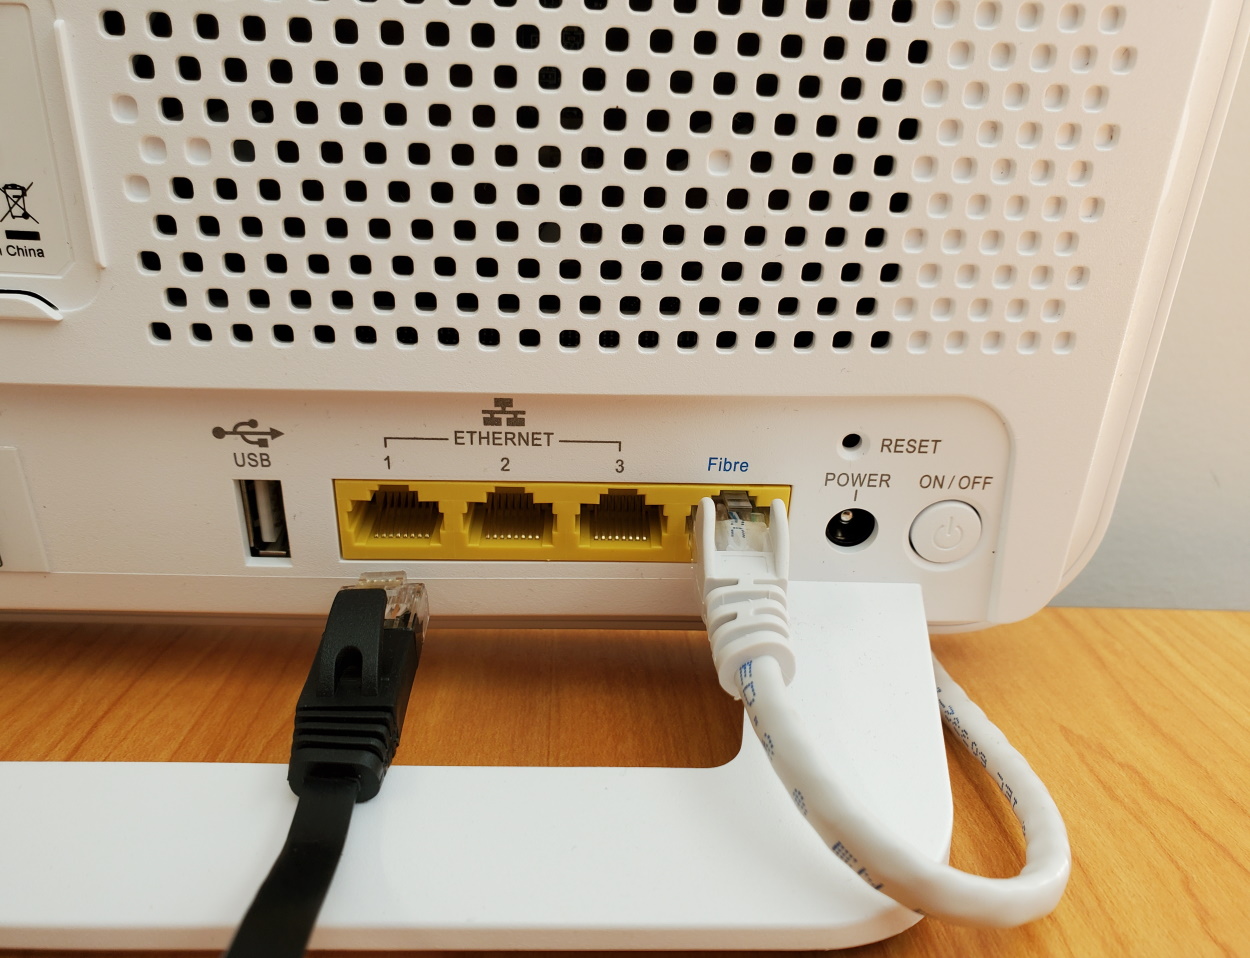
Plug the other end of the cable into one of the LAN ports belonging to your main home router. These ports are usually coloured yellow.
Important note: if you use a Wi-Fi extender (a device that extends your Wi-Fi signal from your main home router), it could cause issues if used alongside a Lifeguard. For this reason, we suggest not plugging in an extender to the Lifeguard unless you have skills working with technology—this would involve setting the extender to AP mode.
Step 2: Register and configure the Lifeguard
Quick terminology
-
The Lifeguard local network dashboard is used on an infrequent basis to control hardware-based features, such as changing the Wi-Fi network name or updating the firmware.
-
The online Safe Surfer dashboard is used on a frequent basis to easily change device-related settings and monitor information related to device protection.
Getting started
The easiest way to get devices protected is to connect them one at a time. First we will connect one of your devices (which will be used for the installation process), then we will show you how to connect other devices.
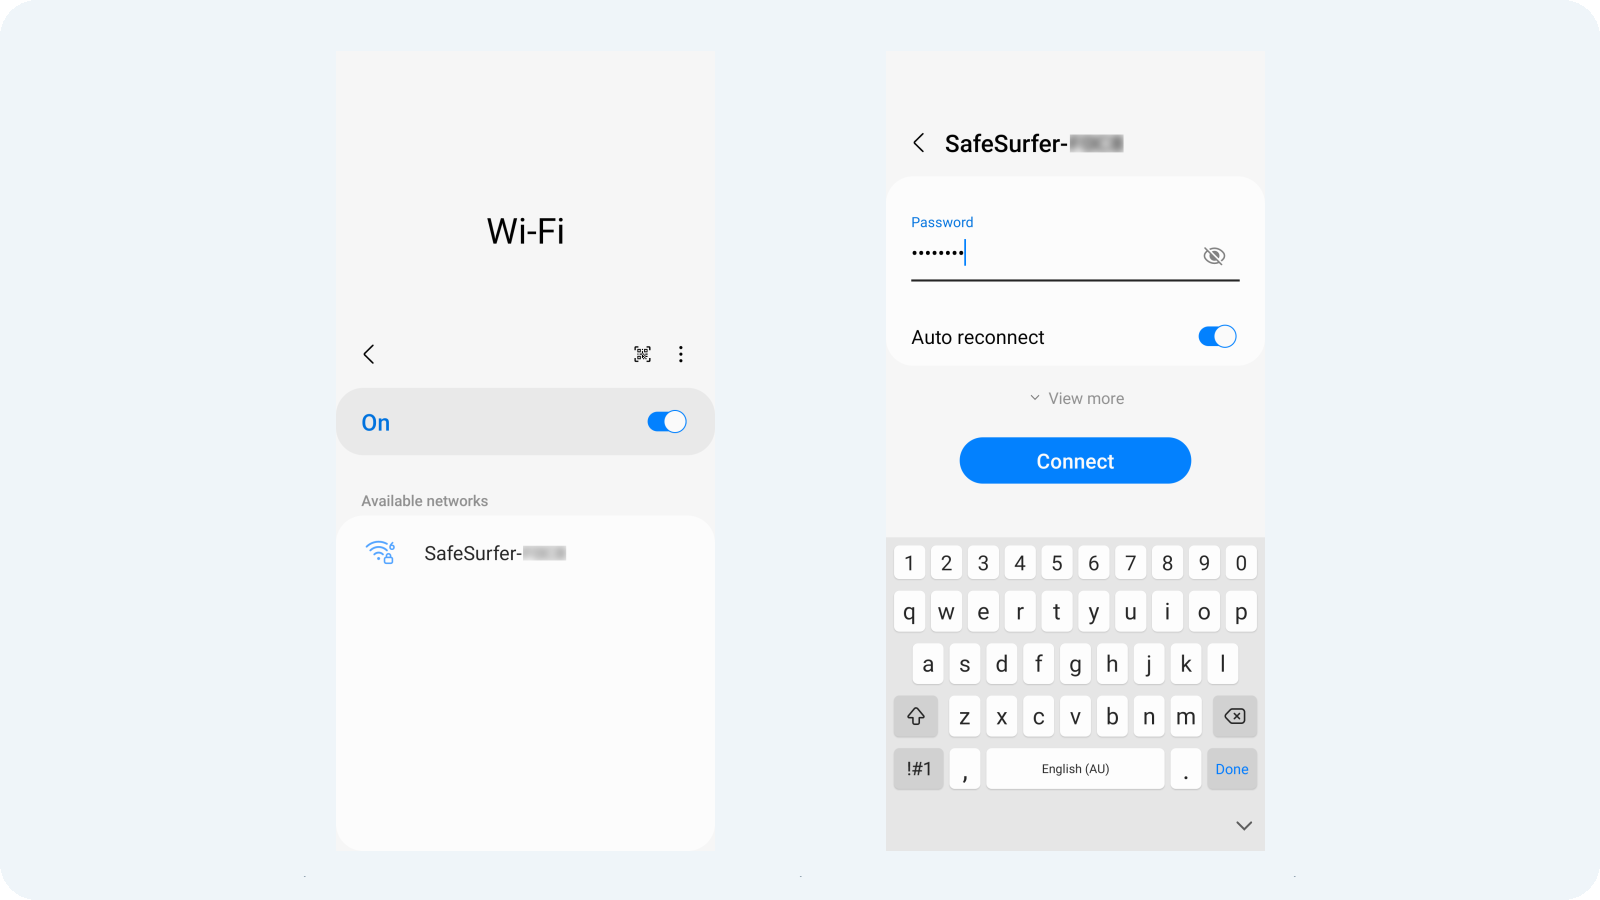
Using a laptop or a smartphone, connect to the Safe Surfer Wi-Fi network. The default password is goodlife (which can be changed later). Alternatively, you can connect this device to one of the Lifeguard LAN ports via an Ethernet cable.
Pro tip: If you have a Huawei-brand wireless modem (that is, when you don’t have a fibre, copper, or cable connection), if you can’t get an internet connection after connecting device to the Wi-Fi Lifeguard, you might need to change a setting for the Huawei modem. You can find out how to do this by clicking this link.
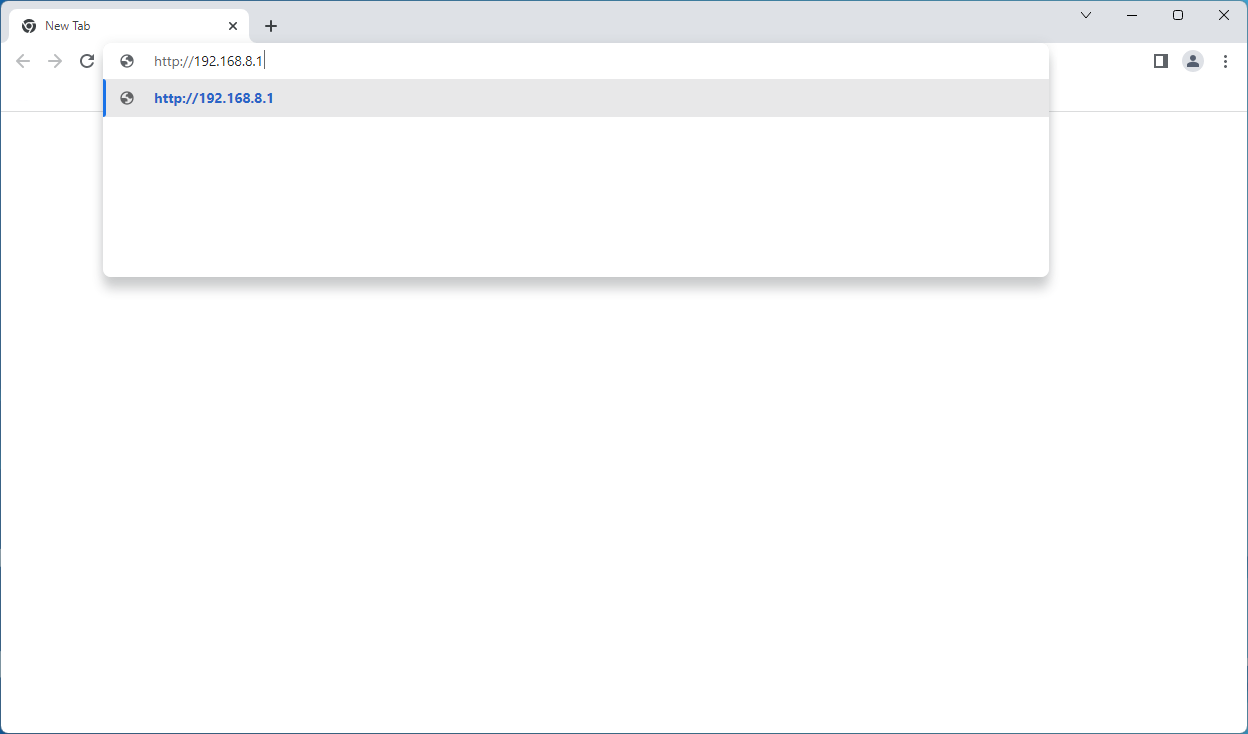
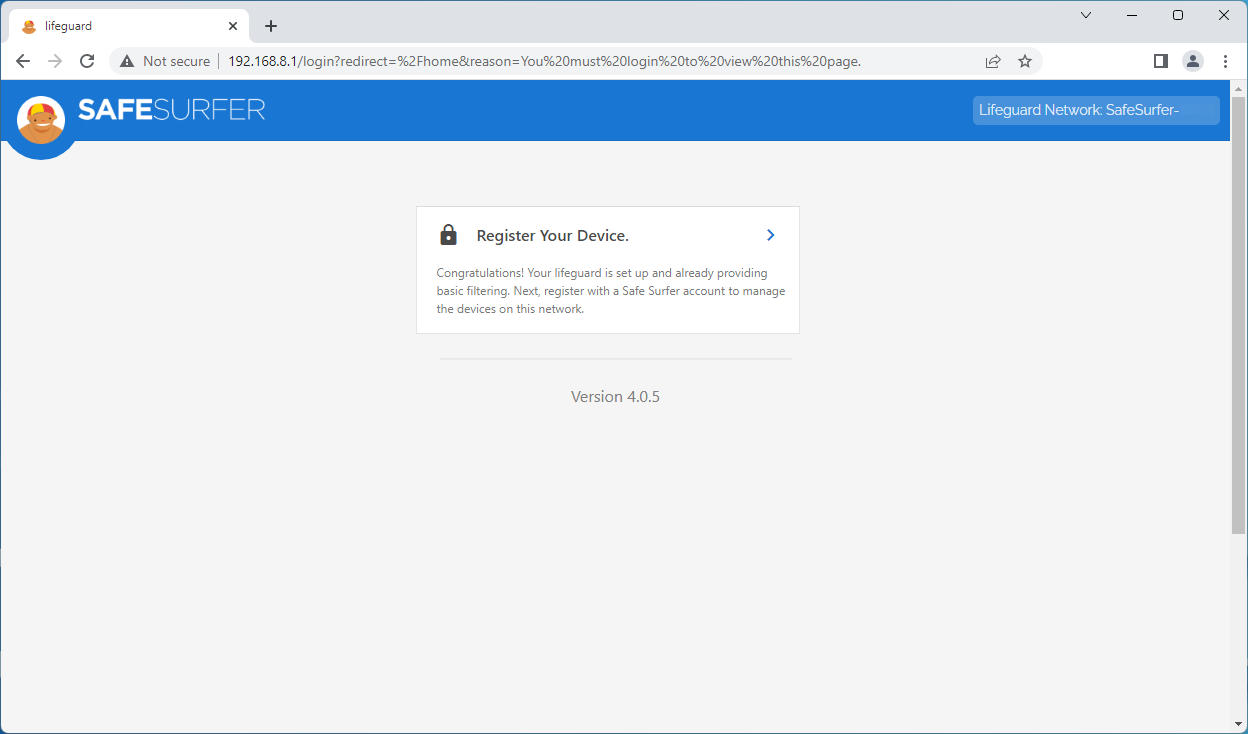
Open a web browser and visit http://192.168.8.1.
Once the Lifeguard local network dashboard comes up, click “Register your device”.
Pro tip: if the Lifeguard reports that it can’t connect to the Internet, double-check your cable connections as per the above images. If you’re still having trouble, log in to your main home router and check its firewall settings. If it’s set to High (or Strong), try changing it to the Medium (or Normal) option and save the changes.
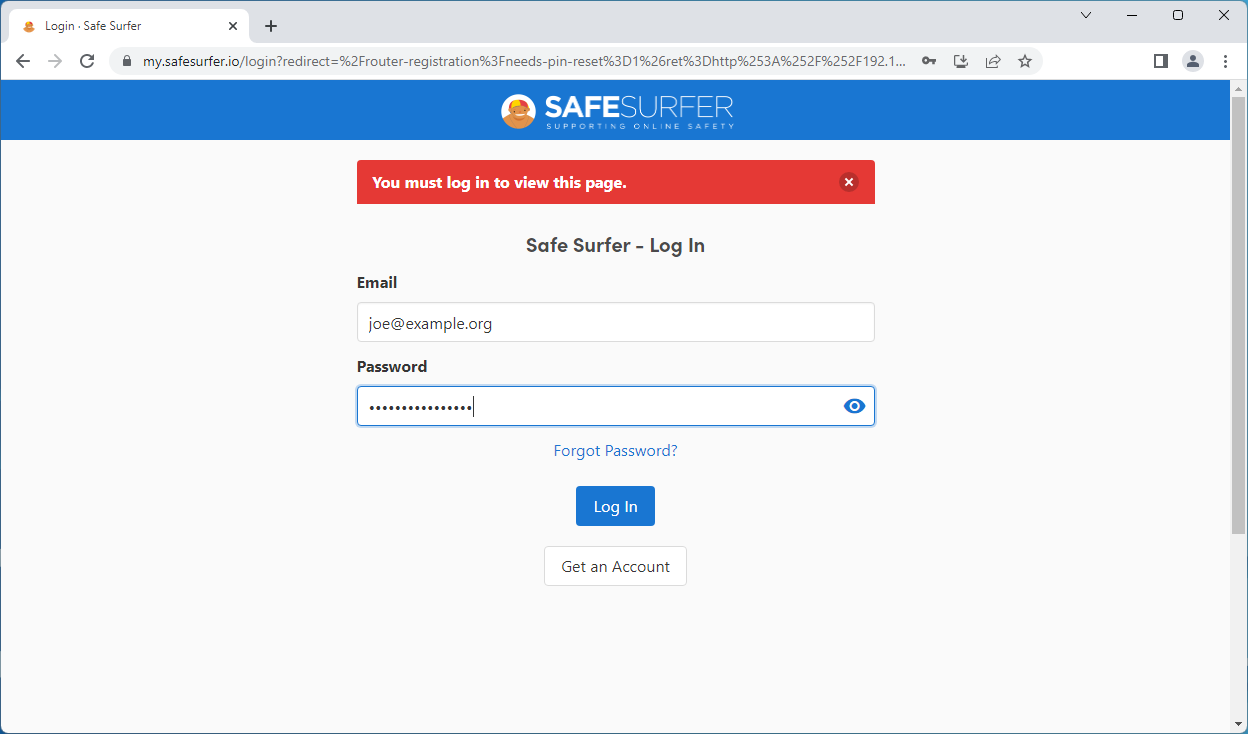
Enter your Safe Surfer account details and click the “Log in” button. If you don’t have an account, you can create one by clicking the “Get an account” button.
Certain features used later on (such as custom blocking and screen time rules) require a Pro Surfer subscription. If you already have an account, you can subscribe here.
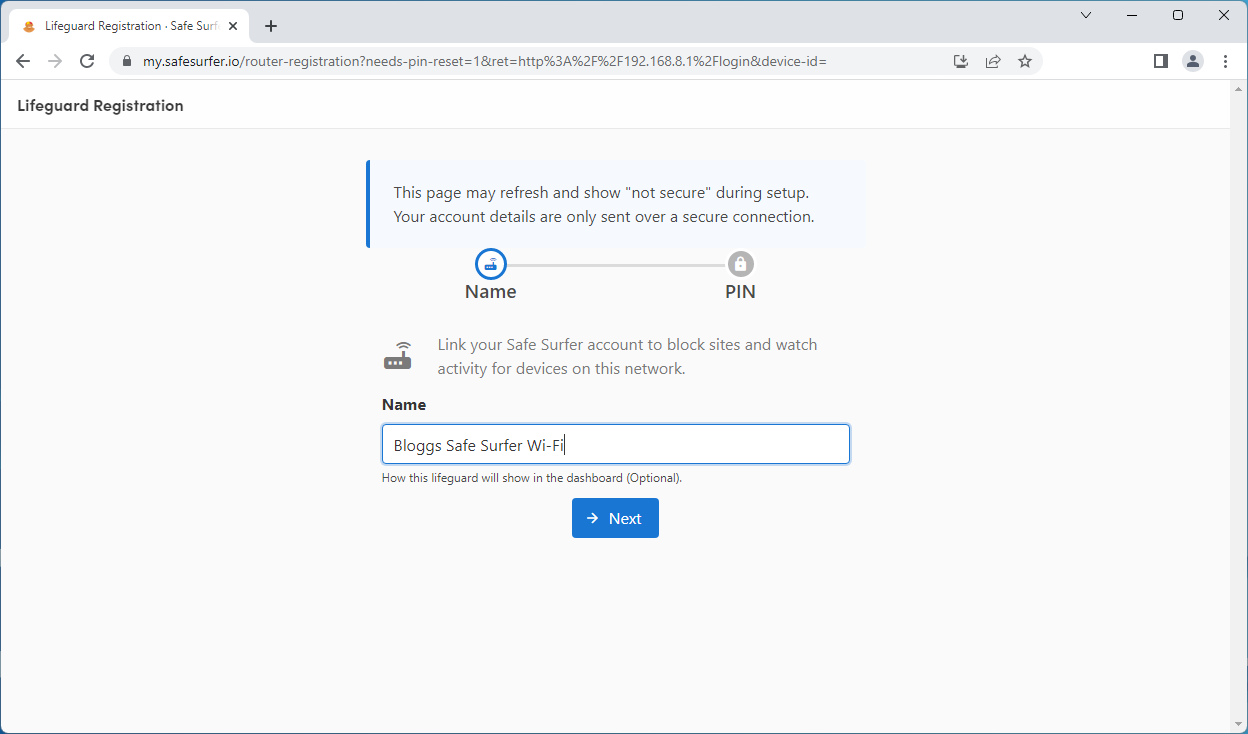
If you like, you can give the Lifeguard network a name. This is used to identify the network on the Safe Surfer dashboard. This doesn’t change the Wi-Fi network name (which can be done later).
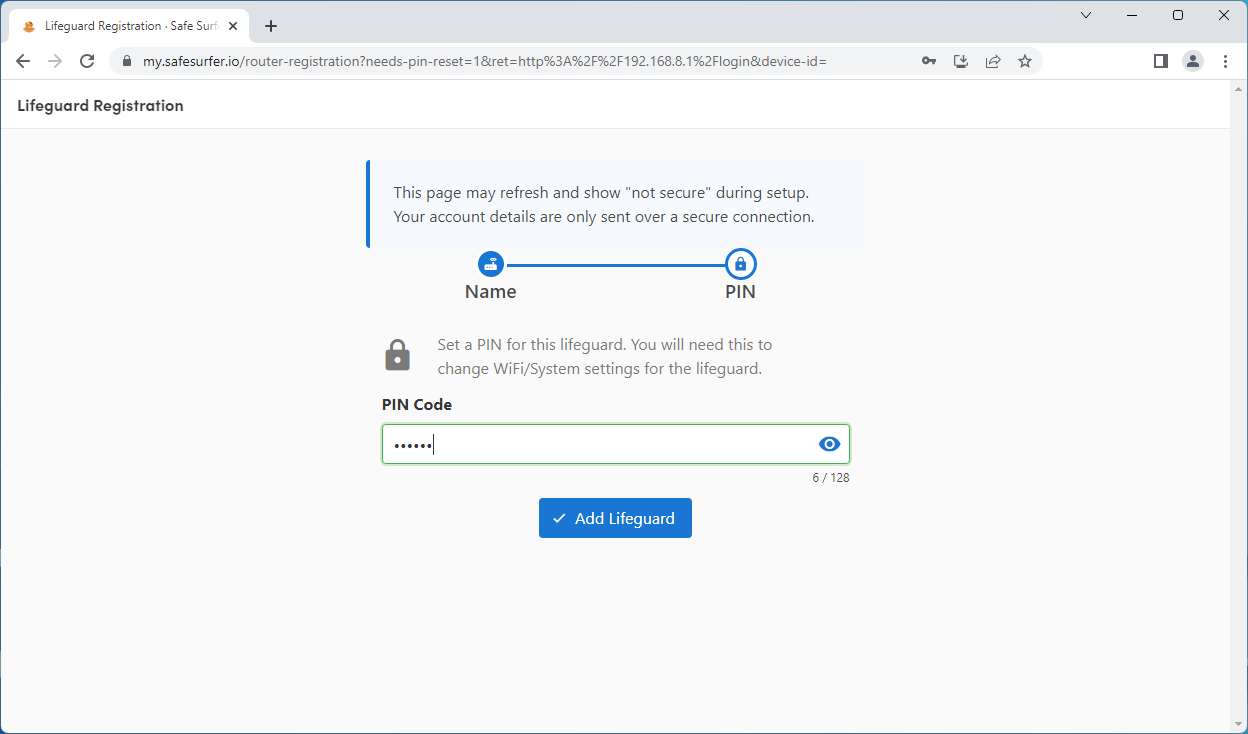
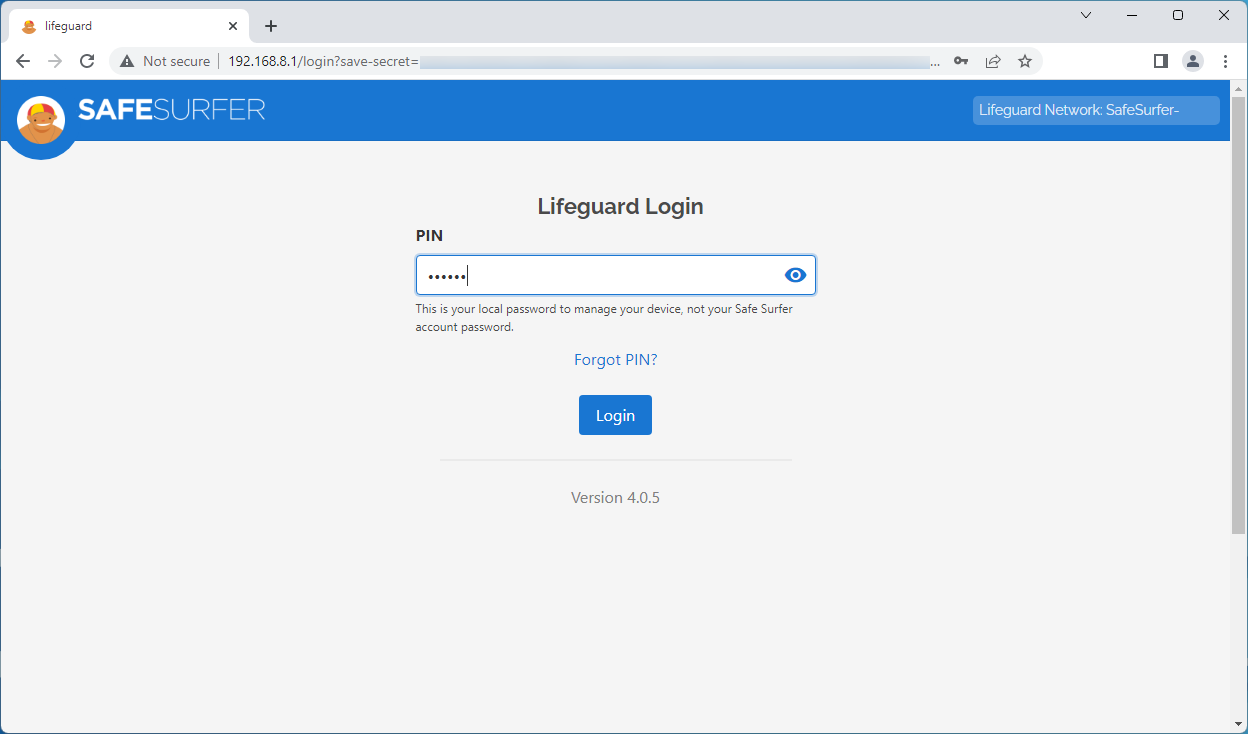
Set a PIN code. This is used when visiting the Lifeguard local network dashboard.
Enter the PIN you set previously. Click the “Log in” button.
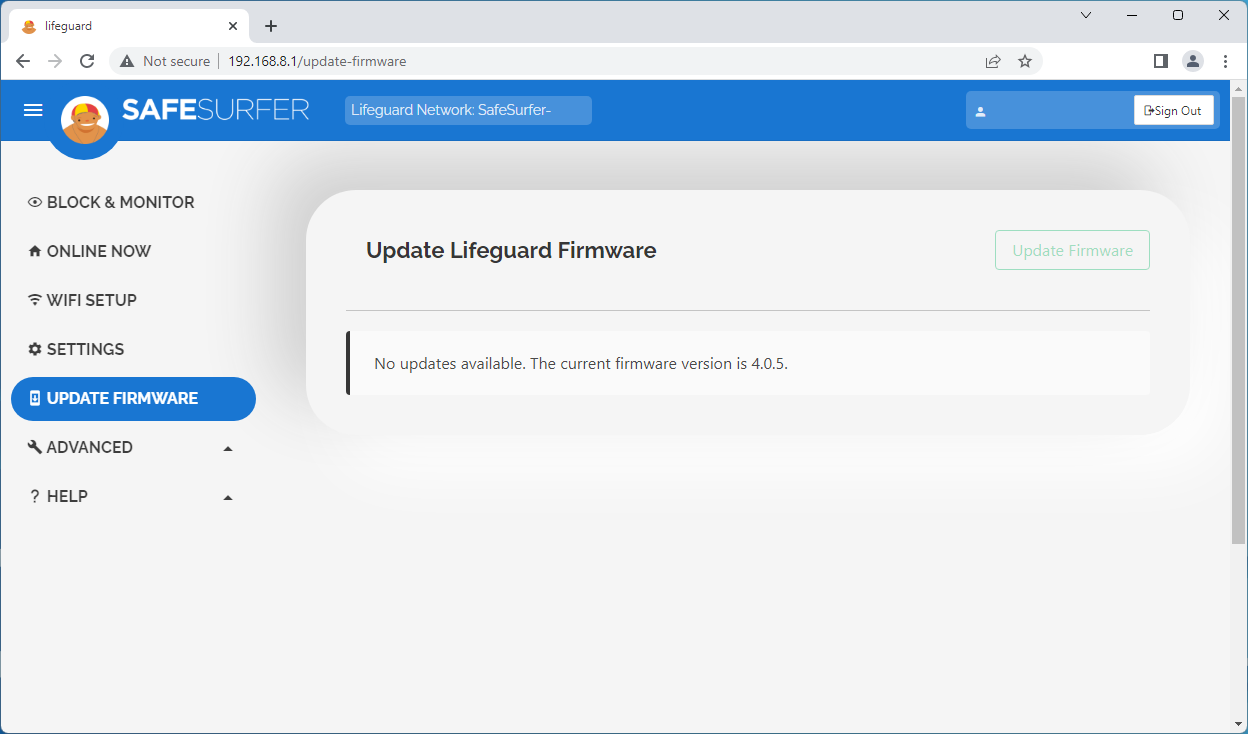
Once you have logged in, click the “Update firmware” menu found on the left-hand sidebar. If a firmware update is available in the future, you can perform the update by clicking the green “Update firmware” button. This process can take 10–15 minutes to complete and will restart the Lifeguard router.
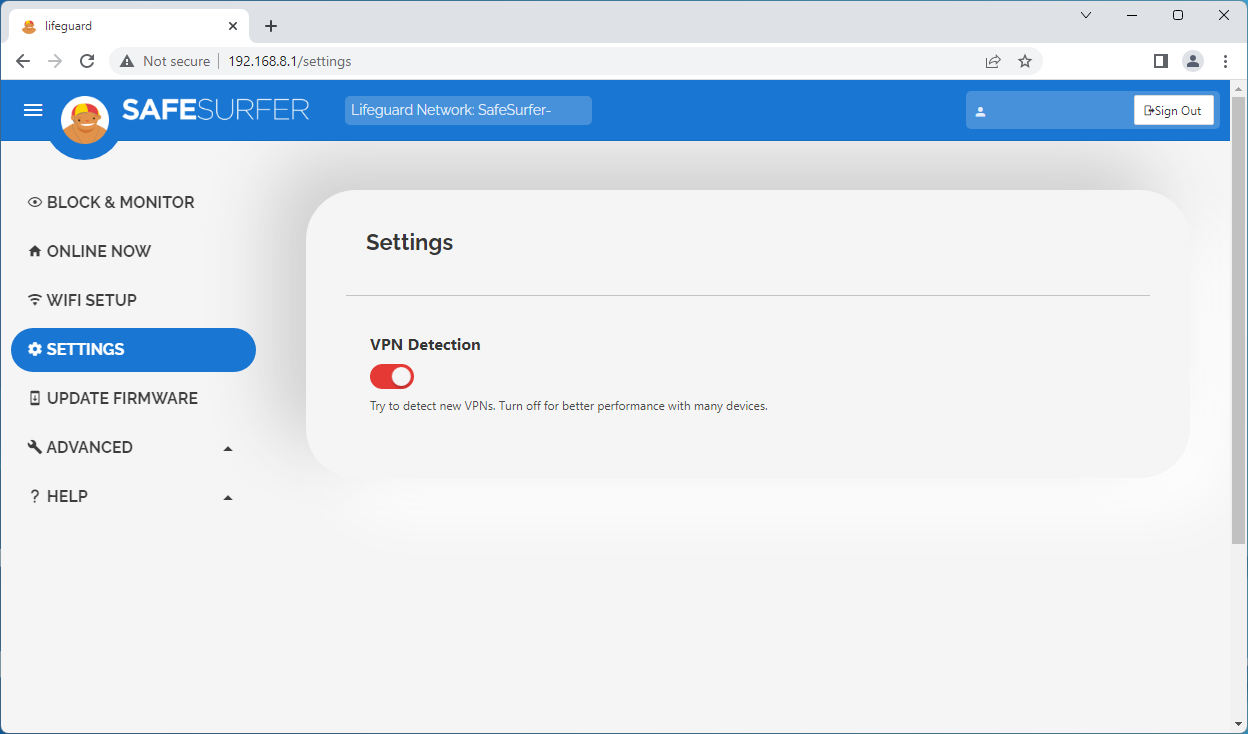
Click the Settings menu. VPNs are a technology that can be used to skip over Safe Surfer. Coupled with our pre-existing online database, we also try to detect new VPNs on Lifeguard networks by default. If you’re concerned about network performance, we’d suggest disabling this feature.
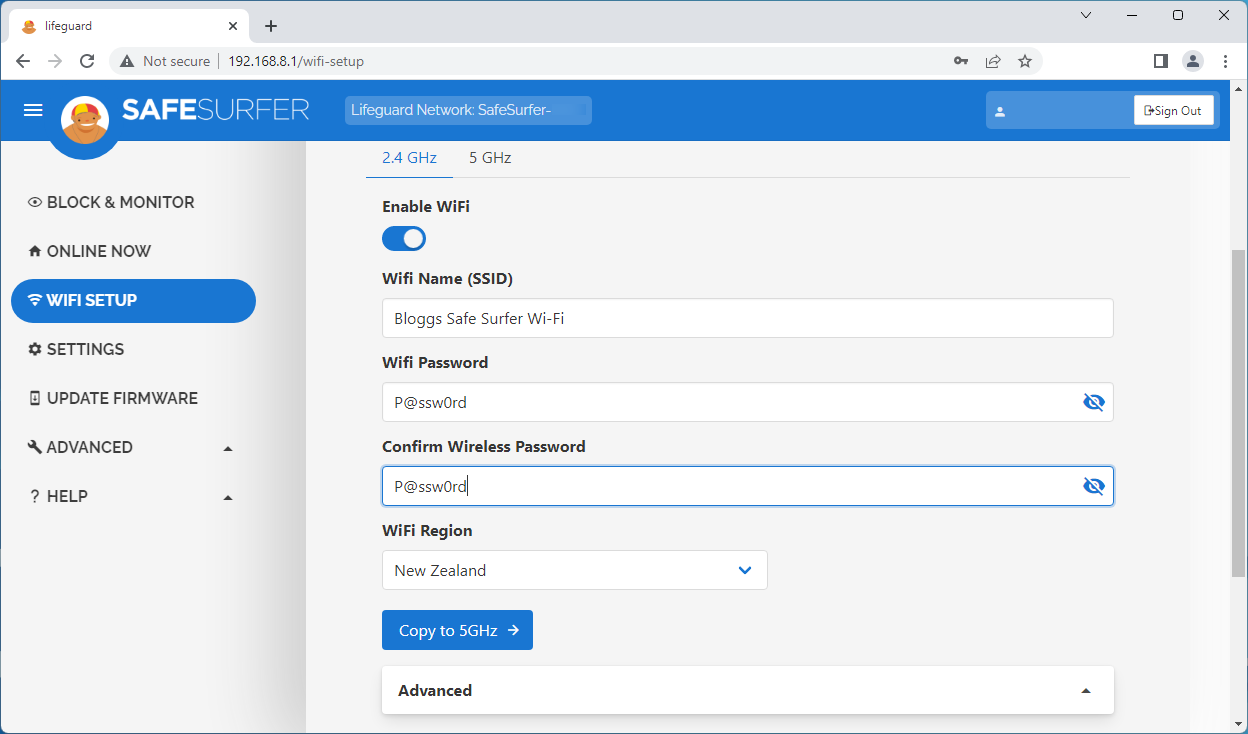
Click the “Wi-Fi setup” menu. From here you can change the Lifeguard SSIDs (that is, the Wi-Fi network name that appears when connecting a Wi-Fi device to the Lifeguard), the Wi-Fi password, and the Wi-Fi region.
Pro tip: If you would like to change the Wi-Fi password, we strongly recommend doing this now (as below) due to how privacy technologies work on modern devices, and how this relates to us detecting devices (so that you can identify each one later on).
If you make any changes in this menu (such as changing the Wi-Fi password), click the “Copy to 5 GHz” button. Click the Save button at the upper-right corner of the page. After a minute has passed, you will need to reconnect to the Lifeguard if this device is connected via Wi-Fi.
You can now close out of this page.
Step 3: Connect devices
Pro tip: When deciding which devices to connect to the Safe Surfer Wi-Fi, it’s good to keep in mind that we can provide an even safer online experience with our protection apps, where we have additional safety technology available. You can find out more by clicking this link. If you protect a device with the Safe Surfer app, it doesn’t matter what Wi-Fi network the device uses, as it will always be protected no matter where it is. If you’re not sure, we typically protect devices with the apps wherever possible, and then we protect trickier home devices (such as smart TVs, video game consoles, and some Chromebooks) with the Lifeguard Wi-Fi.
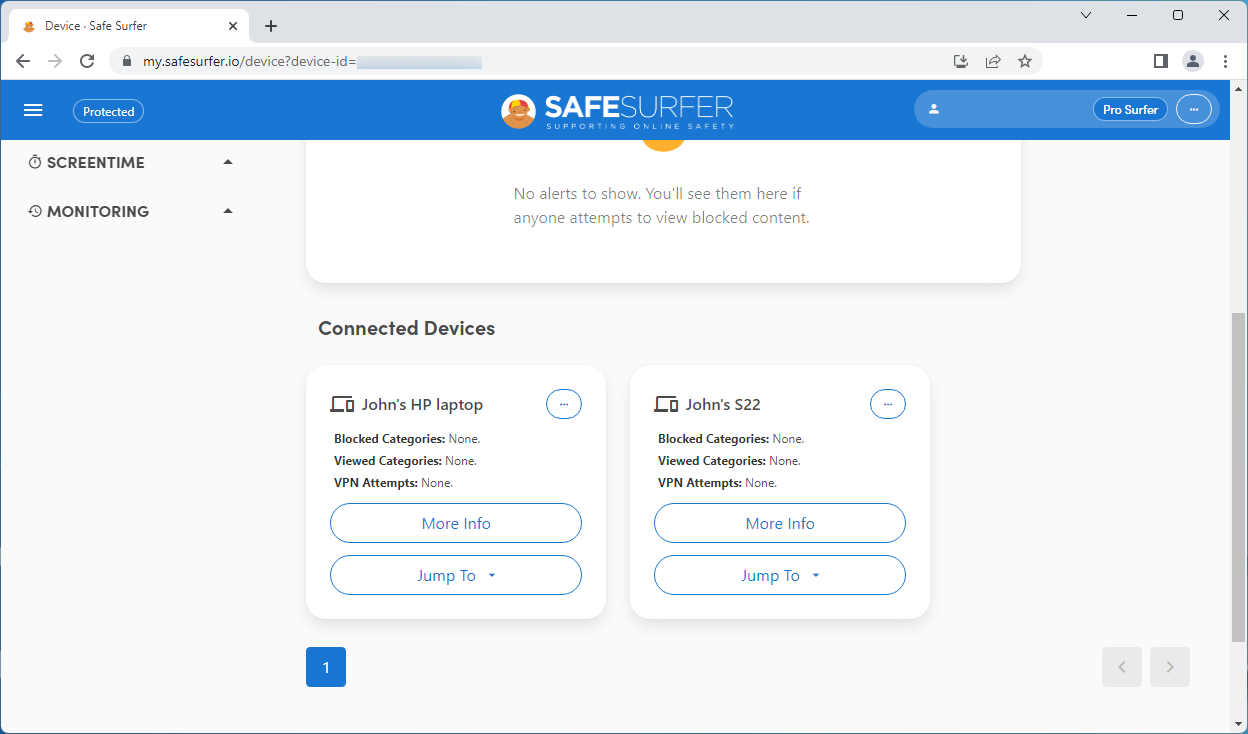
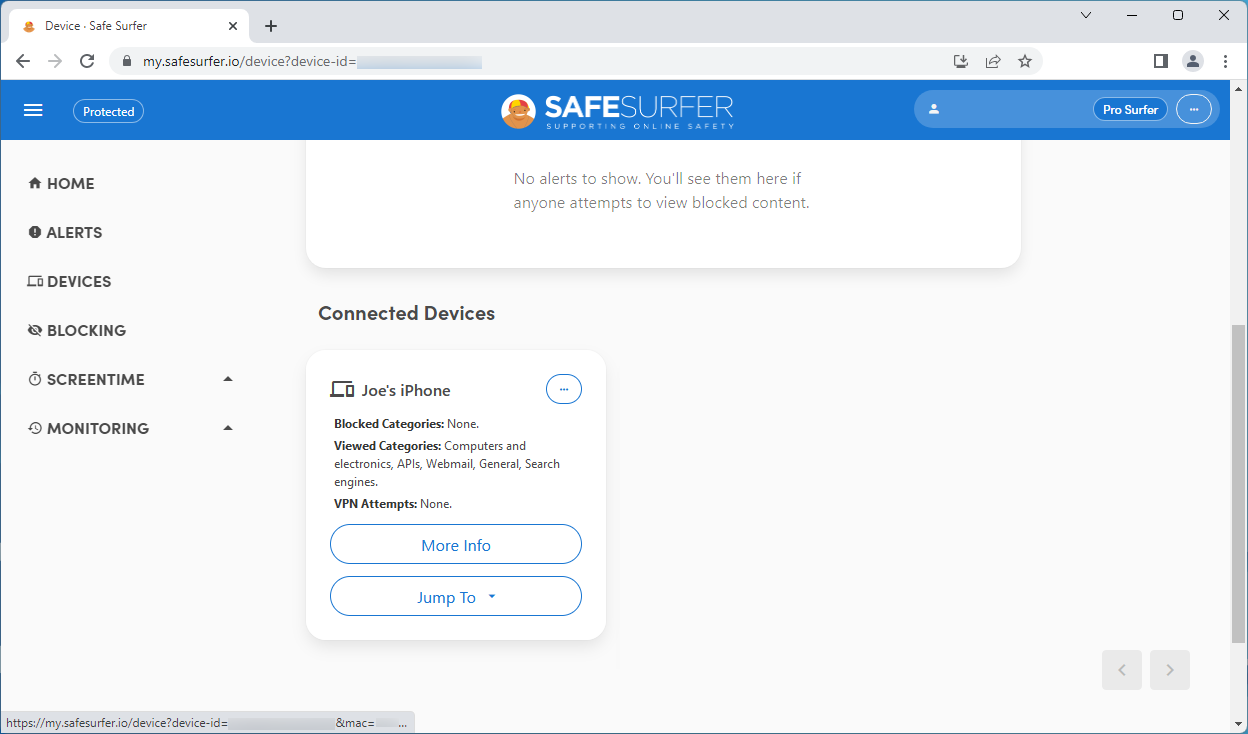
Visit the Safe Surfer dashboard. Click the Devices menu found on the left-hand sidebar. Under the Lifeguard network listing, click the “View [number of] devices on network” button.
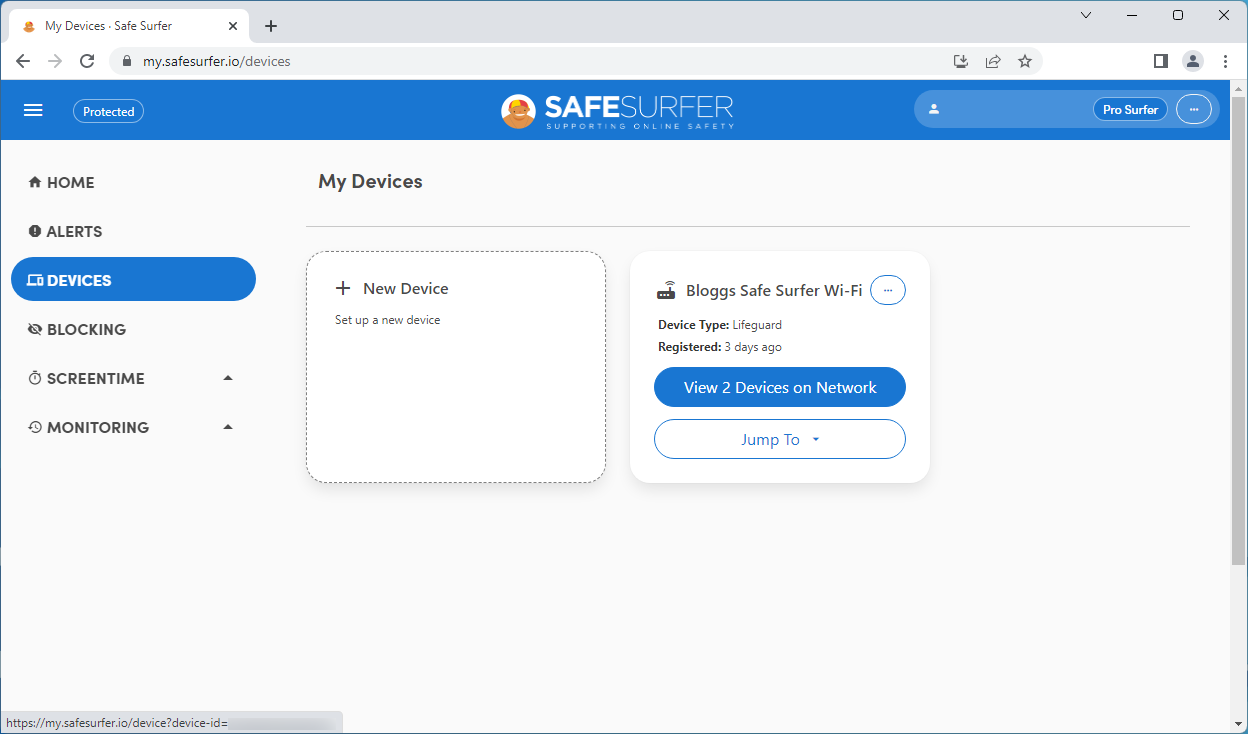
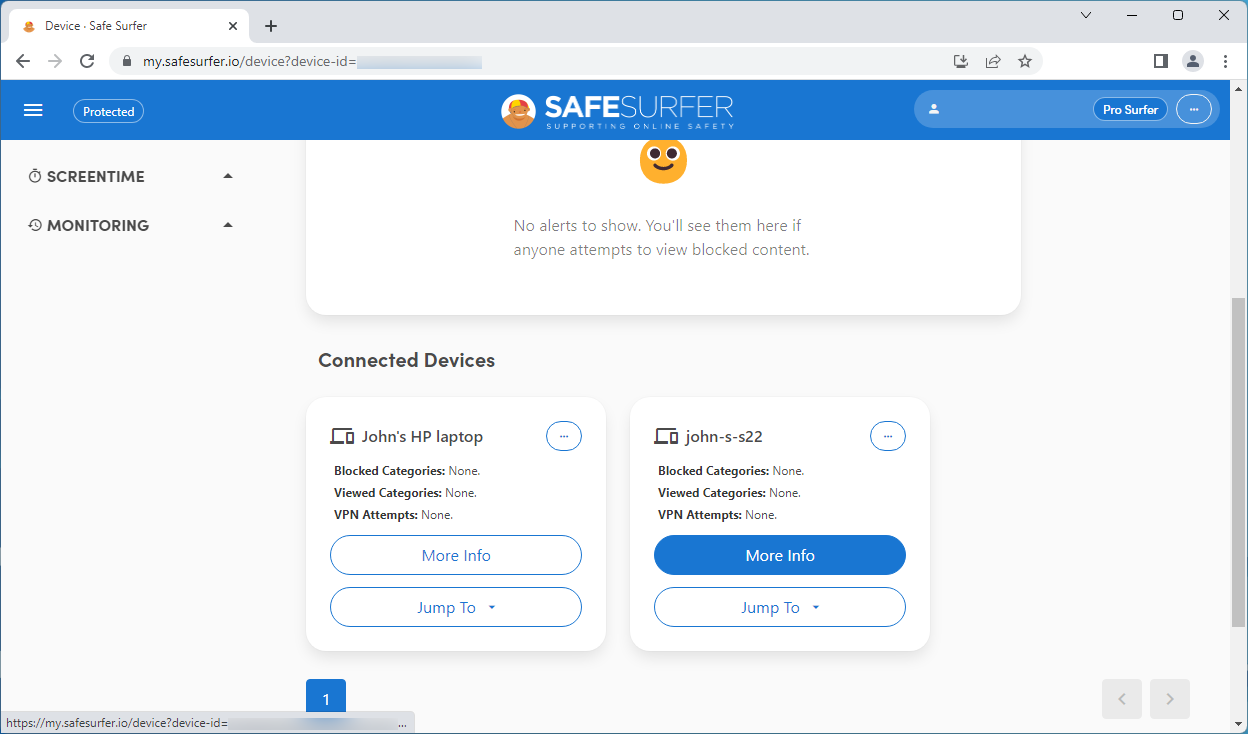
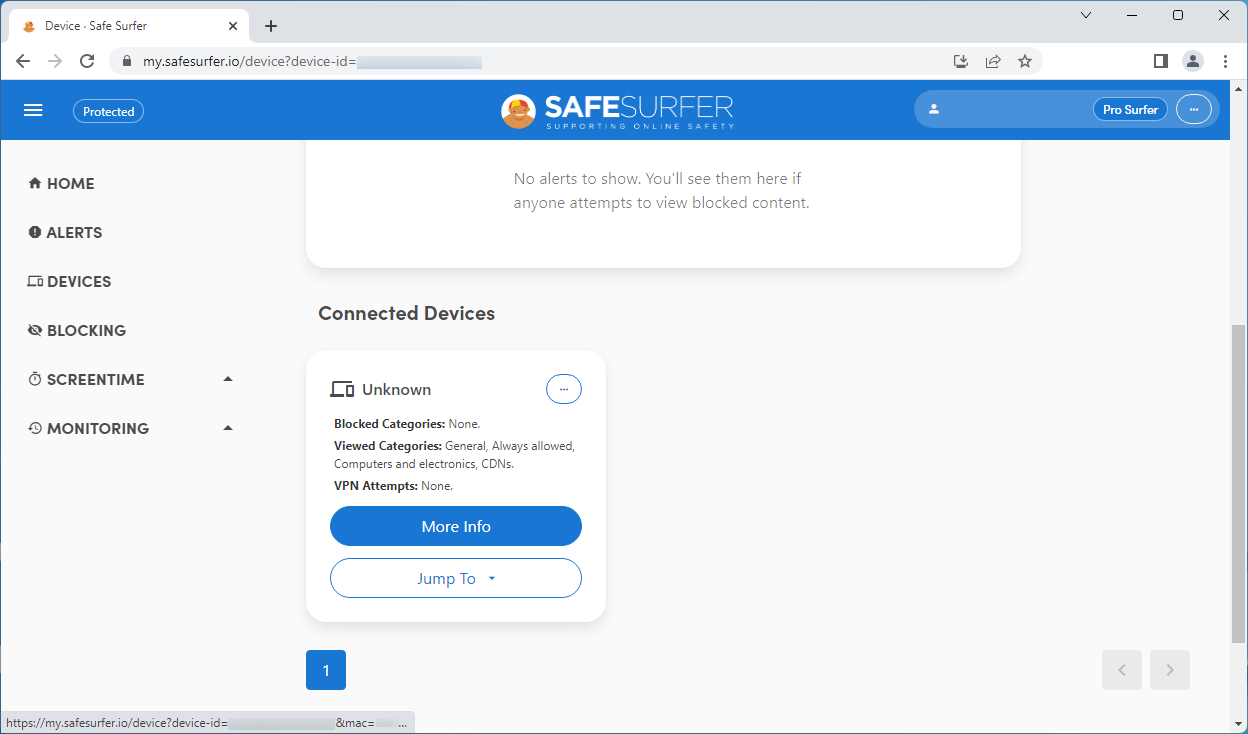
Devices that have connected to your Lifeguard router will appear here. If you need help to identify the owner of a device listing, click the “More info” button found under the respective listing.
Pro tip: if a device is listed as simply “Unknown”, skip ahead to step 4 for instructions on how to resolve this.
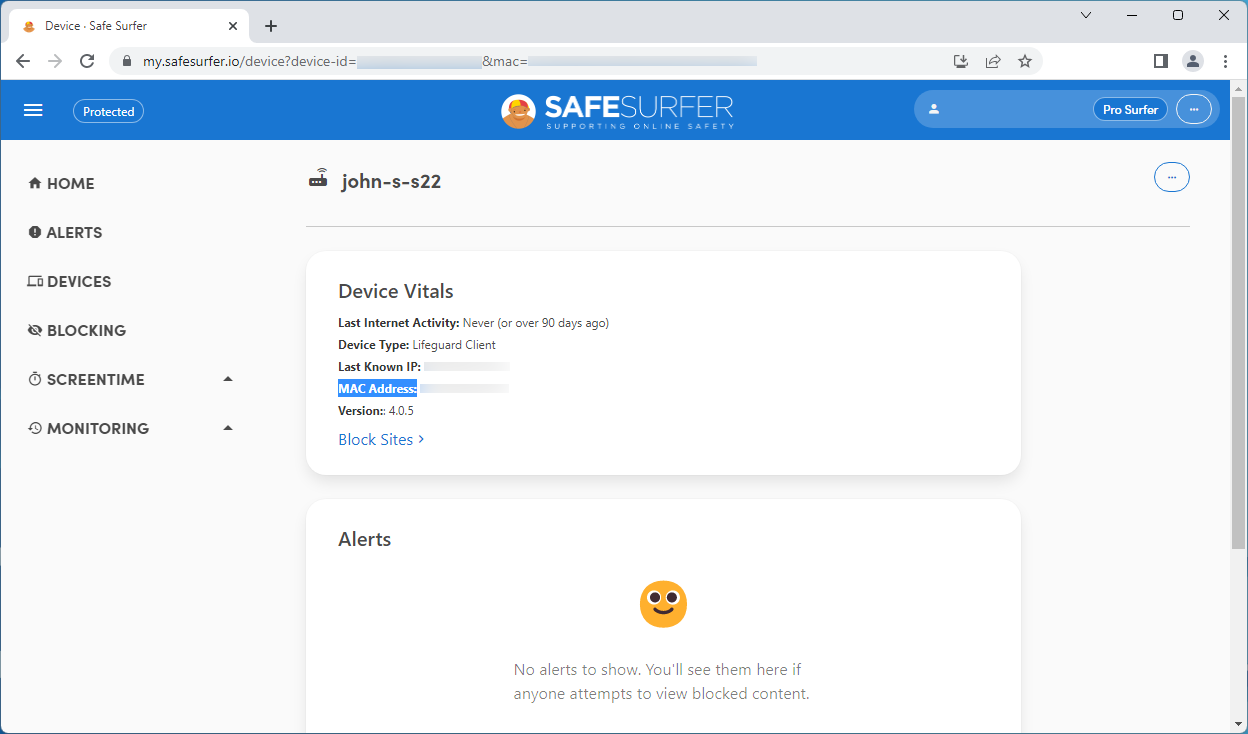
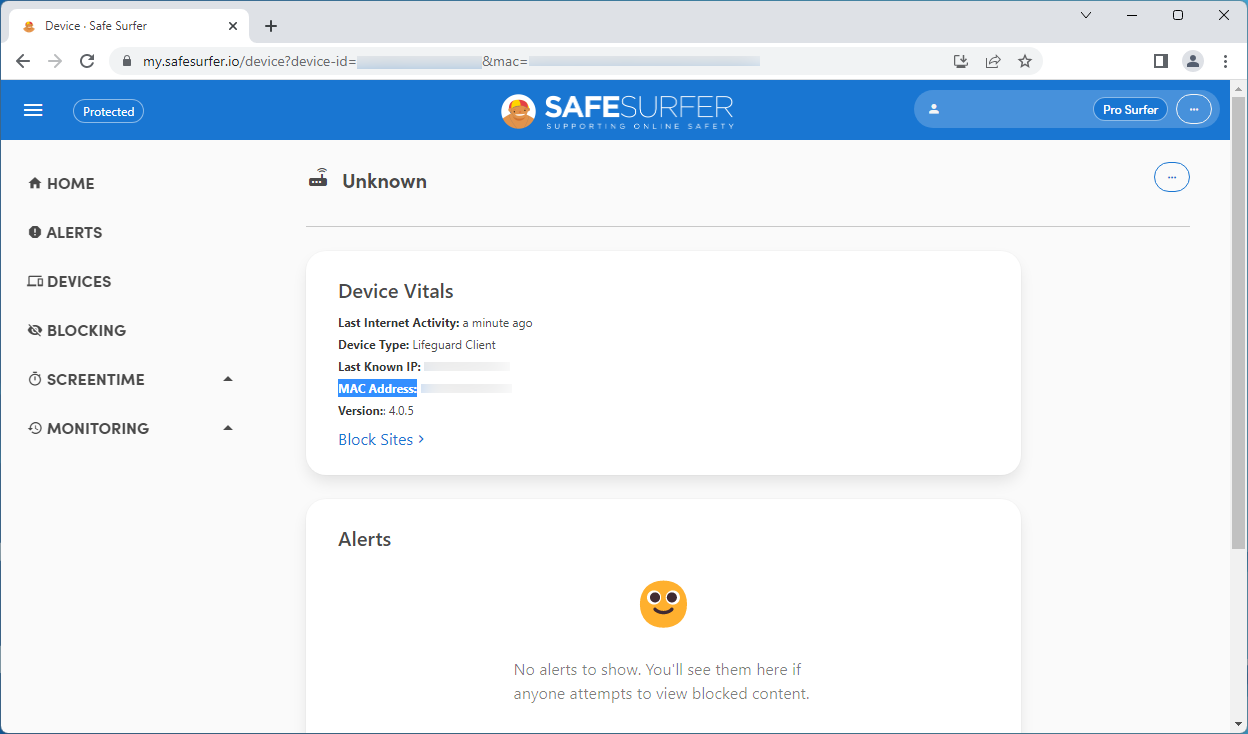
Match the MAC address of this device listing (as highlighted in the screenshot below) by going to the Settings app of a device. If the address doesn’t match, try another device.
- Android [Samsung]: Settings app > Connections > Wi-Fi > cog icon [found next to the Lifeguard network] > view more > MAC address
- iOS / iPadOS: Settings app > Wi-Fi > “i” icon [found next to the Lifeguard network] > Wi-Fi Address
- Windows 11: Start Menu > Settings > Network & internet > [select Wi-Fi or Ethernet menu, depending on what you used to connect this device to the Lifeguard] > Hardware properties > Physical address (MAC)
- Windows 10: Start Menu > Settings > Network & internet > [select Wi-Fi or Ethernet menu, depending on what you used to connect this device to the Lifeguard] > Physical address (MAC)
- macOS: System Settings > Network > [select Wi-Fi or Ethernet menu, depending on what you used to connect this device to the Lifeguard] > Advanced > [Wi-Fi/Ethernet] MAC Address
- ChromeOS (Chromebooks): Launcher [button on the left-hand side of the taskbar] > Settings > Network > Wi-Fi > Network drop-down section > MAC address
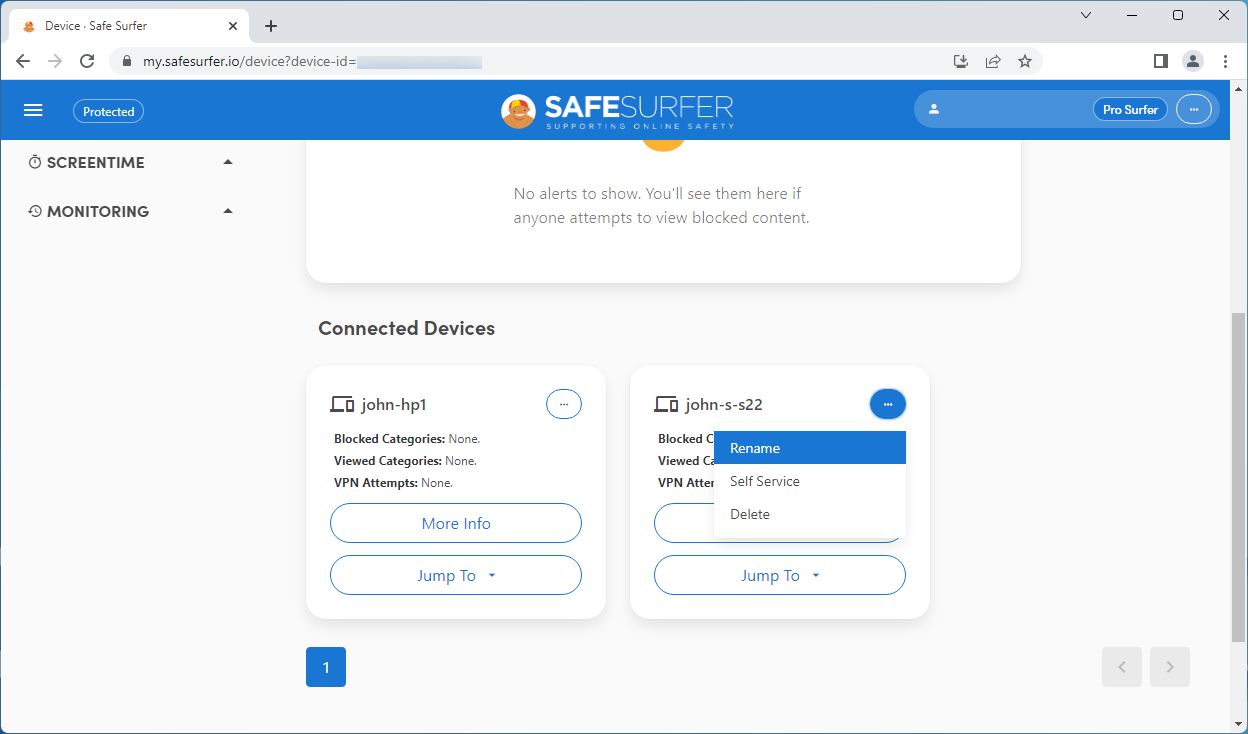
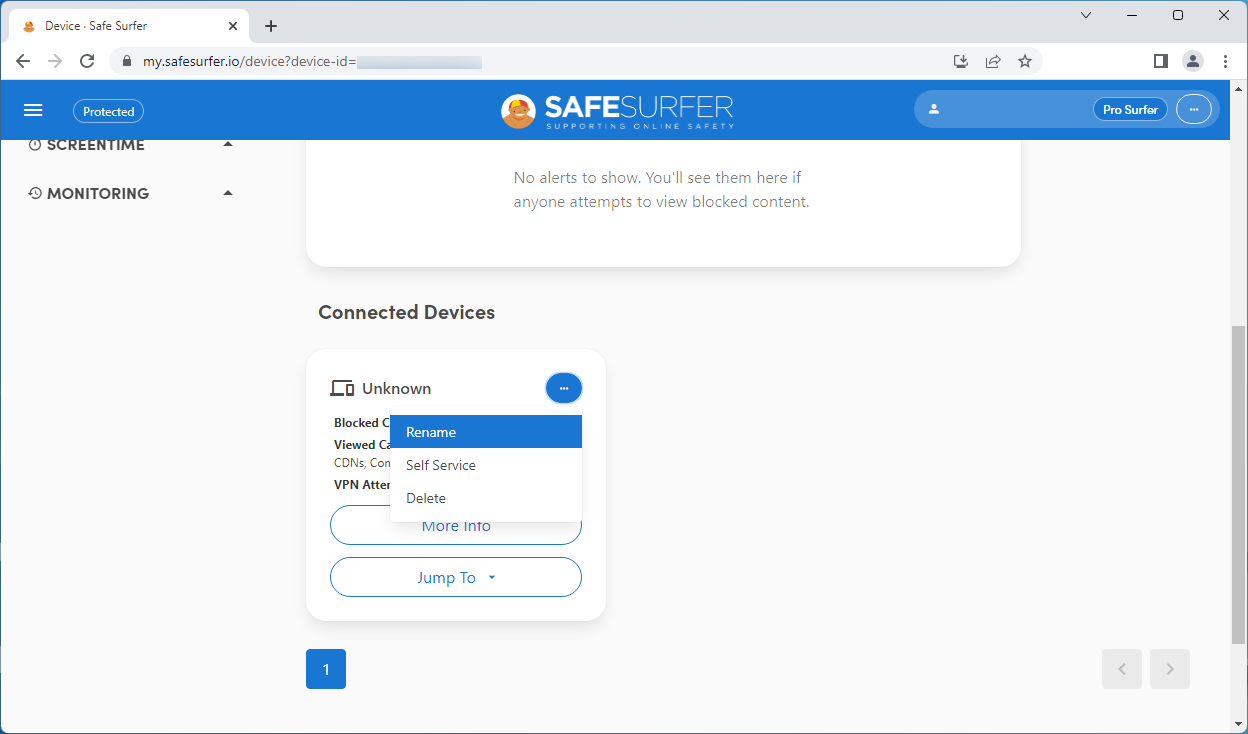
Once you’ve identified the owner of the device in question, go back a page and give the listing a friendly name. Click the three-dot button found under the respective listing, then click the Rename option.
The device listing has now been given a friendly name. Once you have connected the next device to the Lifeguard, simply refresh the page after a few seconds. After connecting a few devices, you can browse through the listings by using the navigation controls found at the bottom of the page.
Step 4: Resolve “Unknown” devices
Devices that appear as simply “Unknown” are being protected by an anti-tracking feature called Private Wi-Fi Address. This is usually the case with iPhone and iPad devices, along with some Android devices. Under the device listing in question, click the “More info” button.
Match the MAC address of this device listing (as highlighted in the screenshot below). Make sure to not turn off Private Wi-Fi Address—this will end up creating another device listing. If the address doesn’t match, try another device.
- iOS / iPadOS: Settings app > Wi-Fi > “i” icon [found next to the Lifeguard network] > Wi-Fi Address
- Android [Samsung]: Settings app > Connections > Wi-Fi > cog icon [found next to the Lifeguard network] > view more > MAC address
Once you’ve identified the owner of the device in question, go back a page and give the listing a friendly name. Click the three-dot button, then click the Rename option.
The device listing has now been given a friendly name. Once you have connected the next device to the Lifeguard, simply refresh the page after a few seconds.
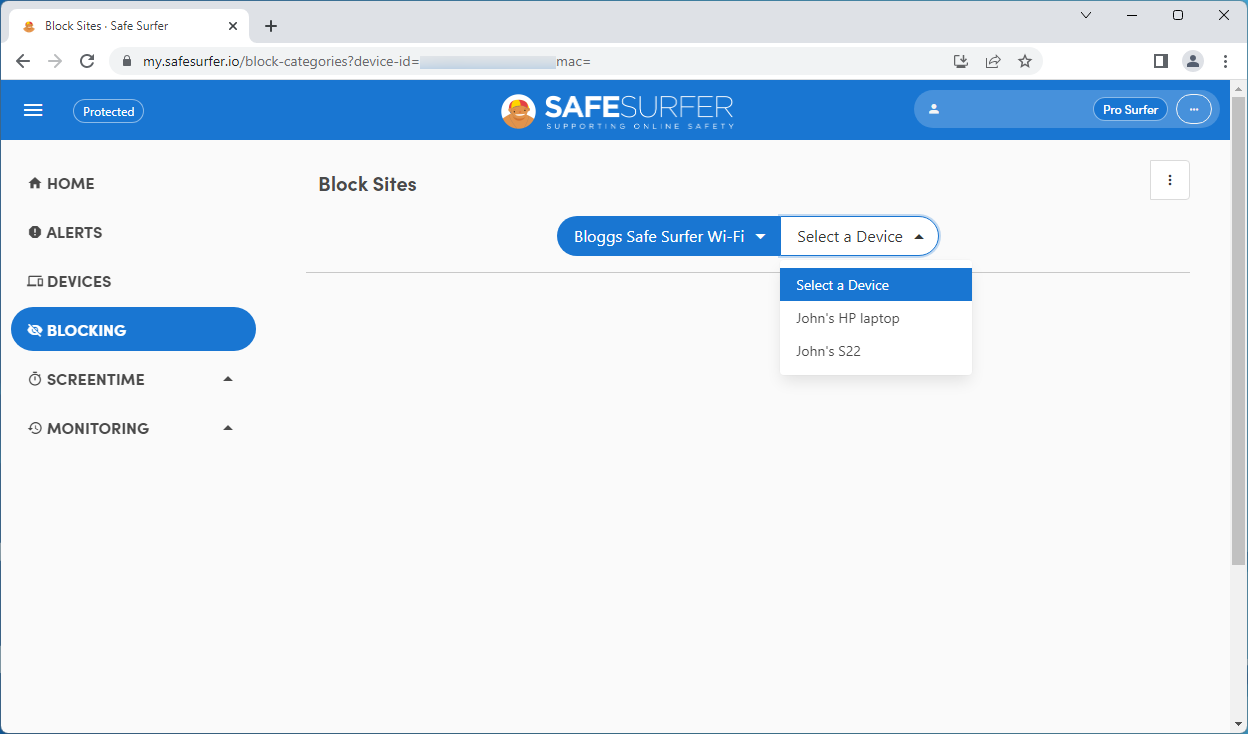
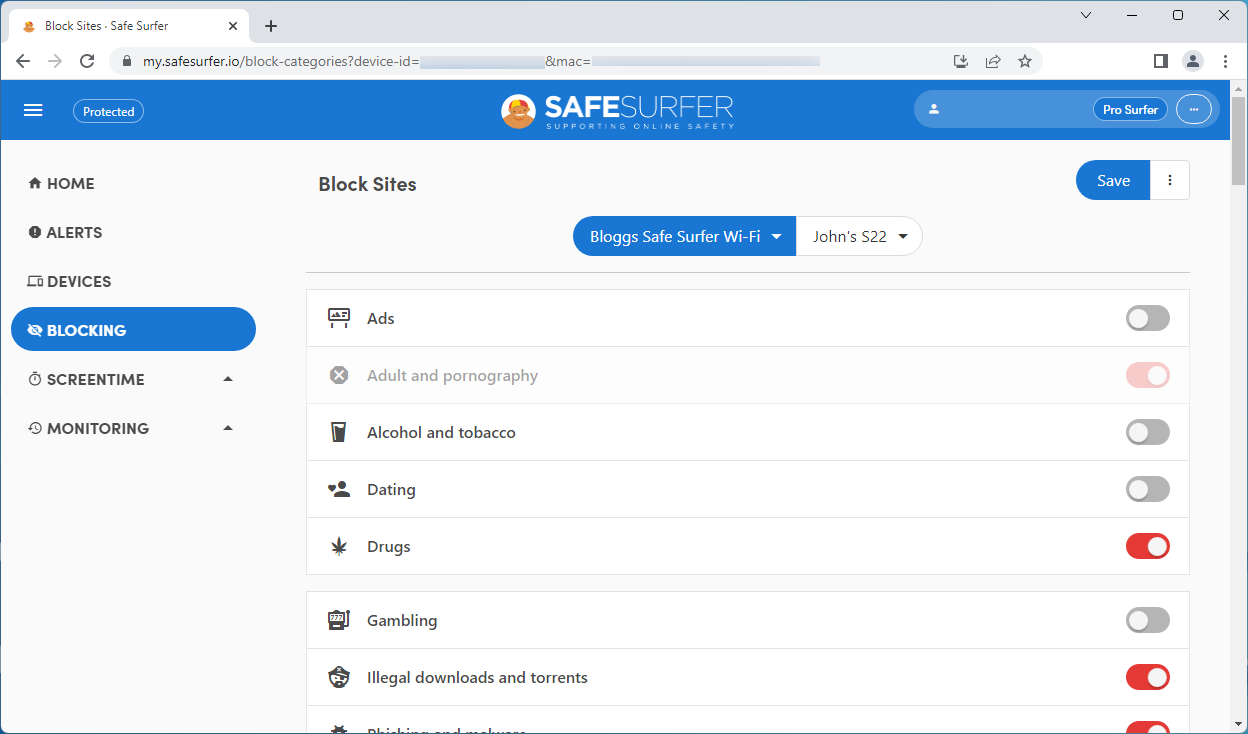
Step 5: Set up blocking
Click the Blocking menu found on the left-hand sidebar. Click the blue bubble drop-down list, then click the Lifeguard network listing. Click “Select a device”, then click a device that you would like to change the filter settings on.
Once you have finished making the changes, click the Save button at the upper-right corner. You might need to restart the device in question to immediately apply the changes.
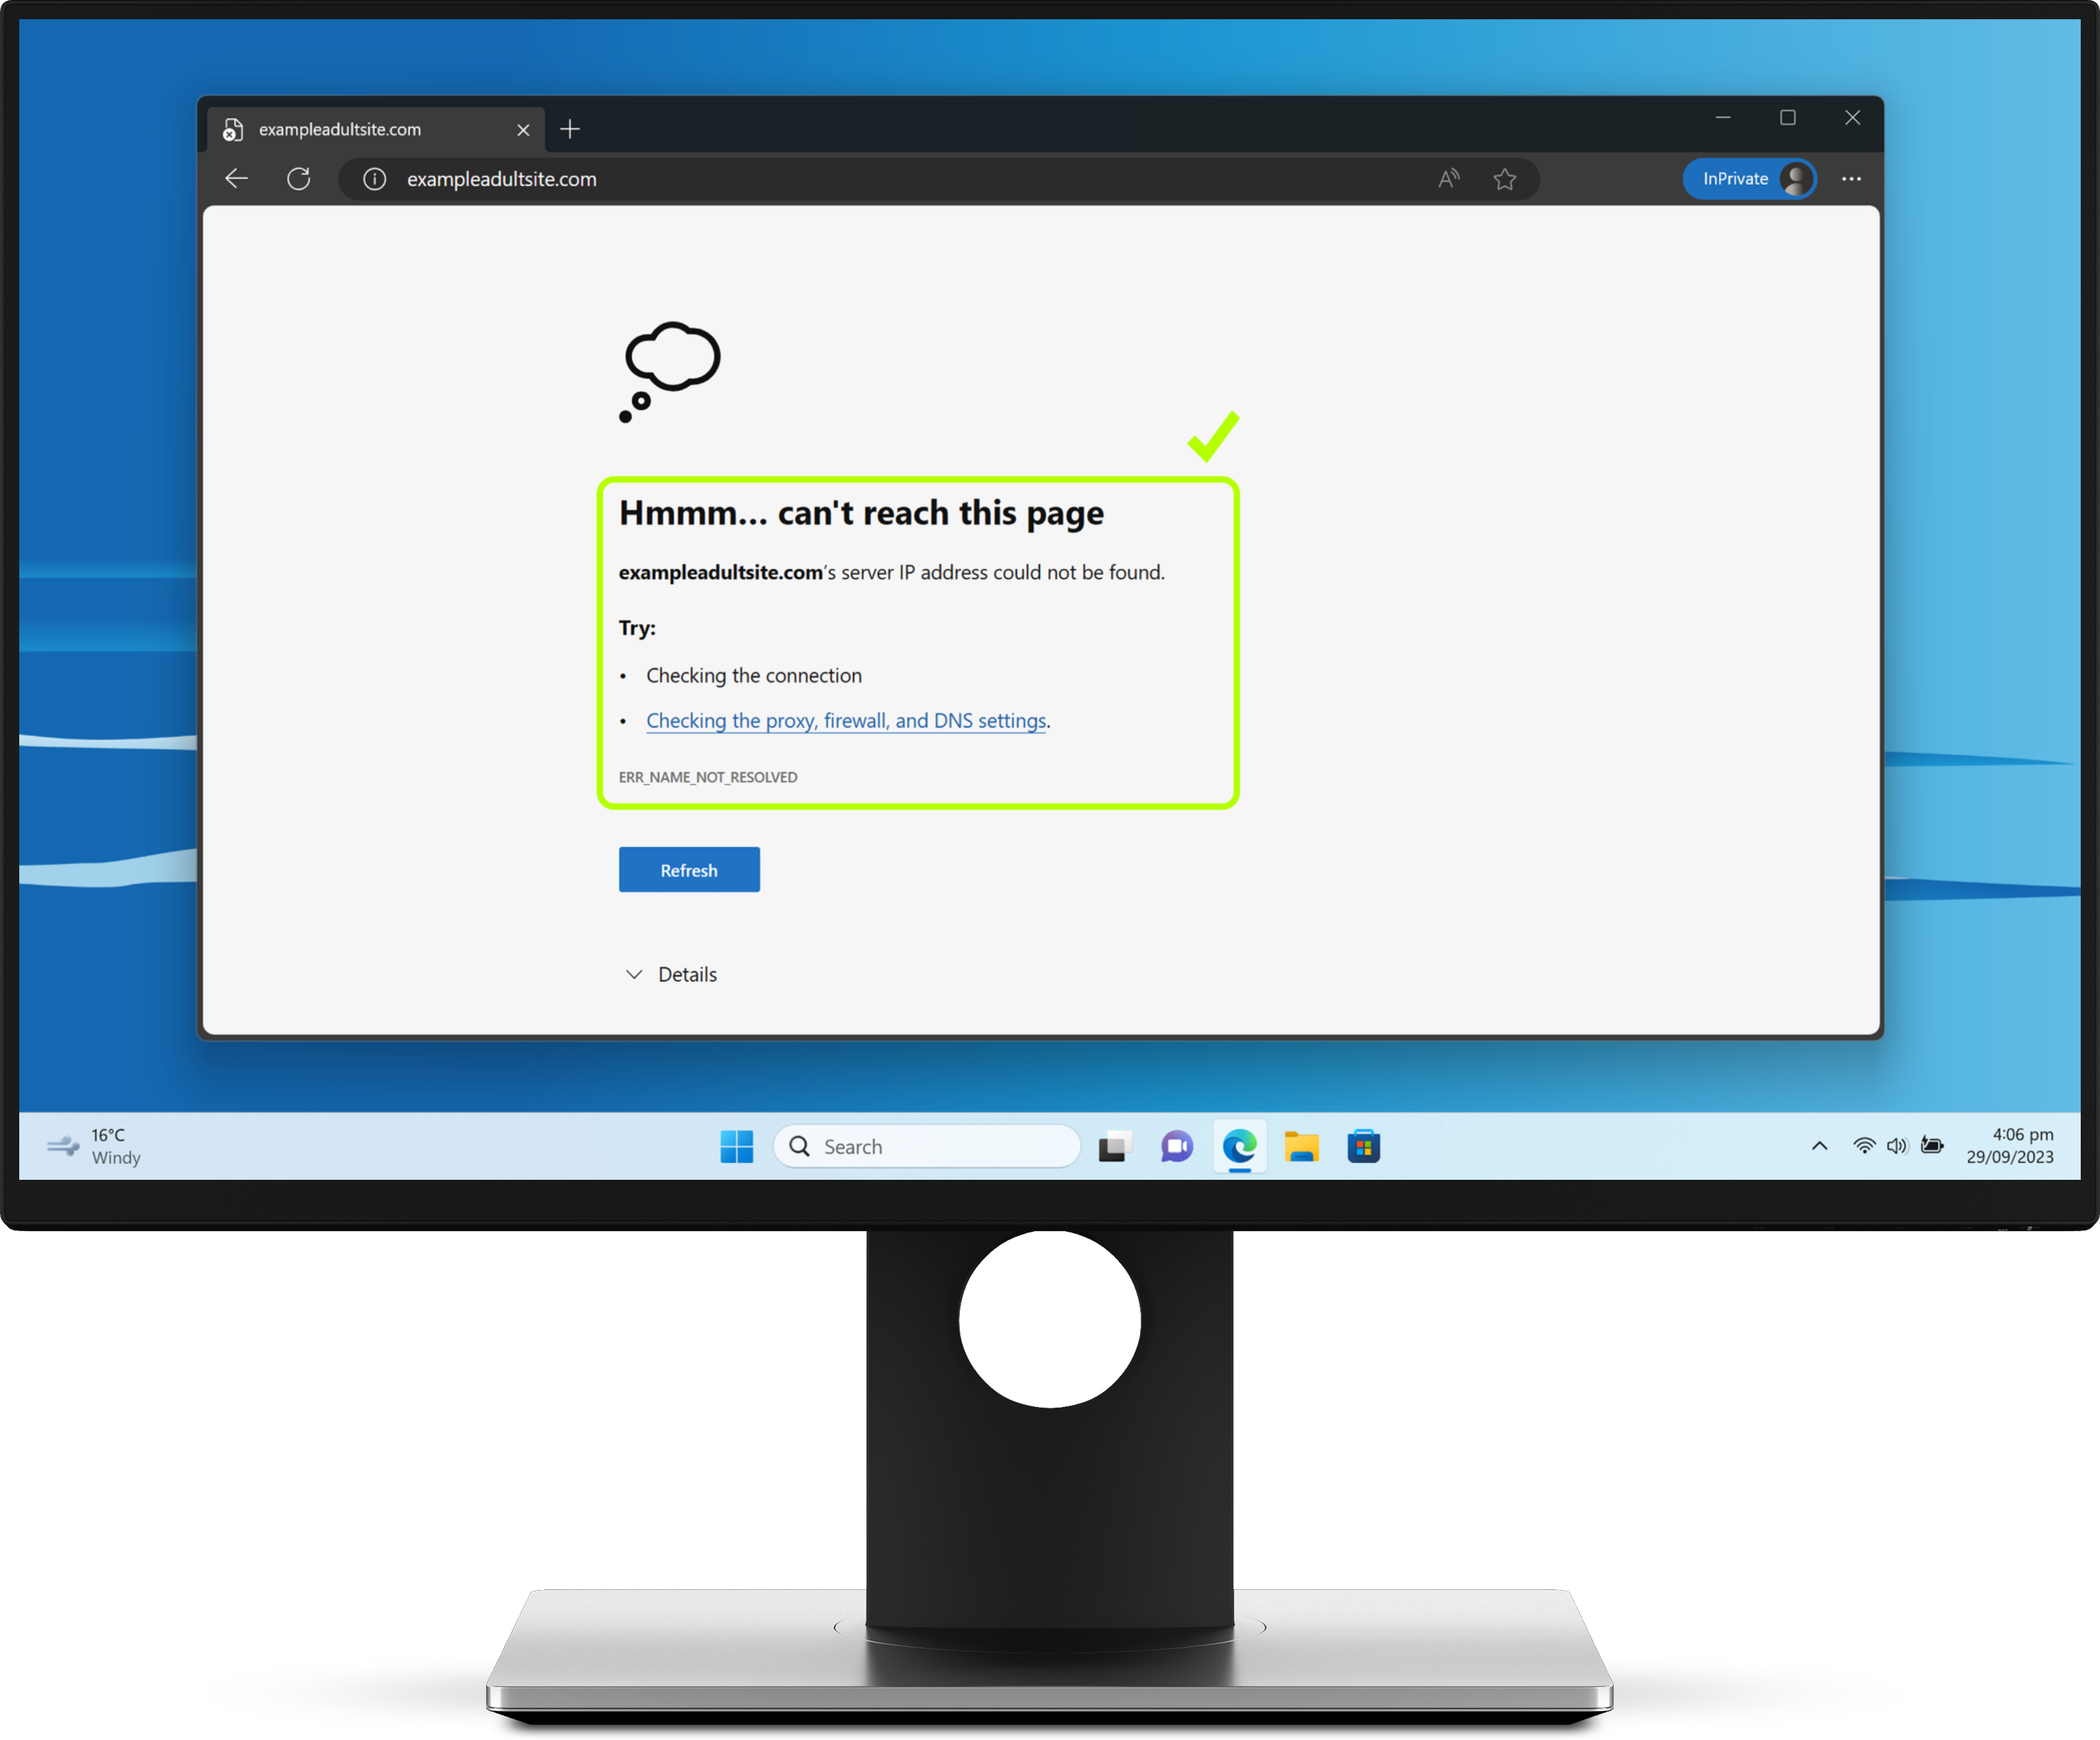
Step 6: Verify the protection installation
Verify the installation by visiting ExampleAdultSite.com inside a web browser. This is a safe website designated for testing if pornographic websites are being blocked. This site should be blocked.
Once you have finished setup, remember to “forget” the previously used Wi-Fi network:
- Android [Samsung]: Settings app > Connections > Wi-Fi > long-press the old network > Forget network
- iOS / iPadOS: Settings app > Wi-Fi > “i” icon [found next to the old network] > Forget This Network
- Windows: Start Menu > All apps > Settings > Network & internet > Wi-Fi > Manage known networks > Forget [the applicable network]
- macOS: System Preferences > Network > Wi-Fi > Advanced > [highlight the applicable network] > click the “–” icon > OK
- ChromeOS (Chromebooks): Launcher [button on the left-hand side of the taskbar] > Settings > Network > Wi-Fi > [select the applicable network] > Forget
You might like to change the password of the old Wi-Fi network (or turn off Wi-Fi broadcasting altogether) by visiting the local dashboard of your main home router. Check the online documentation from the router manufacturer (or internet service provider) for instructions on how to do this. You should be able to perform this operation while still connected to the Lifeguard network.
Step 7: Change content settings for Apple devices (iPhone, iPad, Mac)
The Private Browsing mode for the Safari app on Apple devices can ignore the protection provided by the Lifeguard. To stop this, you’ll need to turn on the following feature for each Apple device: Settings app > Screen Time > Content & Privacy Restrictions > App Store, Media, Web & Games > Web Content > set to Limit Adult Websites (which disables Private Browsing mode in Safari), then save the changes by going back to the Screen Time main menu and setting a Screen Time passcode.
If you’re not already, you will also want to connect family members to an Apple Family Sharing system (so that you can authorise the downloading of apps from the App Store—this helps avoid any potential workarounds when using a Wi-Fi filter solution). You can find out how to do this by clicking this link.
Step 8: Set up screen time
For instructions on how to setup the screen time feature, visit our screen time guide.
Step 8: Install apps for applicable devices (optional)
Due to how computer networking works, the Wi-Fi Lifeguard router cannot protect a device if it switches its internet connection to a mobile data network. In addition, tech-savvy device users might try to use either a VPN app or an anti-censorship tool (such as Tor Browser) to bypass protection. To get the best experience (particularly on mobile devices), this can be prevented by using the Safe Surfer app. You can find out how to install the Safe Surfer app on a device by clicking this link, and you can find out how we support blocking VPN apps and anti-censorship tools by clicking this link.
Protection complete
Great work! The devices connected to the Lifeguard router should now be protected. Visit our easy-to-use online dashboard to start monitoring traffic and blocking content from our premium categories with an affordable Pro Surfer subscription.
If you would like to protect a device that uses mobile data or is away from home, visit our Guides page.