Try Safe Surfer Core
Deploy your own DNS content filtering with Safe Surfer Core.
Get Started
To get the files you'll need to go through this demo yourself, contact us.
You'll get:
- The Safe Surfer Core Helm Chart.
- A login for our container registry.
If you don't want to do that, just read on to see how it works.
Contents
Creating a cluster
- AWS
- Azure
- Google Cloud Platform
- Digital Ocean
- Your Local PC
- Your own data center, and other small cloud providers.
You can skip this step if you already have a K8s (Kubernetes) cluster you want to use for the demo.
You can also configure the Safe Surfer Core DNS server on individual servers rather than K8s. A common setup for ISPs is to deploy the DNS servers within the ISP network, and the other components within K8s.
Select below for how to create a K8s cluster on the platform of your choice:
1. Create the cluster
See AWS guide.
1. Create the cluster
See Azure guide.
1. Create the cluster
See GCP guide.
1. Create the cluster
See Digital Ocean guide.
1. Create the cluster
See minikube guide.
Getting started with Helm
Helm is a package manager for Kubernetes. With it, you can configure Safe Surfer from one well-commented file, rather than thousands of lines of K8s configuration. Get it here before proceeding with the tutorial.
To check if everything is set up correctly, open a terminal in the same directory as the safe surfer chart .tgz file, and run the following:
helm template .\safesurfer-7.3.0.tgz
If everything is working correctly, you should get an error that you haven't specified the image pull secrets:
Error: execution error at (safesurfer/templates/global-validations.yaml:6:5): Image pull secrets needed
Use --debug flag to render out invalid YAML
Now that we know that Helm is working, let's extract the chart into a new directory:
tar xvf safesurfer-7.3.0.tgz
If you're on windows, you can achieve the above by "extracting here" twice using 7-zip.
You may like to initialize a source control repository at this point (e.g. git) in the current folder.
The main file that you'll be using as a reference is safesurfer/values.yaml. This contains all of the different things you can configure, as well as comments that explain what to do. Open it in your favorite text editor (Visual Studio Code works great for this).
Right at the top of the values.yaml should be this block of configuration:
imagePullSecret:
registry: registry.gitlab.com
## Should specify on CLI:
username:
password:
email:
To add the image pull secrets, let's create our own values file called my-values.yaml. This file will follow the same format as values.yaml, but the values we put in here will override those in values.yaml when we install the app.
Copy and paste the imagePullSecret above into my-values.yaml, and add the username, email, and password that you've been given. my-values.yaml should look something like this:
imagePullSecret:
registry: registry.gitlab.com
username: 'myusername'
password: 'mypassword'
email: 'user@example.com'
There are several ways to avoid putting secrets inside the folder itself (or source control), which we'll get to in a later section. To keep things easy for now, we'll put them in the file. Now we can run the following command to preview the output using our own values:
helm template ./safesurfer -f ./my-values.yaml
This should spit out a bunch of yaml that will create the default database configuration. Note that this won't work yet, we'll get on to database setup in the next section.
Creating a database
Safe Surfer Core uses Postgresql as its database. It is fast, reliable, and supported by a wide array of third-party tools and cloud providers.
There are two ways to connect Safe Surfer Core to a Postgres instance:
- Provide connection details for any database you like, such as one created on your cloud platform. This can require less management as you scale, depending on which solution you're using.
- Enable an internal database. This creates a highly-available database inside K8s using postgres operator. This is simpler as it's managed by the helm chart itself, so all your configuration is in one file. It has some limitations on platforms other than AWS. We use this in production.
1. Install postgres operator
Run the following commands to install postgres operator to the postgres-operator namespace, which will manage postgres database clusters for you. This will clone the operator to your current directory, and install the operator to a new namespace in the kubernetes cluster you're currently connected to.
git clone "https://github.com/zalando/postgres-operator"
kubectl create namespace "postgres-operator"
helm -n "postgres-operator" install postgres-operator ./postgres-operator/charts/postgres-operator
2. Wait for the operator to start
As suggested, run the following command until the postgres-operator pod is Running:
kubectl --namespace=postgres-operator get pods -l "app.kubernetes.io/name=postgres-operator"
3. Create our database
In my-values.yaml, add the following block of yaml to create the internal database and initialize the tables:
db:
inCluster:
cpuRequest: 100m
memoryRequest: 256Mi
cpuLimit: "1"
memoryLimit: 512Mi
volume:
size: 1Gi
connectionPooler:
cpuRequest: 50m
memoryRequest: 64Mi
cpuLimit: 100m
memoryLimit: 128Mi
Most of this is toning down the default resource requirements for the purposes of the demo to ensure it runs in restricted environments like minikube. For production, you'd likely want to change these back to the defaults and add a db.inCluster.volume.customStorageClass to ensure postgres gets an SSD.
To apply your new configuration, run the following Helm command:
helm install safesurfer-demo ./safesurfer -f ./my-values.yaml
This will install a new release called safesurfer-demo in your cluster. To watch the database come up, keep running the following command:
kubectl -n safesurfer-db get pods
A highly-available postgres cluster will be downloaded and started, as well as a connection pooler, then the migrations for the Safe Surfer deployment will run. Once that's all done, there should be 4 Running safesurfer-db or safesurfer-db-pooler pods, and one Completed migrations pod.
1. Create a database server (optional)
You can connect Safe Surfer to any Postgres server. If you already have a Postgres server you'd like to use, you can skip this step.
Popular options for a managed Postgres cluster are RDS for Postgresql on AWS, Azure Database for PostgreSQL, AllowDB or Cloud SQL on Google Cloud, or Databases for Digital Ocean. Ensure that your Kubernetes cluster can connect to your new database. For example:
- Give it an internal IP address in the same network as your Kubernetes cluster, or an internal IP accessible from your Kubernetes cluster.
- Create a private Kubernetes cluster and whitelist its external IP on your database server.
The exact steps here will differ depending on your setup. If you're looking for an easier/more consistent setup, try the "Internal database" option above.
2. Create a database
Log on to your database server (methods vary) and create a new database and user by running the following SQL commands:
CREATE DATABASE safesurfer;
CREATE USER safesurfer WITH PASSWORD 'mypassword';
GRANT ALL PRIVILEGES ON DATABASE safesurfer TO safesurfer;
You'll want to update mypassword to be something more secure.
3. Connect to the database
In my-values.yaml, add the following block of yaml to connect to the external database and initialize the tables, updating the connection parameters to be your database server:
db:
inCluster:
enabled: false
external:
enabled: true
pguser: safesurfer
pgpassword: mypassword
pghost: 127.0.0.1
pgdb: safesurfer
pgsslmode: require
To apply your new configuration, run the following Helm command:
helm install safesurfer-demo ./safesurfer -f ./my-values.yaml
This will install a new release called safesurfer-demo in your cluster. To watch the database come up, keep running the following command:
kubectl -n safesurfer-db get pods
Once successful, you'll see one Completed migrations pod.
Running the admin app
The admin app is an easy way to manage domains and categories for DNS filtering, as well as users, IPs, and others.
1. Enable the admin app
To enable it, add the following block to my-values.yaml:
categorizer:
adminApp:
enabled: true
admin:
username: Admin
password: mypassword
redis:
enabled: true
You may wish to change the password "mypassword" to something more secure.
To apply the change, run the following Helm command:
helm upgrade safesurfer-demo ./safesurfer -f ./my-values.yaml
To check if the admin app is up yet, run the following command:
kubectl -n categorizer get pods
There should be 1 Running admin-app pod.
The admin app also requires Redis for some functionality. To check if it's running, run the following command:
kubectl -n redis get pods
There should be 1 Running redis pod.
2. Access the admin app
To access the admin app, you can either use port forwarding or enable the ingress. Port forwarding is a feature of kubectl, the Kubernetes CLI, and requires access to the cluster. This is good for testing, but can be a security concern as you'd have to give someone cluster access for them to manage domain classifications or do other tasks within the admin app.
Enabling the ingress makes the admin app accessible over the internet, password-protected using the credentials you provided earlier.
If you're using minikube (which is only intended for testing), then port forwarding is the only option.
Run the following command to access the admin app locally:
kubectl -n categorizer port-forward svc/admin-app 8080
While that command is still running, you can view the admin app by opening your web browser to http://localhost:8080 and entering the credentials you provided earlier.
To create an ingress that will allow accessing the admin app, and eventually other apps, from the internet, we'll need to install two things:
To install nginx ingress, run the following set of commands. This will add a new helm repository, update all helm repositories, and install nginx ingress in the cluster under a new namespace. If you're using an existing cluster, you might already have this installed and can skip this step.
helm repo add "ingress-nginx" "https://kubernetes.github.io/ingress-nginx"
helm repo update
kubectl apply -f "./setup-files/nginx/manifests/namespace.yaml"
helm install "nginx-ingress-1" "ingress-nginx/ingress-nginx" --namespace "nginx-ingress" -f "./setup-files/nginx/values.yaml"
To check if nginx ingress is running yet, run the following:
kubectl -n nginx-ingress get pods
You should see a few Running nginx-ingress pods. Nginx will proxy requests to your apps, handle TLS/SSL, enforce rate-limiting, among other things. To change how it's set up, have a look at the ./setup-files/nginx/values.yaml file. To see all possible Nginx values, run helm show values ingress-nginx/ingress-nginx.
The Nginx chart will have also created a load balancer service for you, with an external IP. This external IP will be the entry point for any apps that we create ingresses for in this cluster. To see it, run the following command:
kubectl -n nginx-ingress get svc
It should be listed under the EXTERNAL-IP column. It may take a few minutes to show up.
To finish making the admin app publicly accessible, you'll need to add a DNS record pointing to the EXTERNAL-IP. To make things easier in the future, we can host all the apps in this cluster under one subdomain, e.g. *.safesurfer-demo.example.com. Add a wildcard record by deciding on a similar subdomain and adding a DNS record for it.
After adding a DNS record and waiting for a minute, you should be able to access your nginx instance by going to your domain, e.g. admin.safesurfer-demo.example.com.
However, HTTPS will be broken and the admin app isn't connected yet. Let's fix that now by installing Cert Manager!
To install Cert Manager, run the following command:
kubectl apply -f https://github.com/cert-manager/cert-manager/releases/download/v1.9.1/cert-manager.yaml
To check whether Cert Manager is running yet, run the following command:
kubectl -n cert-manager get pods
Once it's started, you should see 3 Running pods:
- A cert-manager.
- A cert-manager-cainjector.
- A cert-manager-webhook.
Now we're ready to connect the admin app and generate a certificate. Modify the categorizer config block to look like the following:
categorizer:
adminApp:
enabled: true
admin:
username: Admin
password: mypassword
ingress:
enabled: true
host: admin.safesurfer-demo.example.com
Replace admin.safesurfer-demo.example.com with the actual domain you added earlier. If you added a wildcard DNS record like *.safesurfer-demo.example.com, you can replace the * with any valid name in my-values.yaml. Deploy the change and wait for the certificate to become valid:
helm upgrade safesurfer-demo ./safesurfer -f ./my-values.yaml
kubectl -n categorizer get cert
After a few minutes, the certificate should become valid and you should be able to access the admin app using HTTPS. There's no need to restart the ingress.
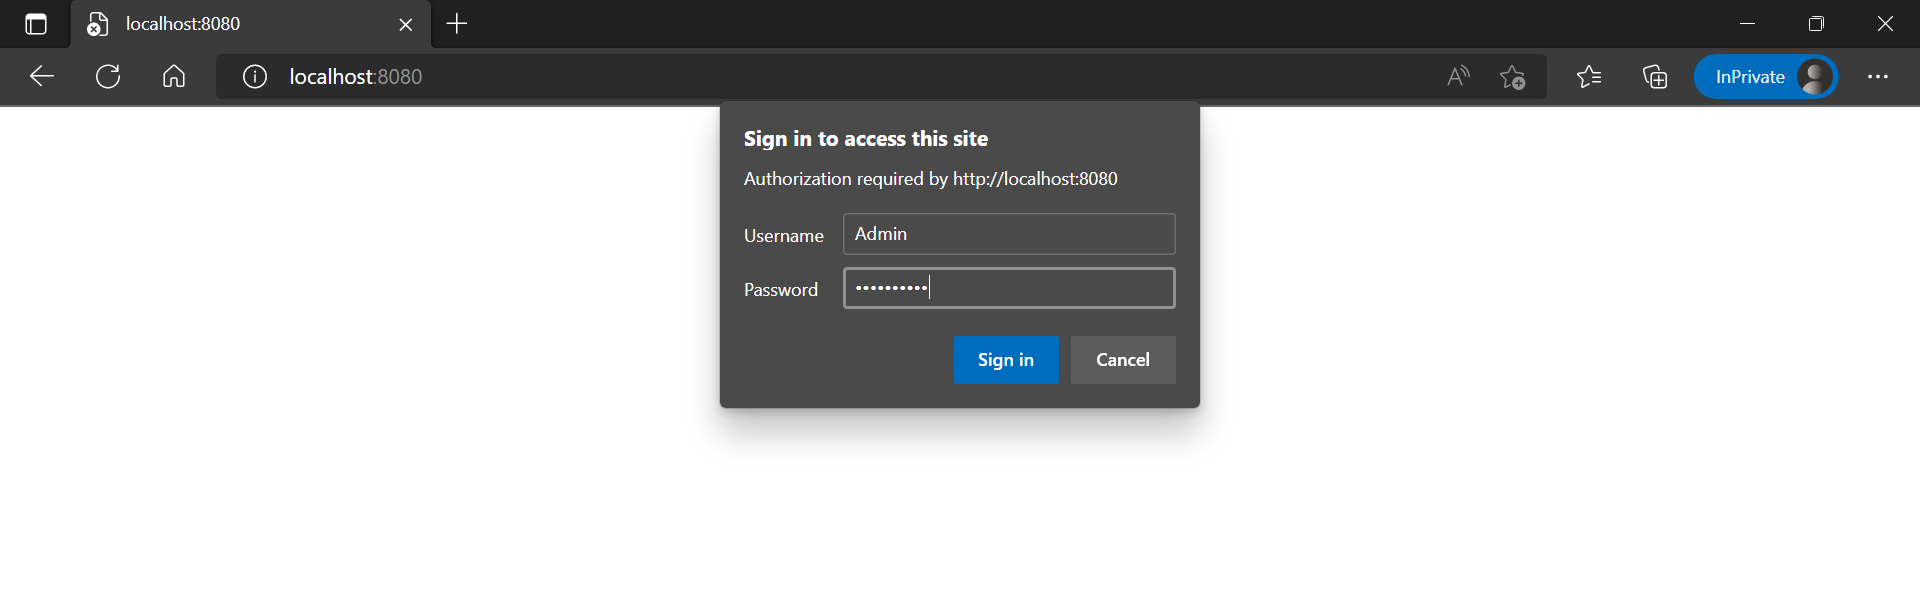
However, you decide to access the admin app, you'll need to enter the credentials you provided earlier to access it:
After that, you should be presented with the main screen, which is for searching for domains. Of course, we don't have any domains yet. Head to the Categories menu instead.
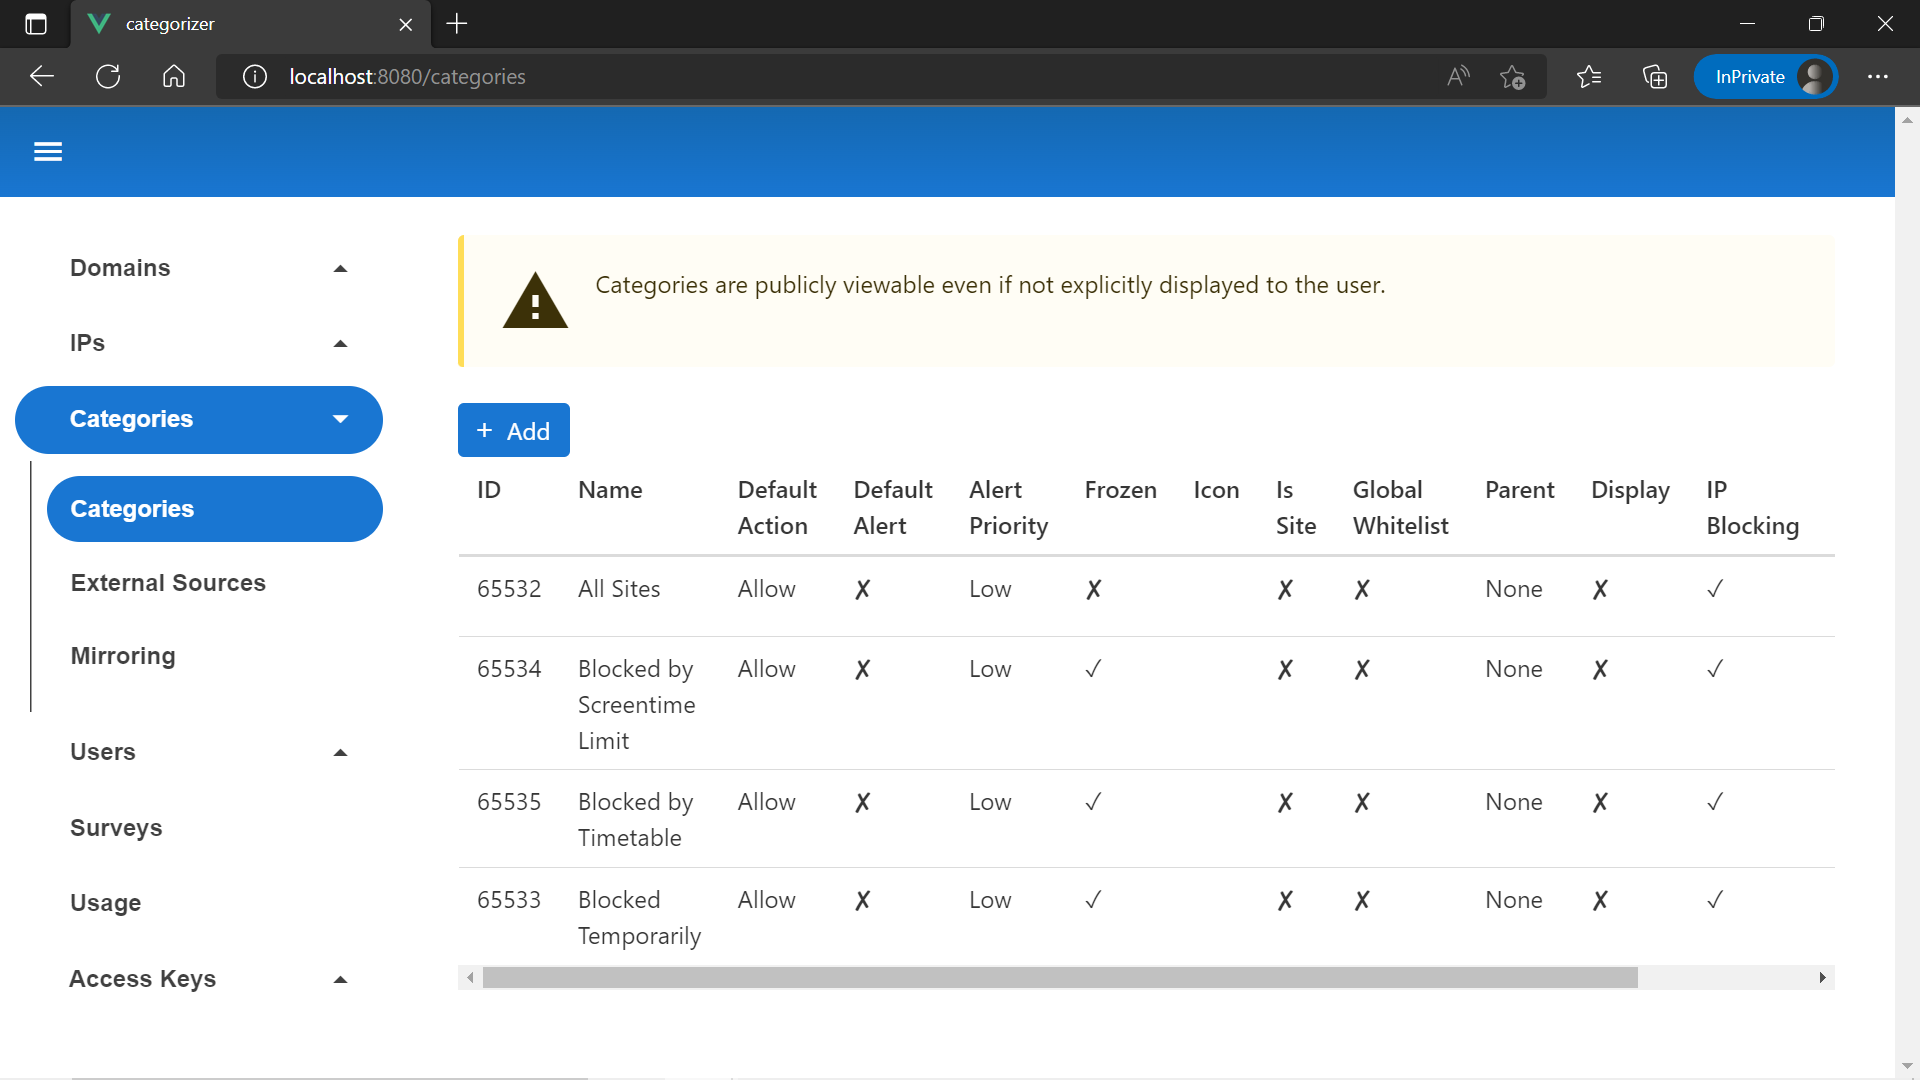
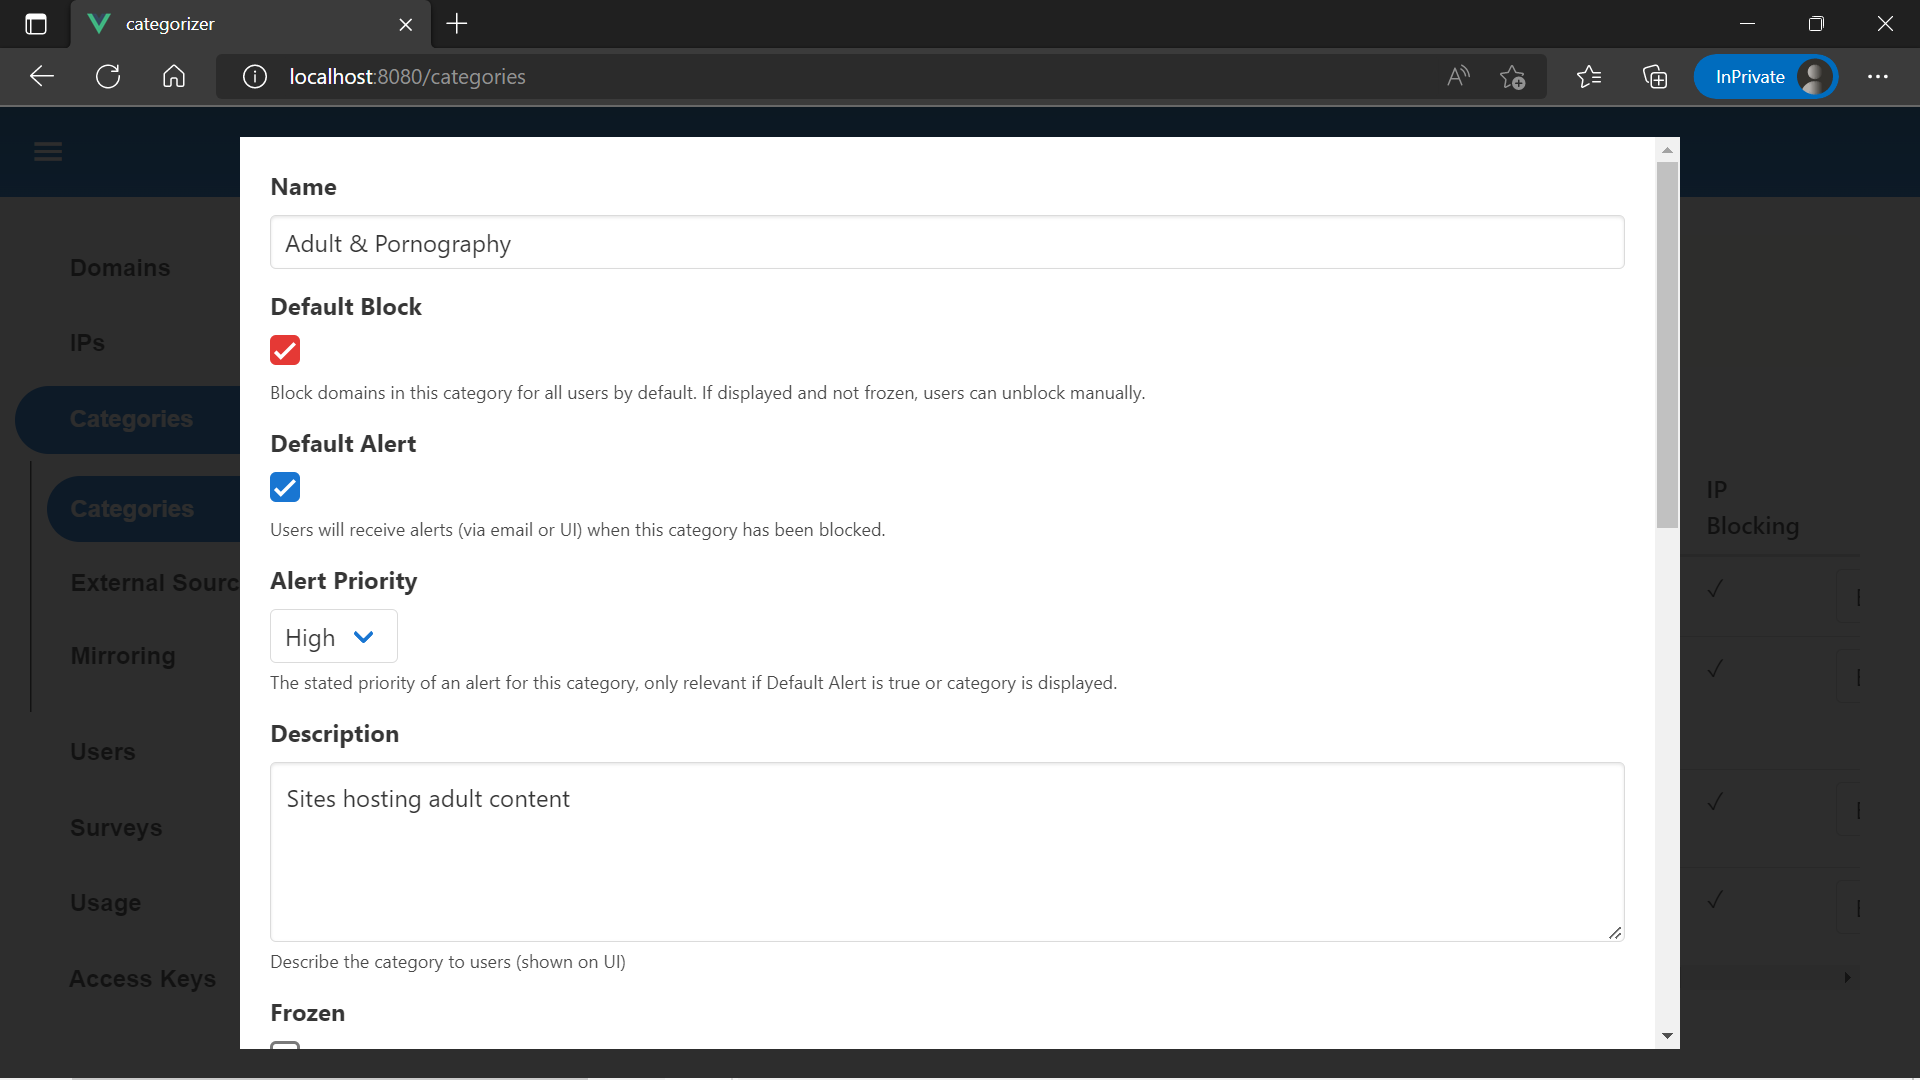
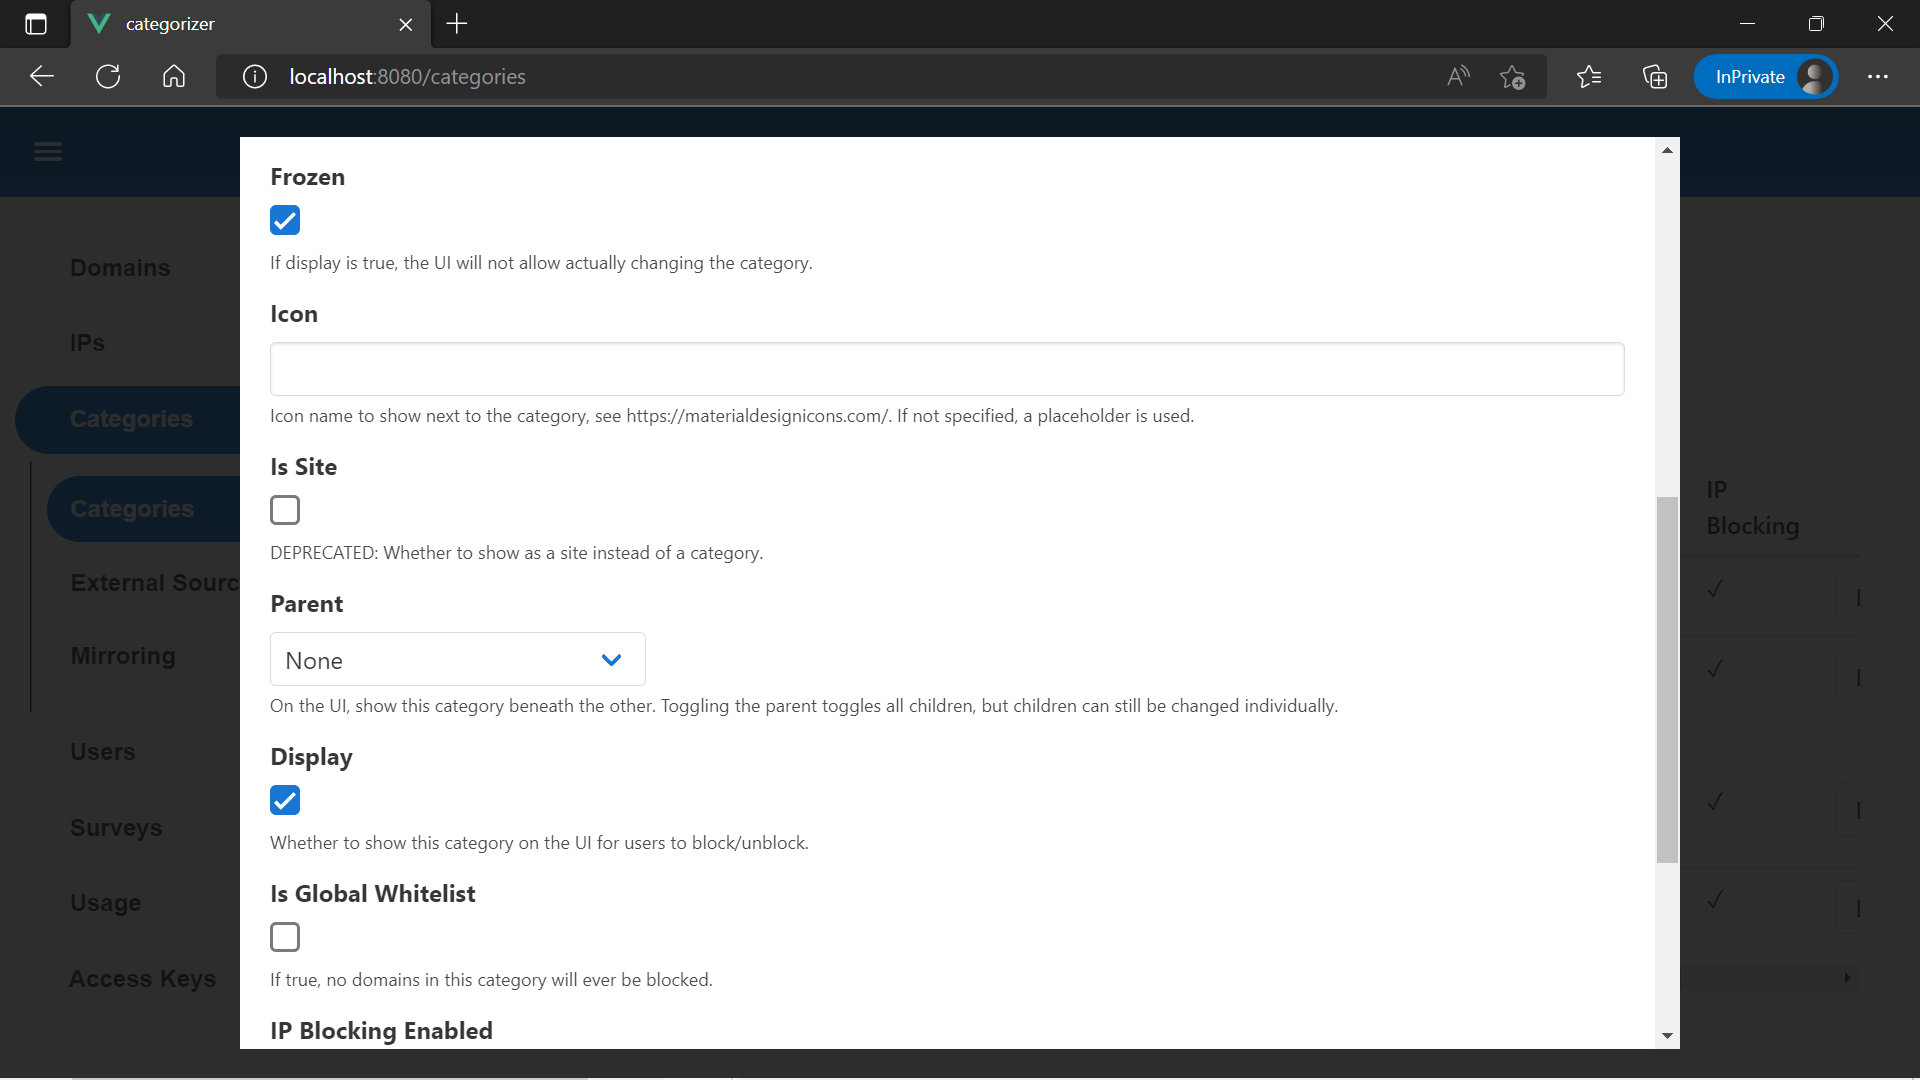
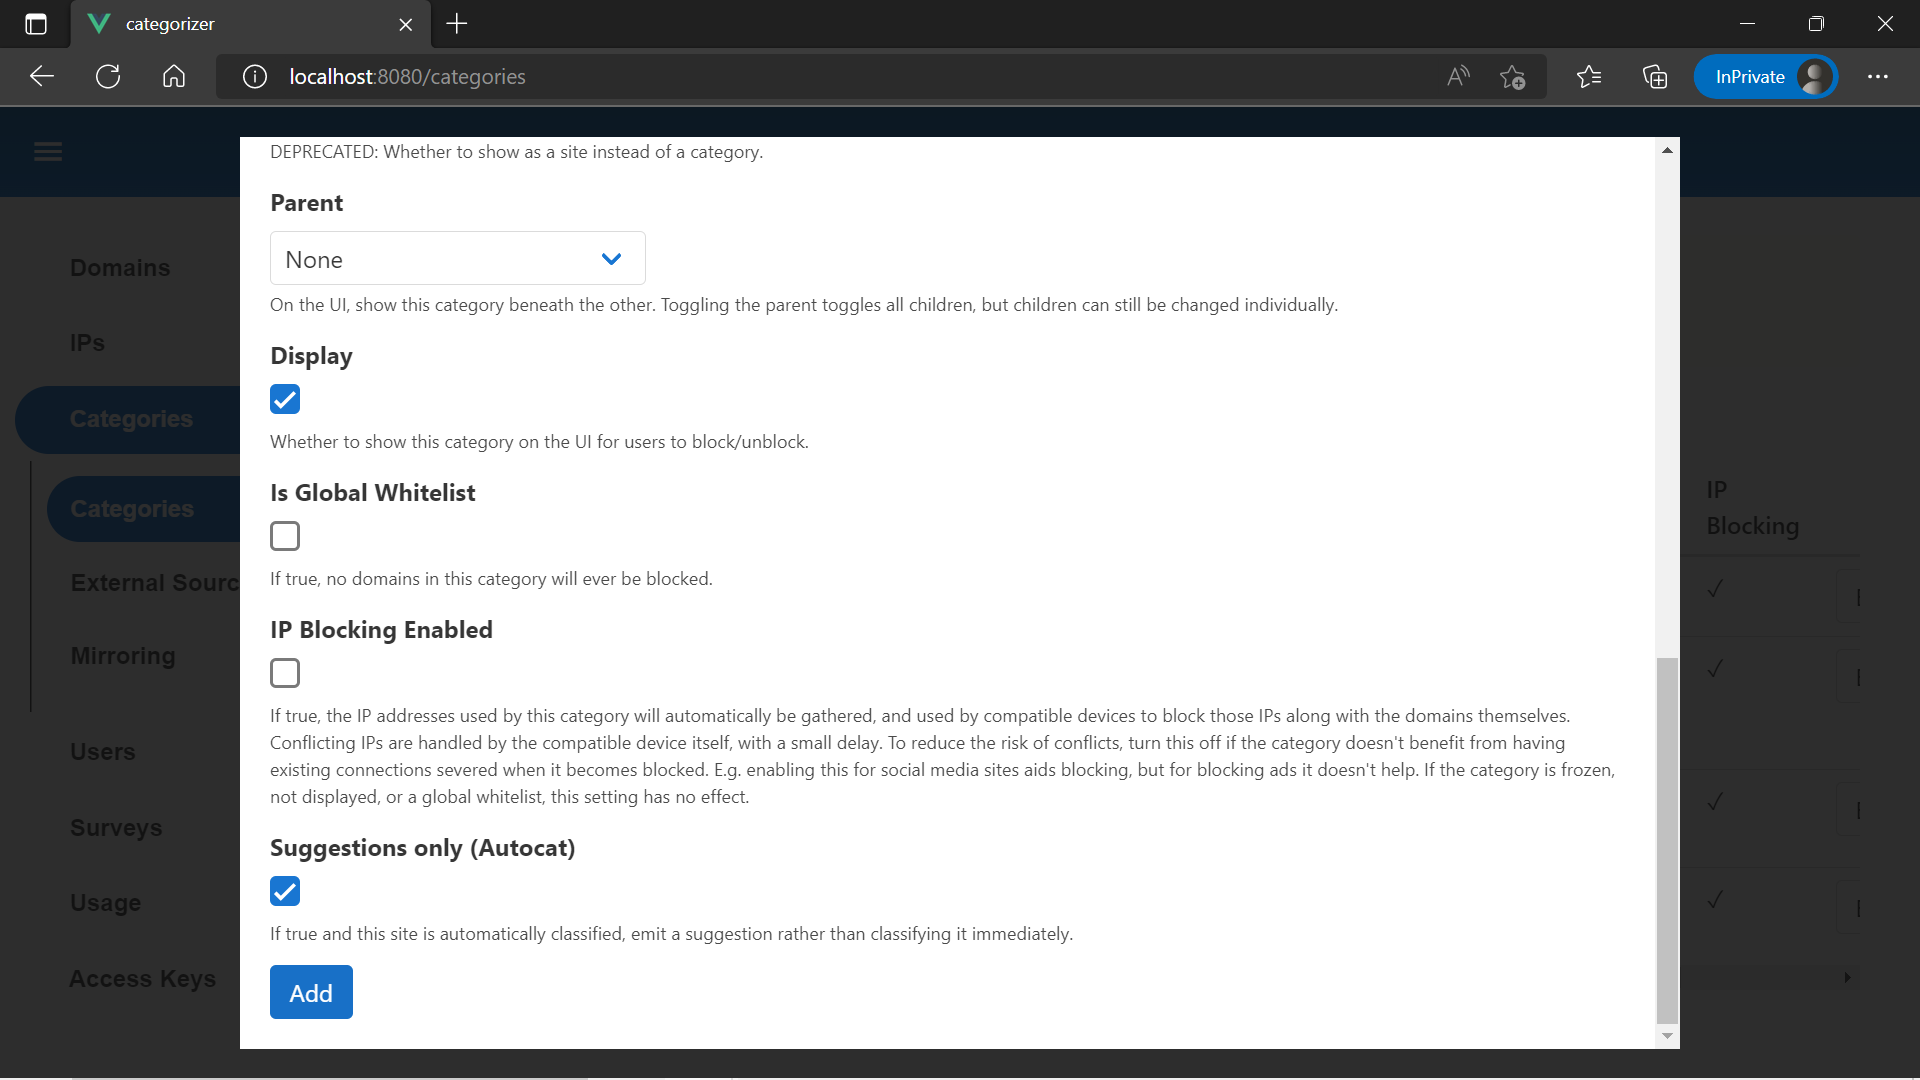
The categories you see initially are used to implement screentime rules, and cannot be edited. Hit "Add" up the top. Adding a category will let us add domains to it, block or unblock those domains for all users, or display it on the user dashboard.