It’s easy with Safe Surfer to install an effective porn blocker on an iPhone, iPad, or iPod device. Along with protecting your privacy, we also use our behind-the-scenes technology to block porn and other harmful online content. Let’s get started with installing protection.
Pro tip: you can find the latest version of this guide on our help desk by clicking this link.
Step 1: Install protection
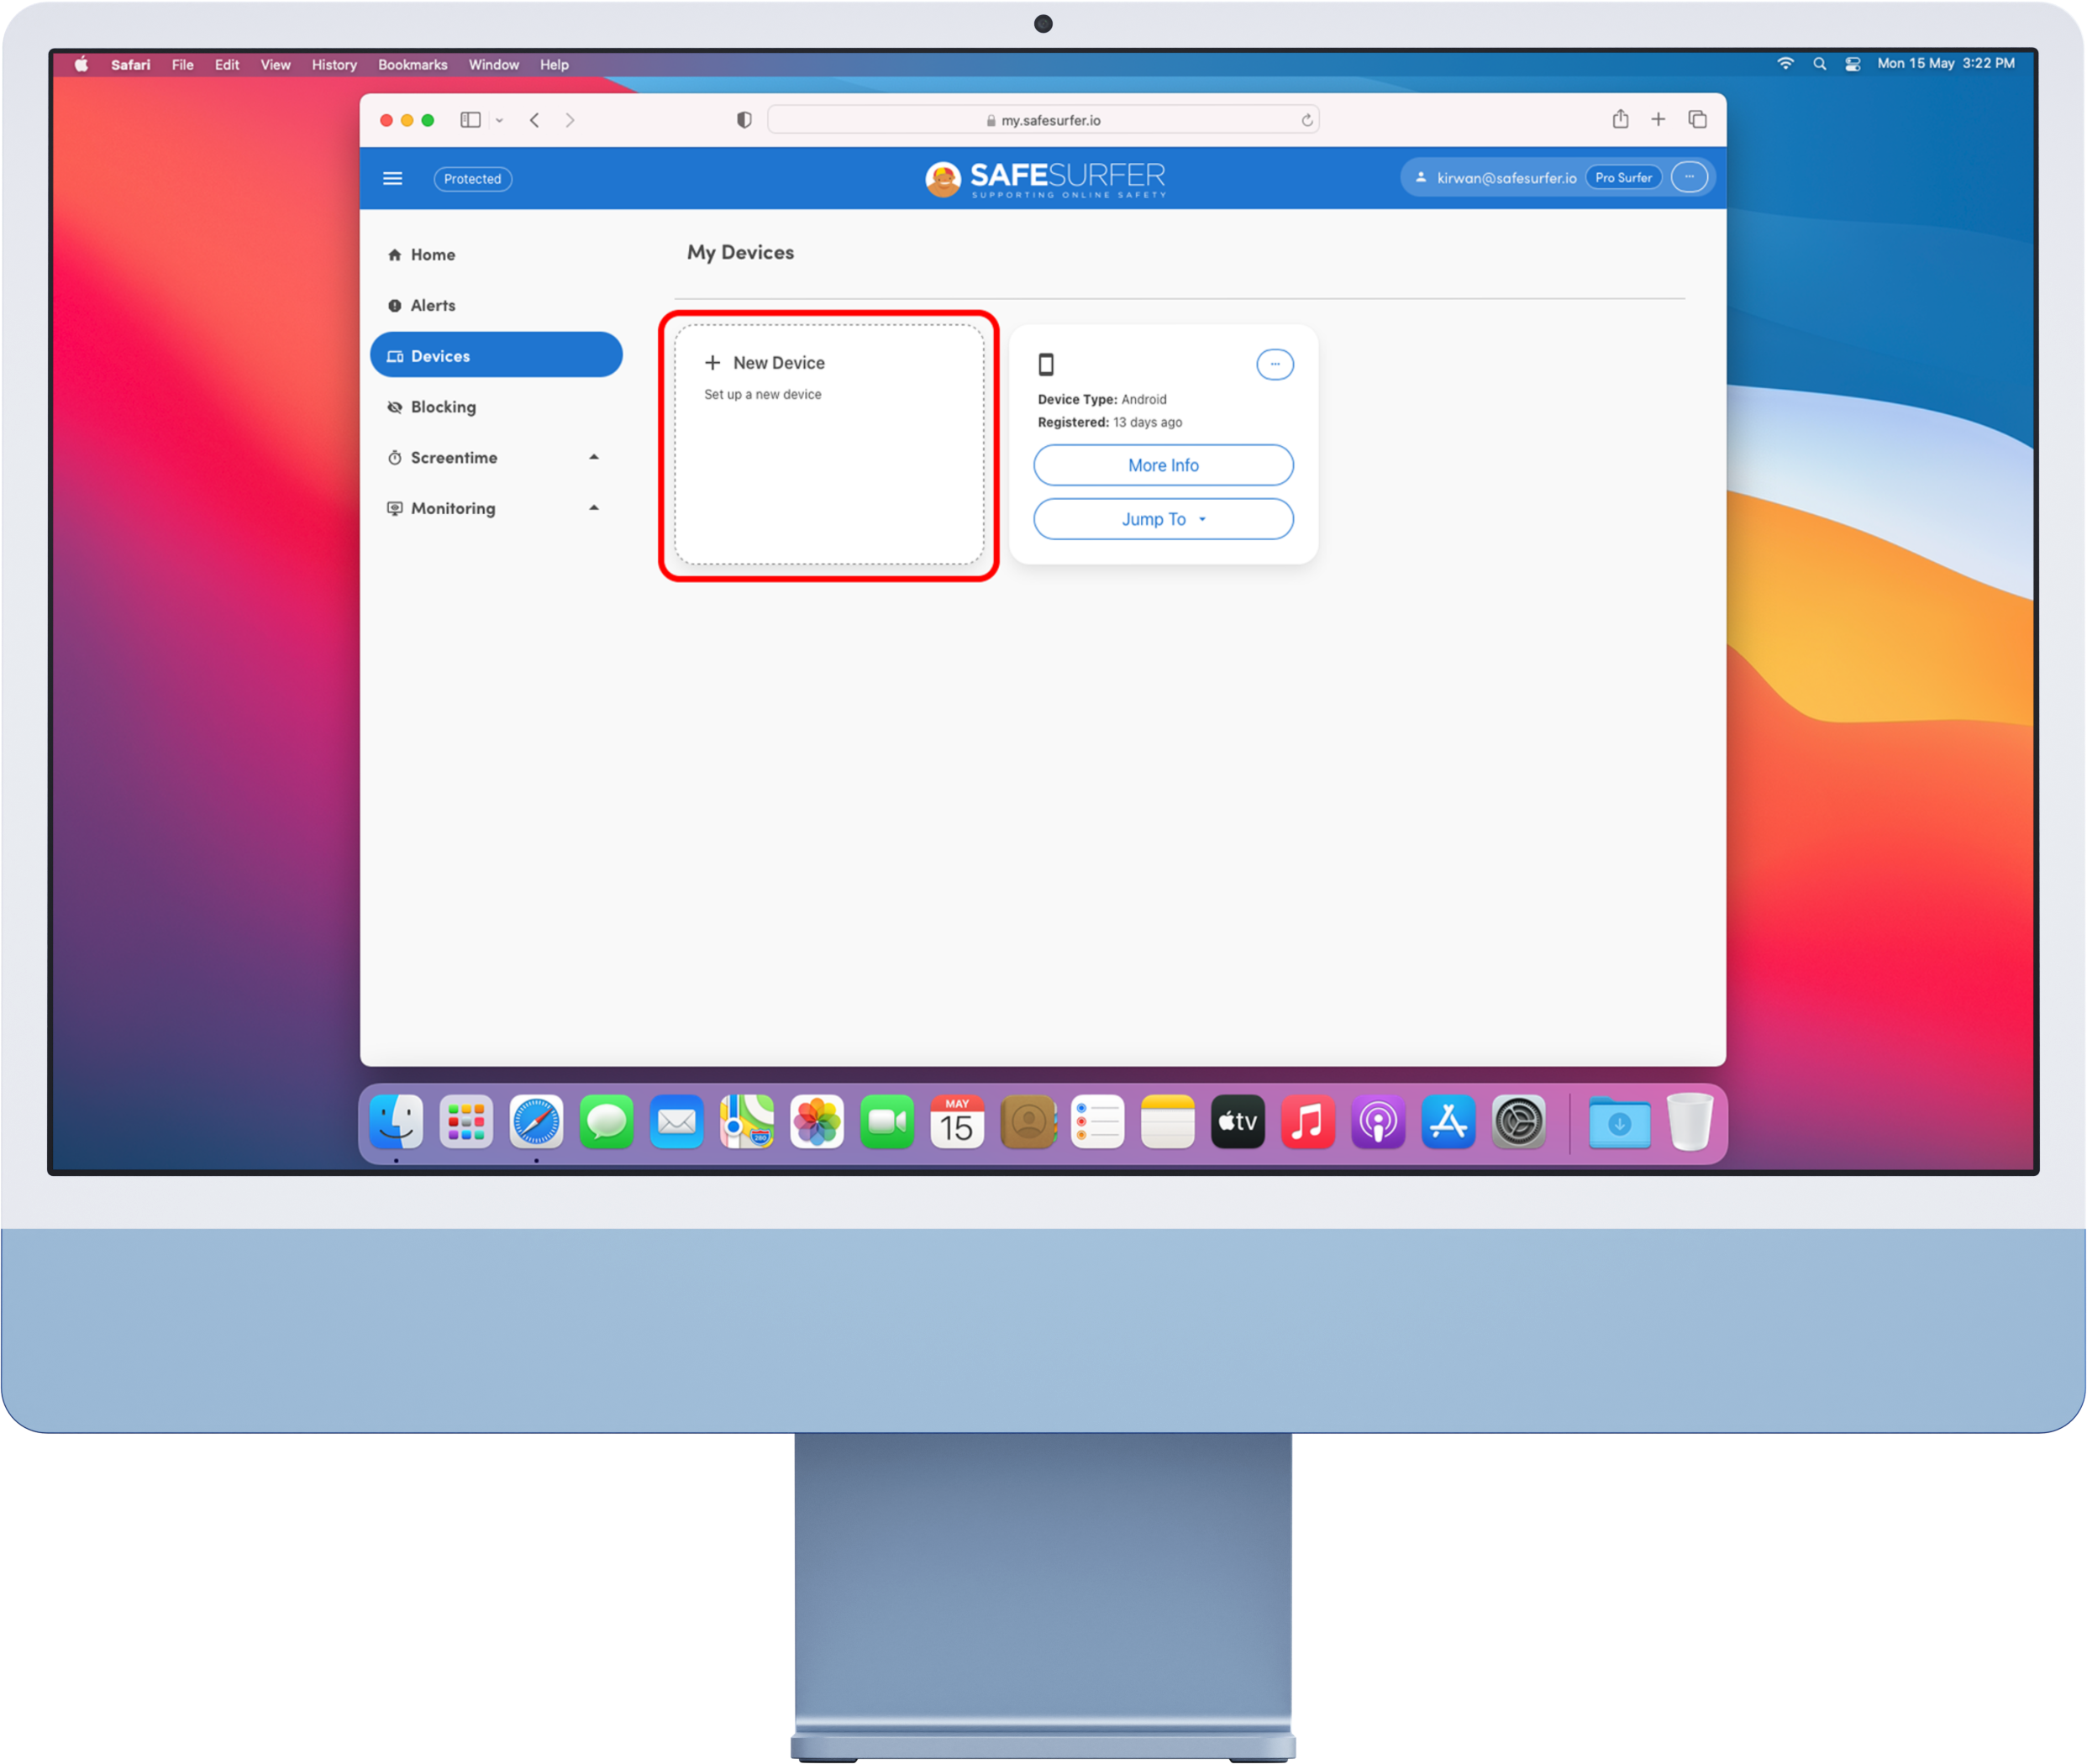
Visit the Safe Surfer dashboard on a personal computer and log in to your account. Click the Devices menu on the left-hand sidebar. Click the “+ New Device” button.
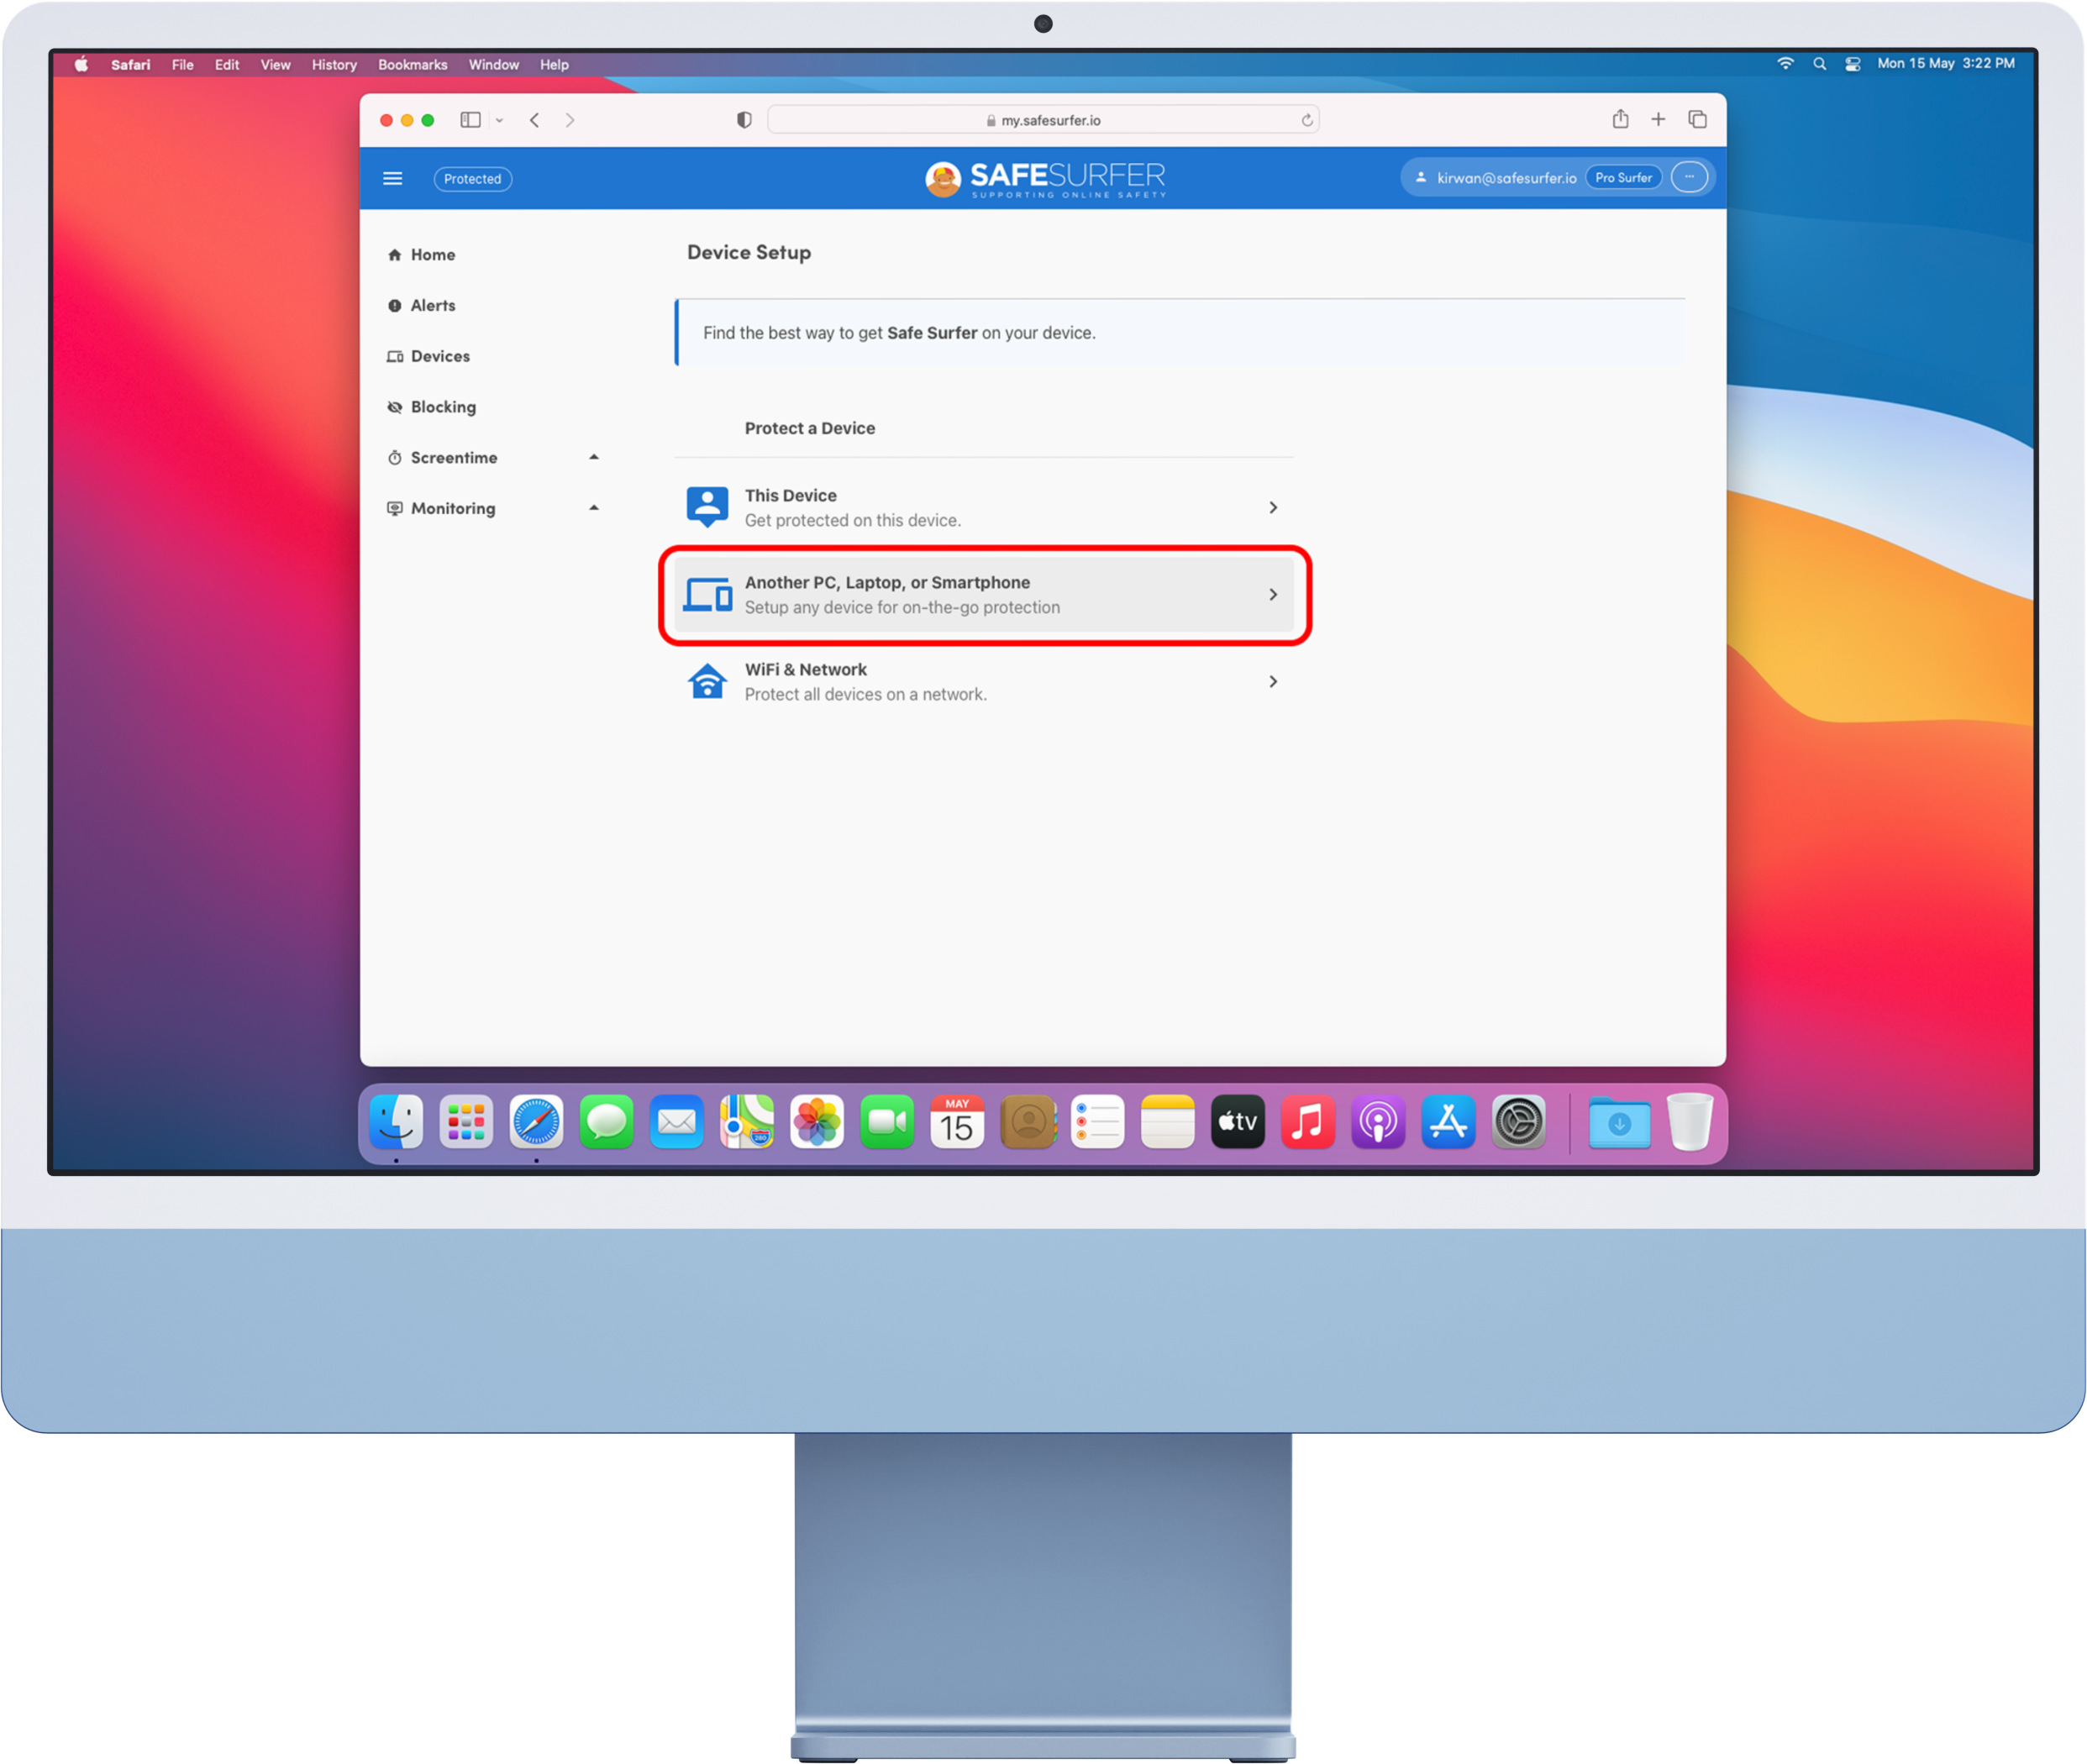
Click “Another PC, laptop, or smartphone”.
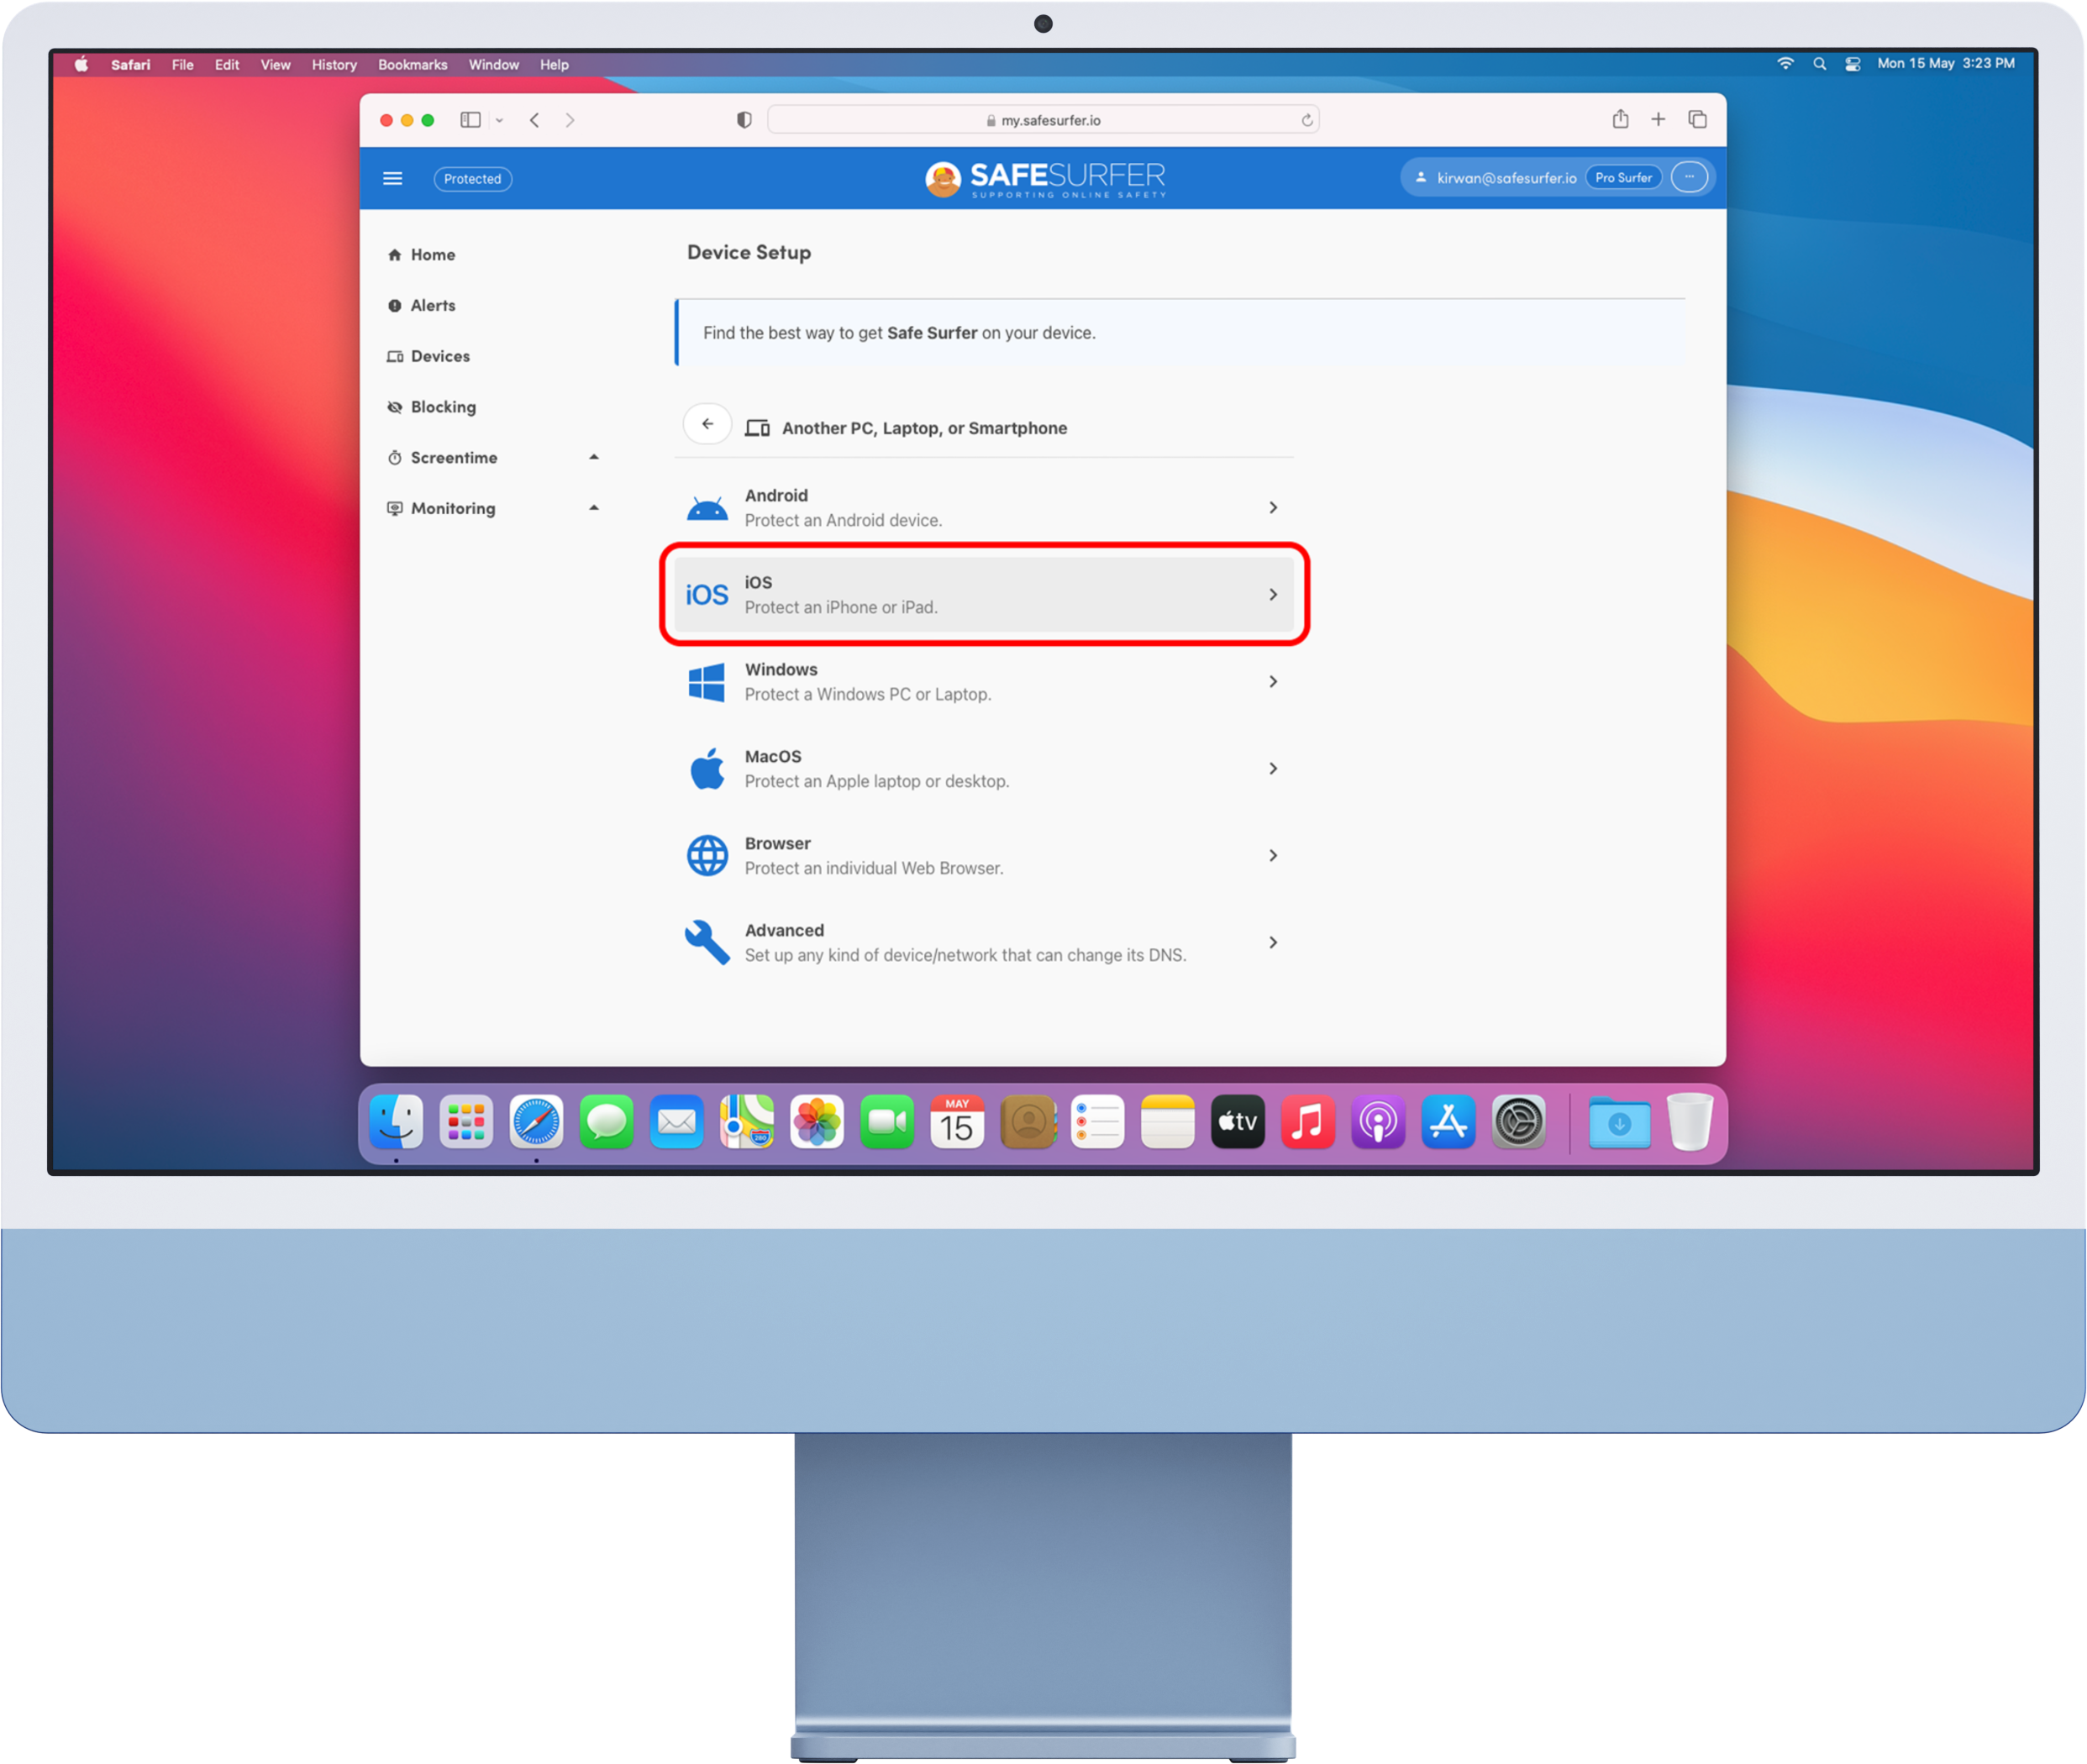
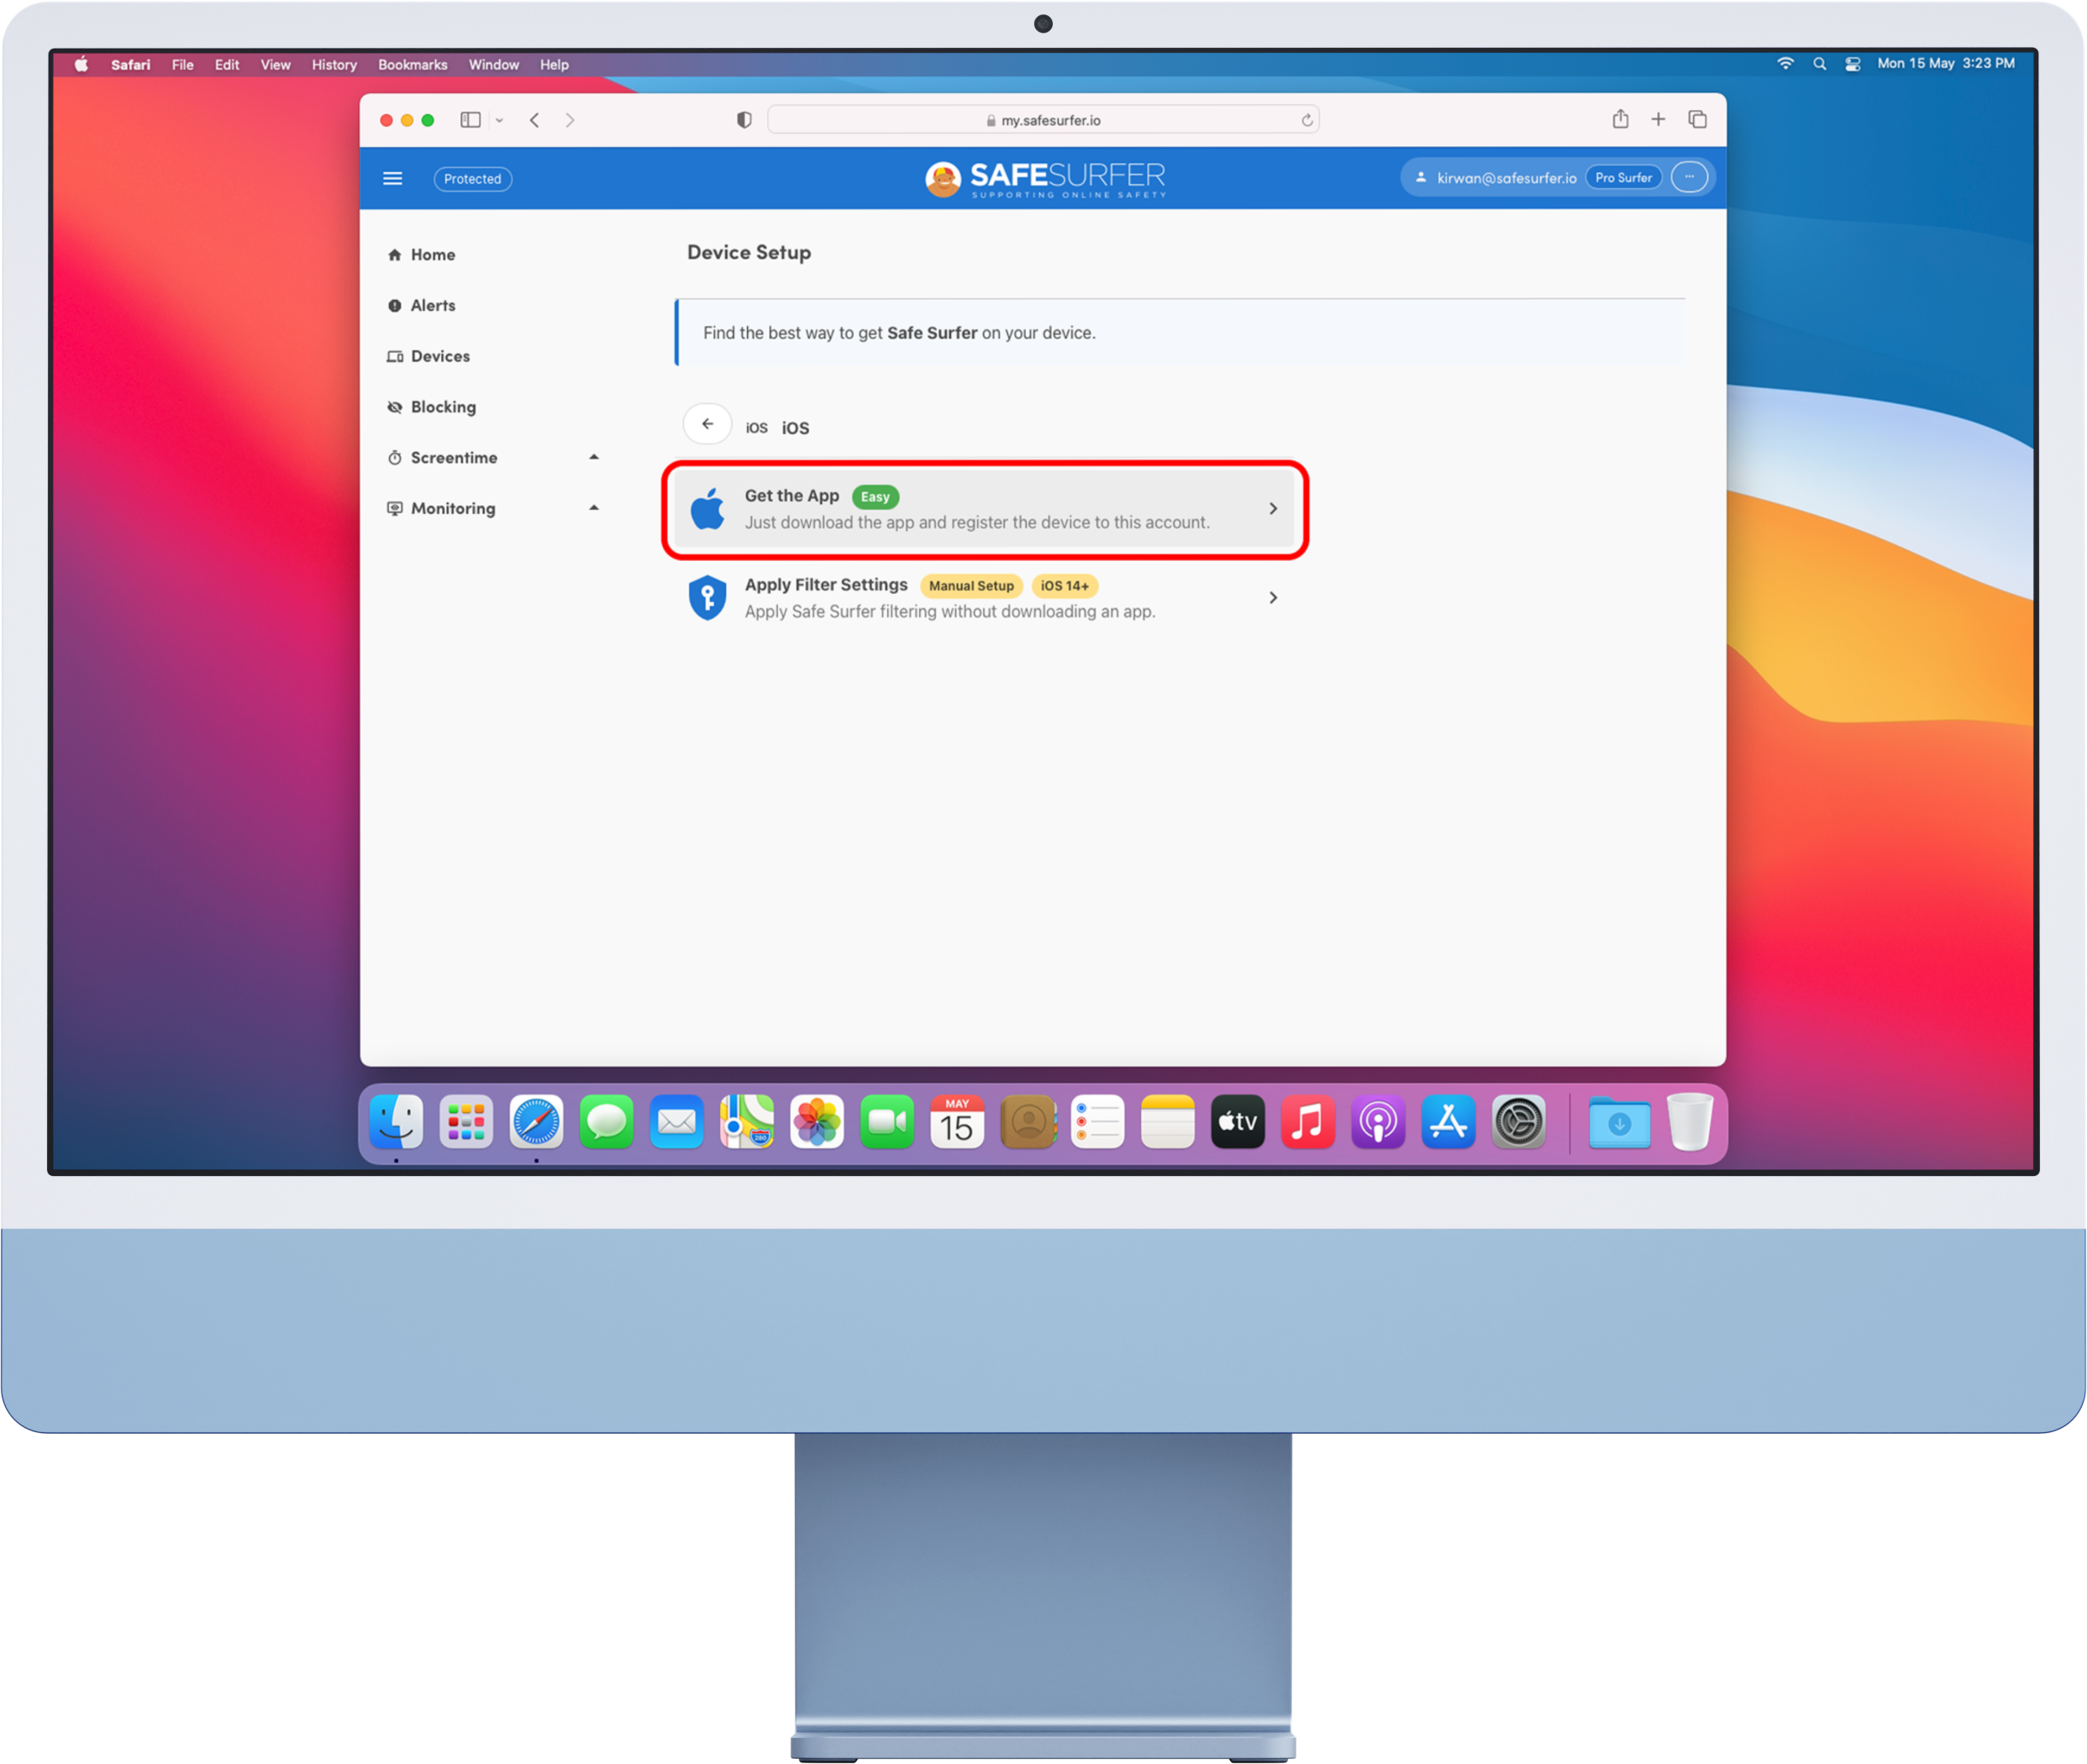
Click “iOS”.
Click “Get the app”.
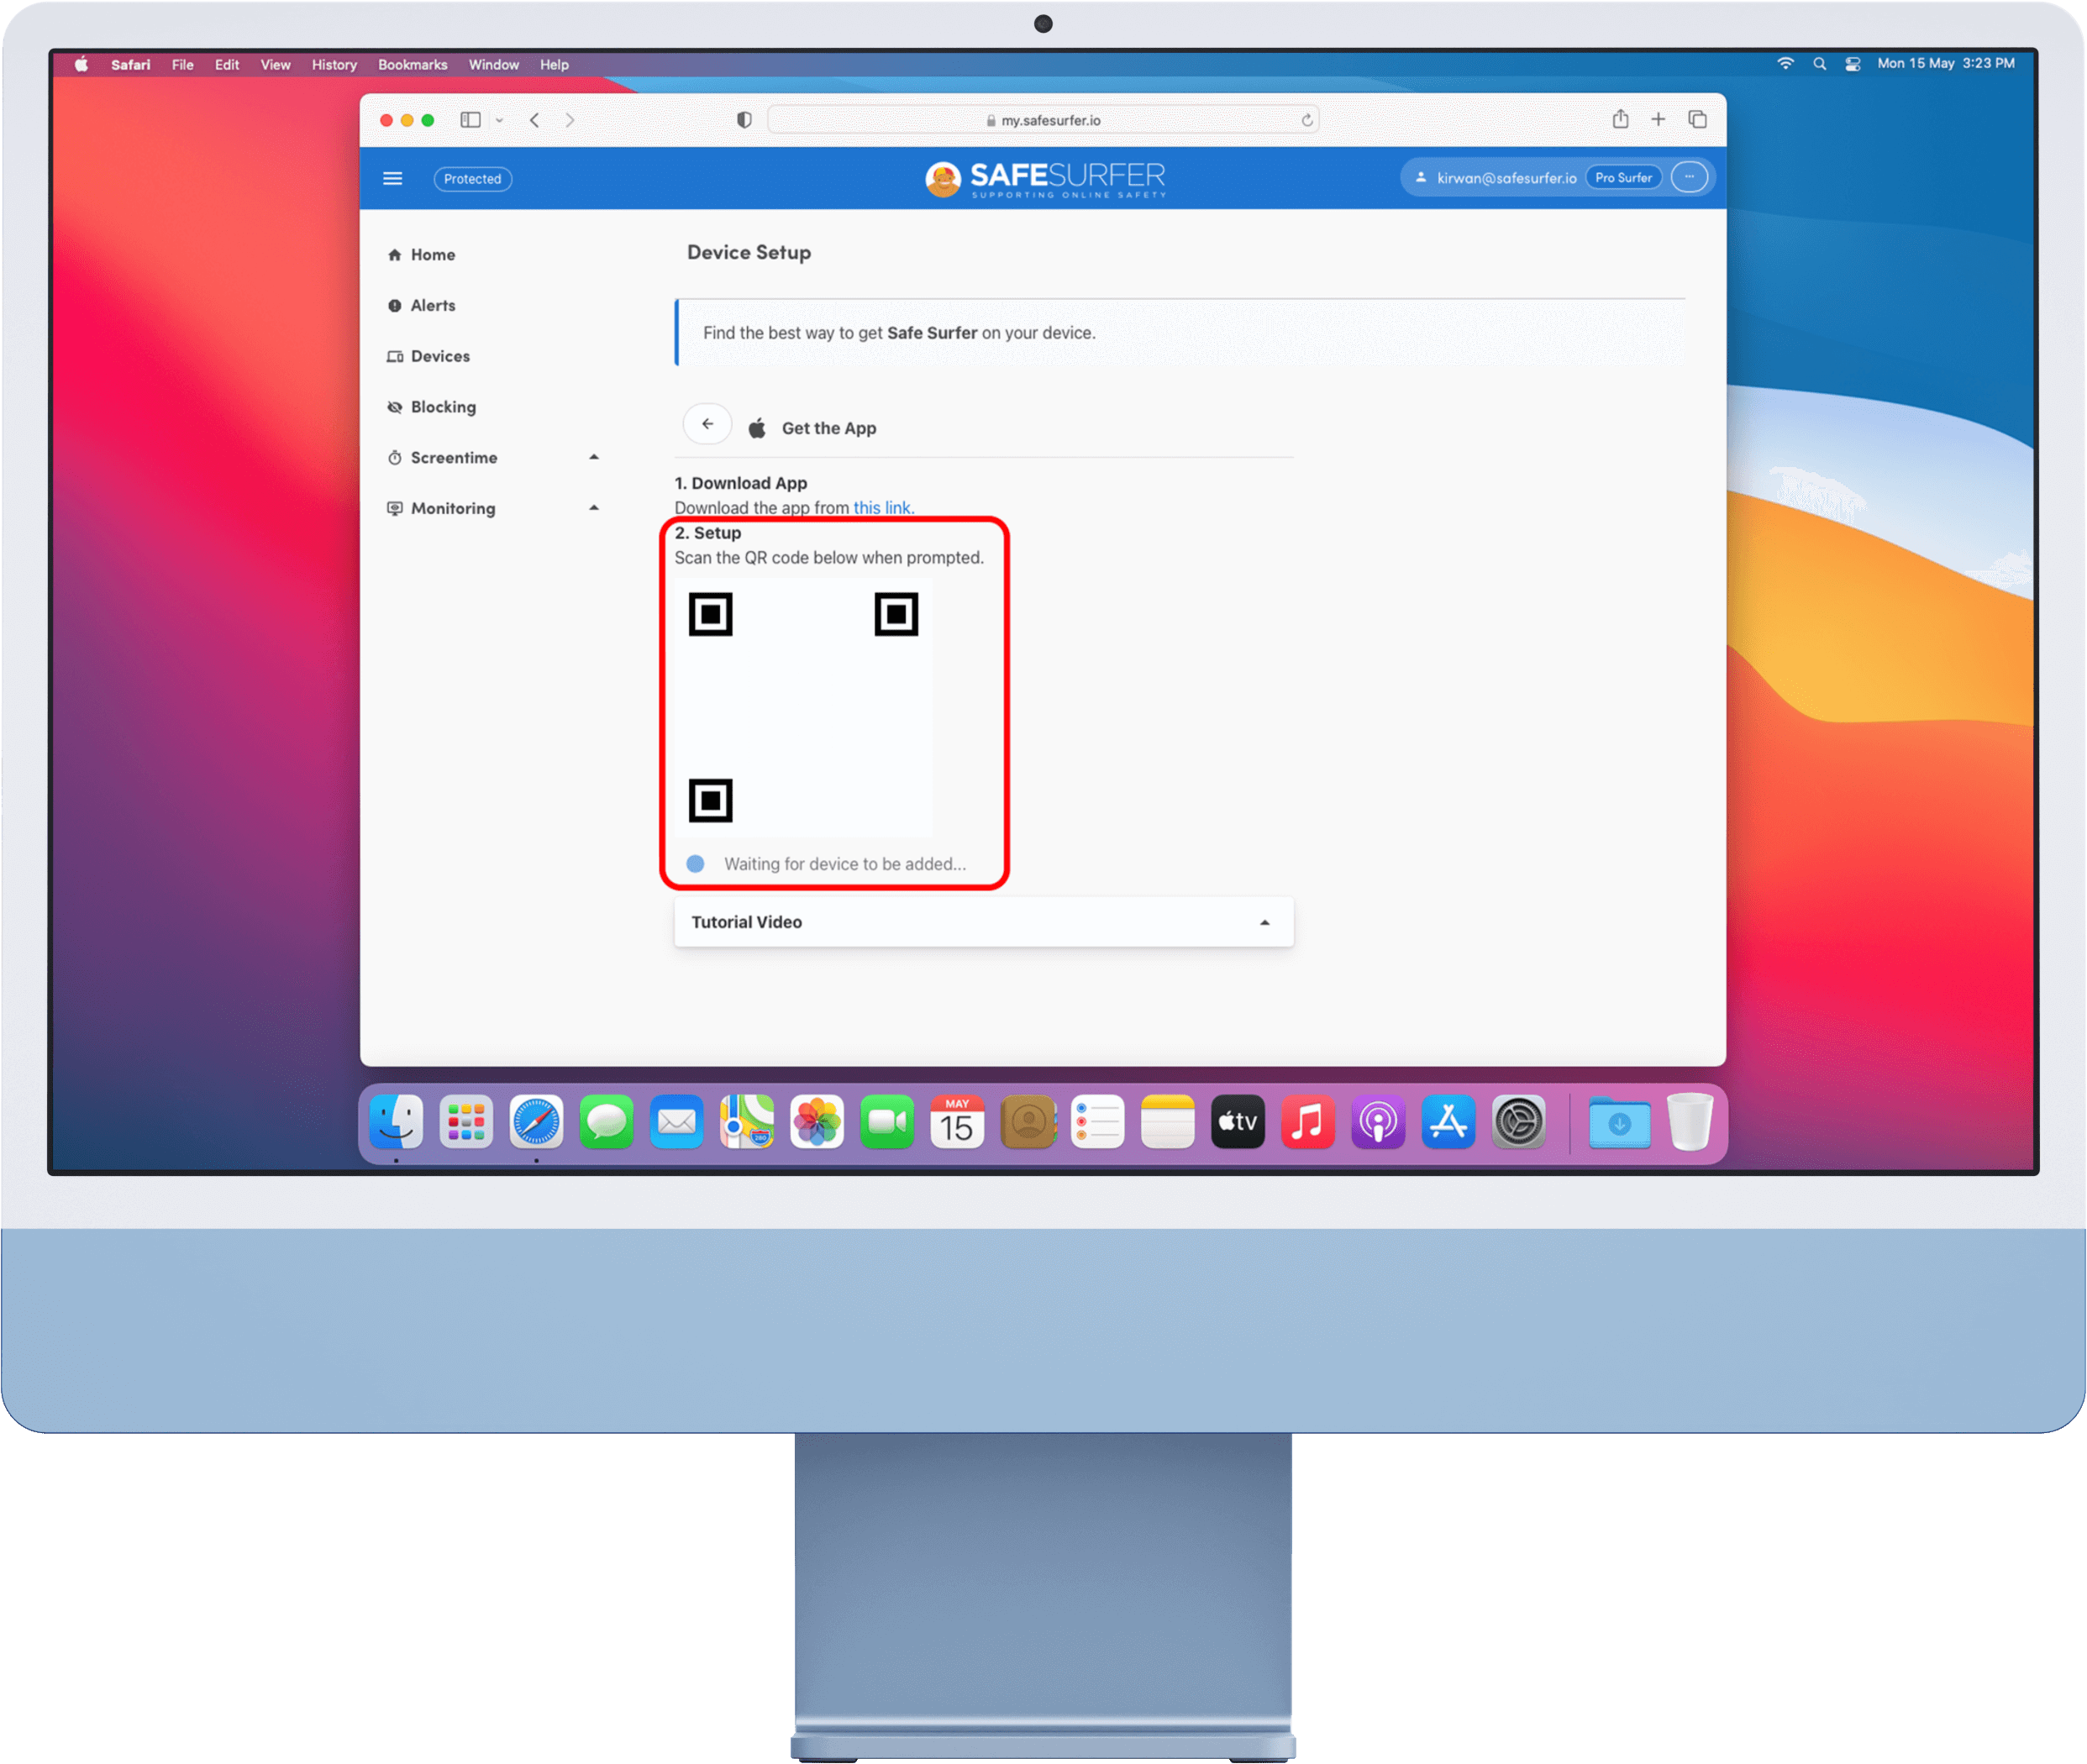
On the next section you’ll see a QR code to be scanned within the Safe Surfer app. We’ll use this later on.
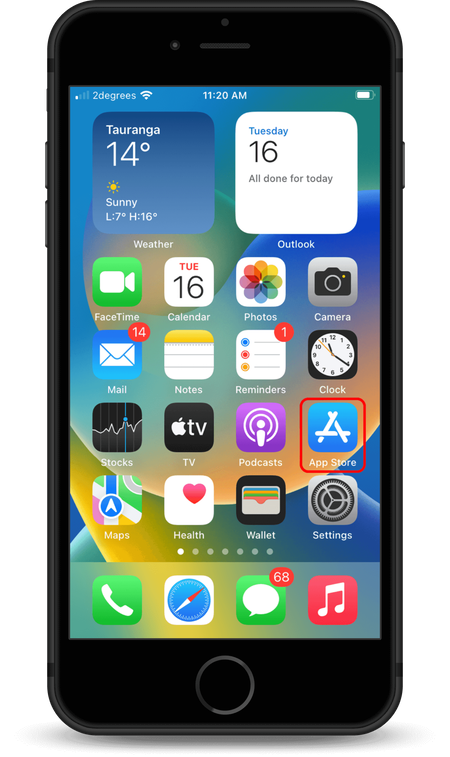
On the device to be protected, tap the App Store. If you can’t see it, swipe left until you arrive at the App Library. Use the search bar to find and open the App Store.
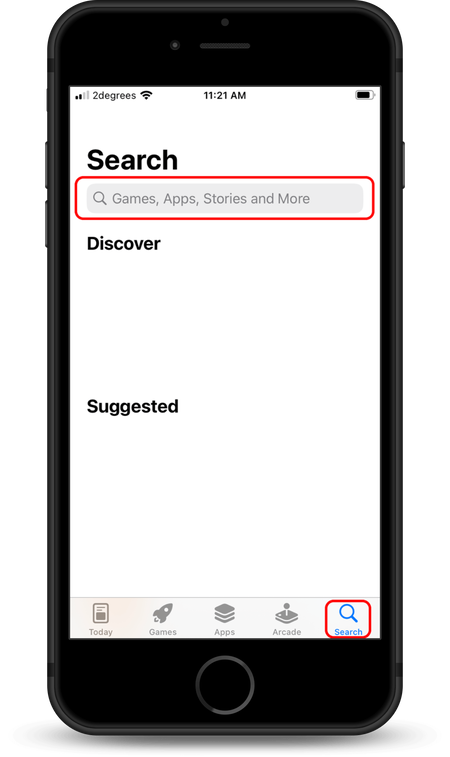
In the App Store, tap the Search button on the toolbar, then tap the search bar.
Search for “safe surfer”, then tap the first result.
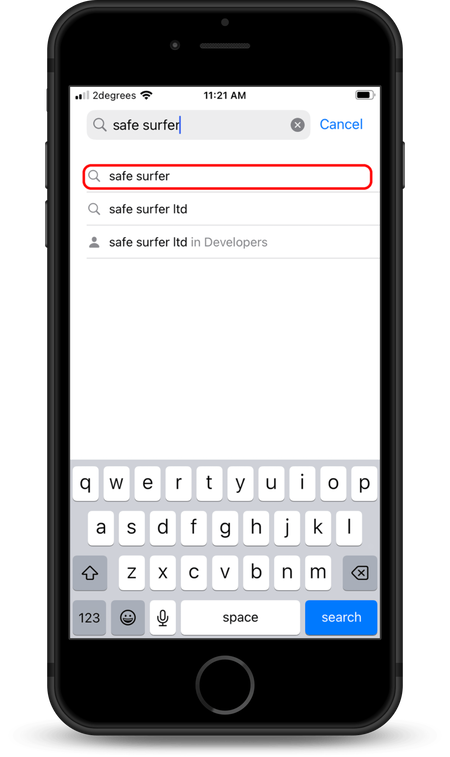
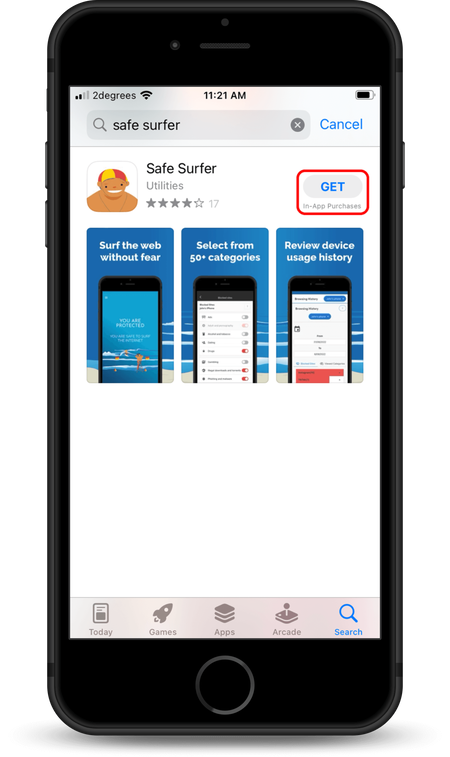
Tap the Get button to download the Safe Surfer app.
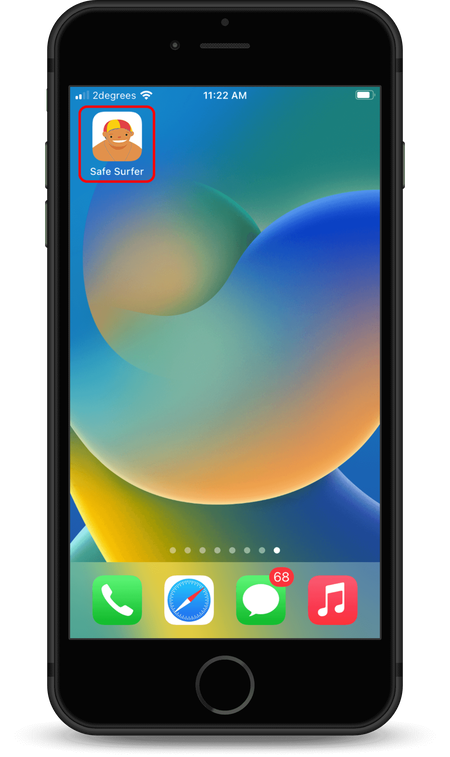
Once the Safe Surfer app has downloaded, it will appear on the Home Screen. Tap the Safe Surfer app to open it.
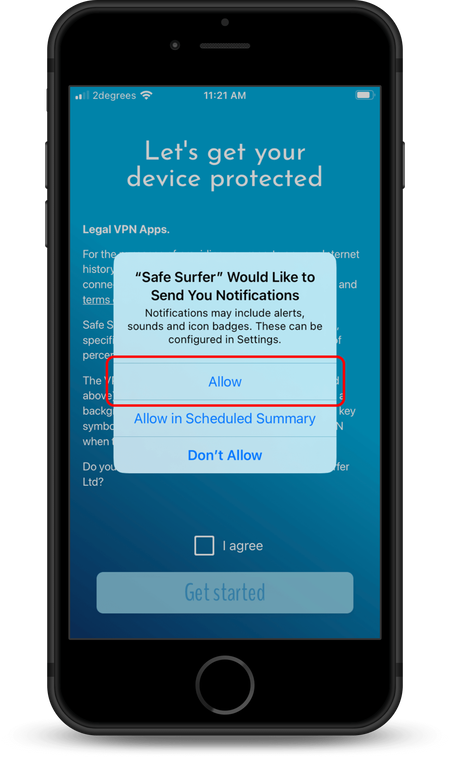
On the prompt that comes up, tap the Allow button.
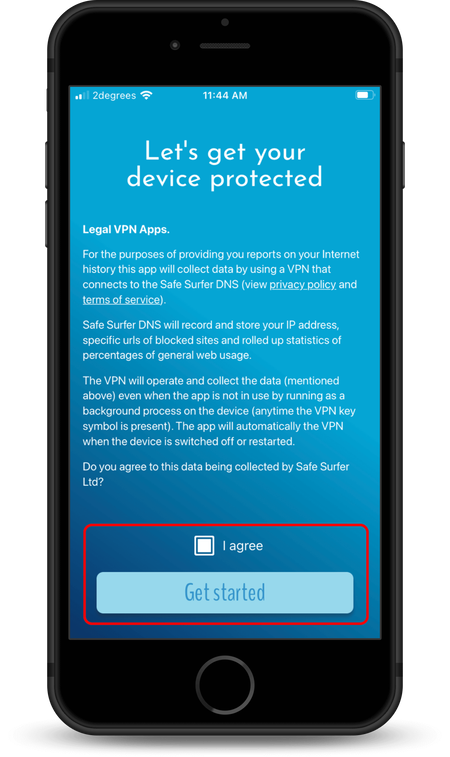
Acknowledge the presented information by tapping the “I agree” checkbox, then tap the “Get started” button.
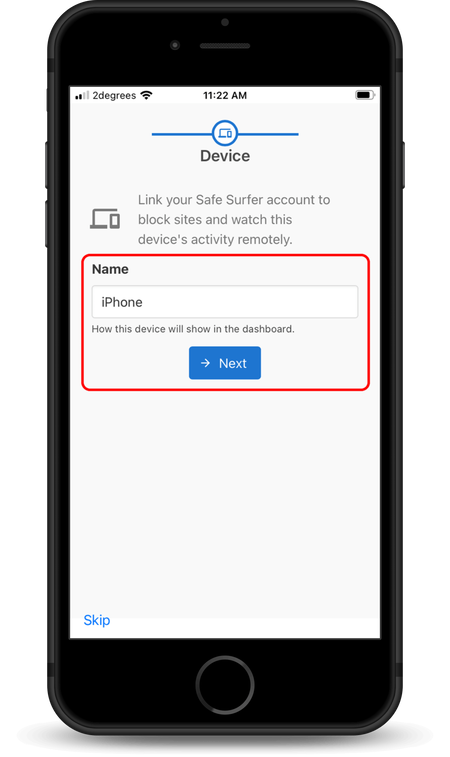
Enter a name for this device, then tap the Next button.
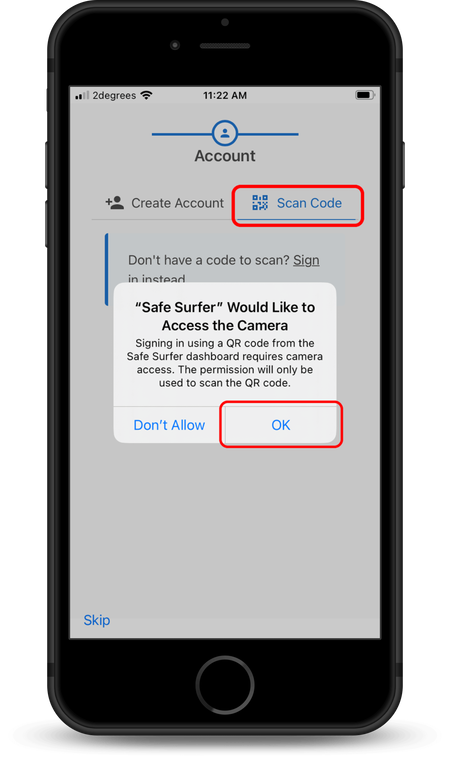
Tap the Scan Code tab, then tap the OK button.
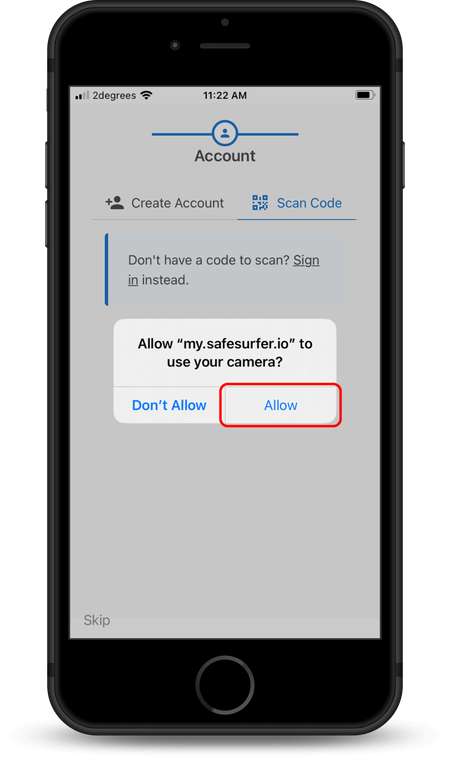
Tap the Allow button, then scan the QR code on your personal computer.
Back on your personal computer, once you’ve scanned the QR code, the Safe Surfer dashboard will report that the device has been added to your account.
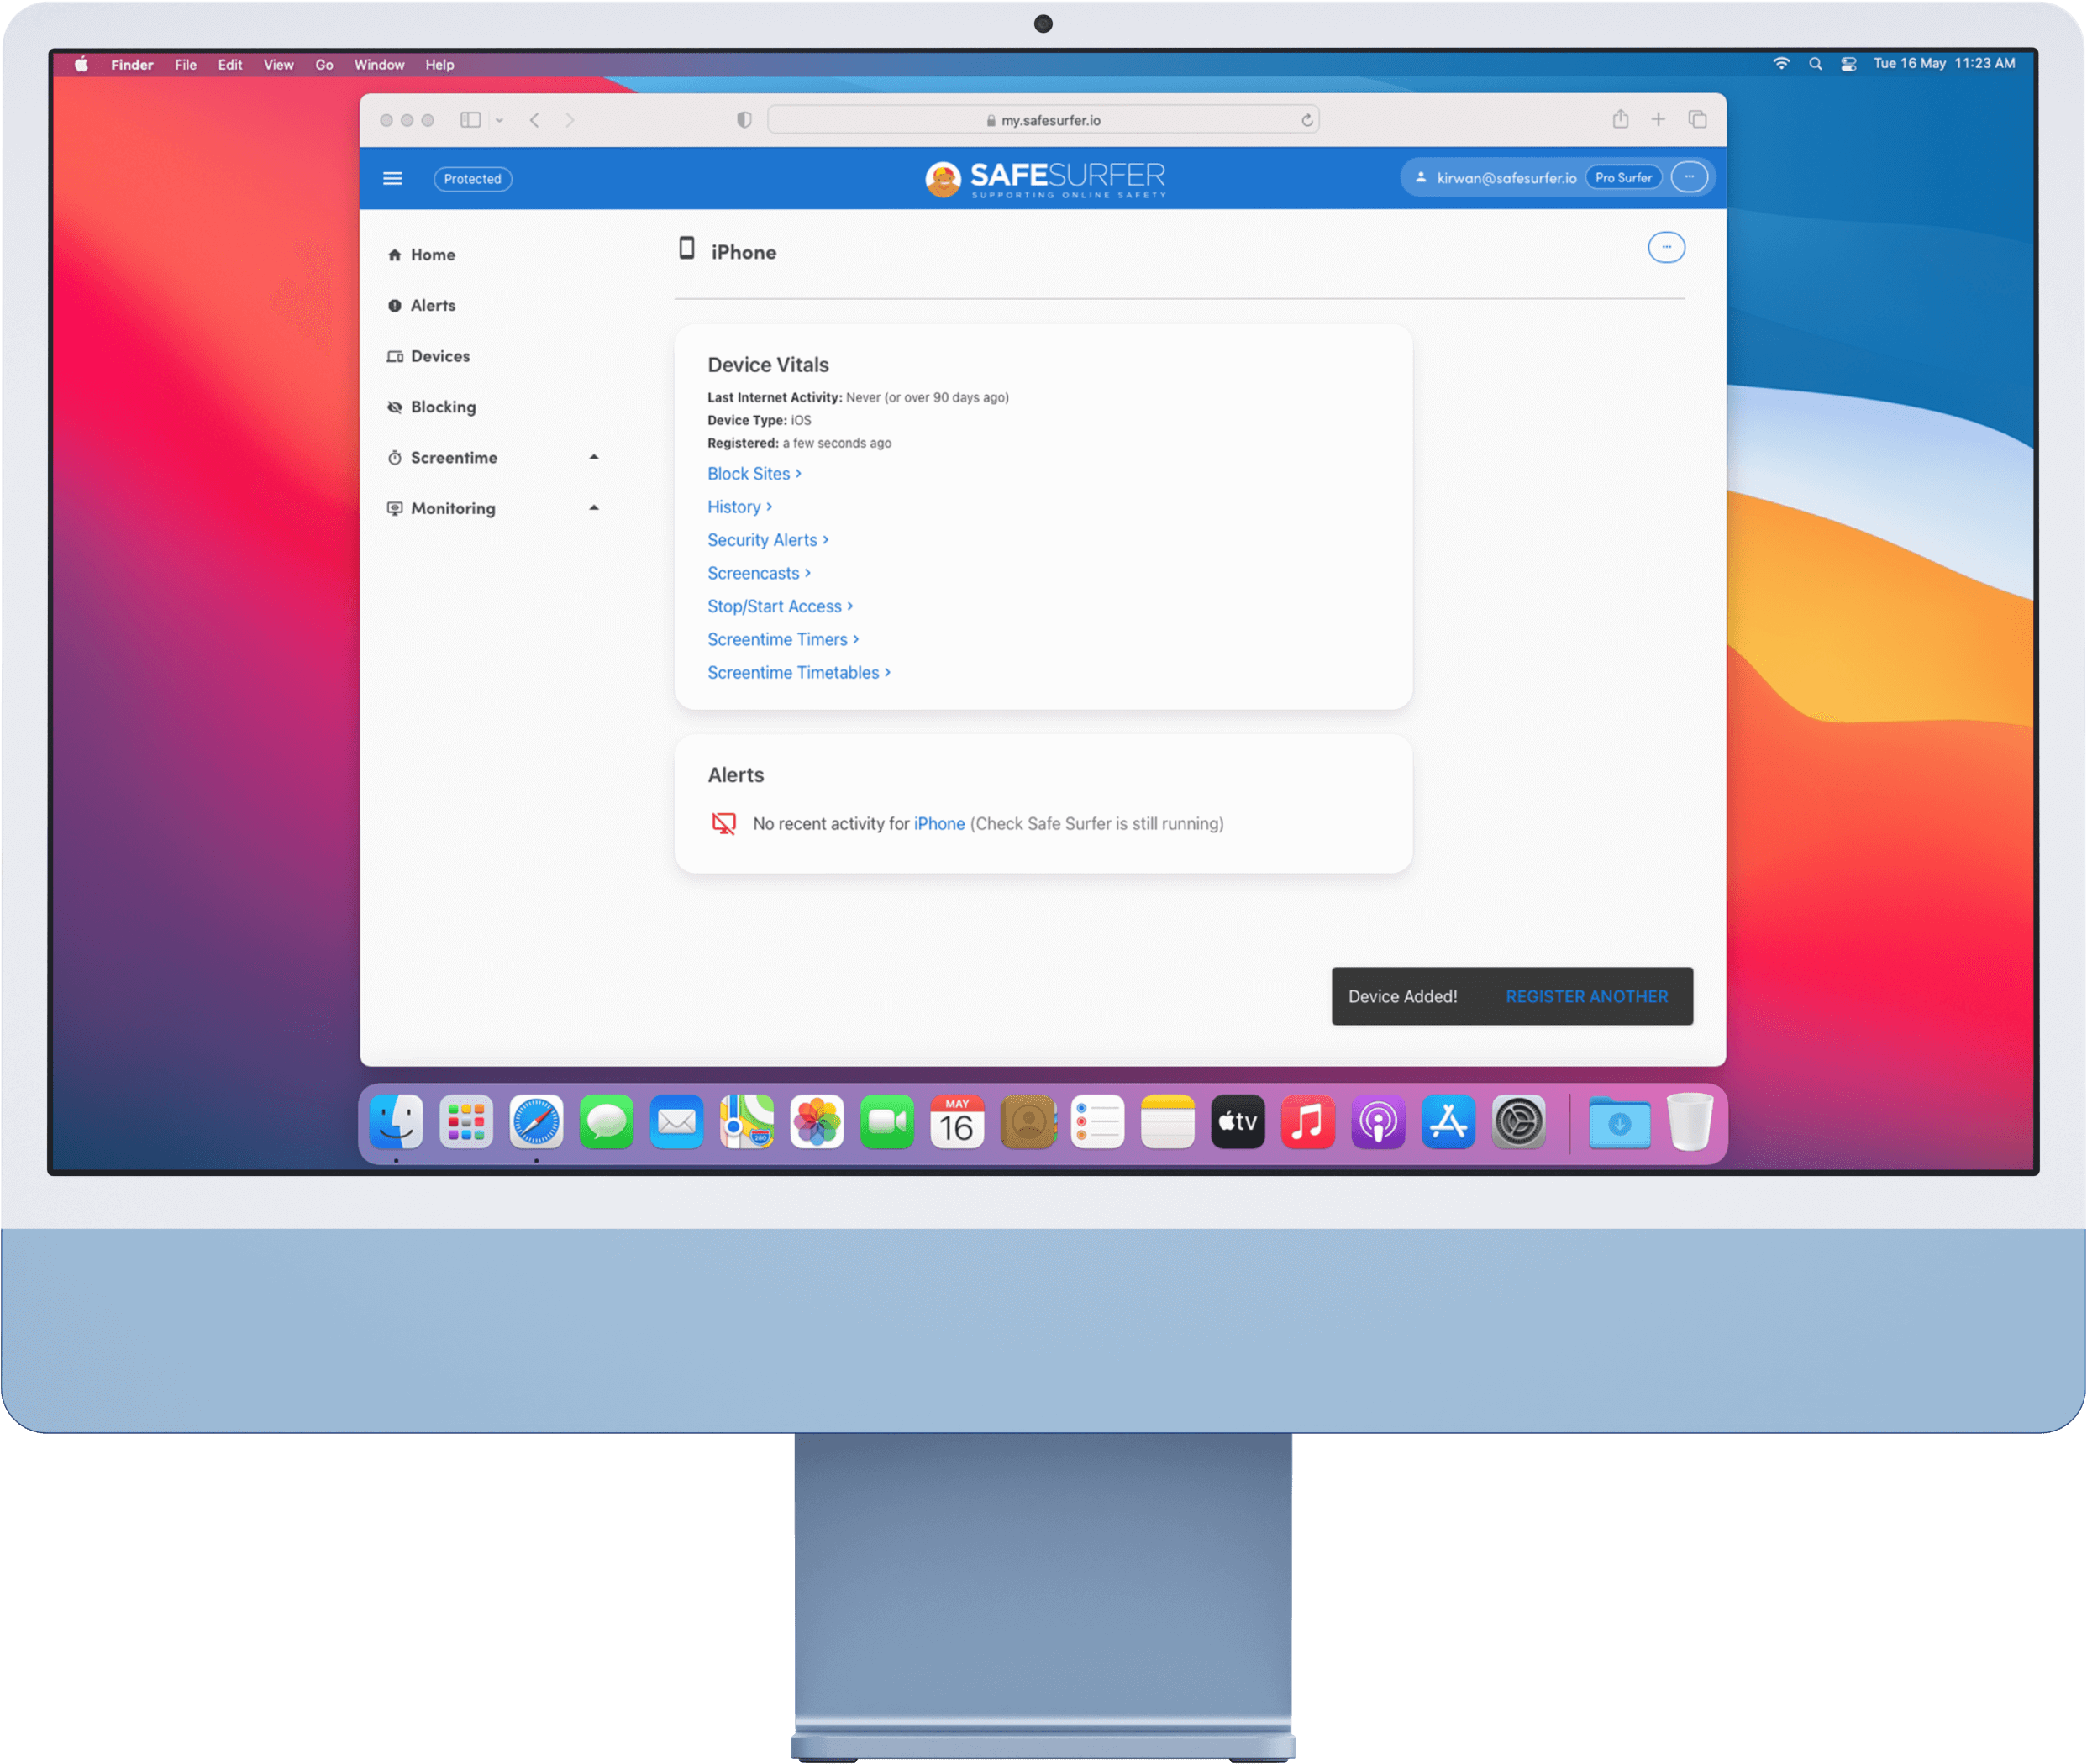
Click the Blocking menu on the left-hand sidebar. Click the blue bubble list, then click the listing for this device.
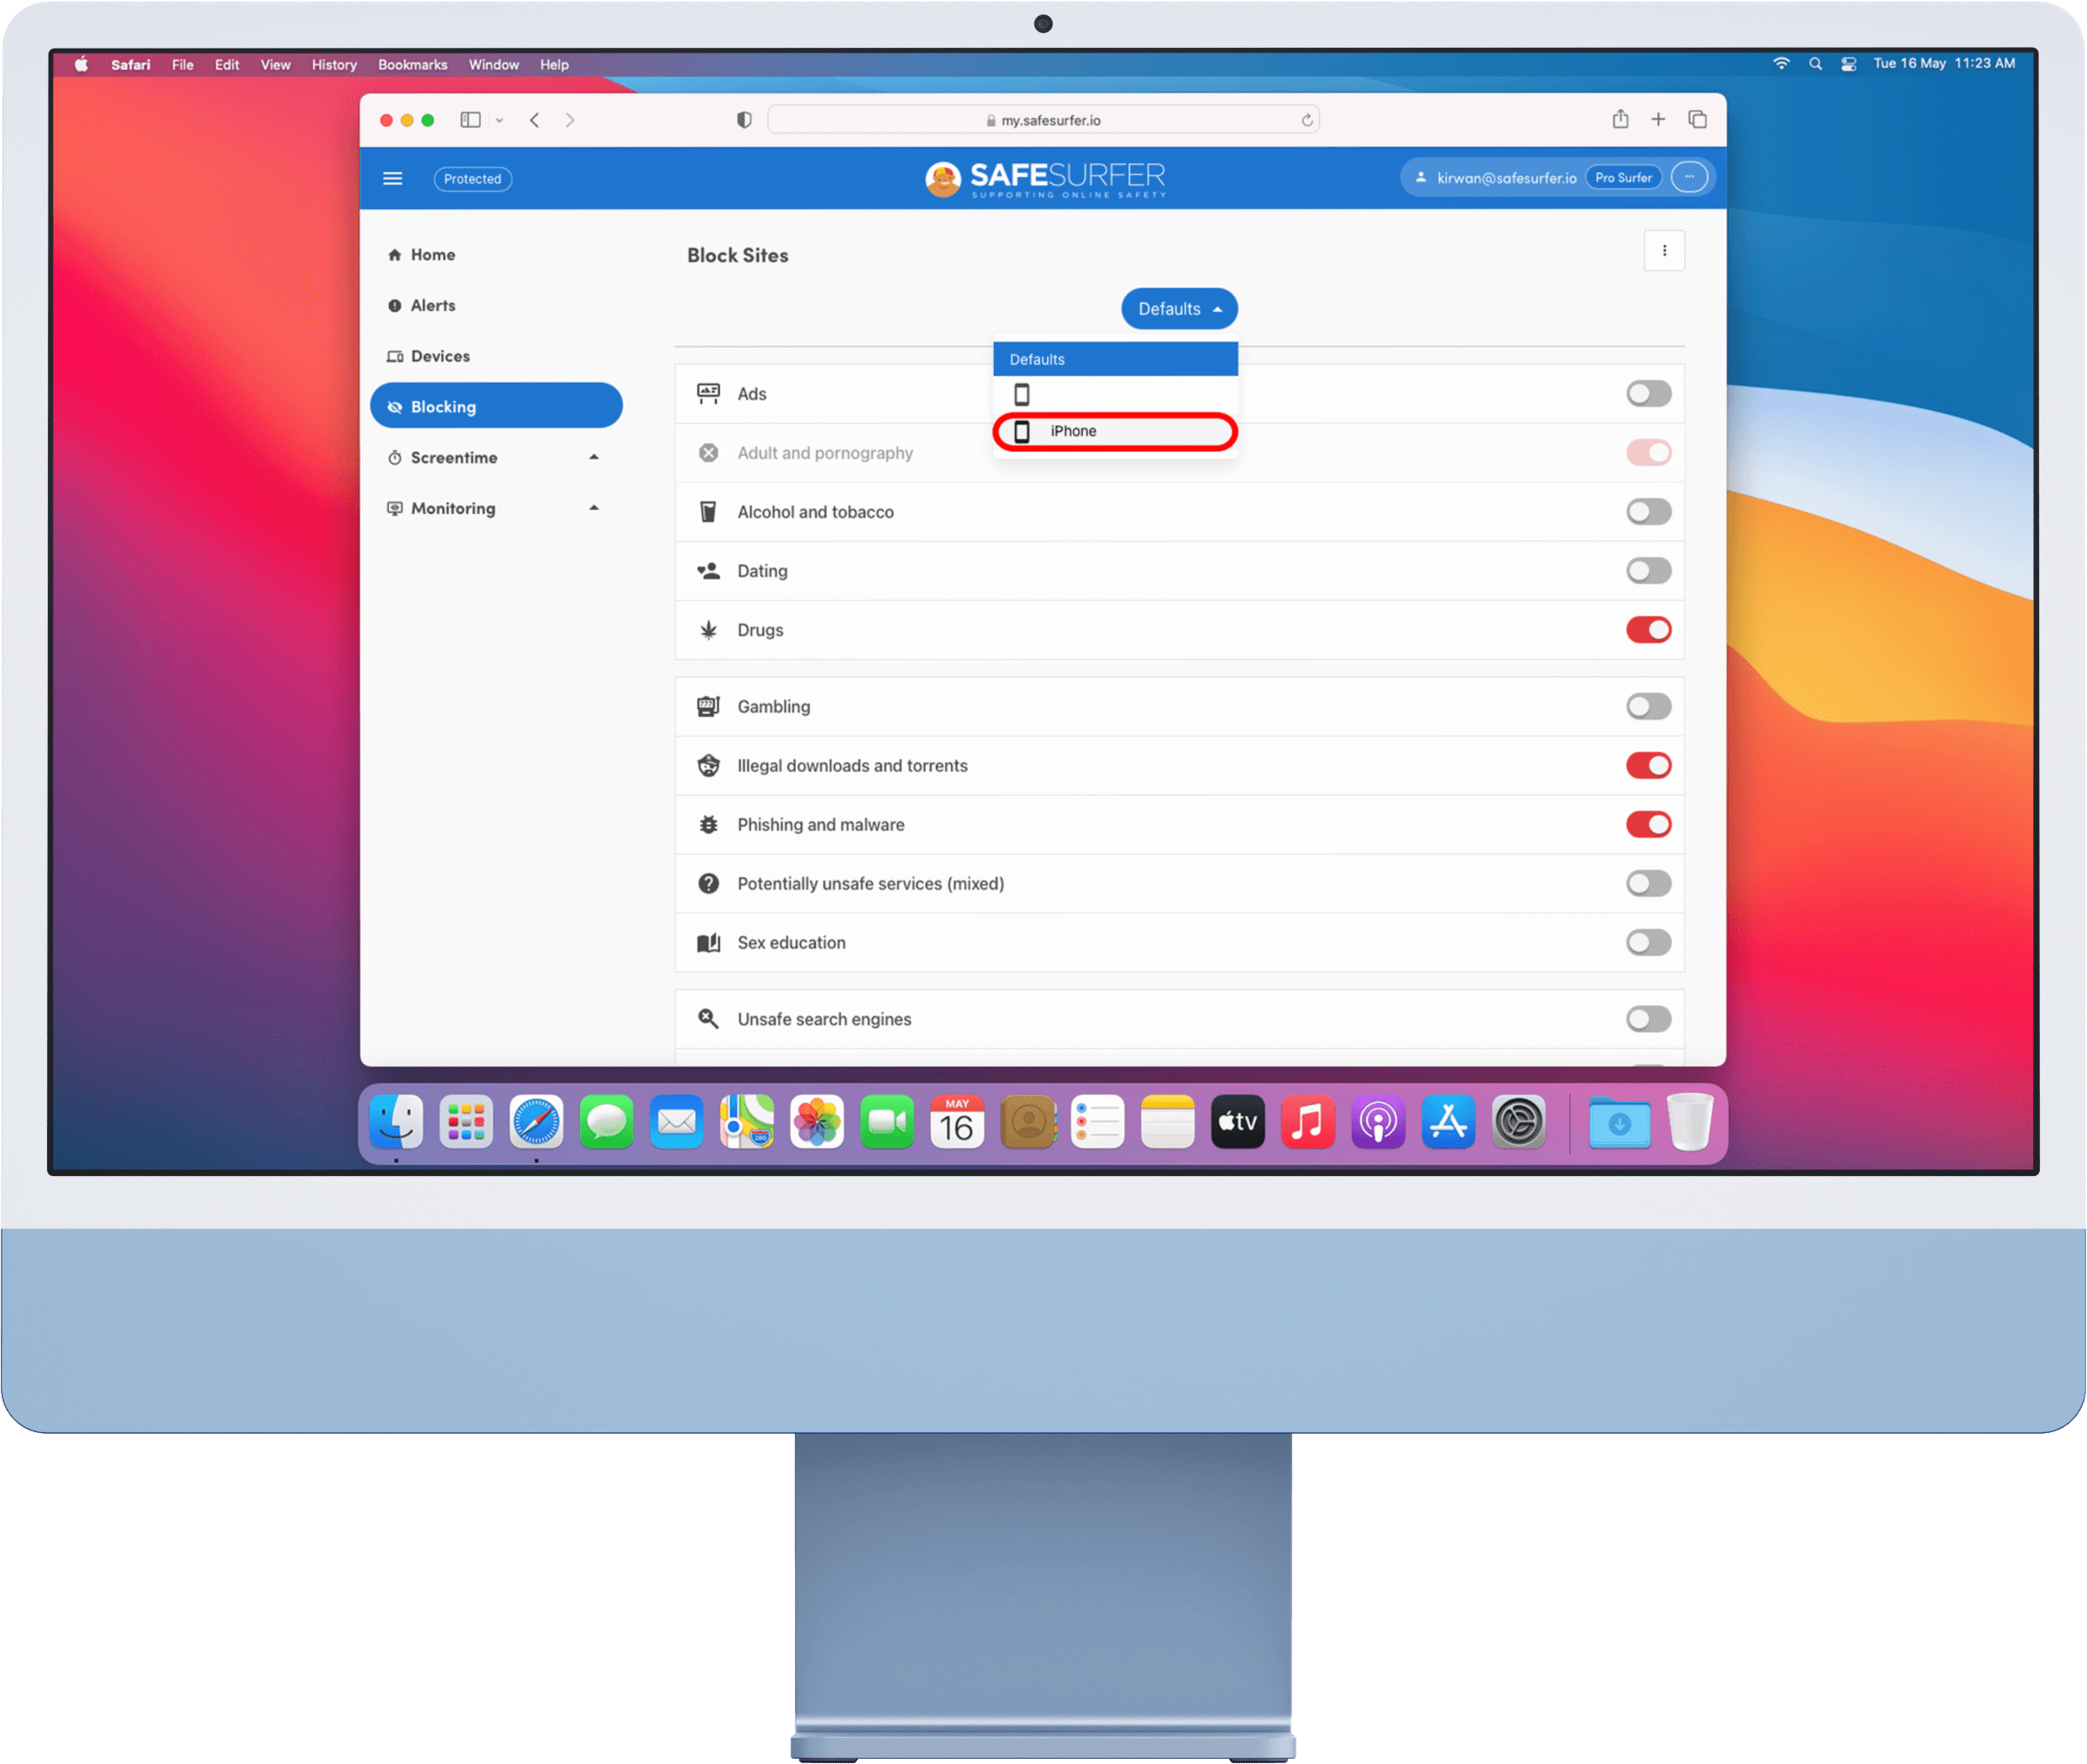
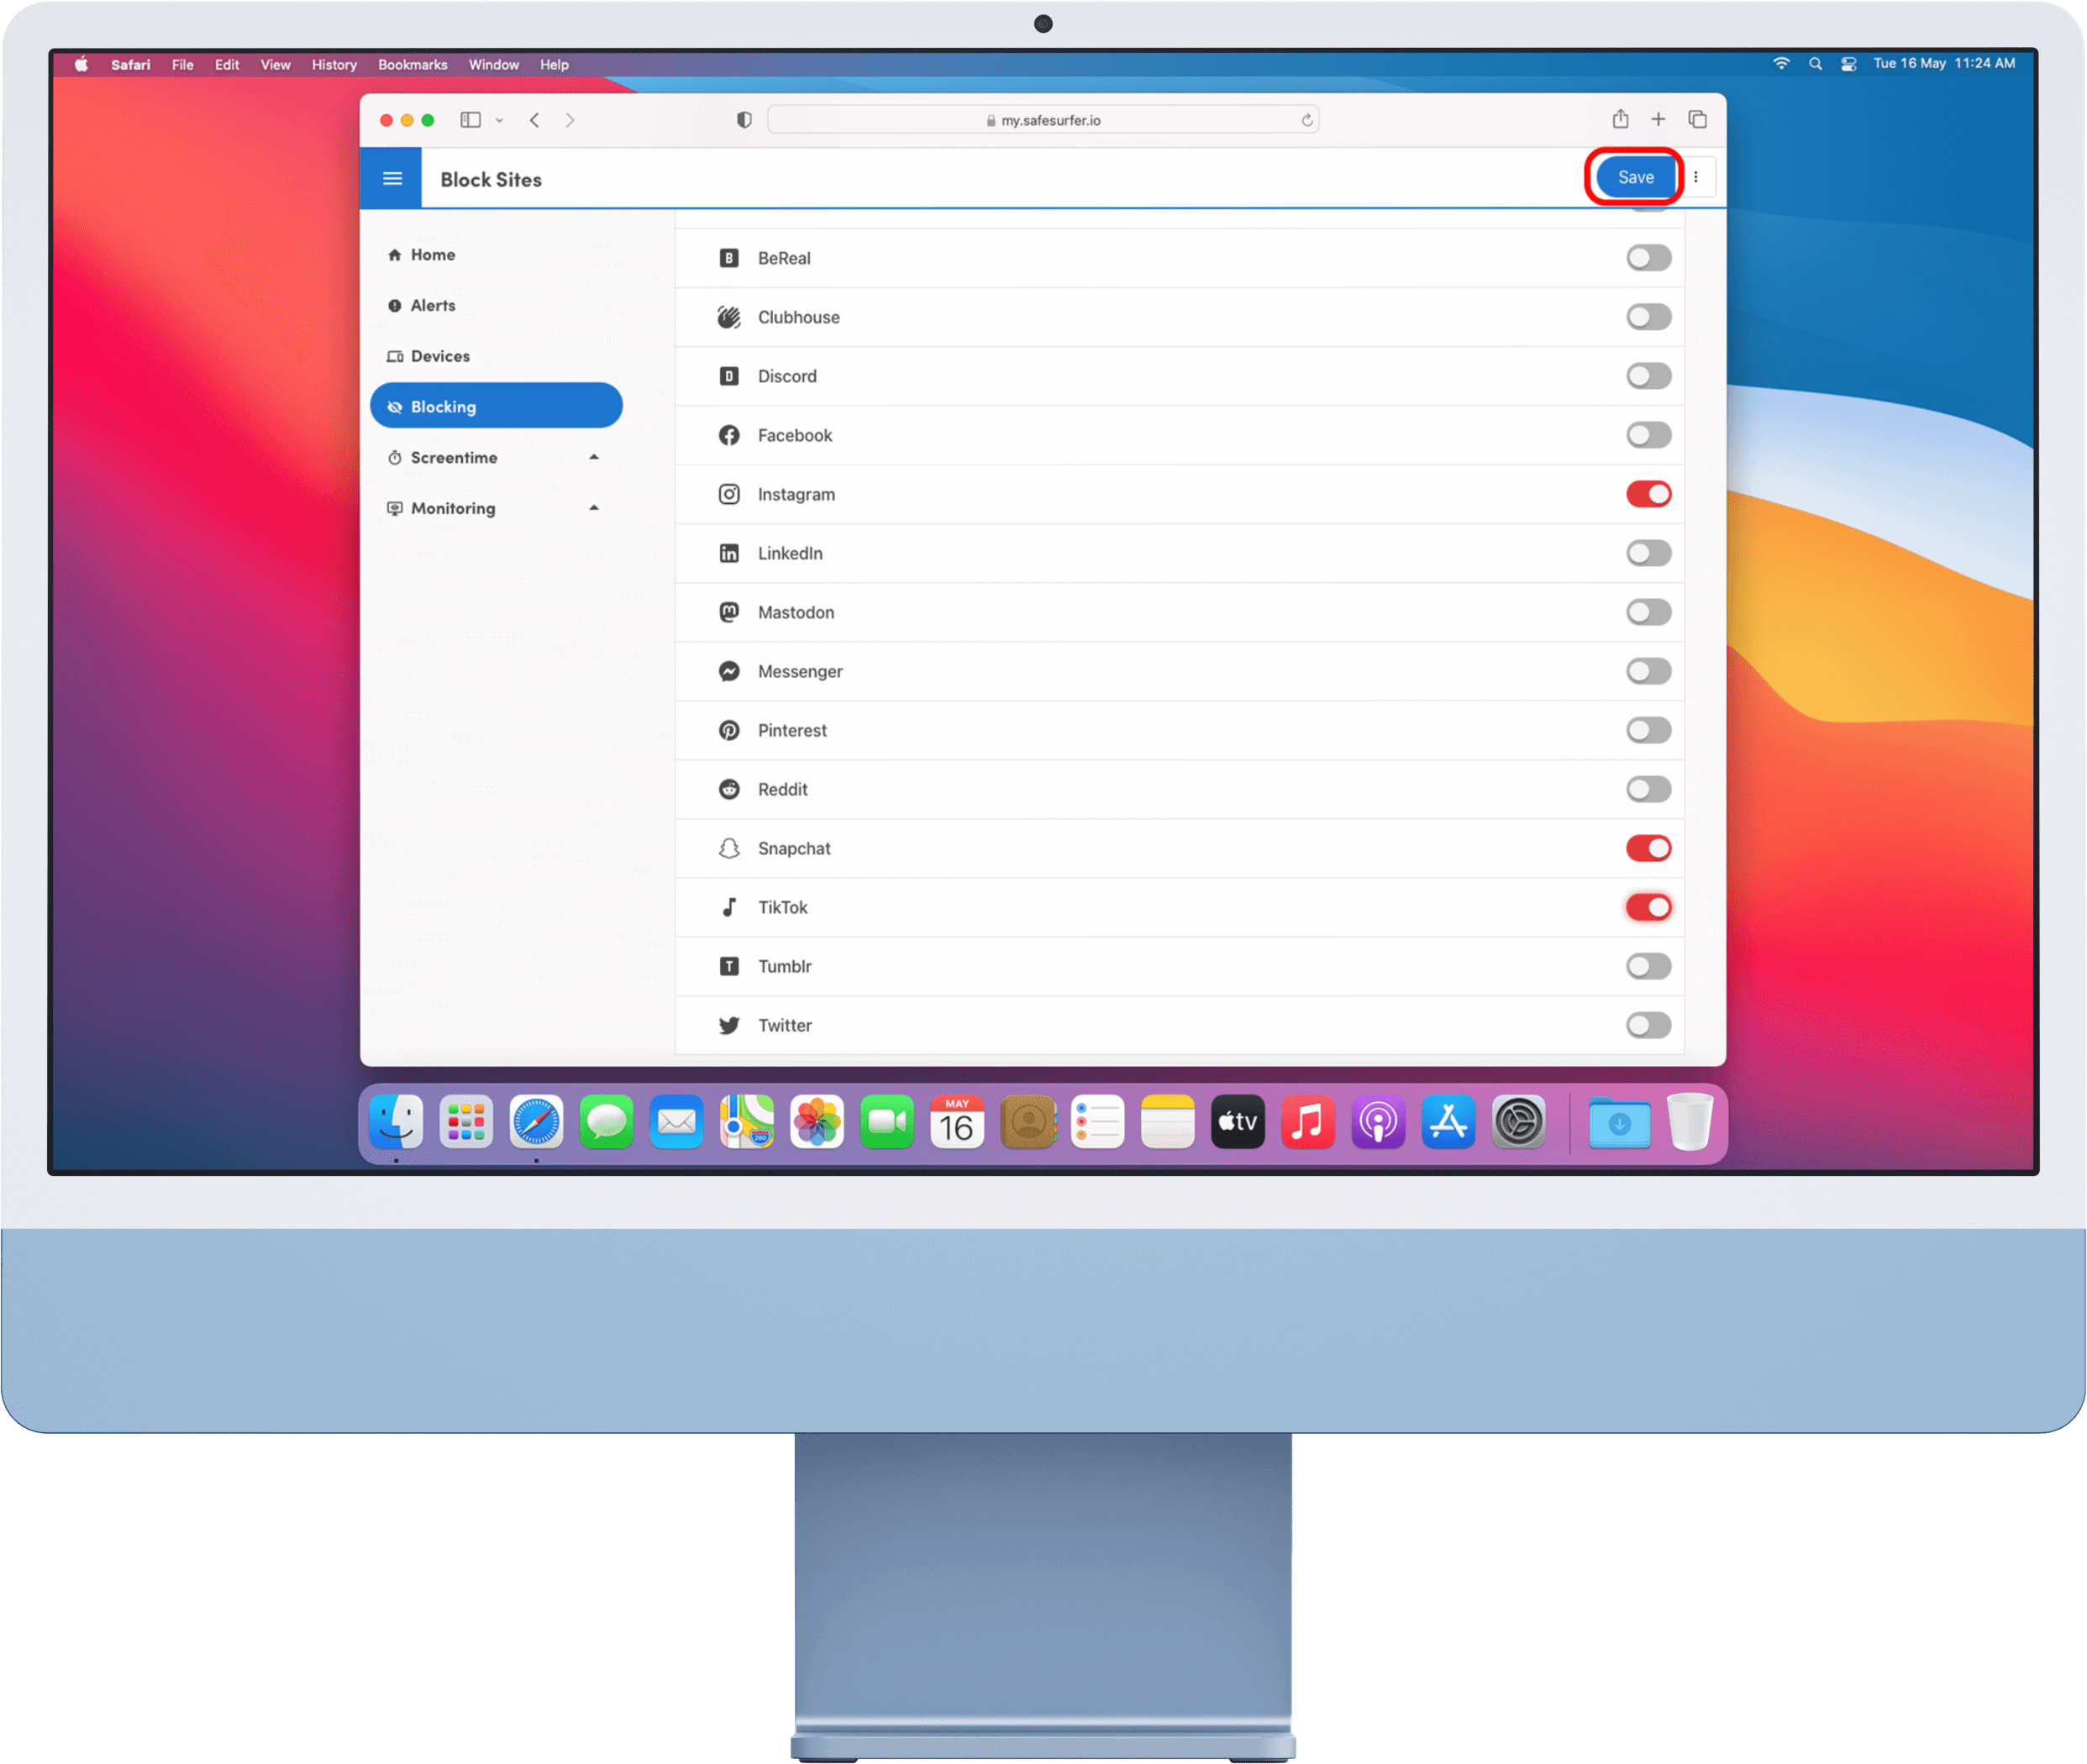
Click the switches to either block or unblock categories—grey means not blocked, and red means blocked. Once you’re done, click the Save button at the upper-right corner. You might need to scroll to the top of the list for the Save button to appear.
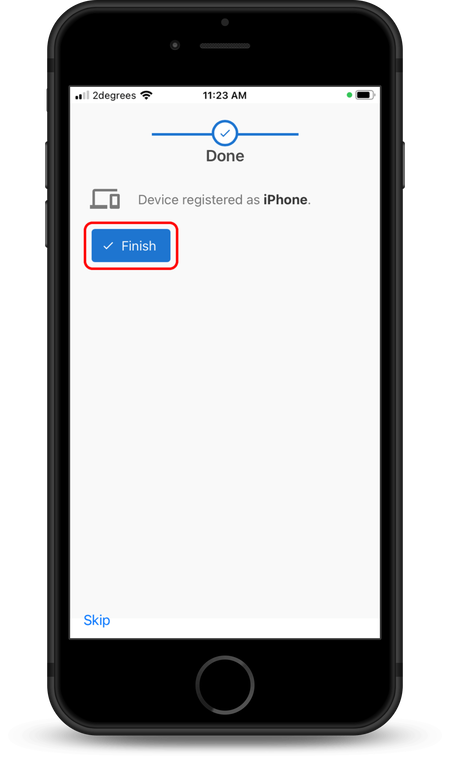
Back on the device being protected, tap the Finish button.
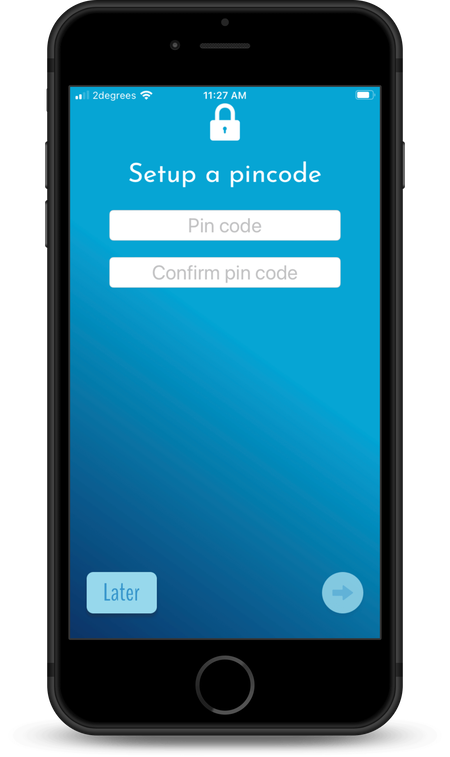
Set a PIN code, then tap the right-arrow button.
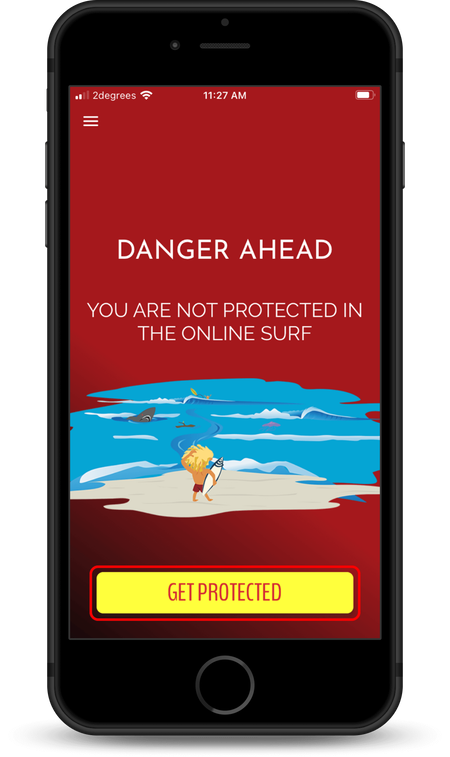
Tap the “Get protected” button.
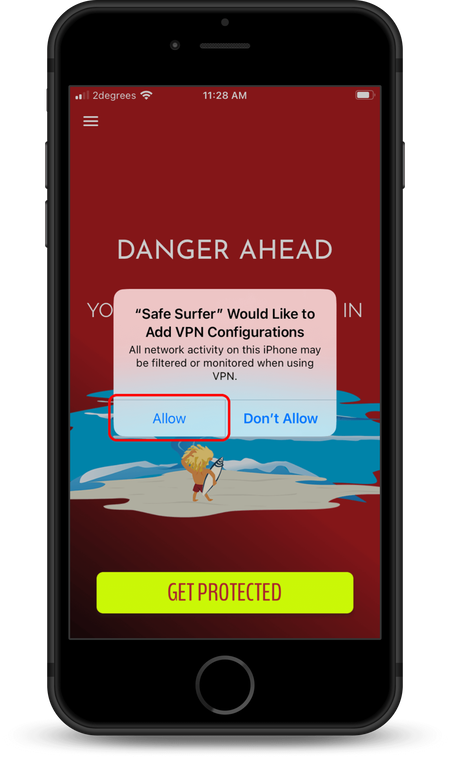
On the prompt that comes up, tap the Allow button.
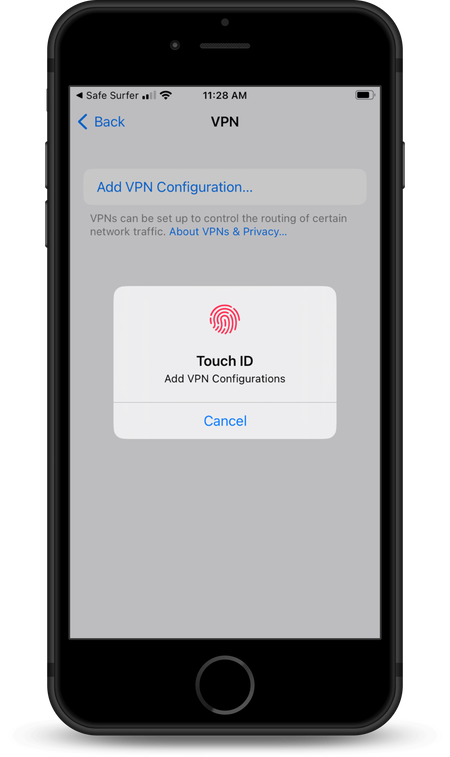
To perform this action, use either the biometric authentication (that is, Touch ID or Face ID) or the PIN code of the device user.
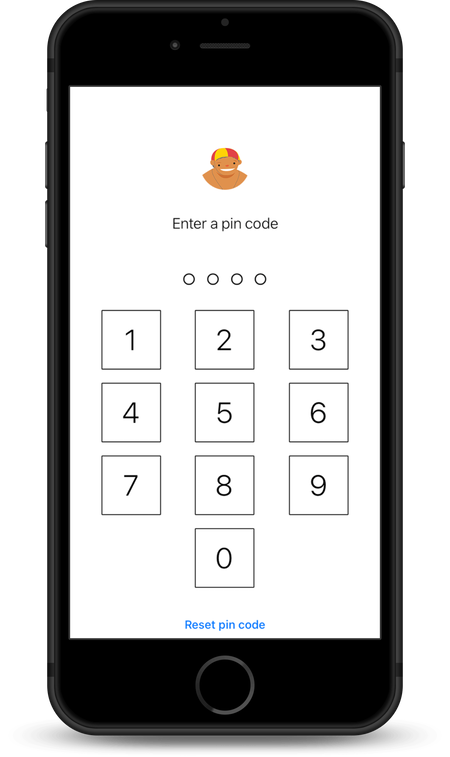
Enter the PIN code you set for the Safe Surfer app.
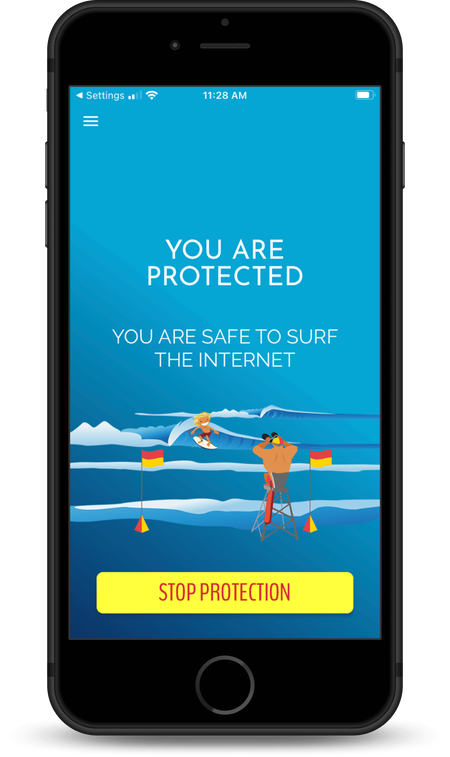
This device is now protected, but there’s still a little more we need to do for the best experience.
Step 2: Change Apple content restrictions settings
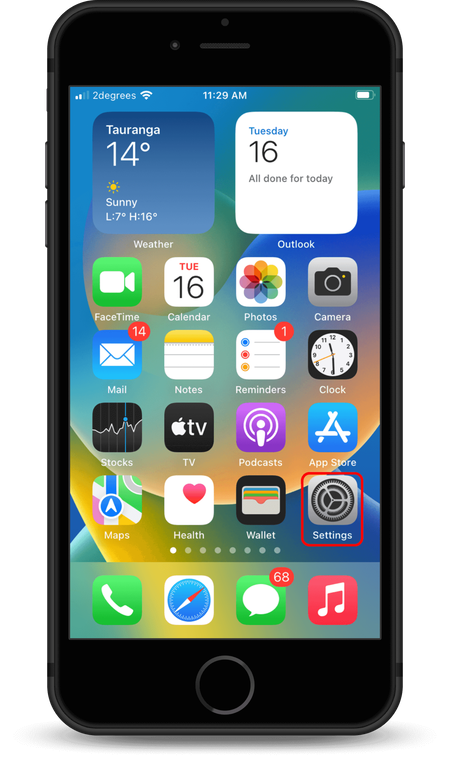
Go to the Home Screen, then tap the Settings app.
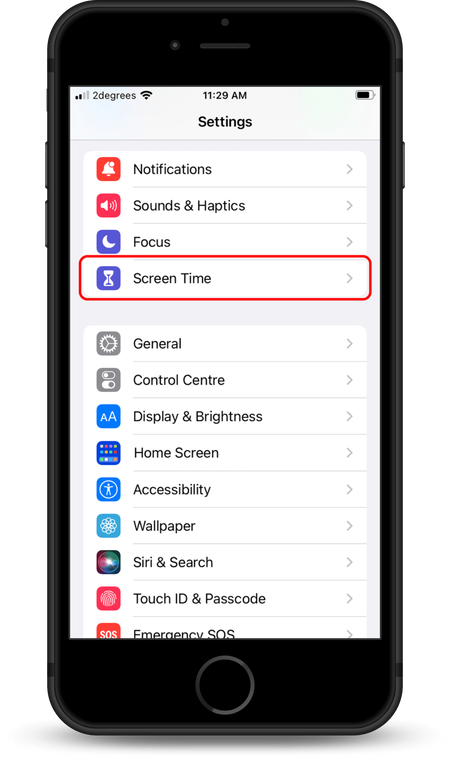
Scroll down and tap the Screen Time menu.
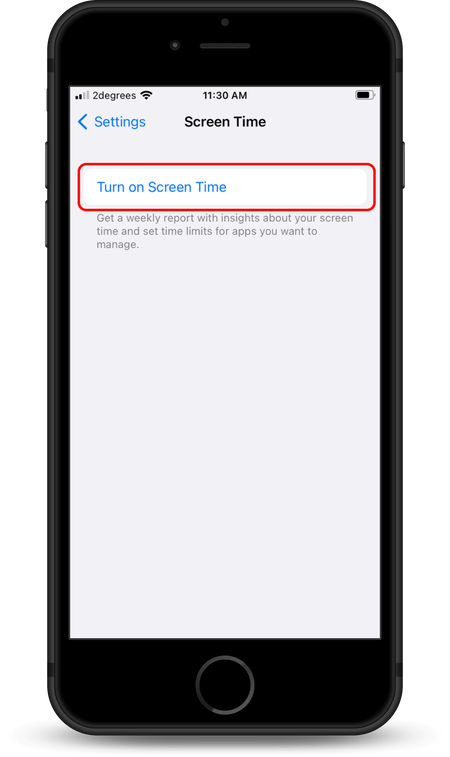
Tap “Turn on Screen Time”.
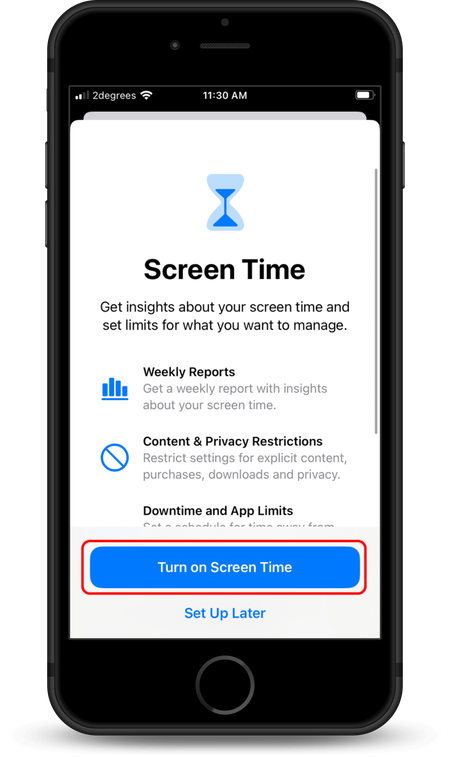
On the information card that appears, tap “Turn on Screen Time”.
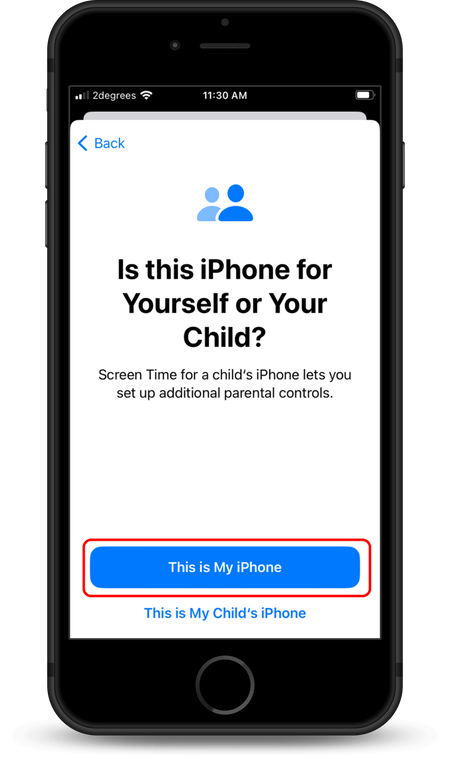
Tap either “This is My iPhone” or “This is My Child’s iPhone”. If you’re not sure what to use, tap “This is My iPhone”.
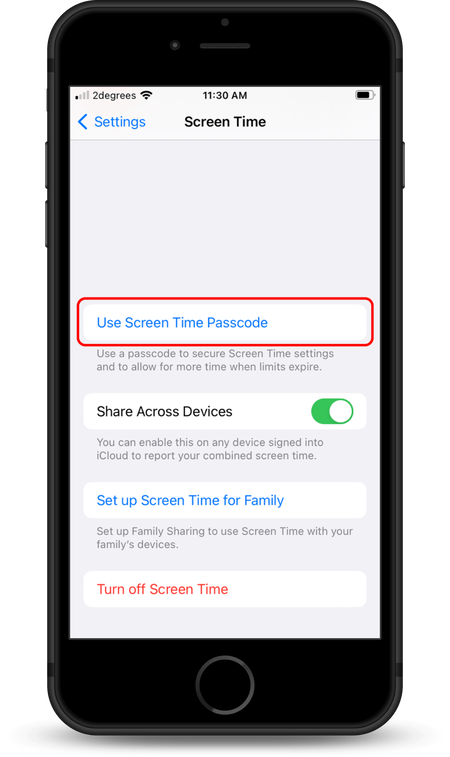
Scroll down and tap “Use Screen Time Passcode”.
Set a passcode for the Screen Time feature.
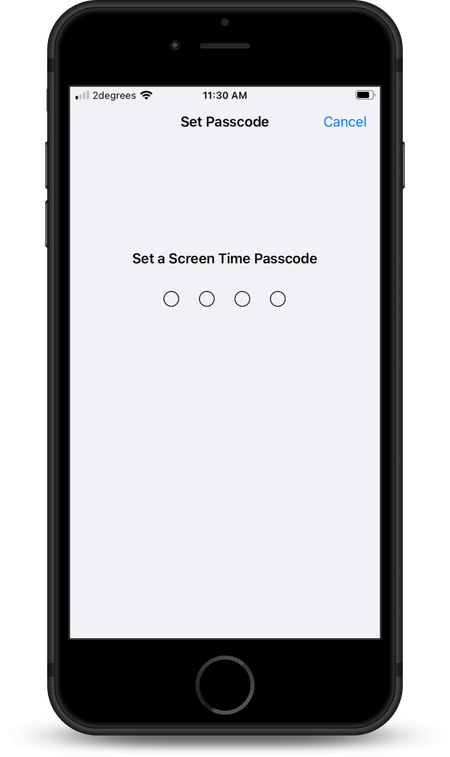
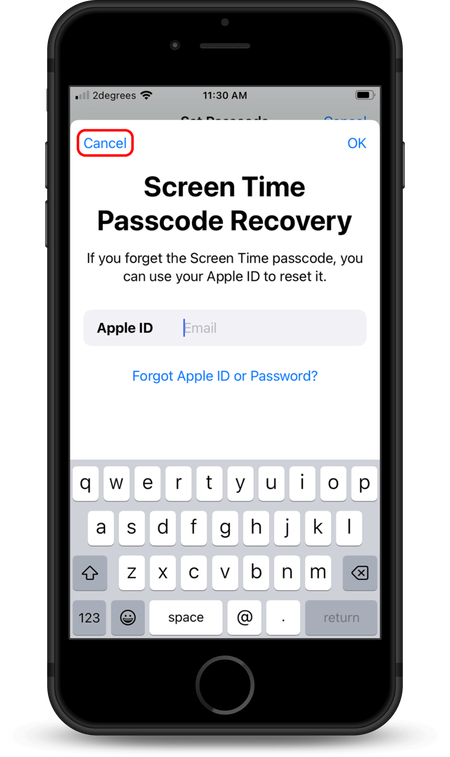
If you don’t want to use an Apple ID for Screen Time Passcode Recovery, tap the Cancel button.
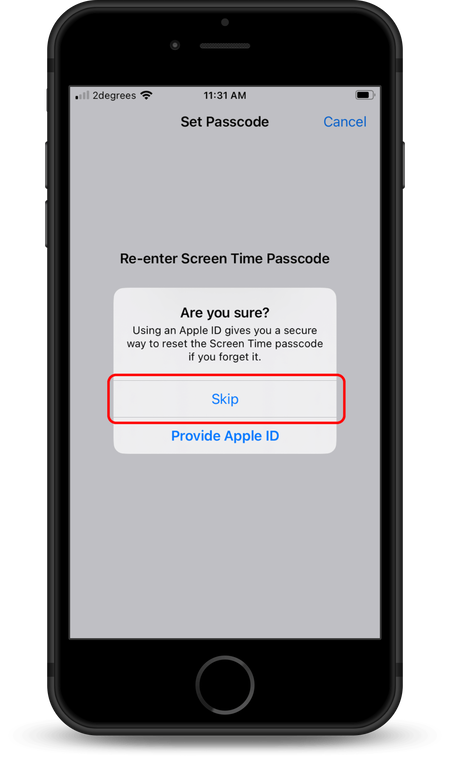
In cancelling the above action, tap Skip.
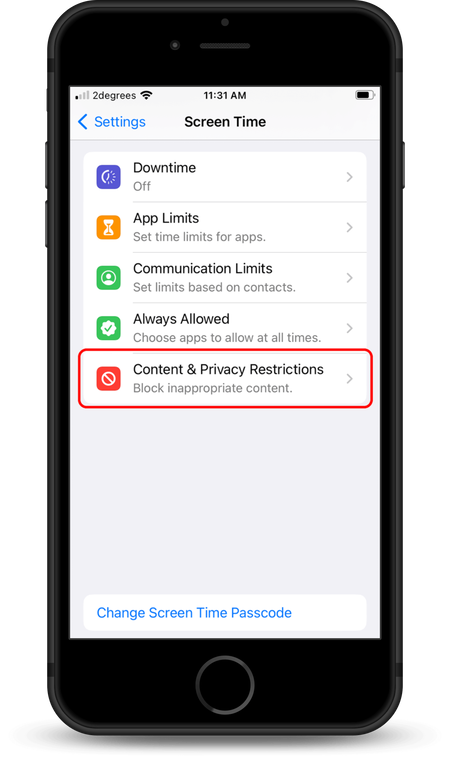
Tap the Content & Privacy Restrictions menu.
Tap the toggle switch found next to Content & Privacy Restrictions.
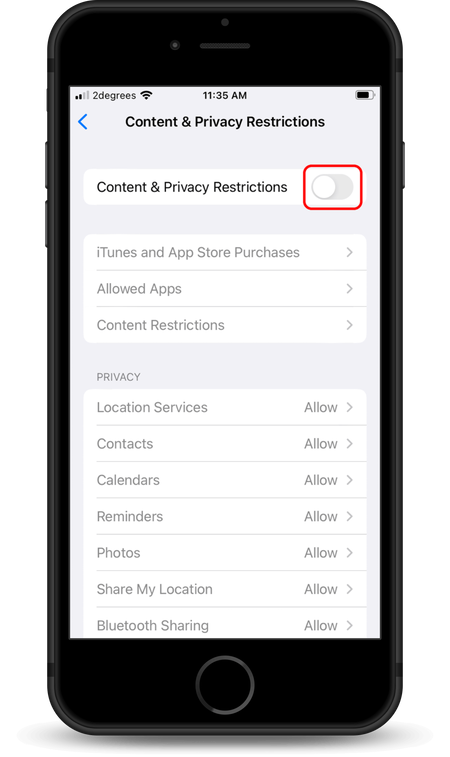
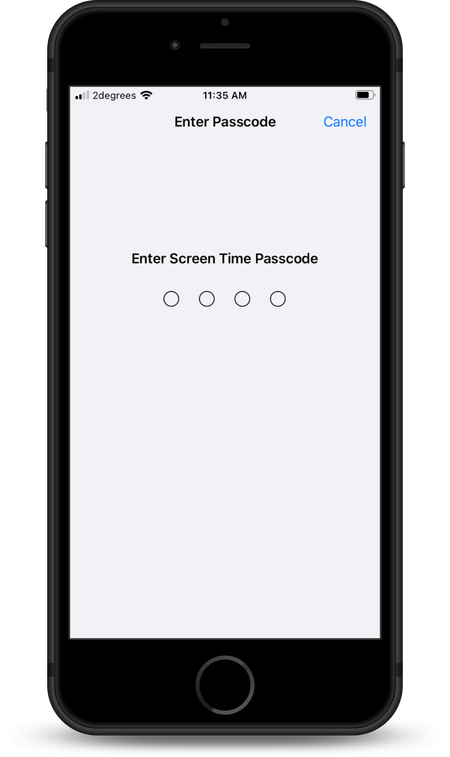
Enter the Screen Time passcode.
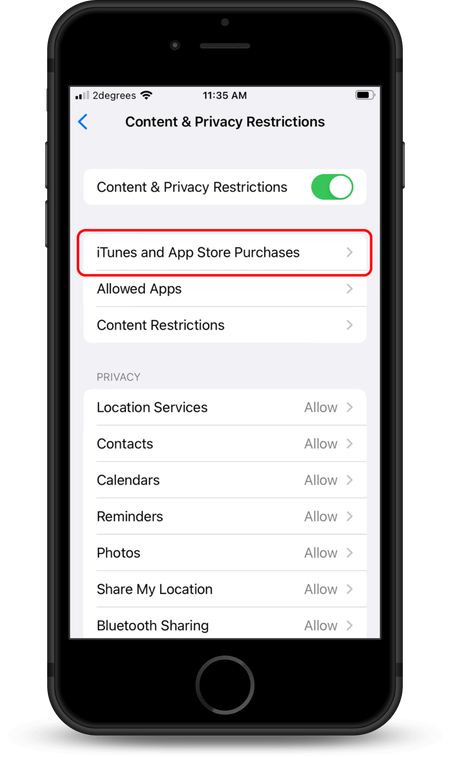
Tap the “iTunes and App Store Purchases” menu.
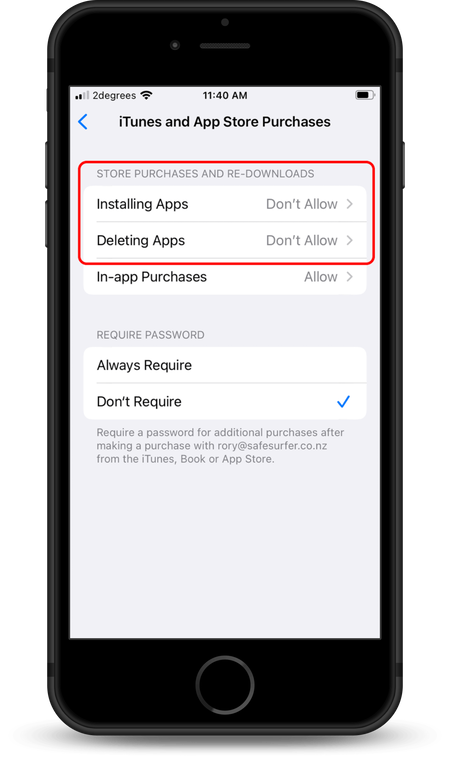
We suggest using the following options:
- Installing apps: Don’t Allow (this is optional, and not needed if you set an age rating restriction later on)
- Deleting apps: Don’t Allow (this is required)
Go back to the Content & Privacy Restrictions home menu. Tap the Content Restrictions menu.
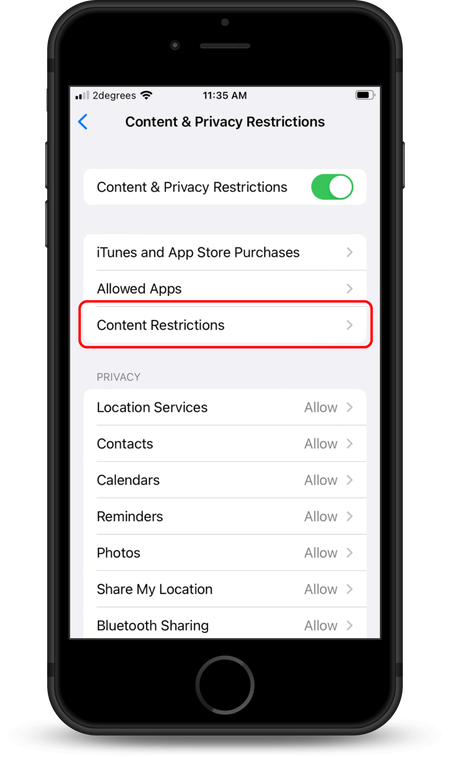
We suggest using the following options:
- Music, Podcasts, News, Fitness: Clean
- Music Videos: Off
- Music Profiles: Off
- Movies: M (that is, PG-13 or the equivalent for your region)
- TV Shows: M (that is, PG-13 or the equivalent for your region)
- Books: Clean
- Apps: 12+ (highly recommended, unless the device user absolutely requires a web browser app other than Safari, such as Google Chrome—any other web browsers would become unavailable, even if they’re already installed).
- App Clips: Don’t Allow
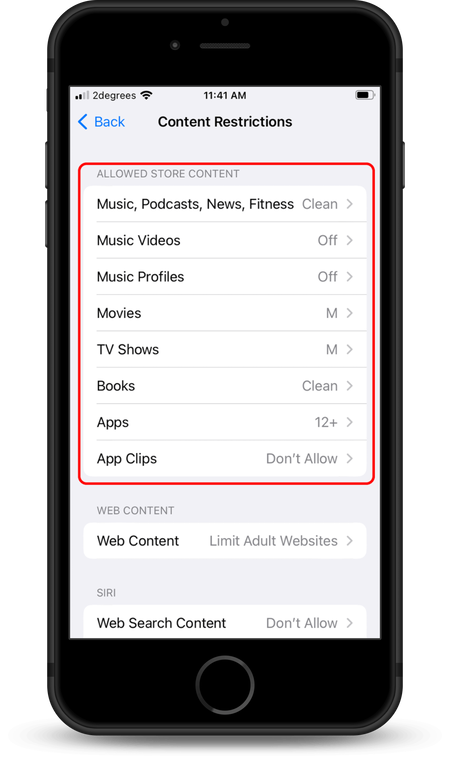
After scrolling down further, we suggest using the following options:
- Web content: Limit Adult Websites (highly recommended as a fallback protection for the Safari app)
- (Siri) Web Search Content: Don’t Allow
- (Siri) Explicit Language: Don’t Allow
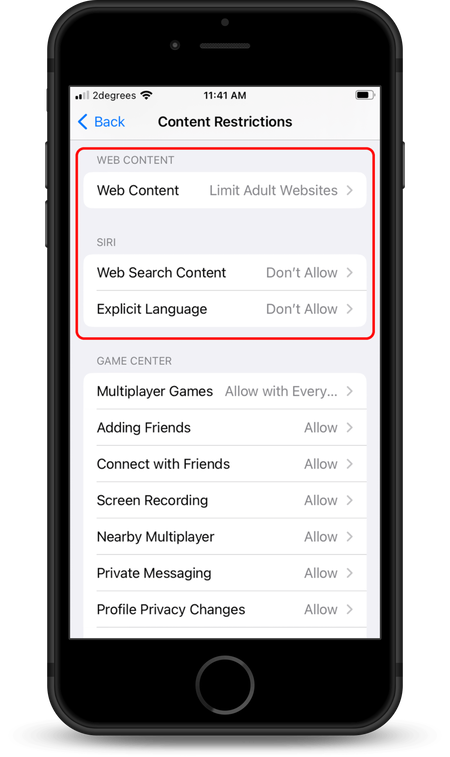
Go back to the home menu of the Settings app to close out of the Screen Time menu.
Step 3: Verify protection
Visit the Safe Surfer website and check the protection bubble at the top of the page to verify that this device is protected.

To see blocking in action, try visiting ExampleAdultSite.com. This is a safe website for testing if pornographic websites are being blocked. This website should be blocked.
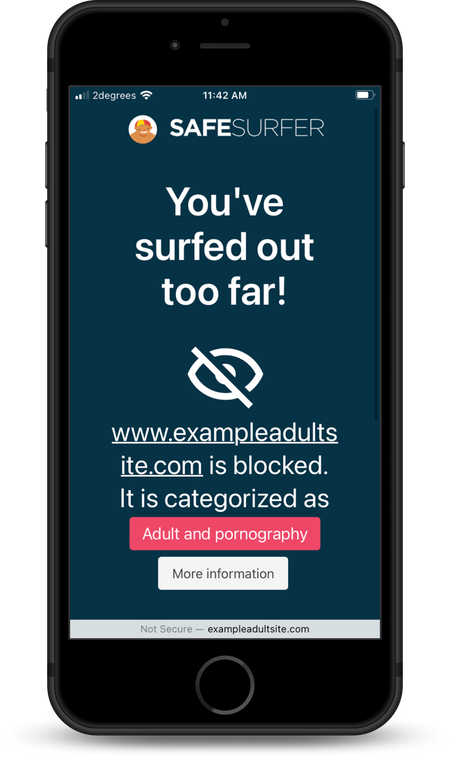
Protection complete
Great work! This device is now protected. To start monitoring protected devices, visit our easy-to-use online dashboard.
If you have any other iPhone, iPad, or iPod devices you would like to protect, simply start again from the top of the guide. If you would like to protect a different kind of device, visit our Guides page.
Disclaimer: Safe Surfer Limited is in no way associated with Apple Inc.
