It’s easy with Safe Surfer to install an effective porn blocker on a Windows 11 device. Along with protecting your privacy, we use our behind-the-scenes technology to block porn and other harmful online content. Let’s get started with installing protection.
Pro tip: you can find the latest version of the guide on our help desk by clicking this link.
Step 1: Install protection
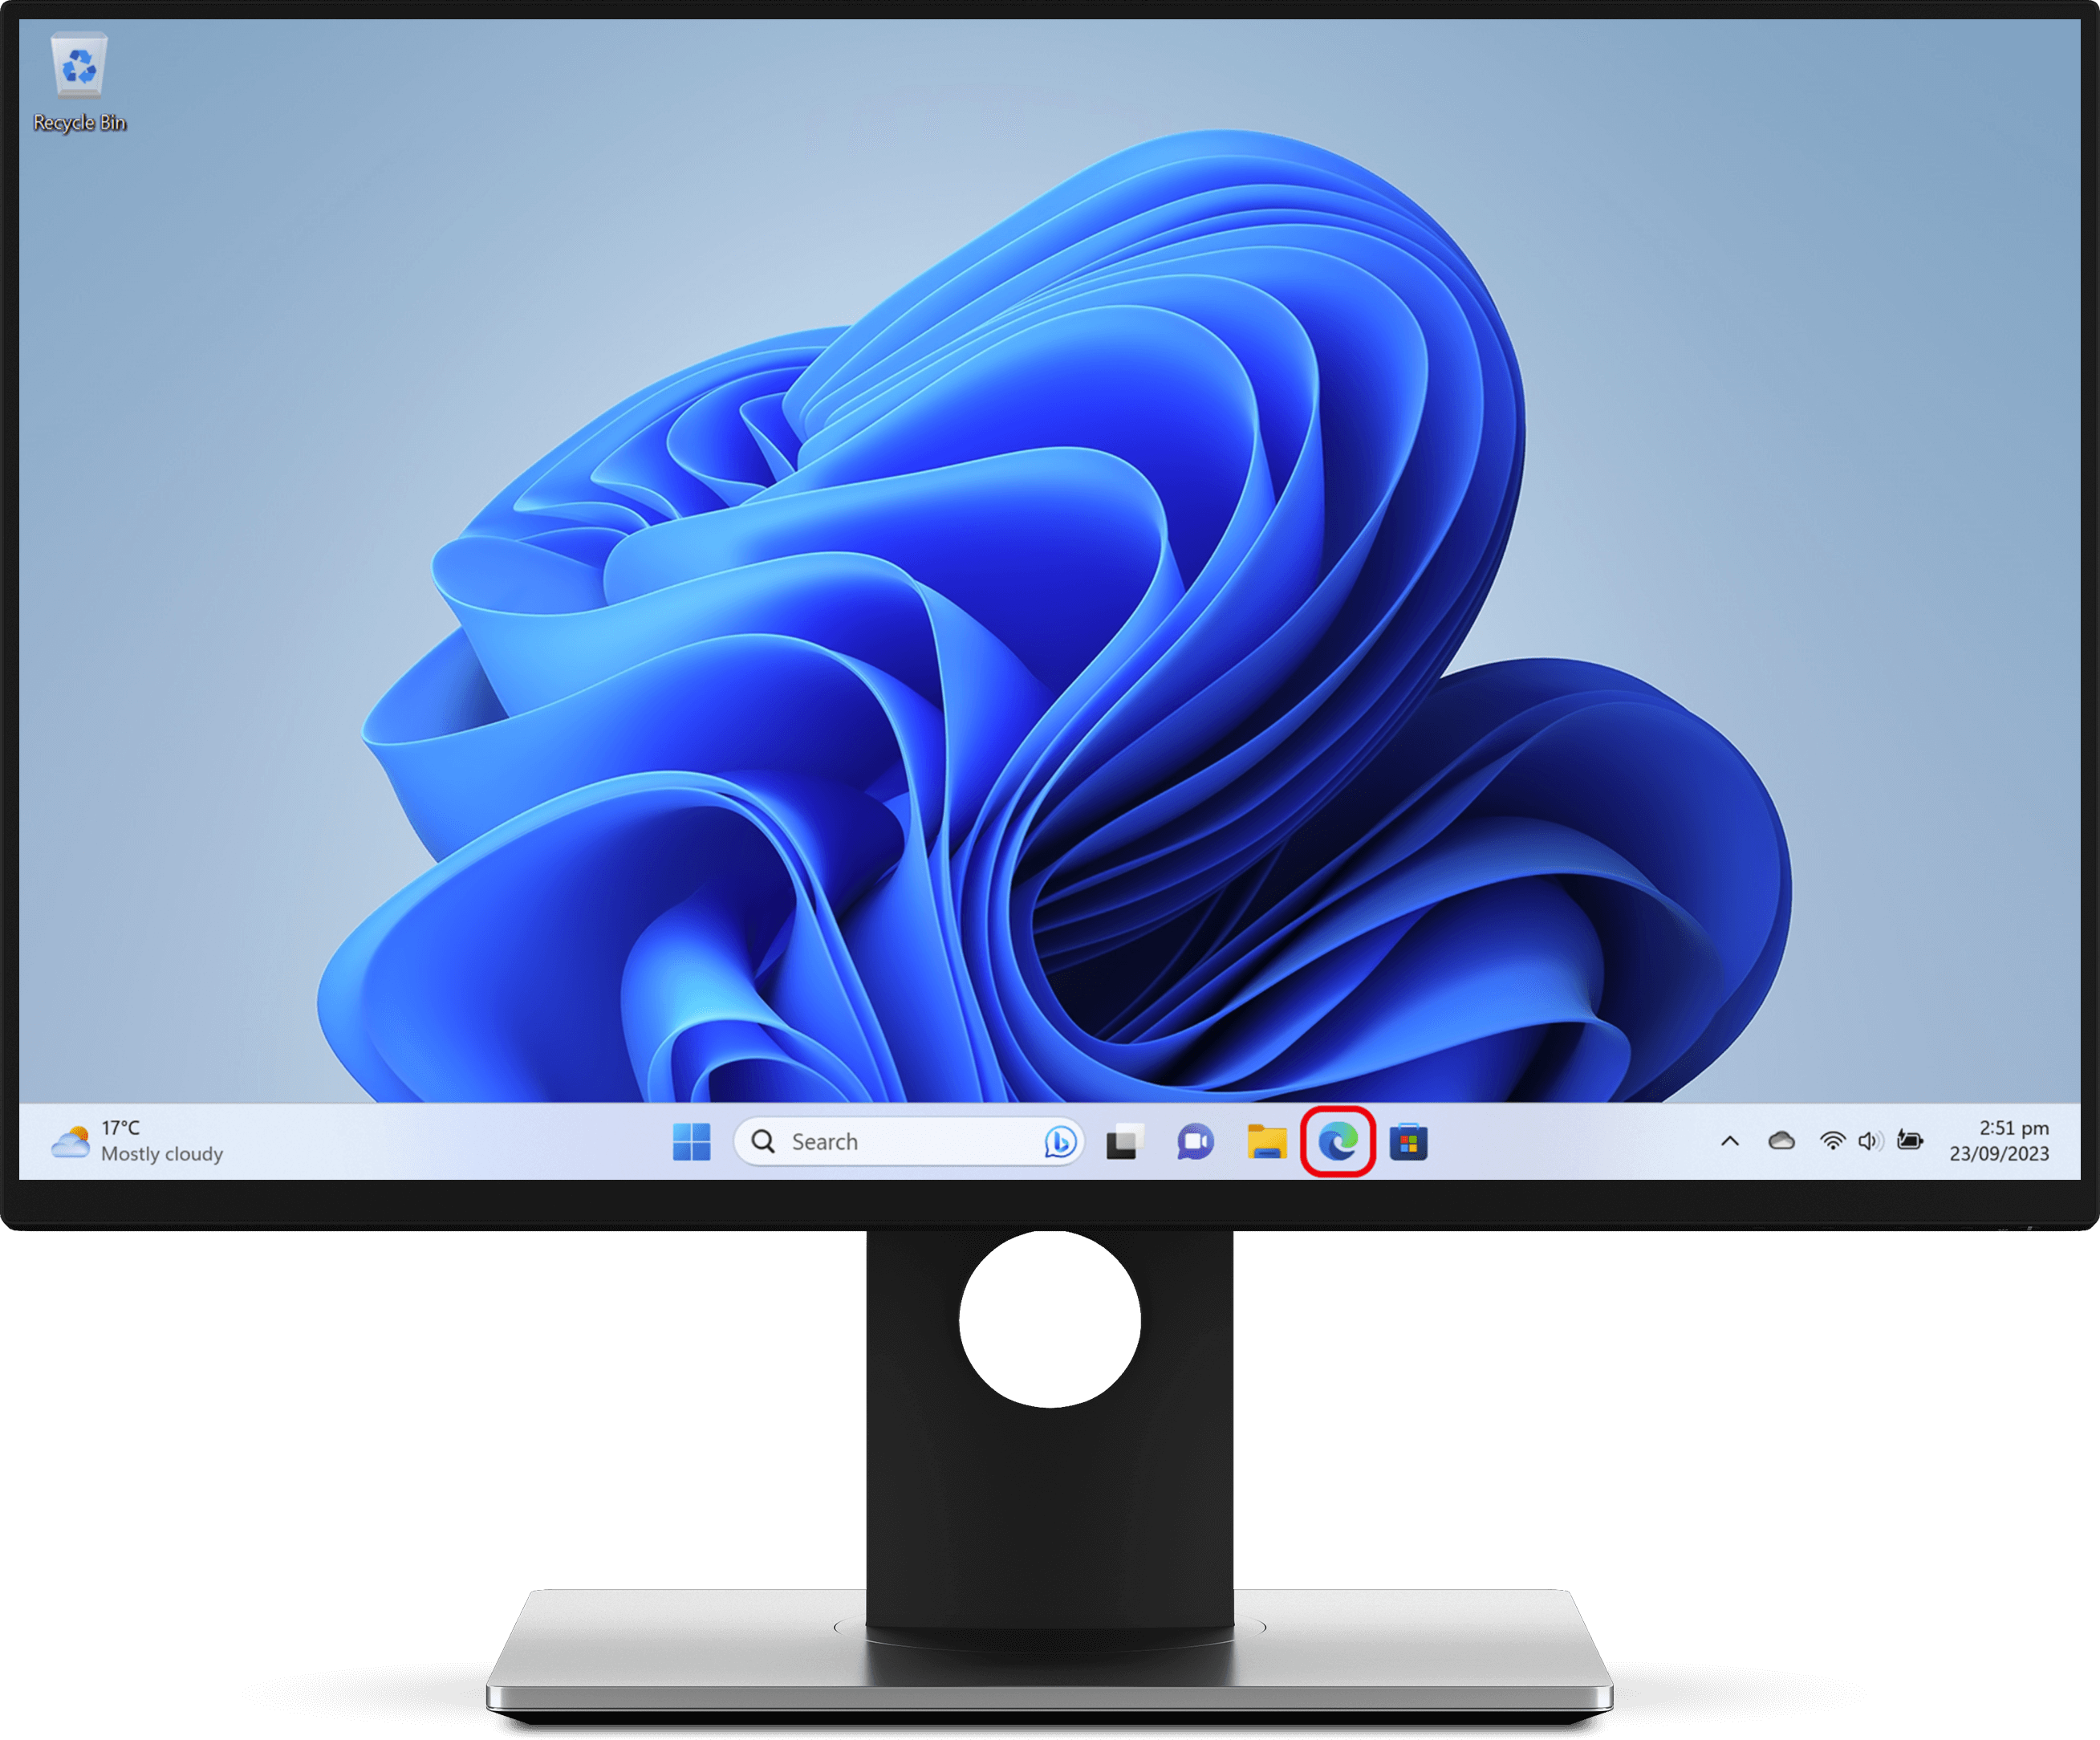
On the device to be protected, click the Microsoft Edge app (or any other web browser app, such as Google Chrome) on the taskbar.
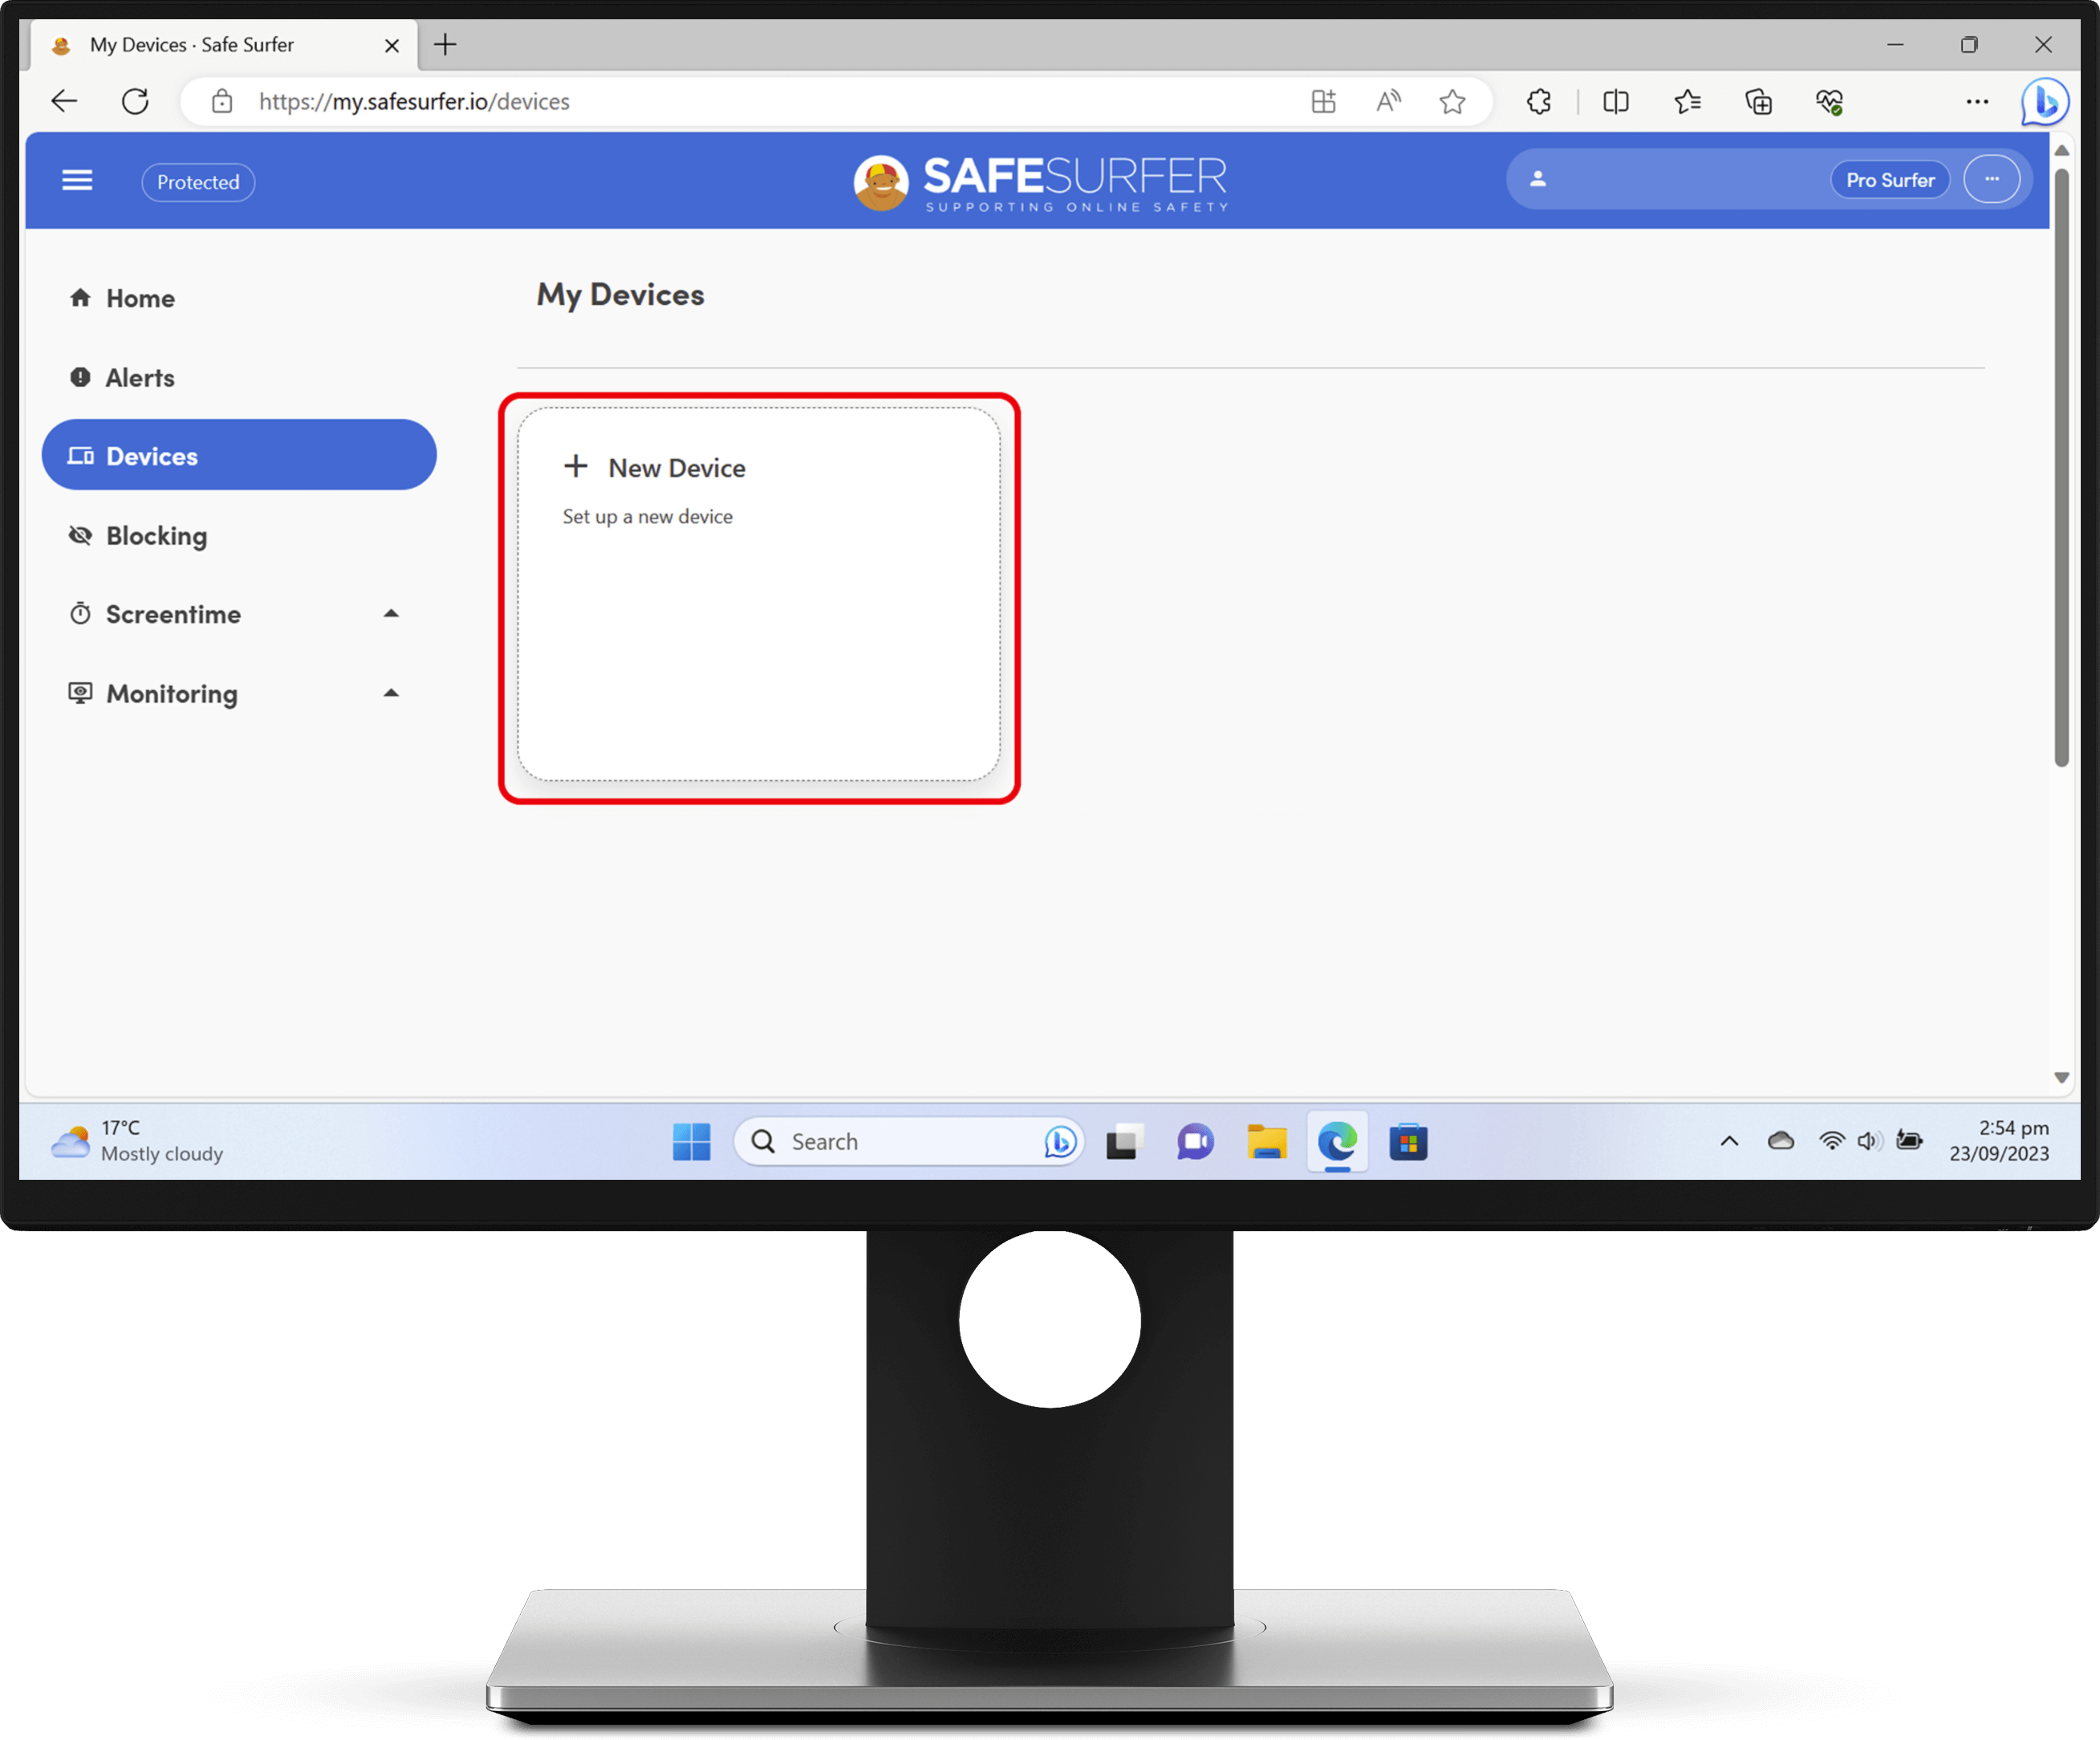
Visit the Safe Surfer dashboard and log in to your account. Click the Devices menu on the left-hand sidebar, then click the “+ New Device” button.
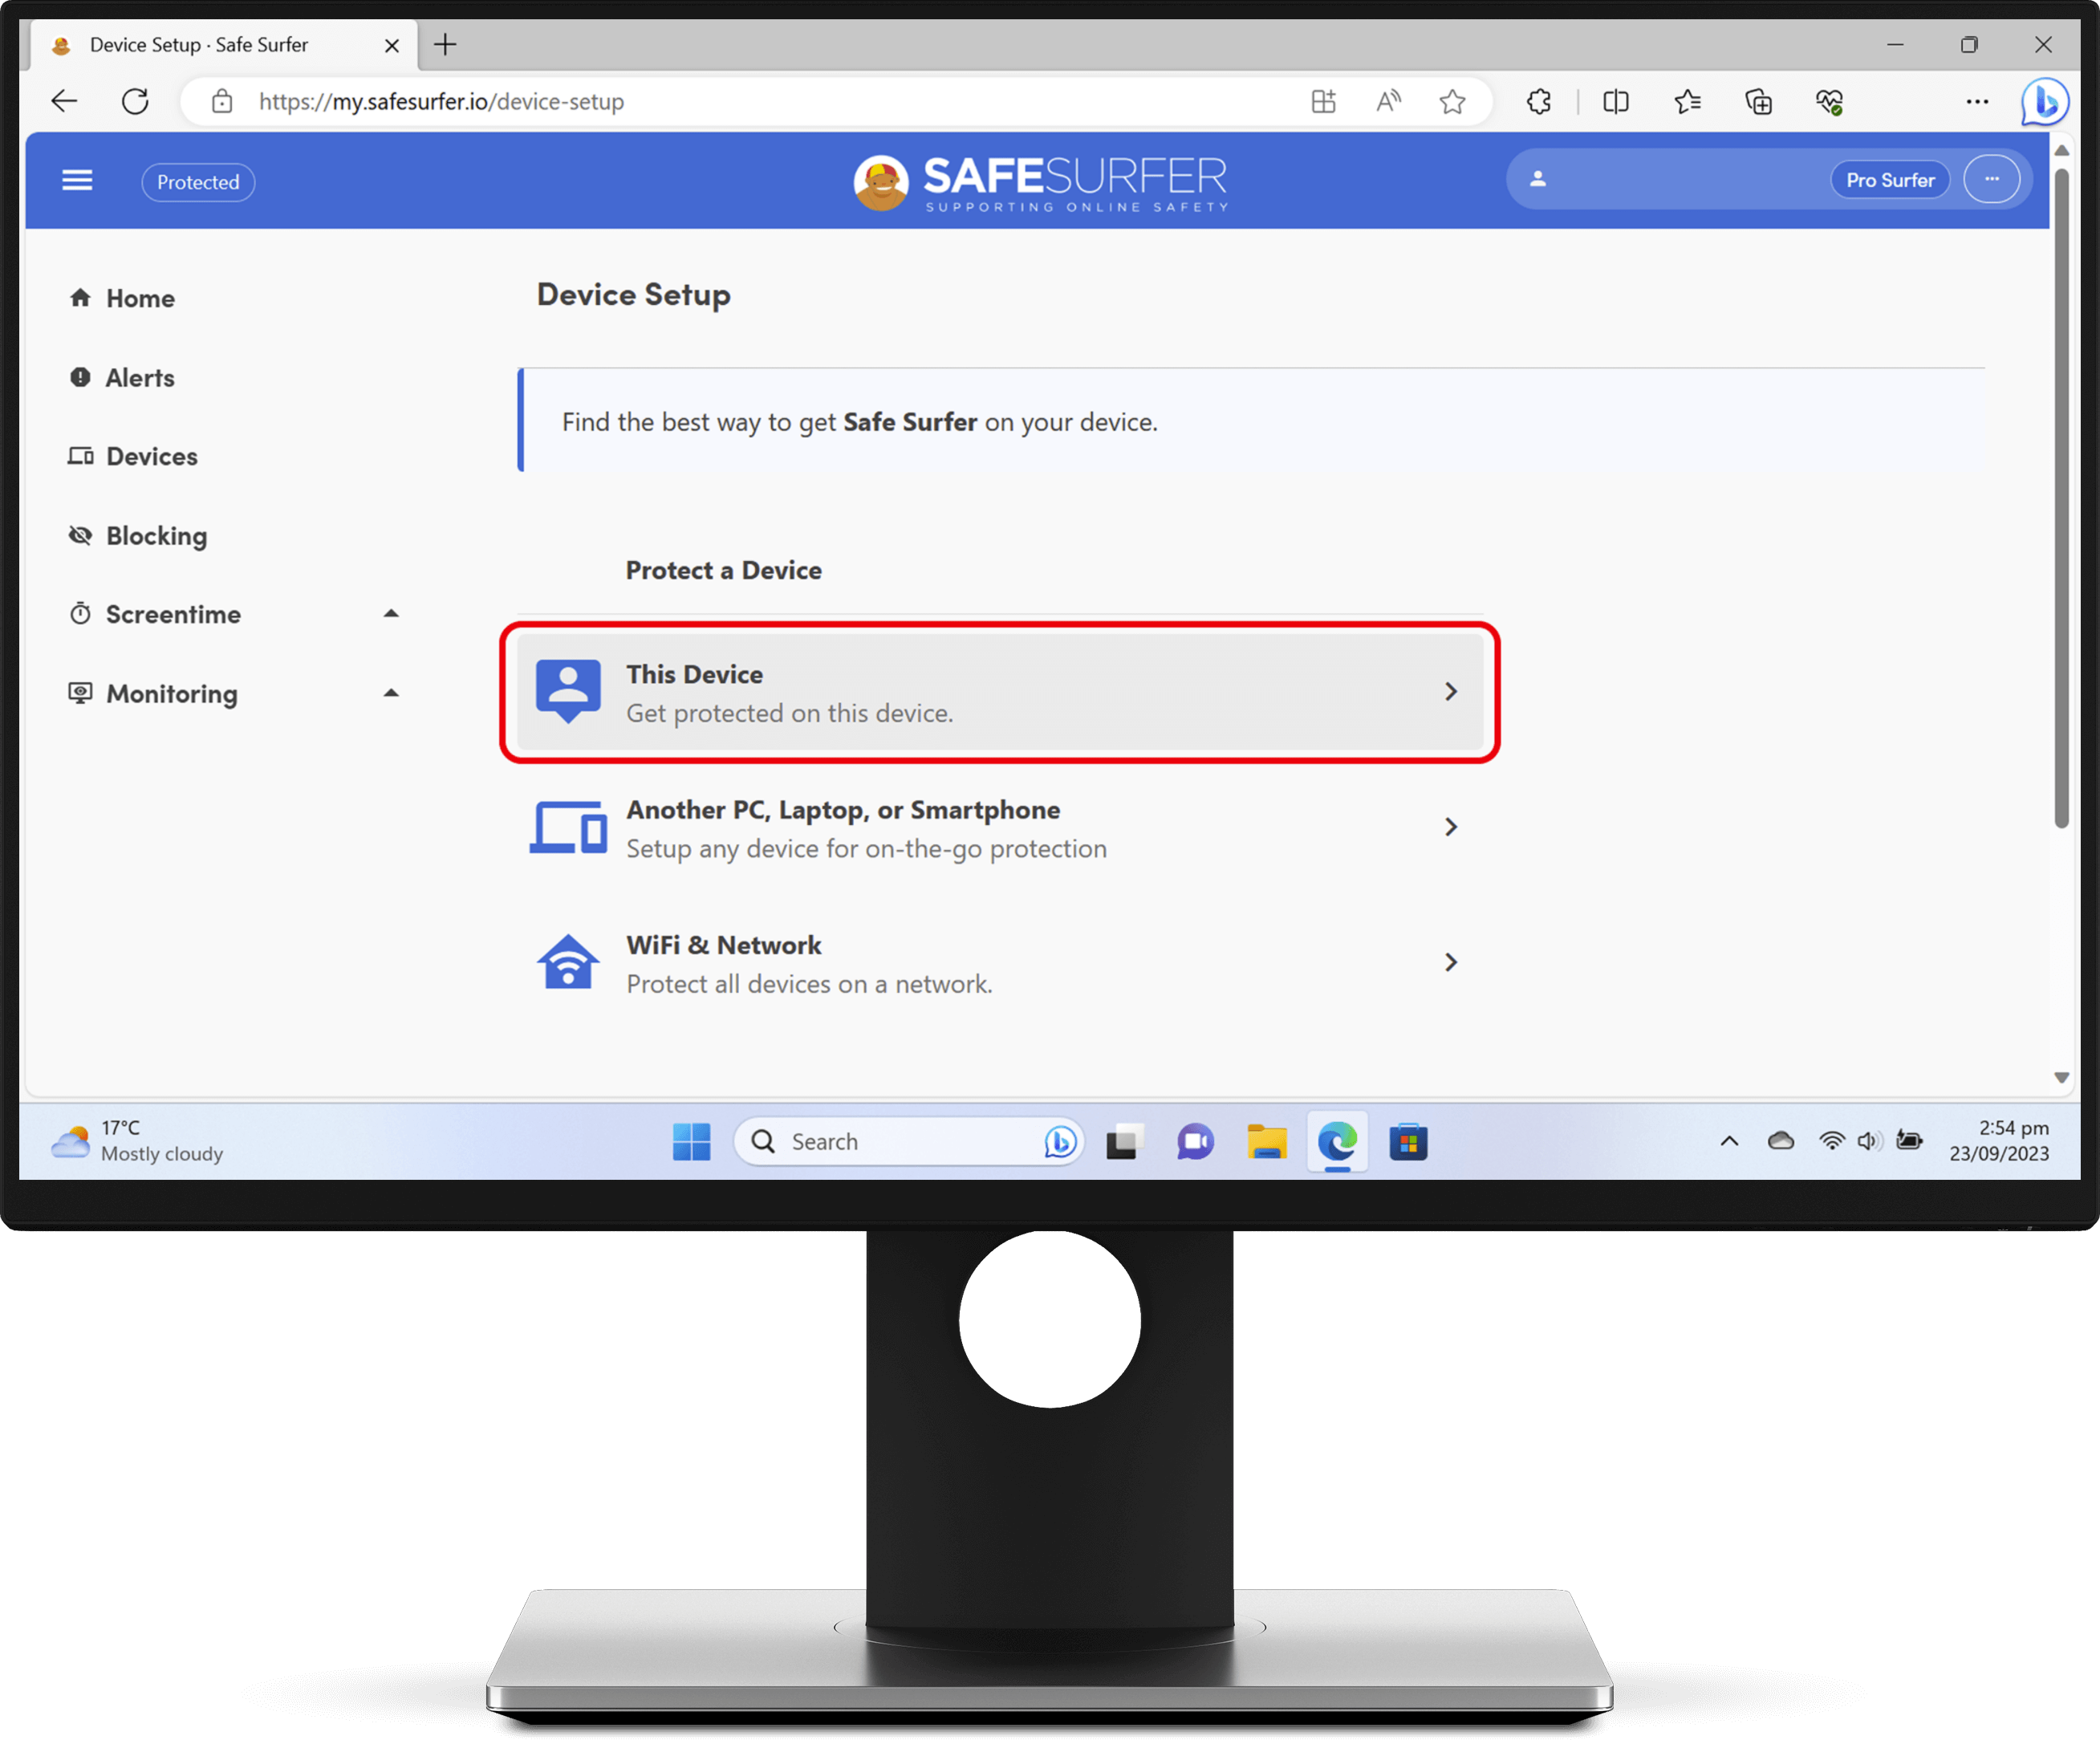
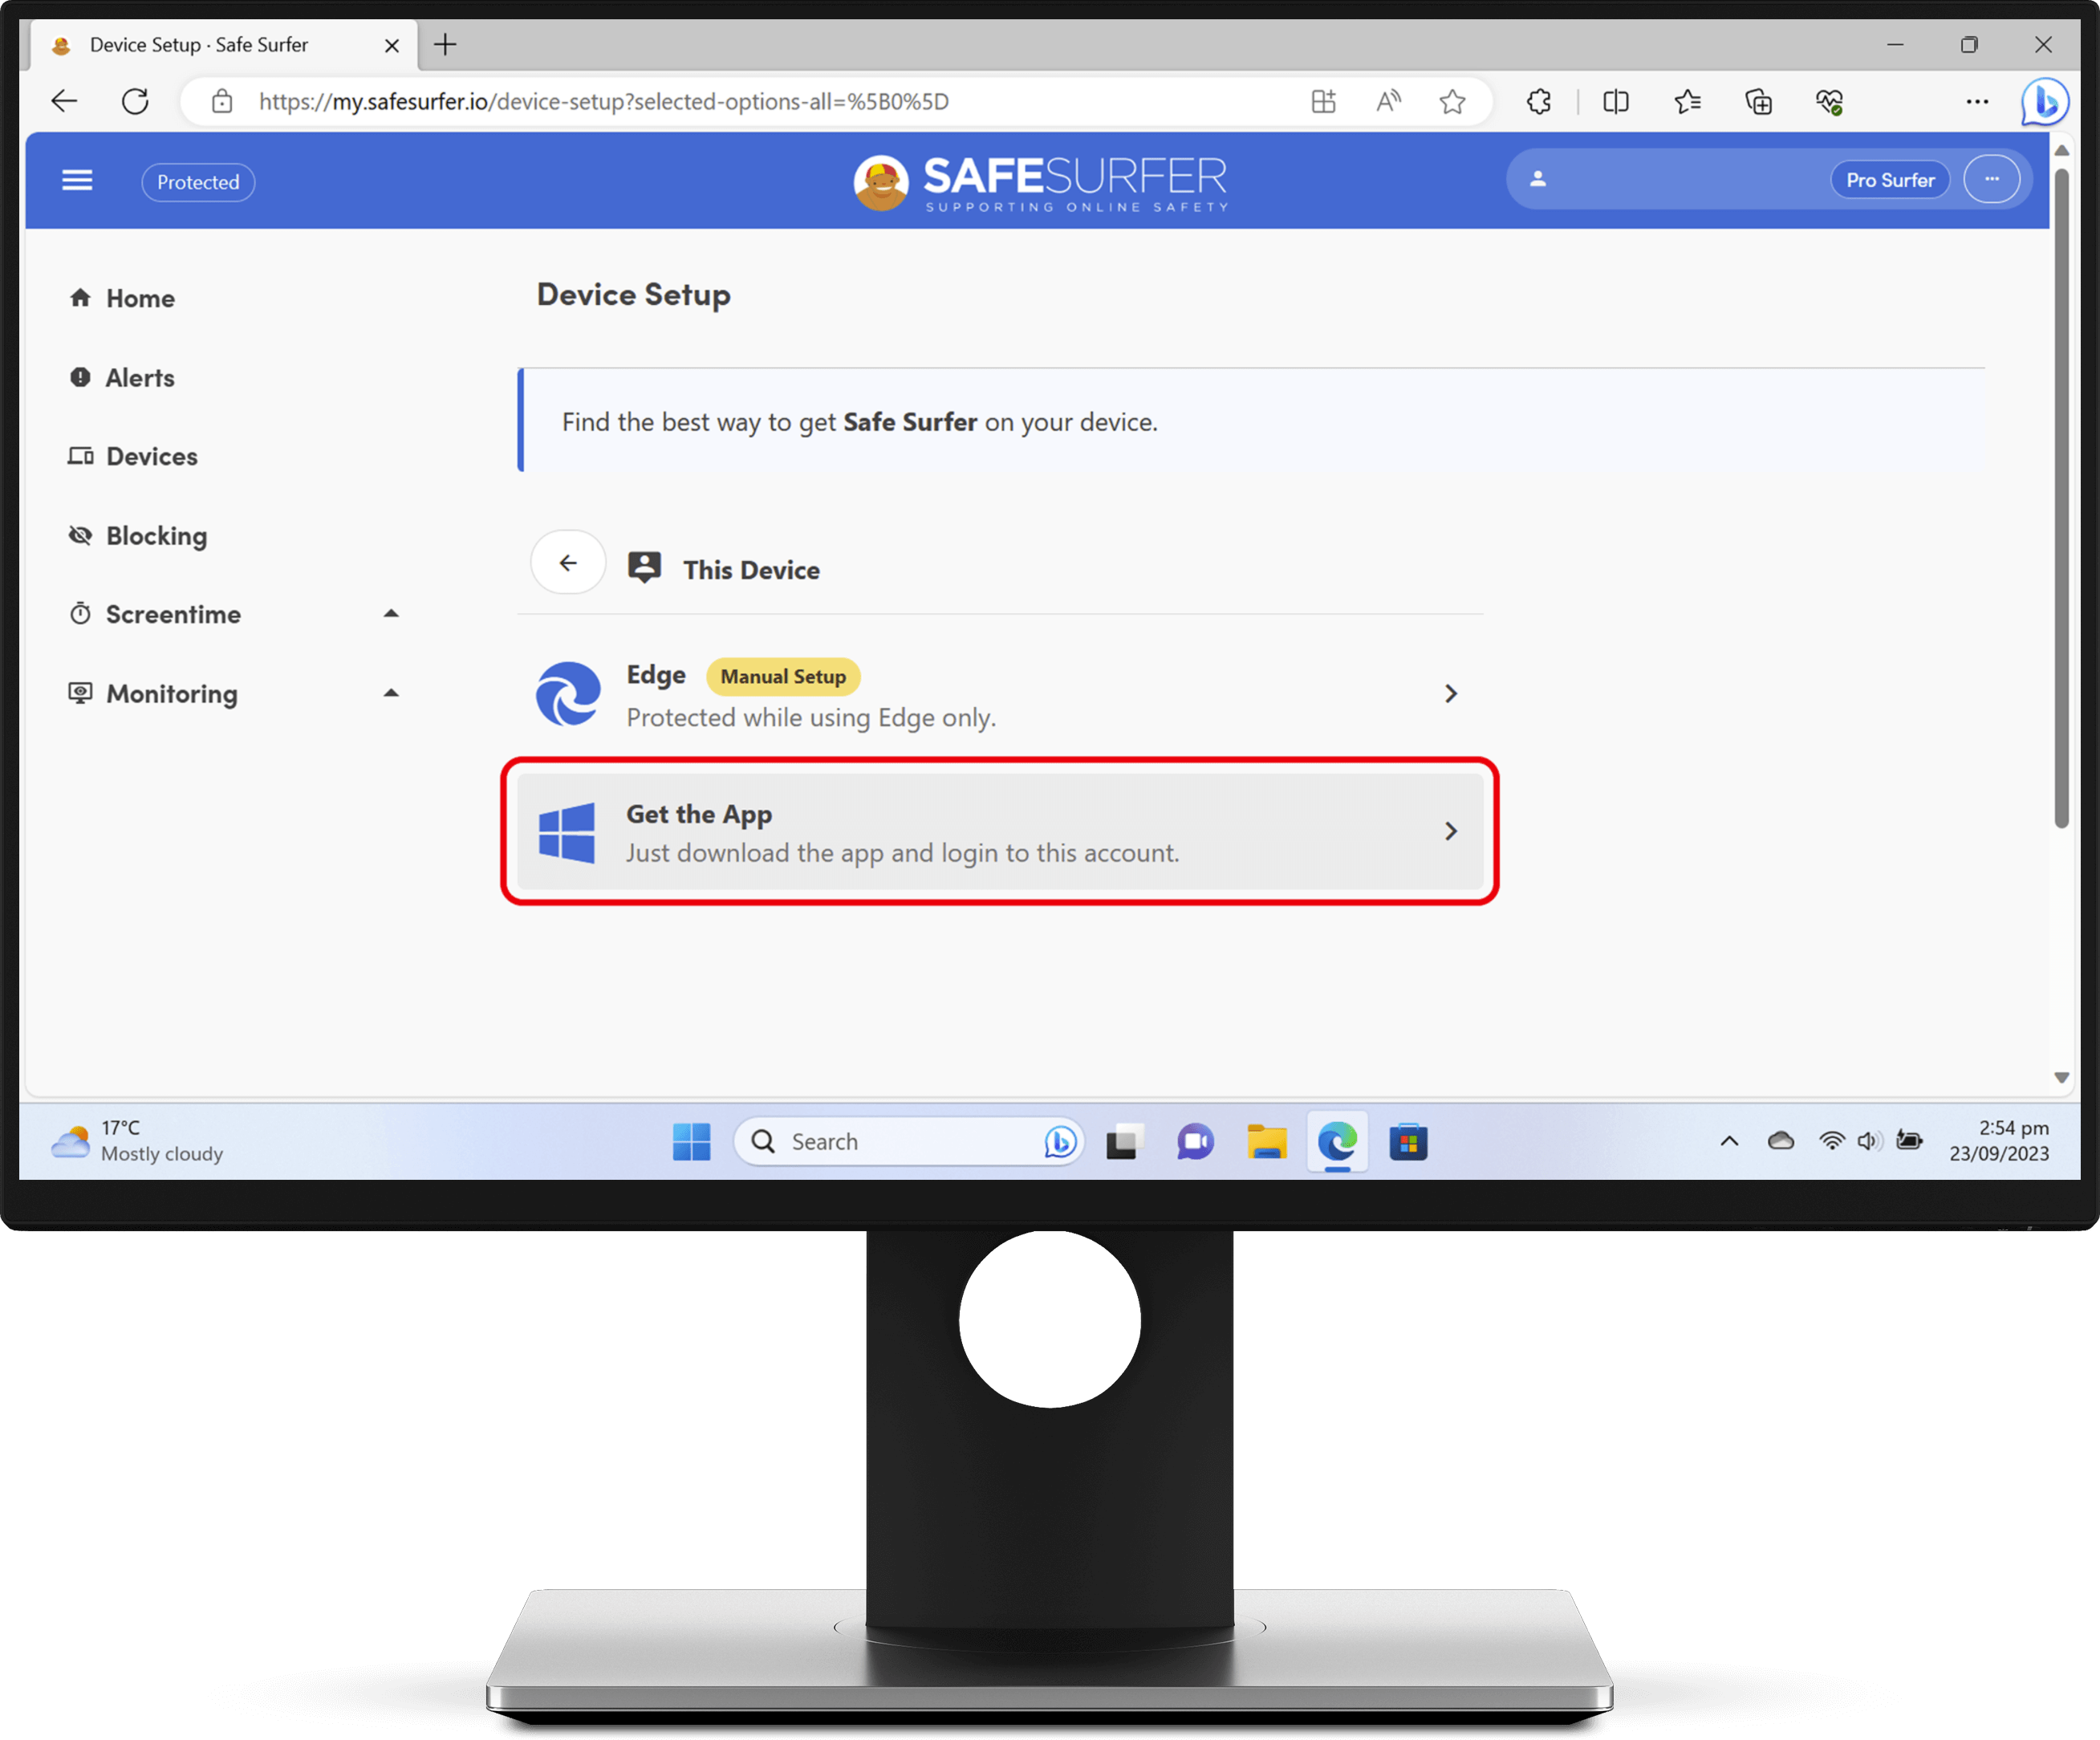
Click “This device”.
Click “Get the app”.
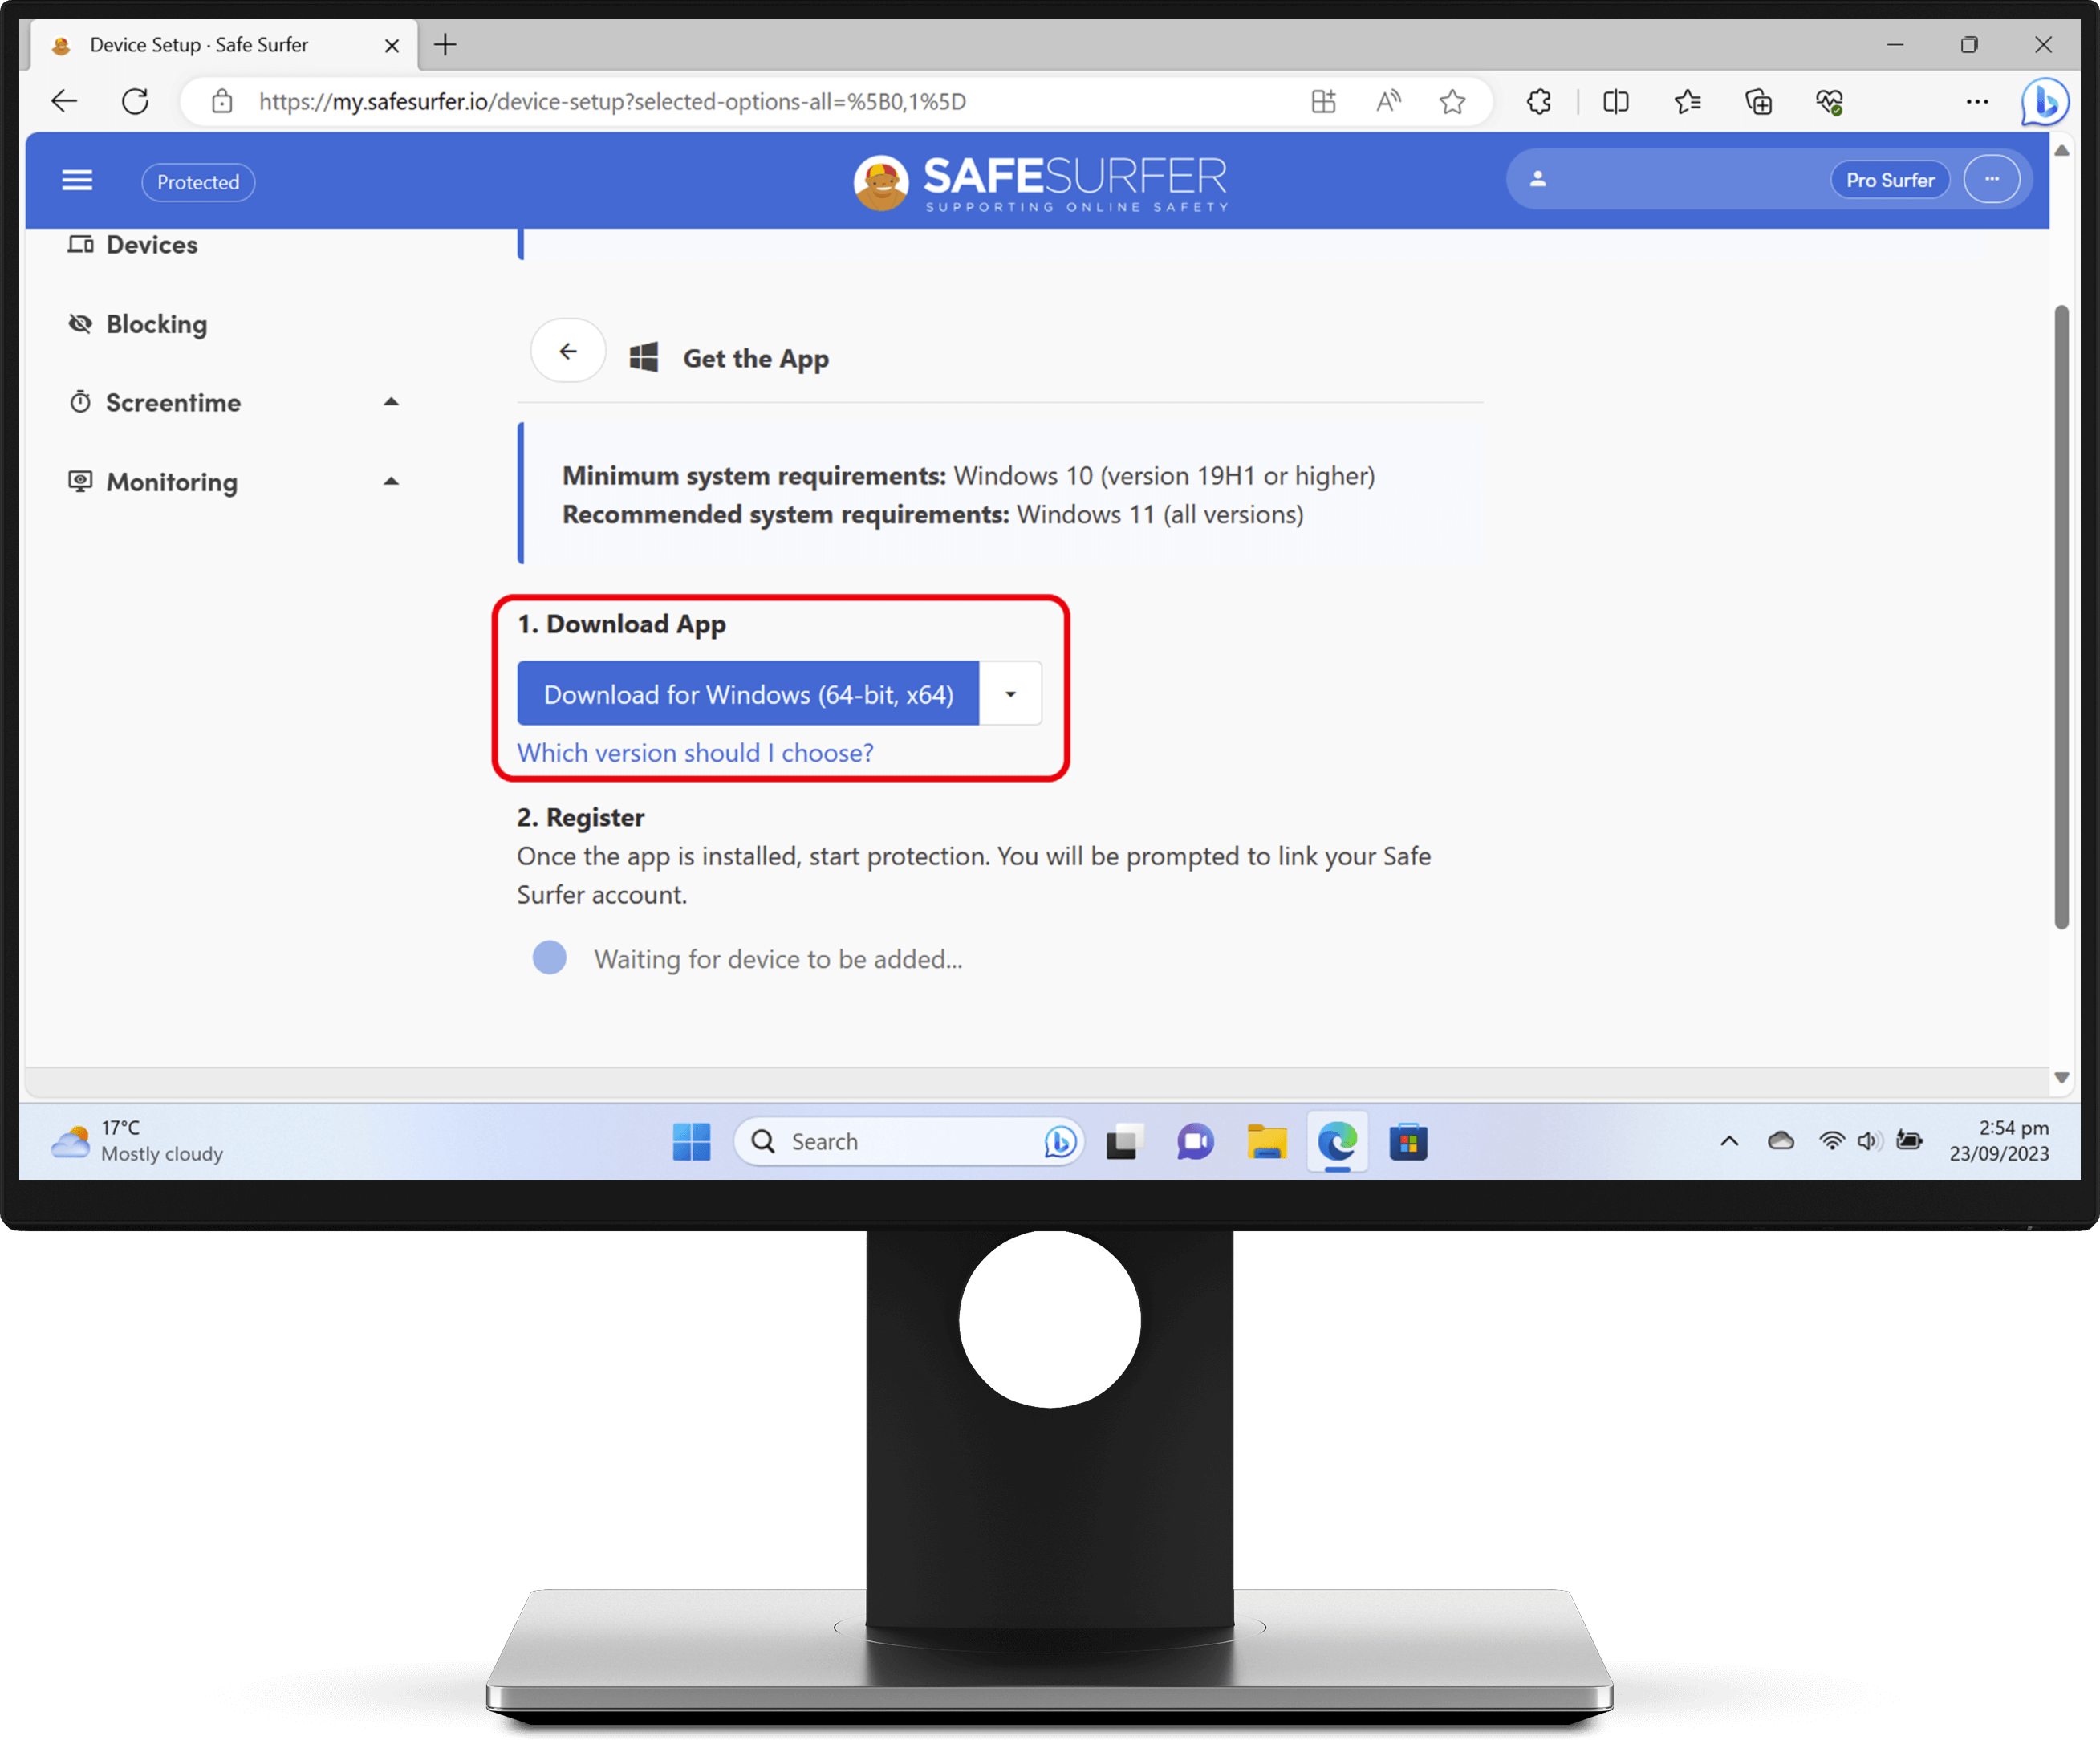
From this page, you can download the correct installer for this computer. In most cases, you will be downloading the installer that has been pre-selected for you (64-bit, x64). If you know that this computer is running a 32-bit or ARM64 copy of Windows, you can click the arrow button to download the correct installer instead.
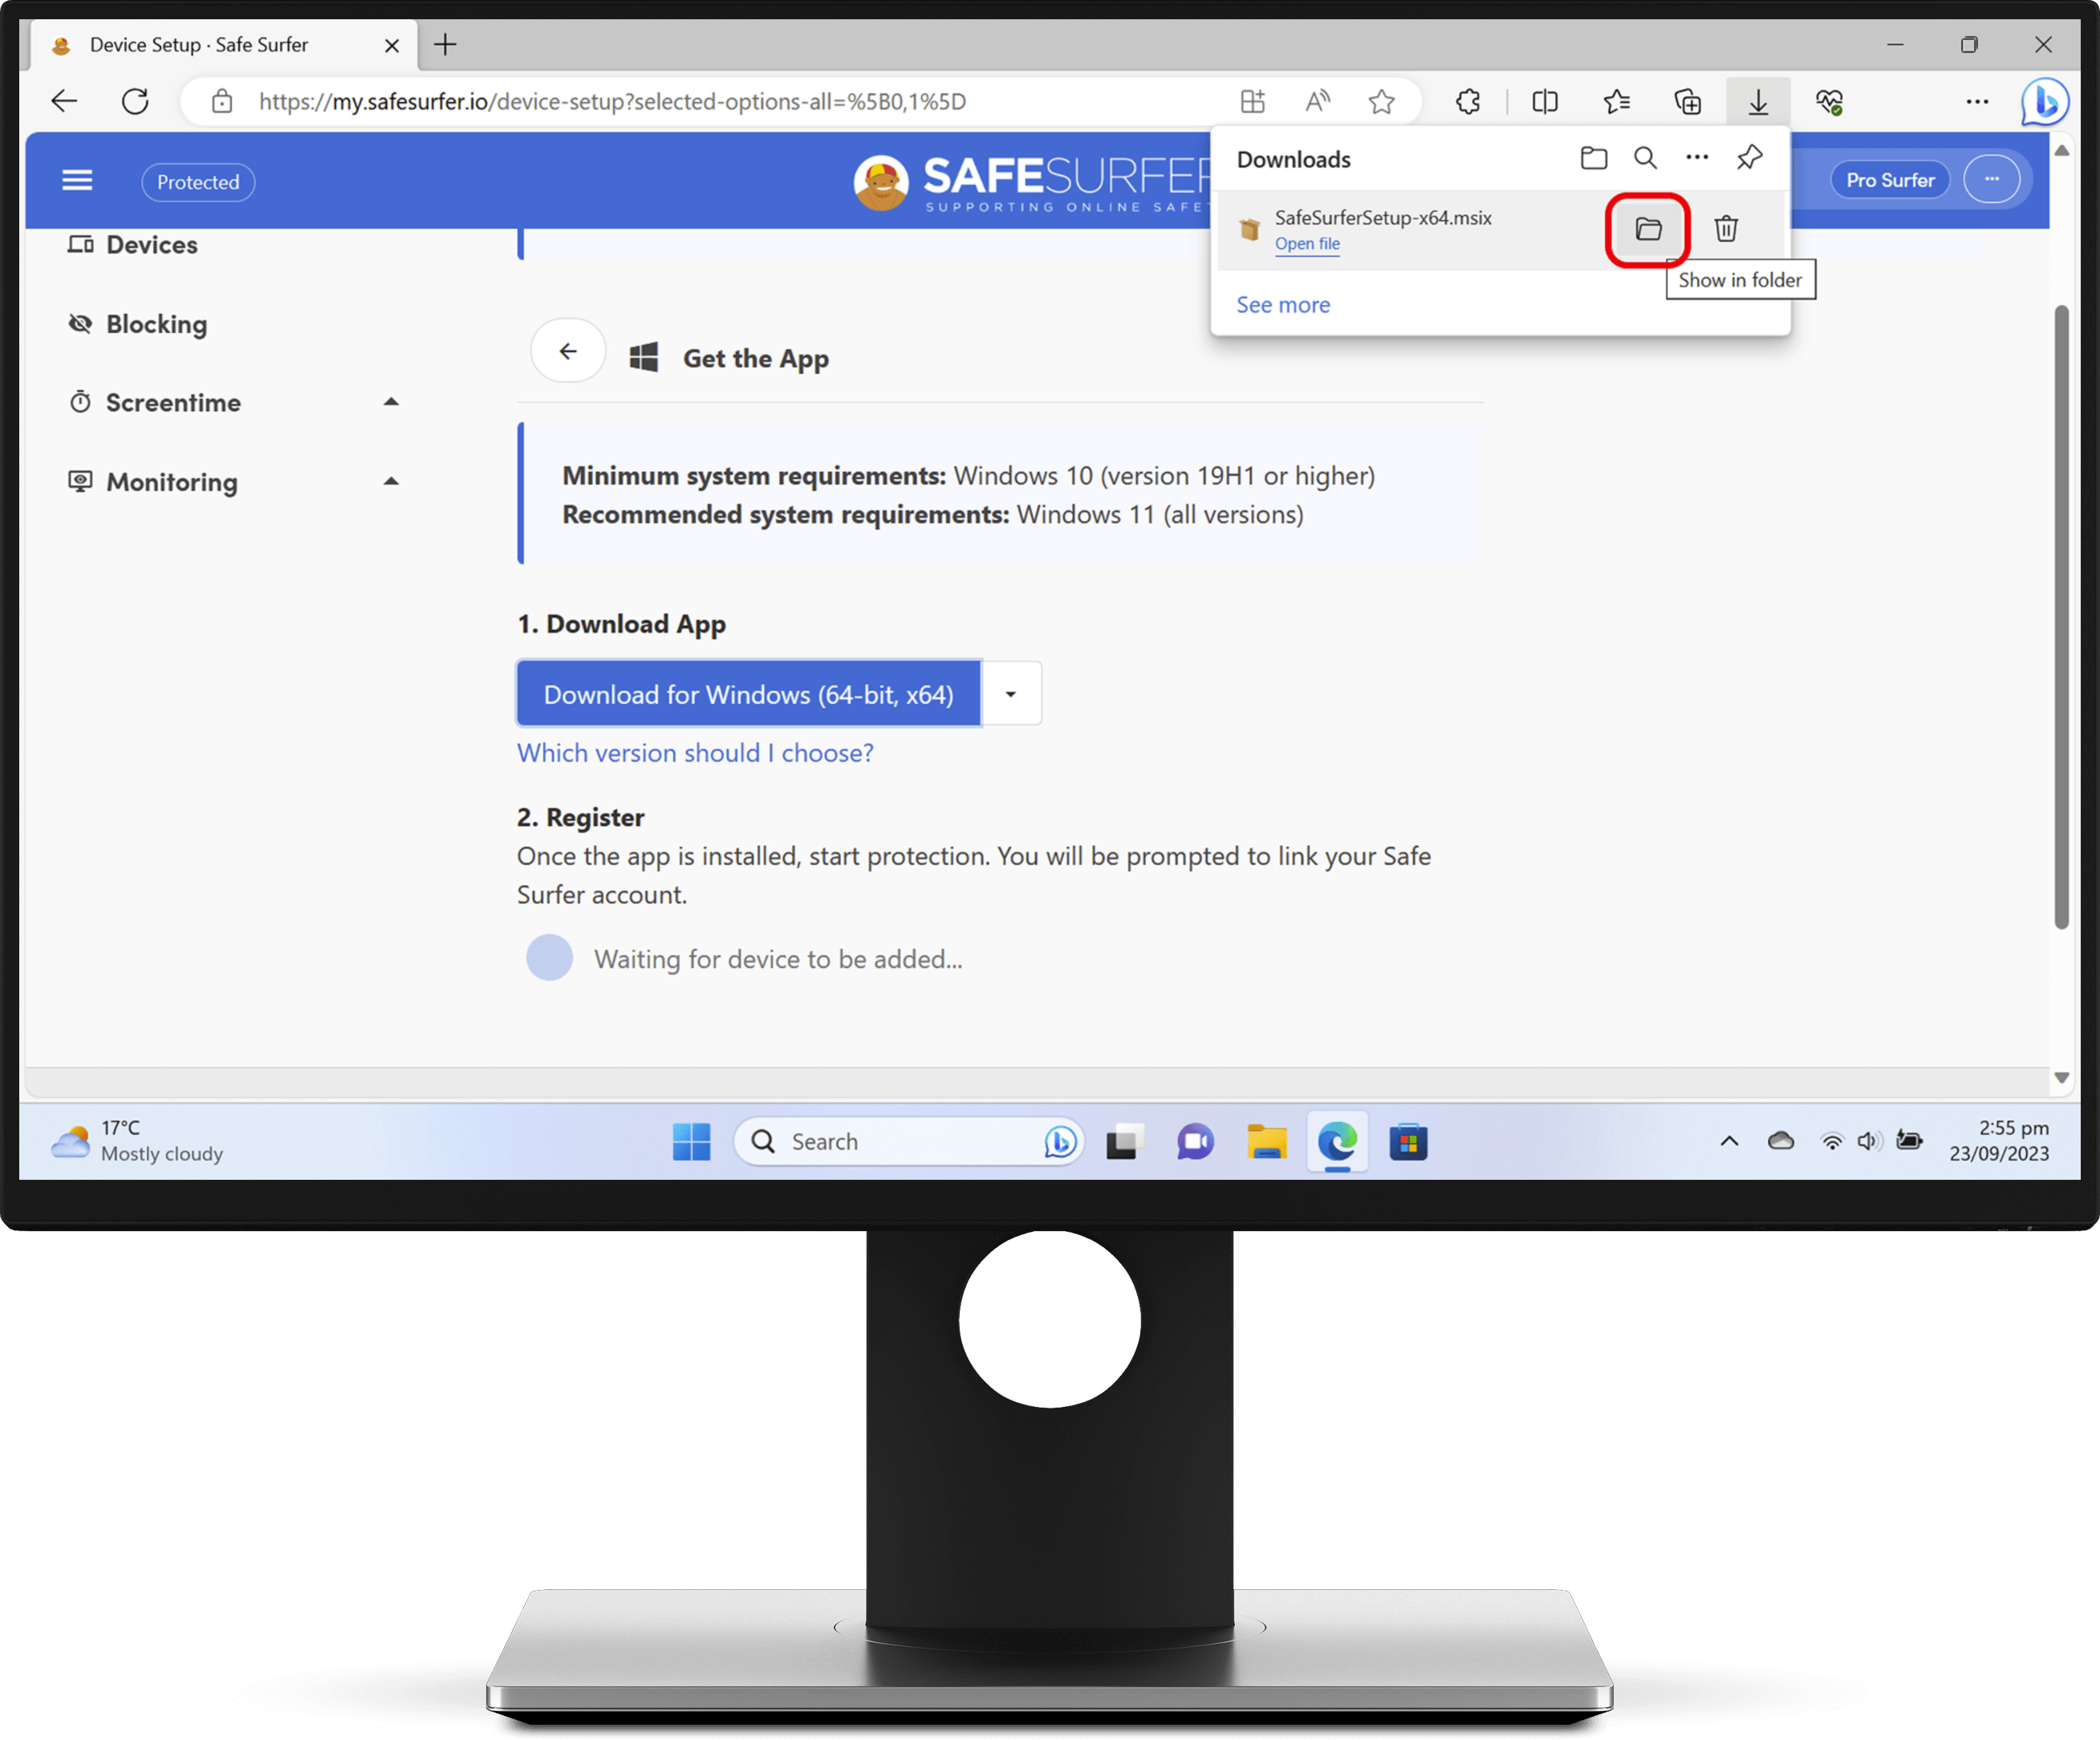
Once the app has downloaded, you can click the folder icon at the upper-right corner to open the Downloads folder.
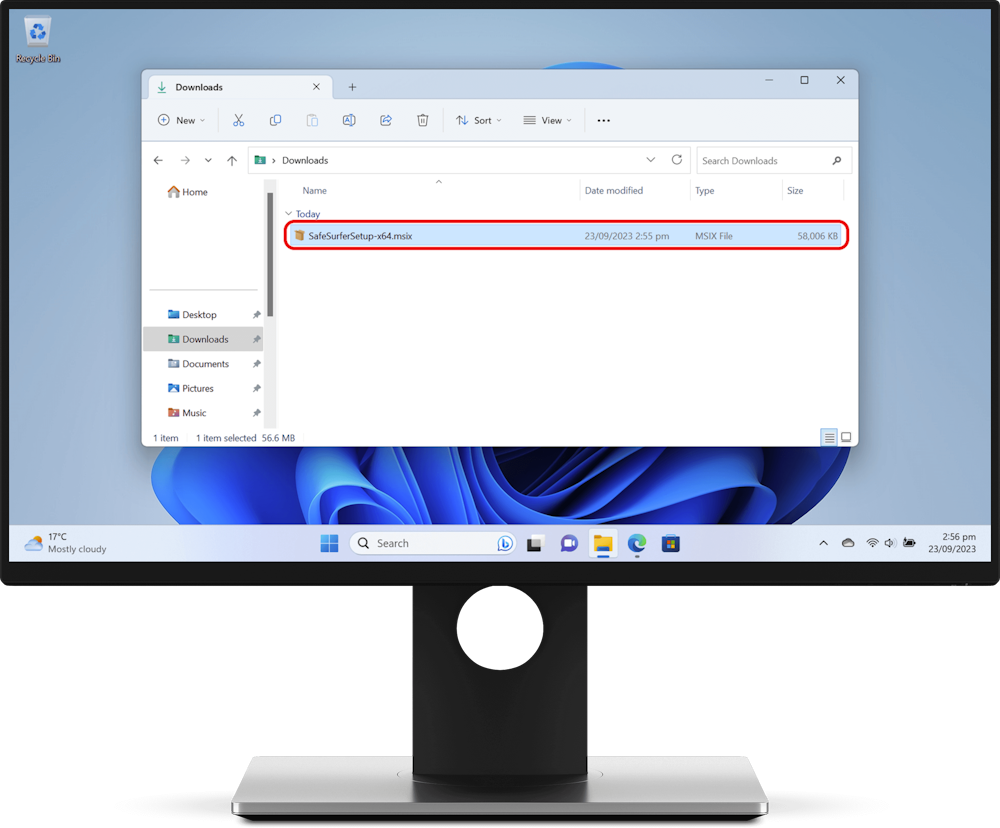
Double-click the installer file.
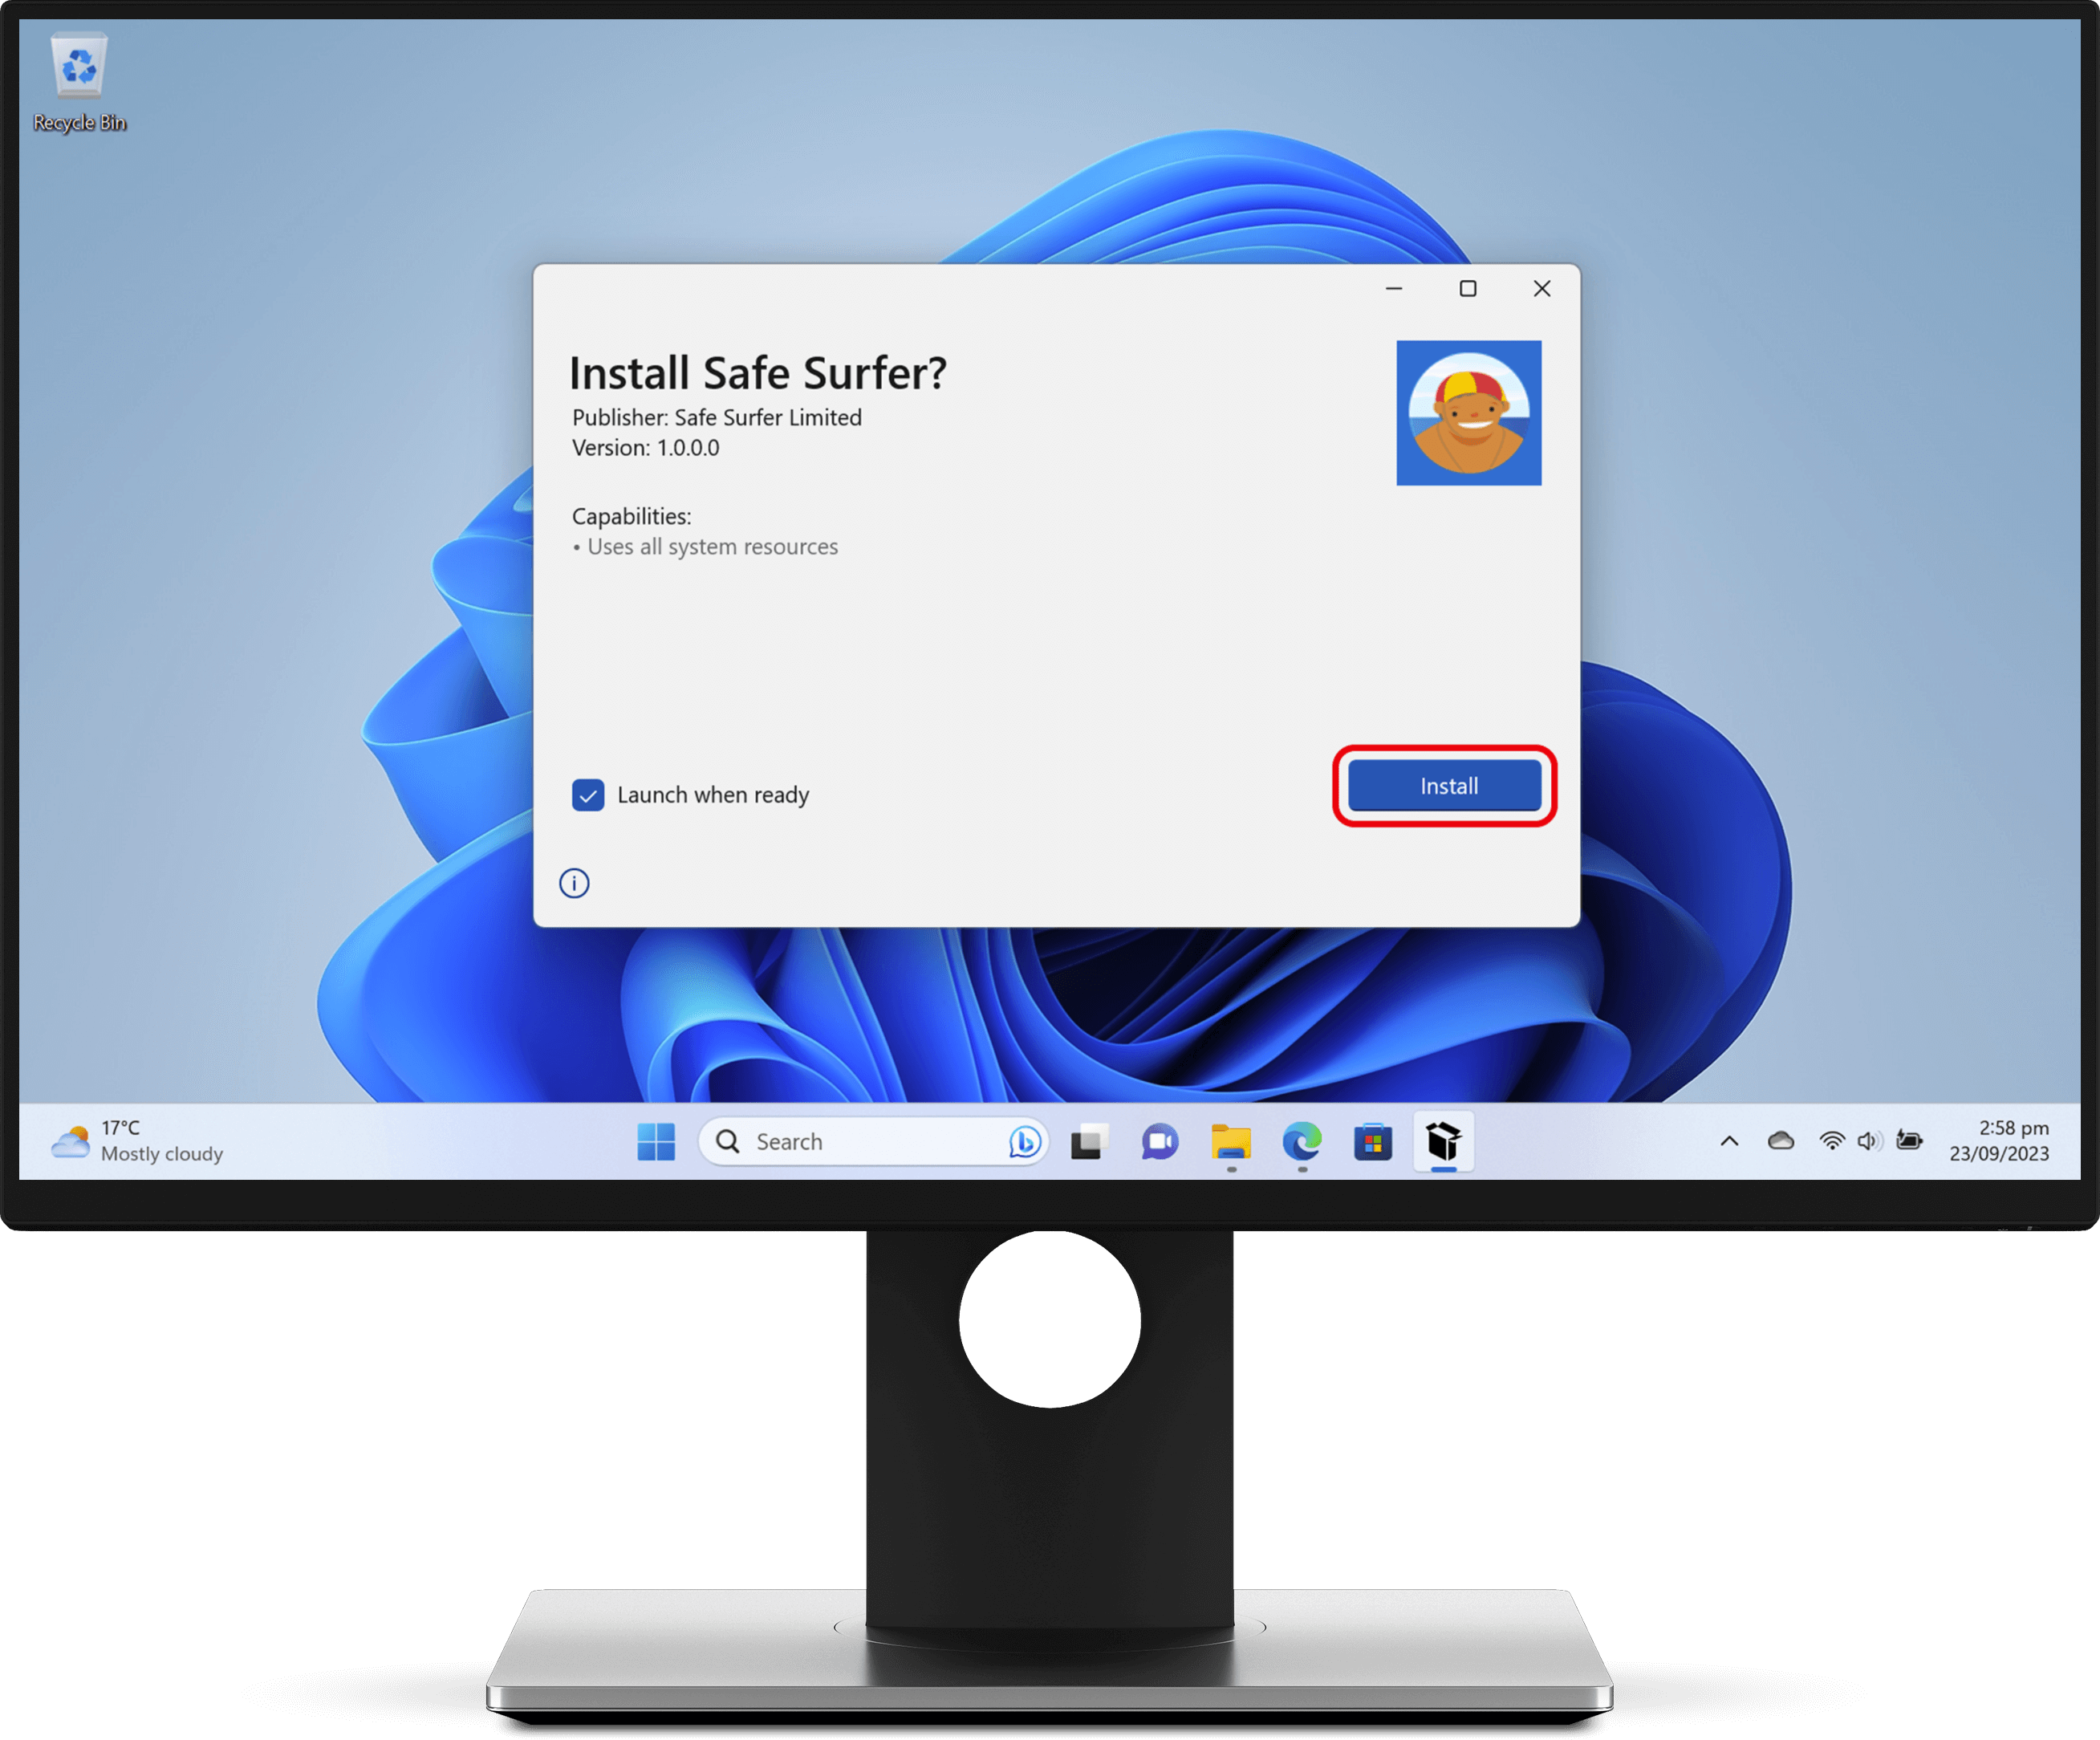
When Windows asks you if you would like to install Safe Surfer, click the Install button.
This can take 1–2 minutes to complete. In rare cases you might get an error regarding a failure “to install package dependencies”—if this occurs, close out of the installer window. Download the official Microsoft app runtime installer for either 64-bit computers (most cases), 32-bit computers, or ARM64 computers. Once the app runtime installer has downloaded, open it and wait for it to close. Once the installer has closed, you can try installing Safe Surfer again.
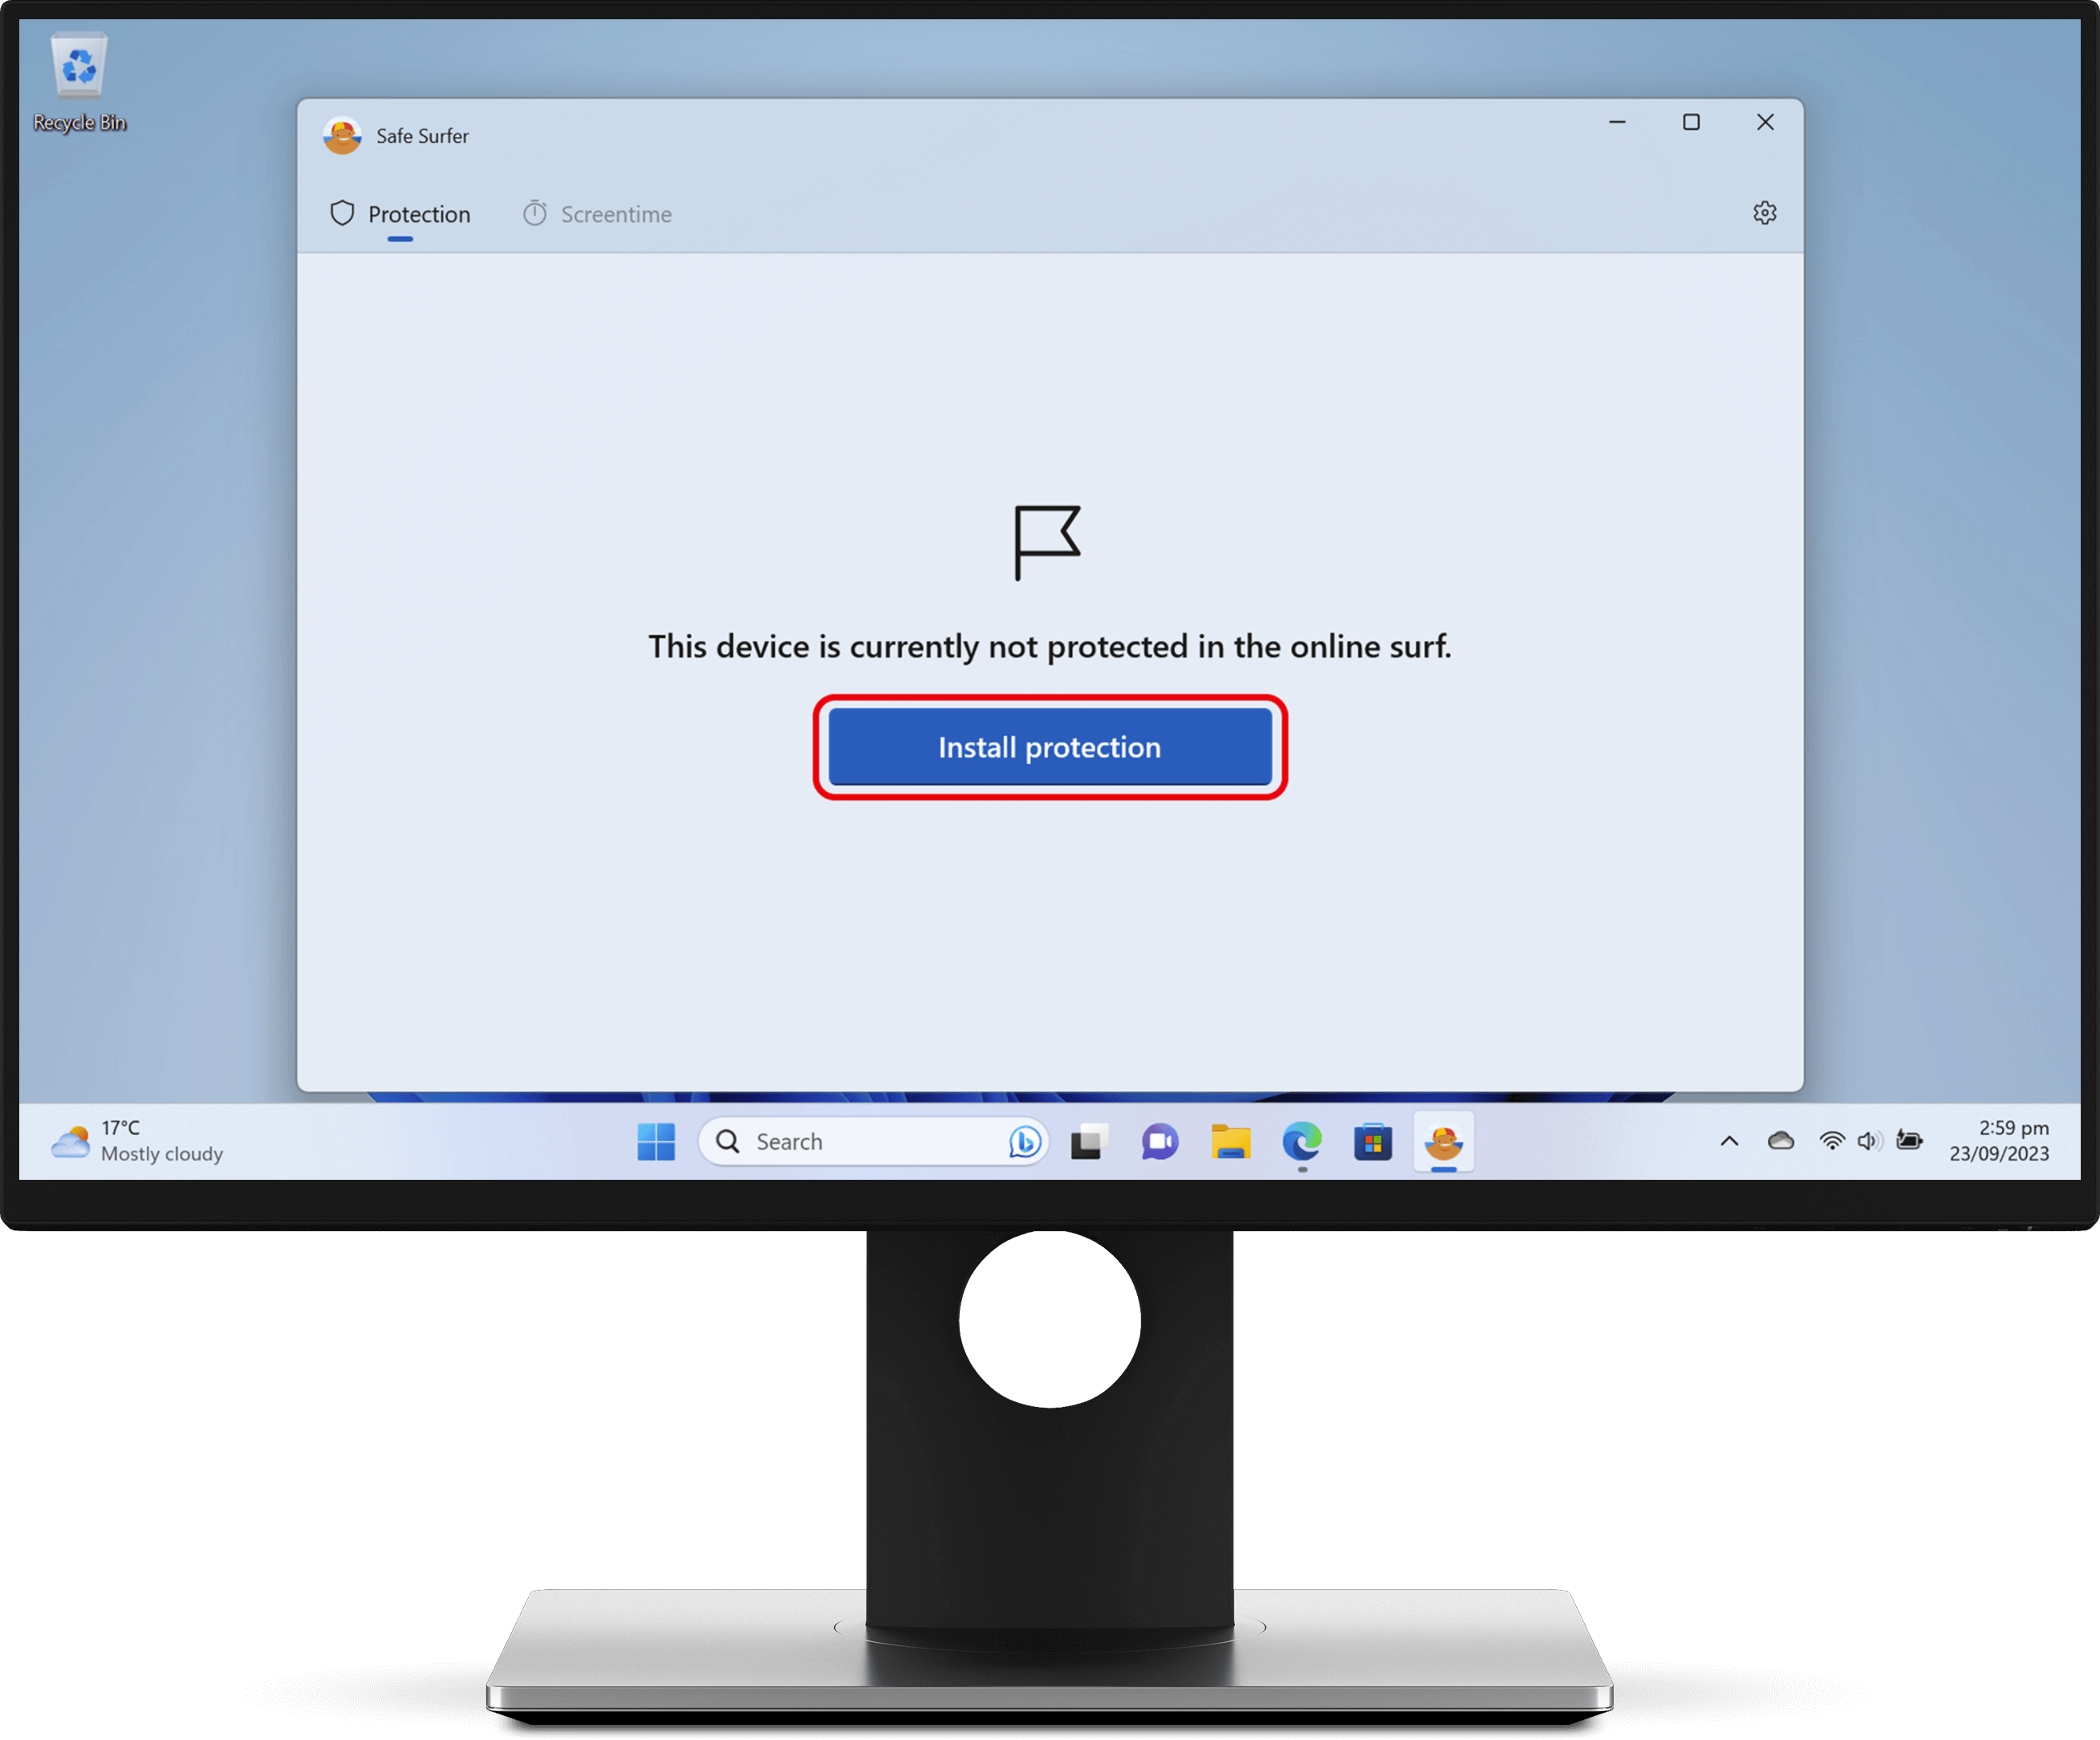
Once the app has installed, it will open automatically. Click the “Install protection” button.
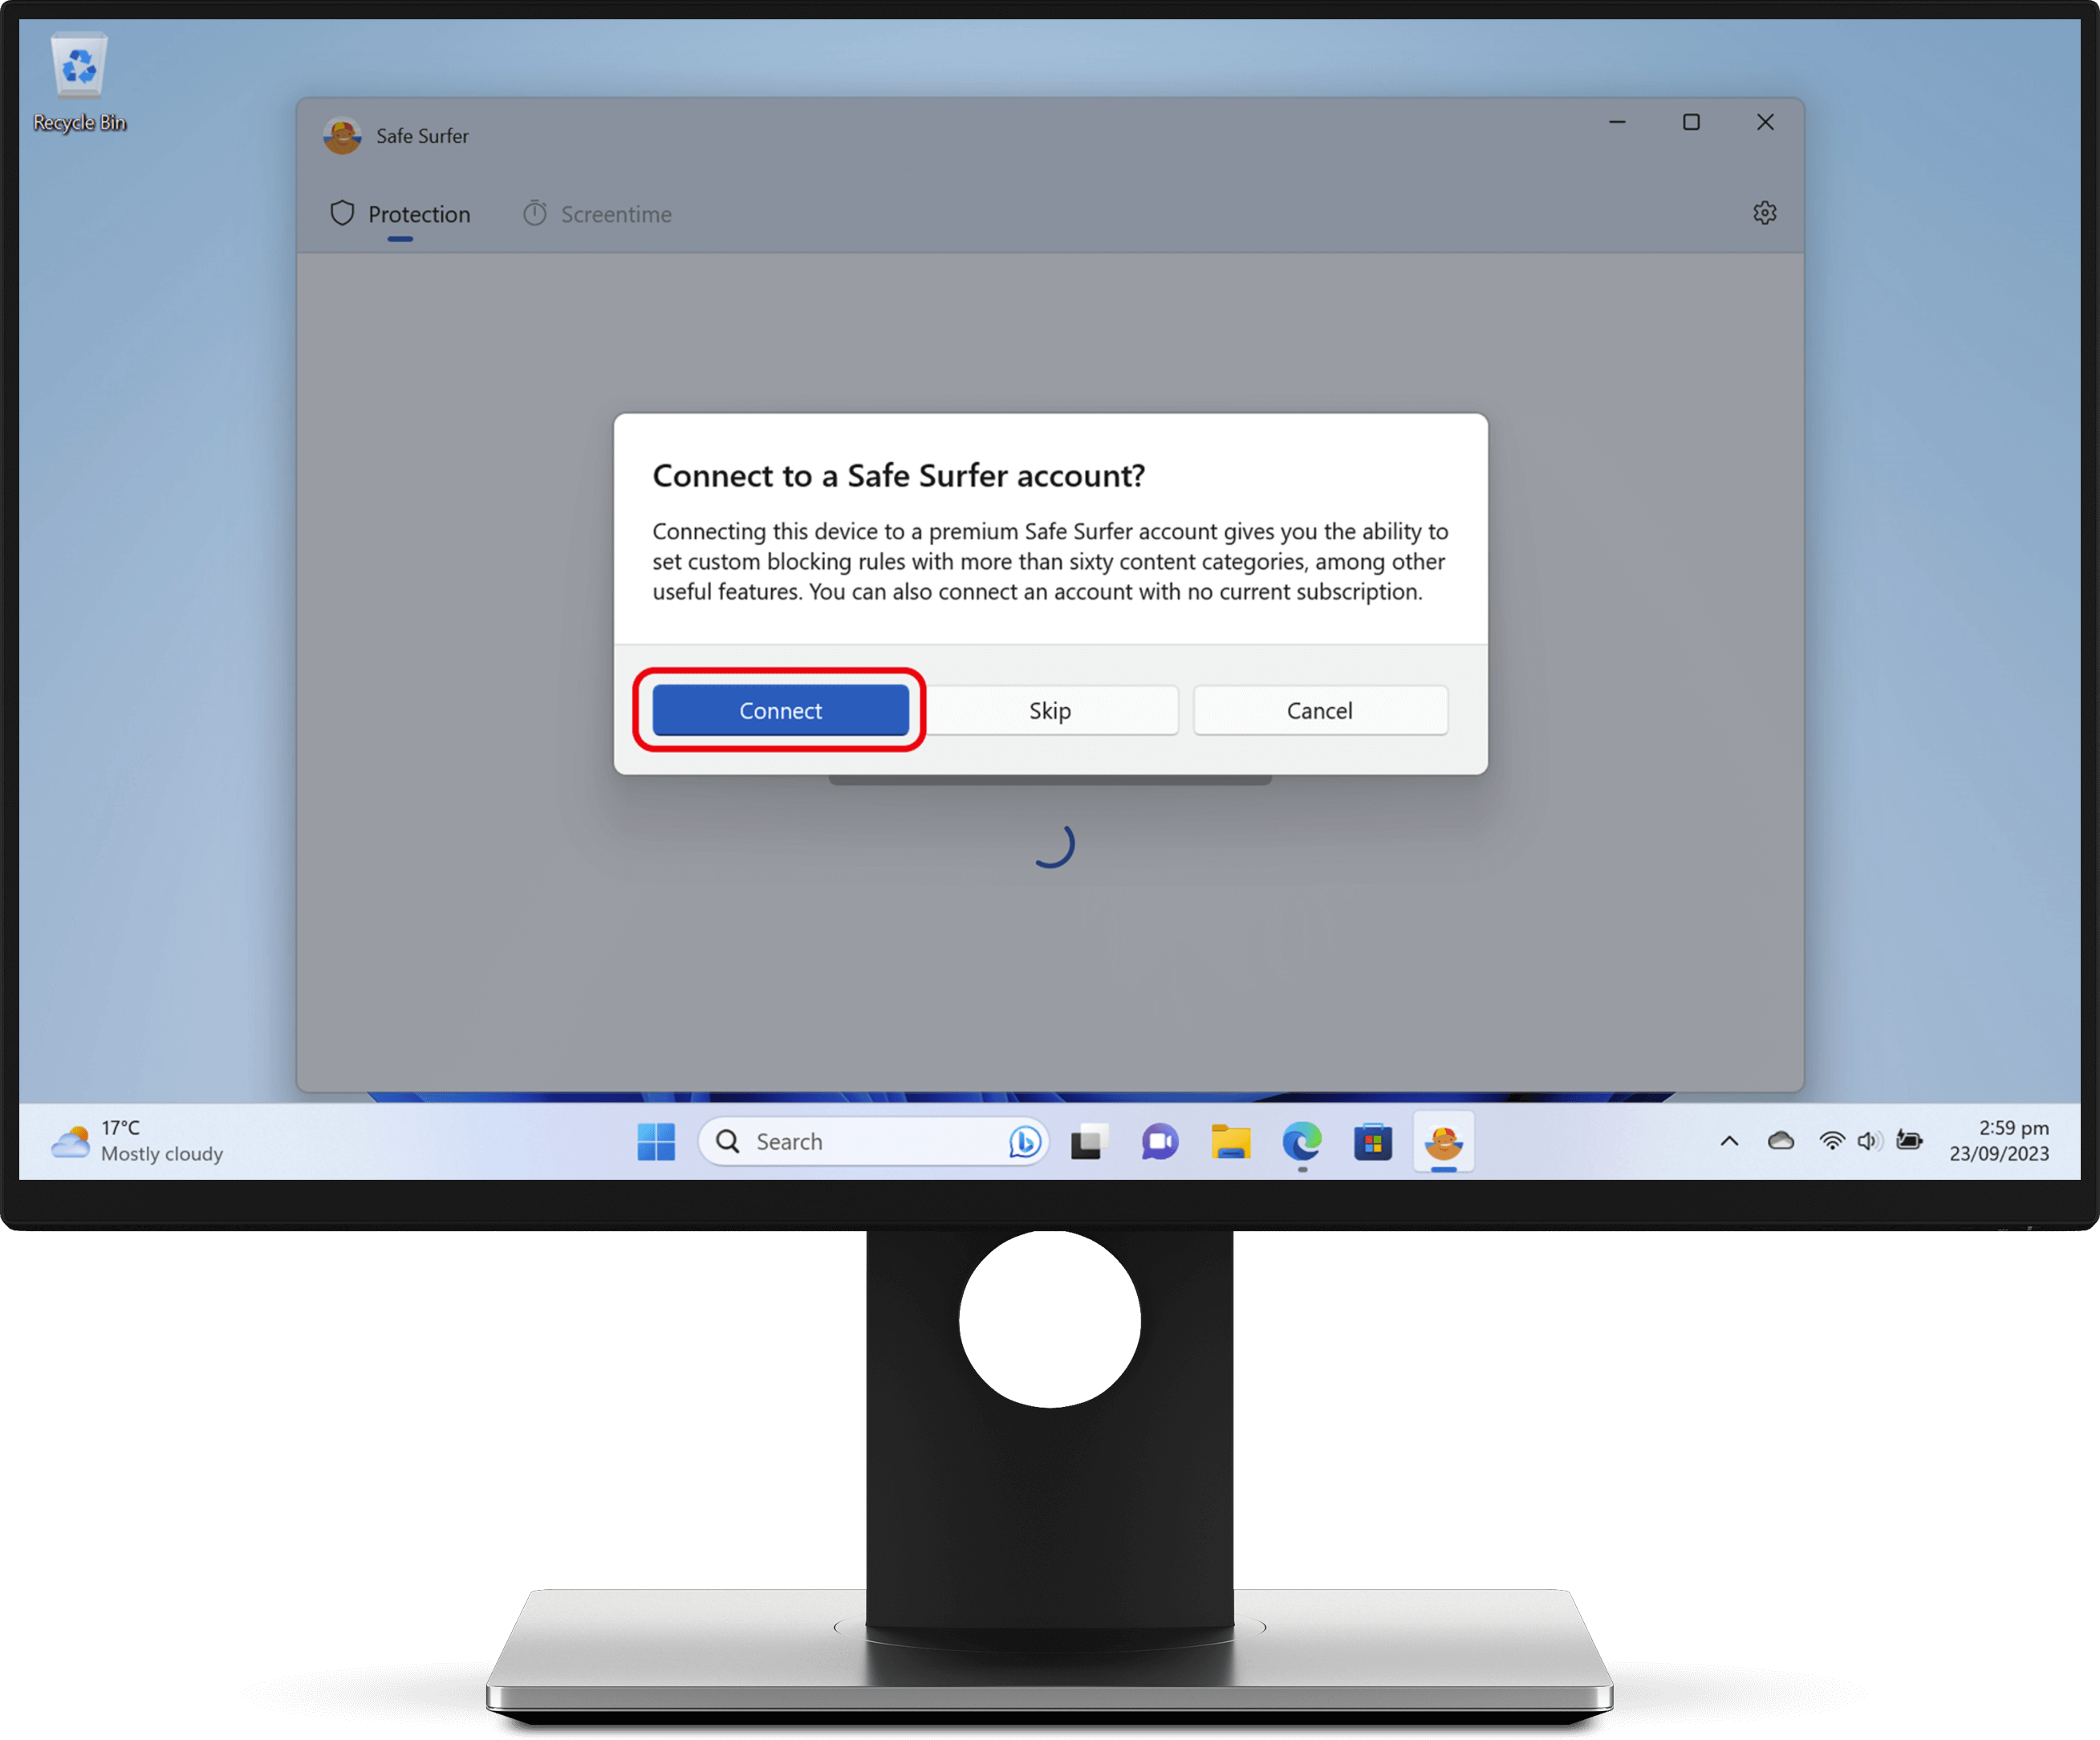
Click the Connect button.
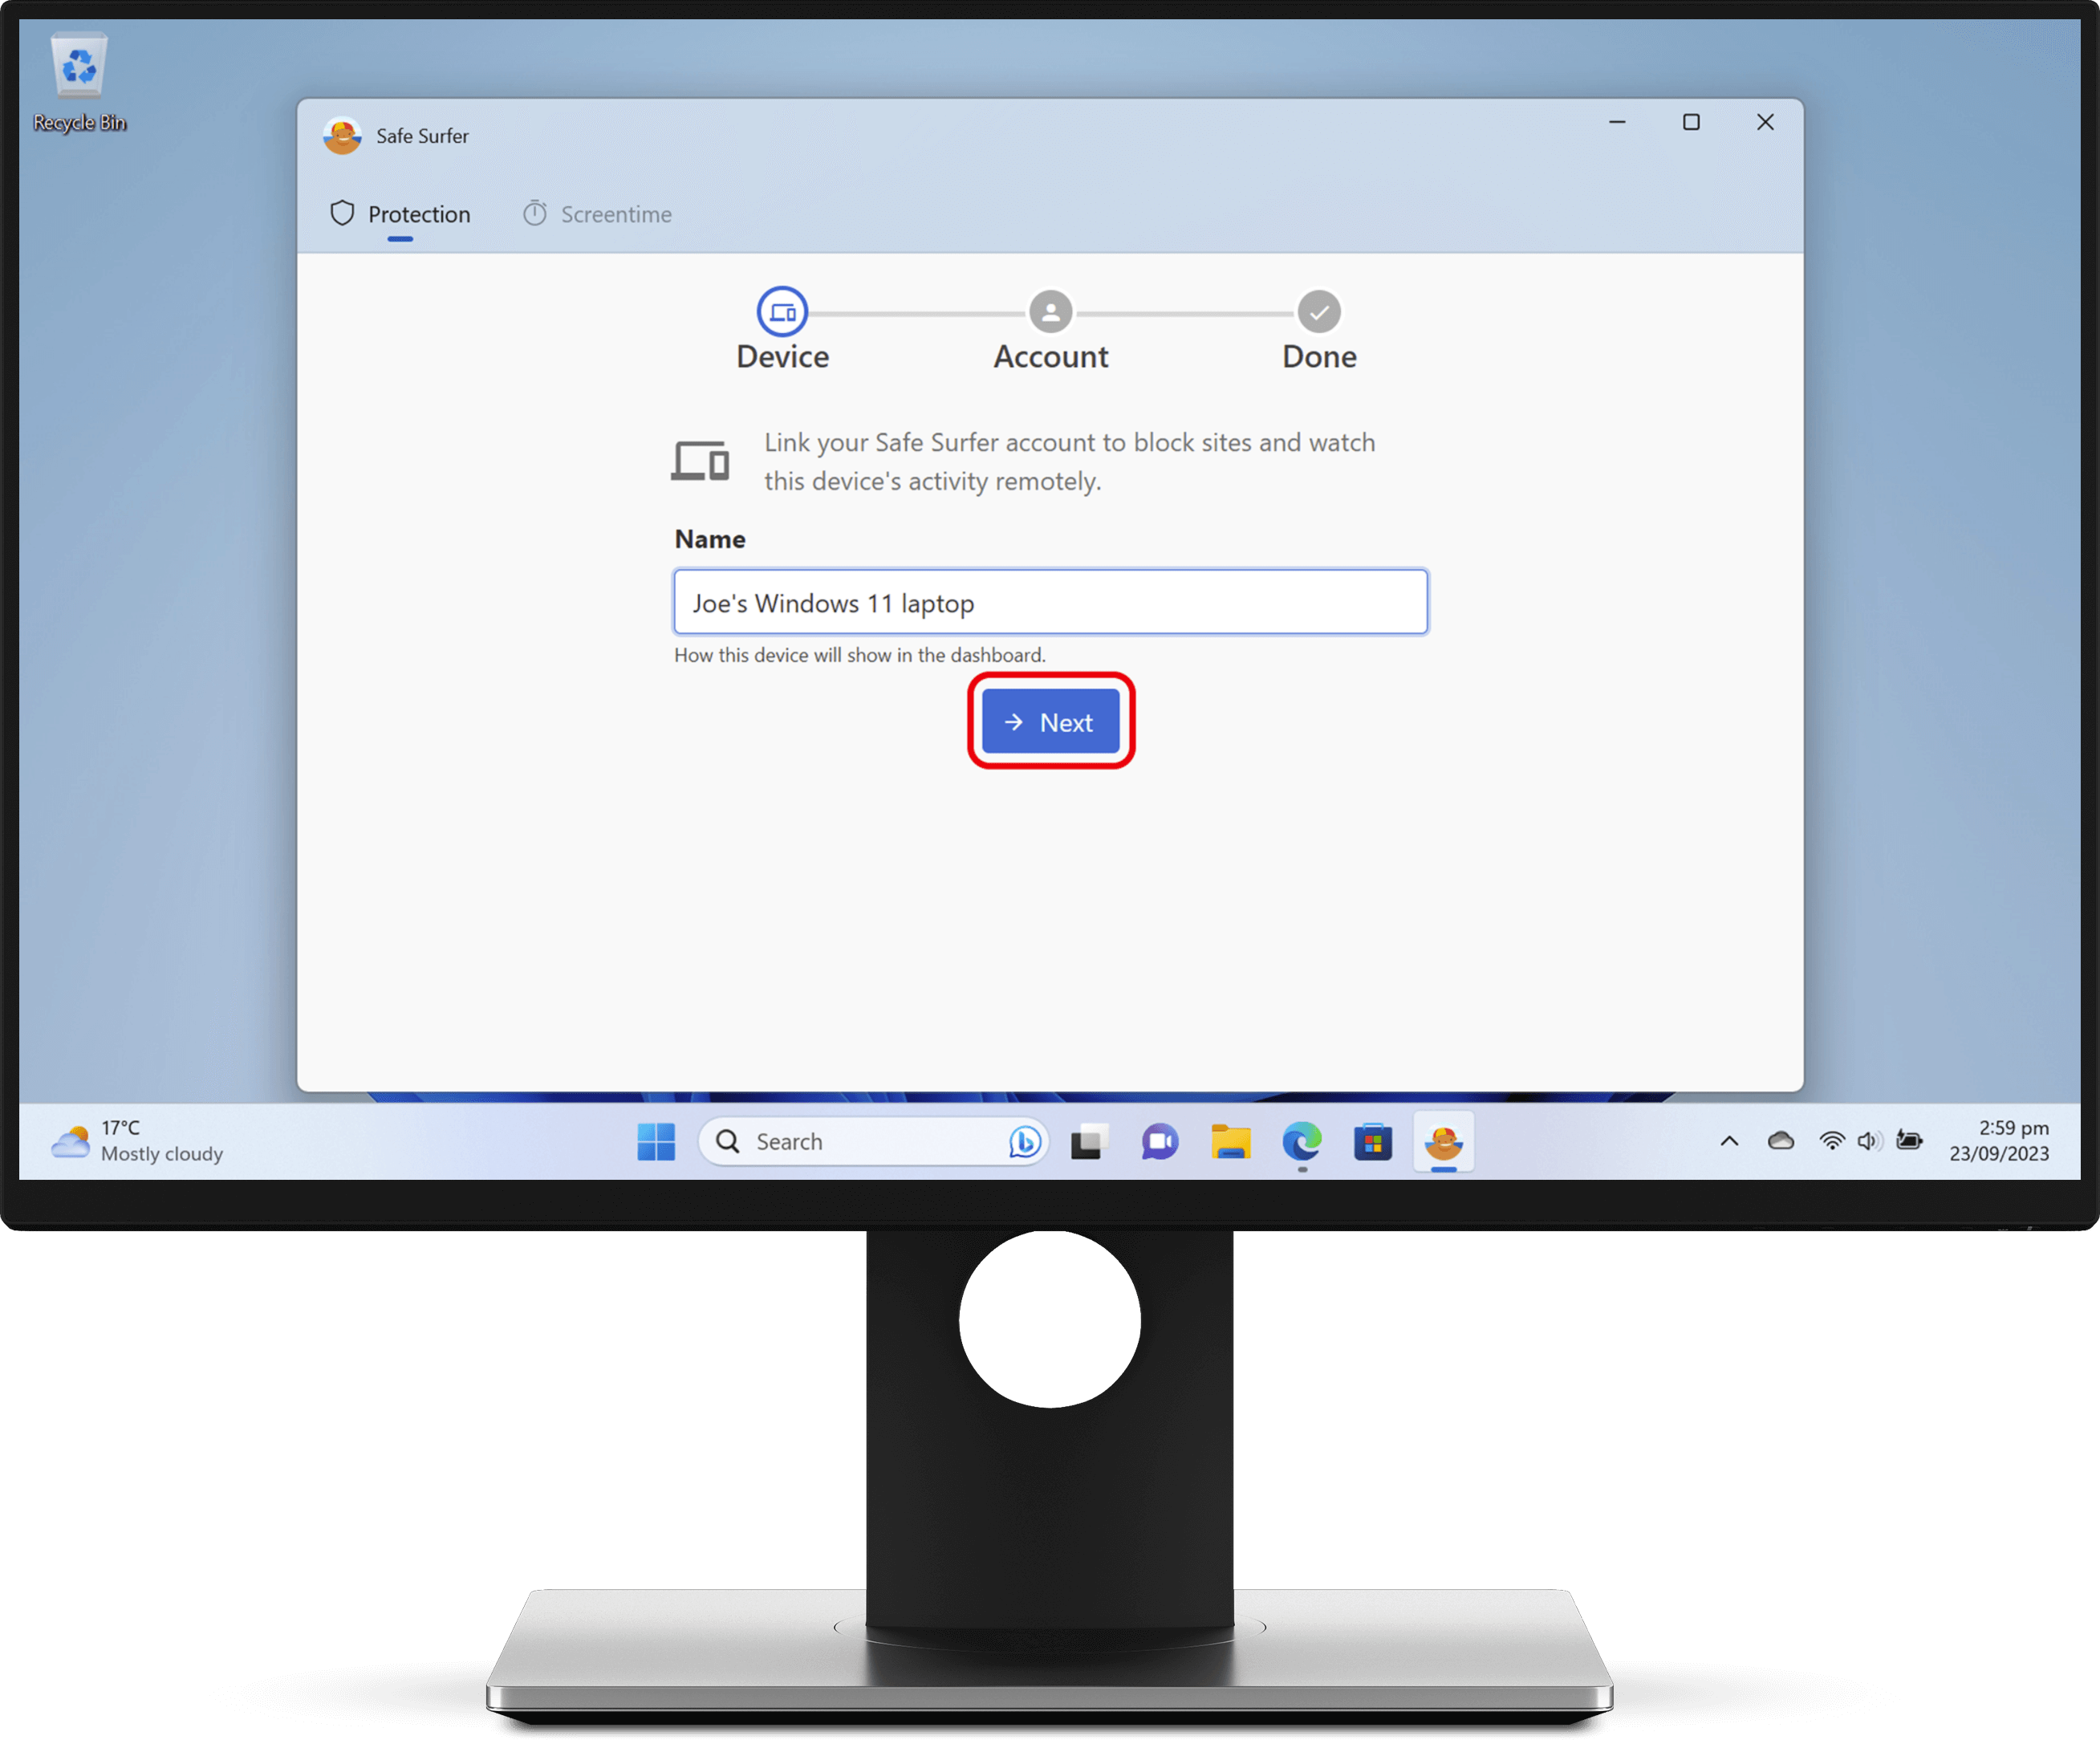
The app will retrieve the model name of this computer. Alternatively, you could use a friendly name to later identify this device on the Safe Surfer dashboard.
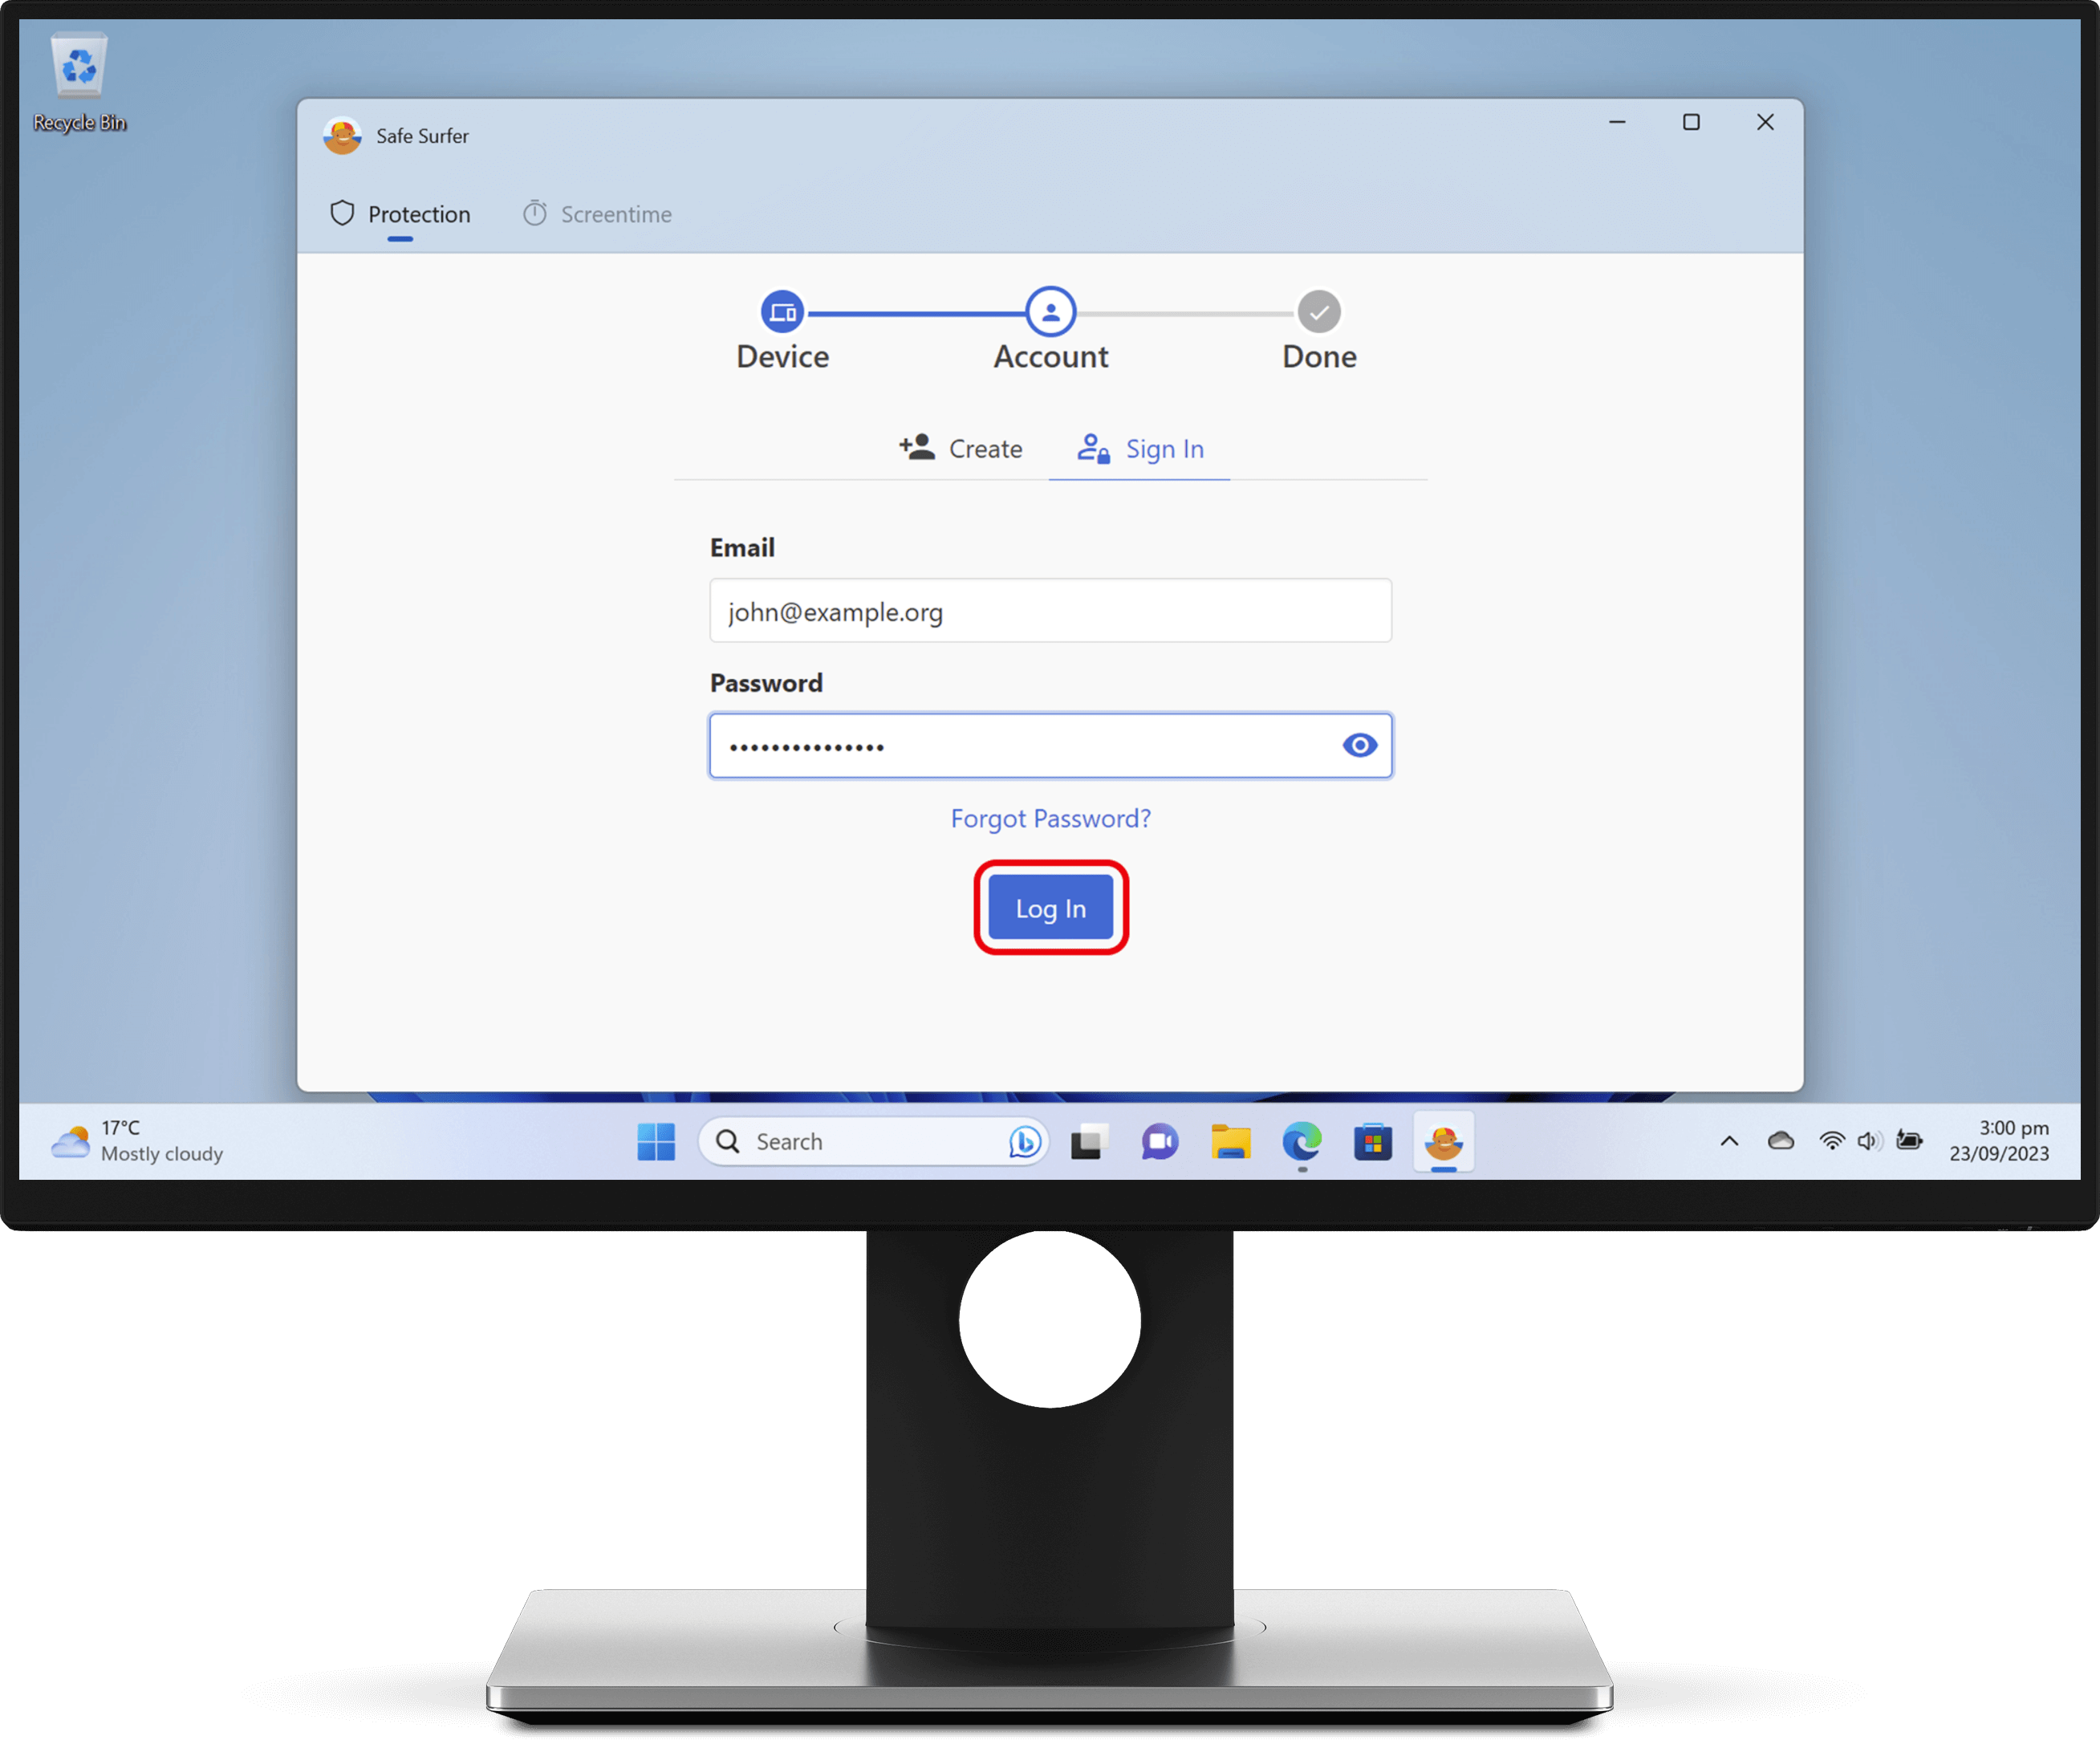
Click the “Sign in” option, then enter your account details. Click the “Log in” button.
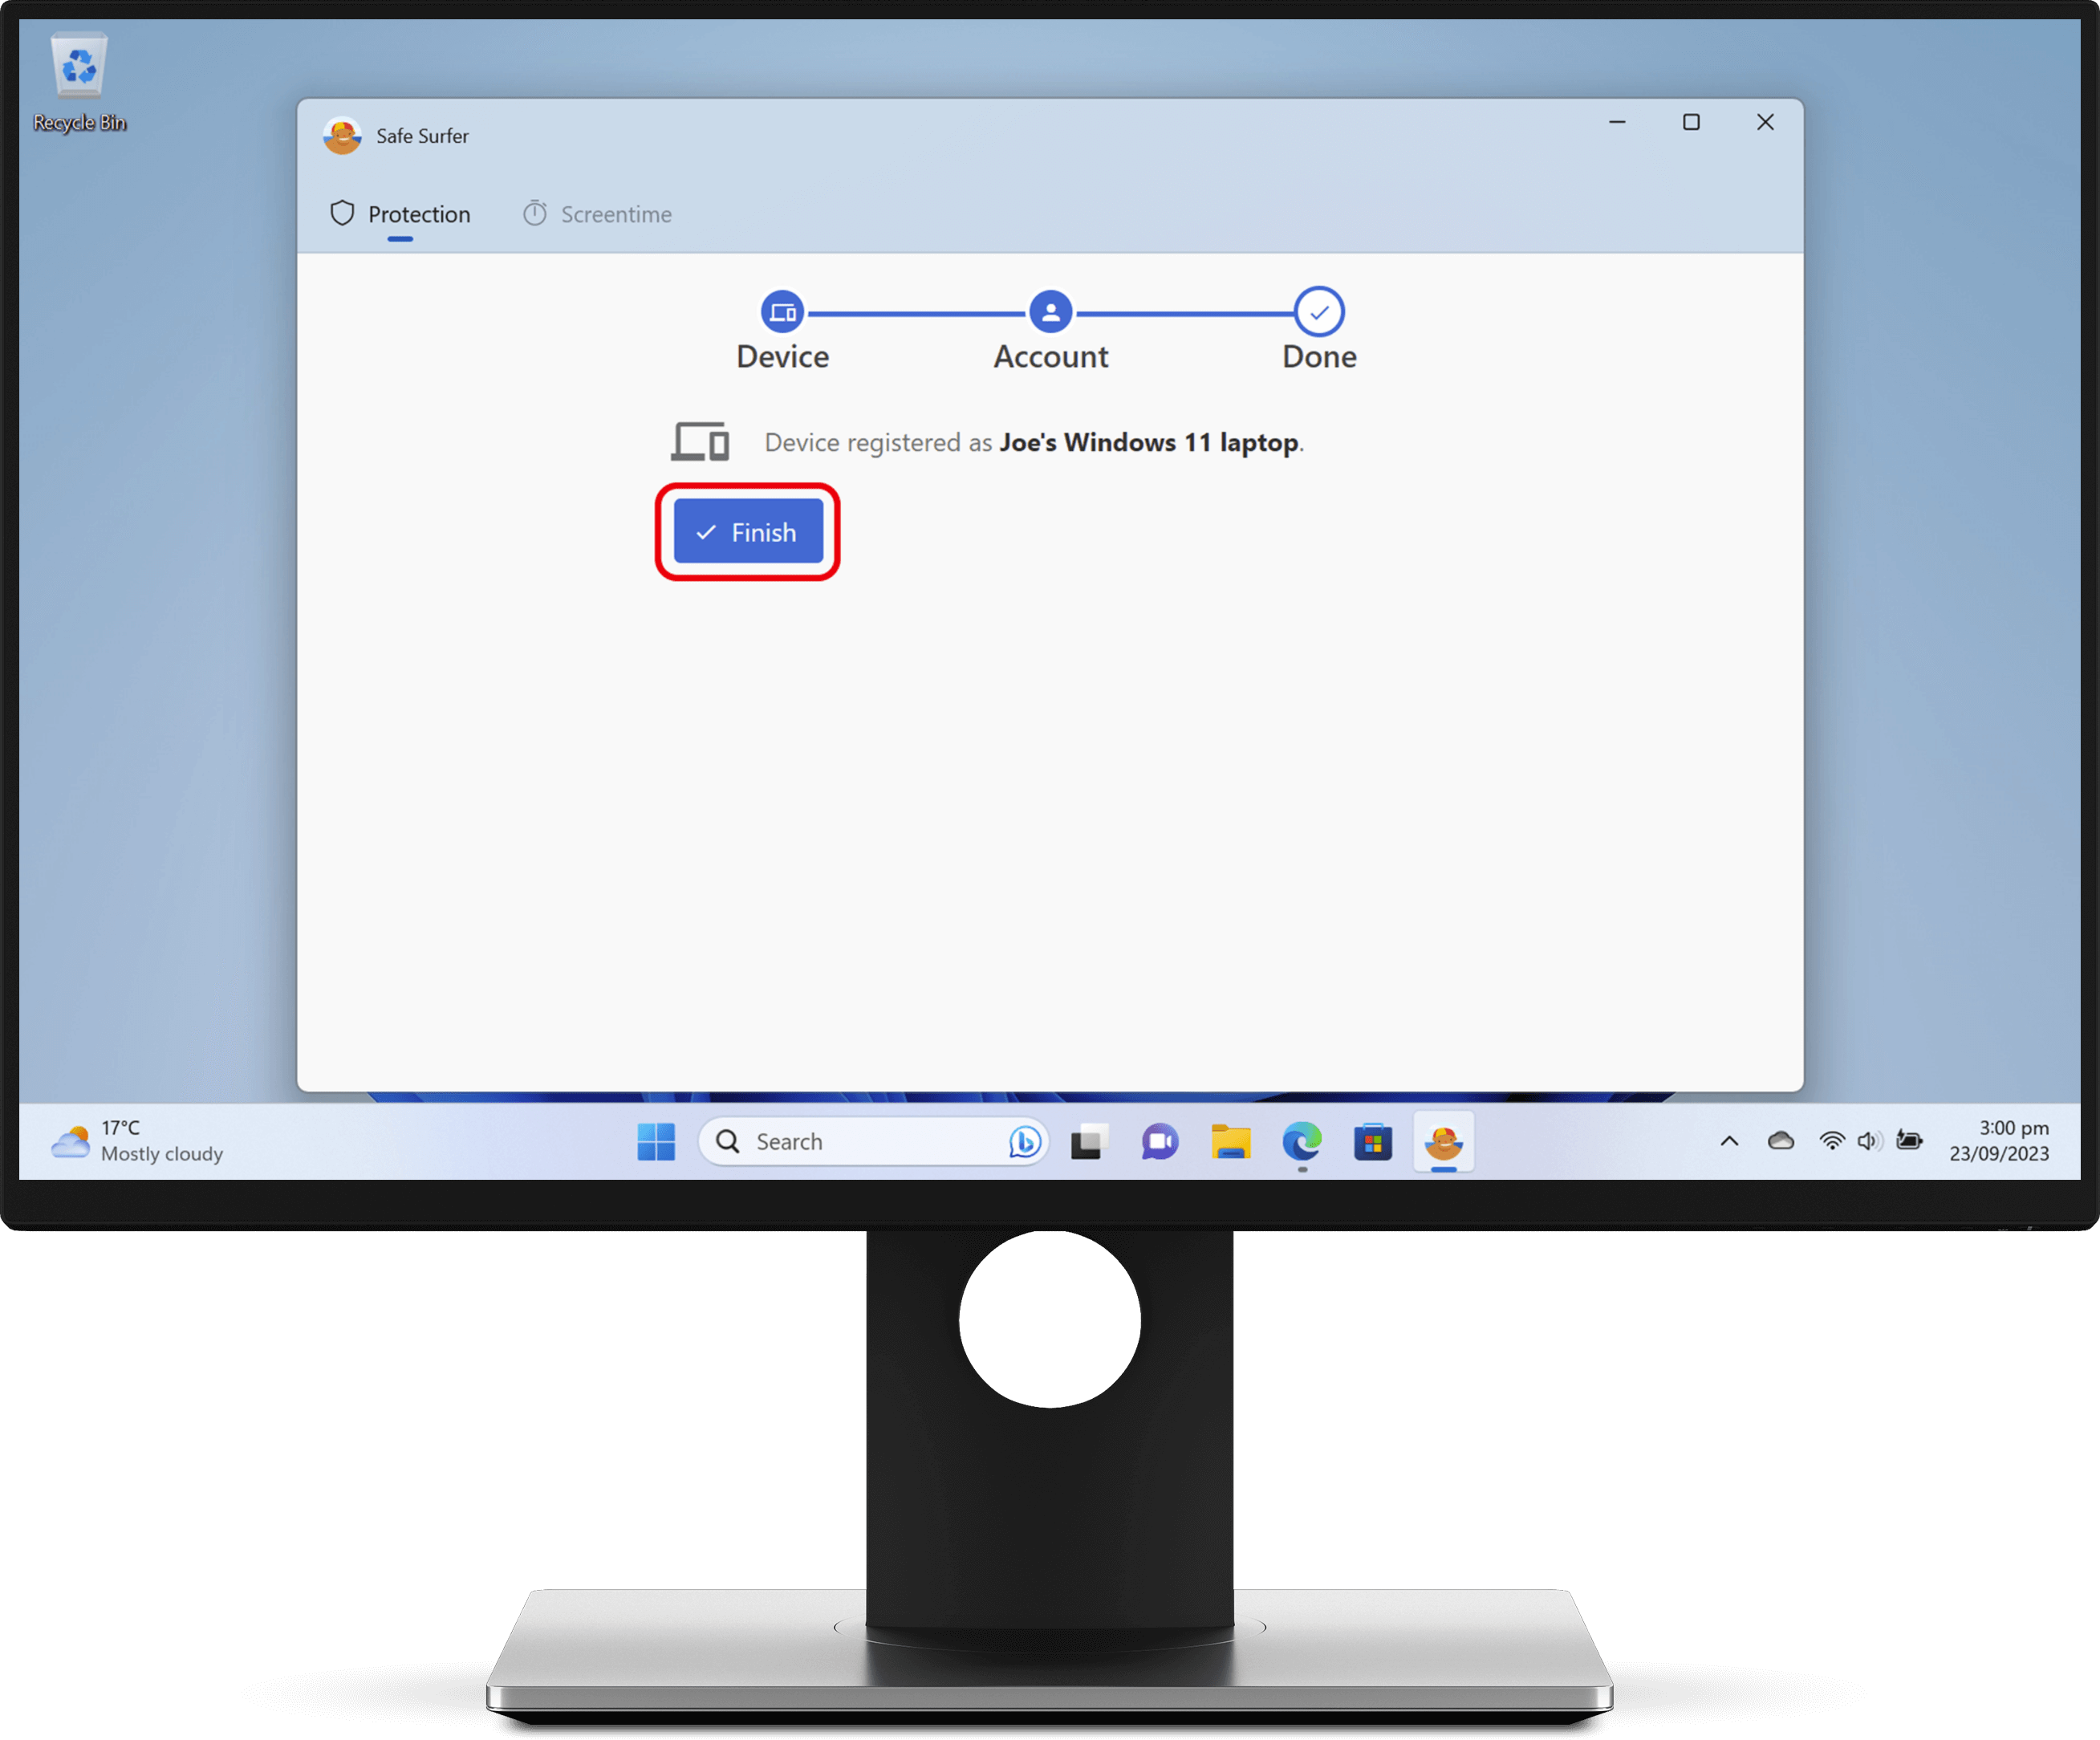
Click the Finish button. When you are asked to authorise system changes through the Windows Command Prompt app, click the Yes button.
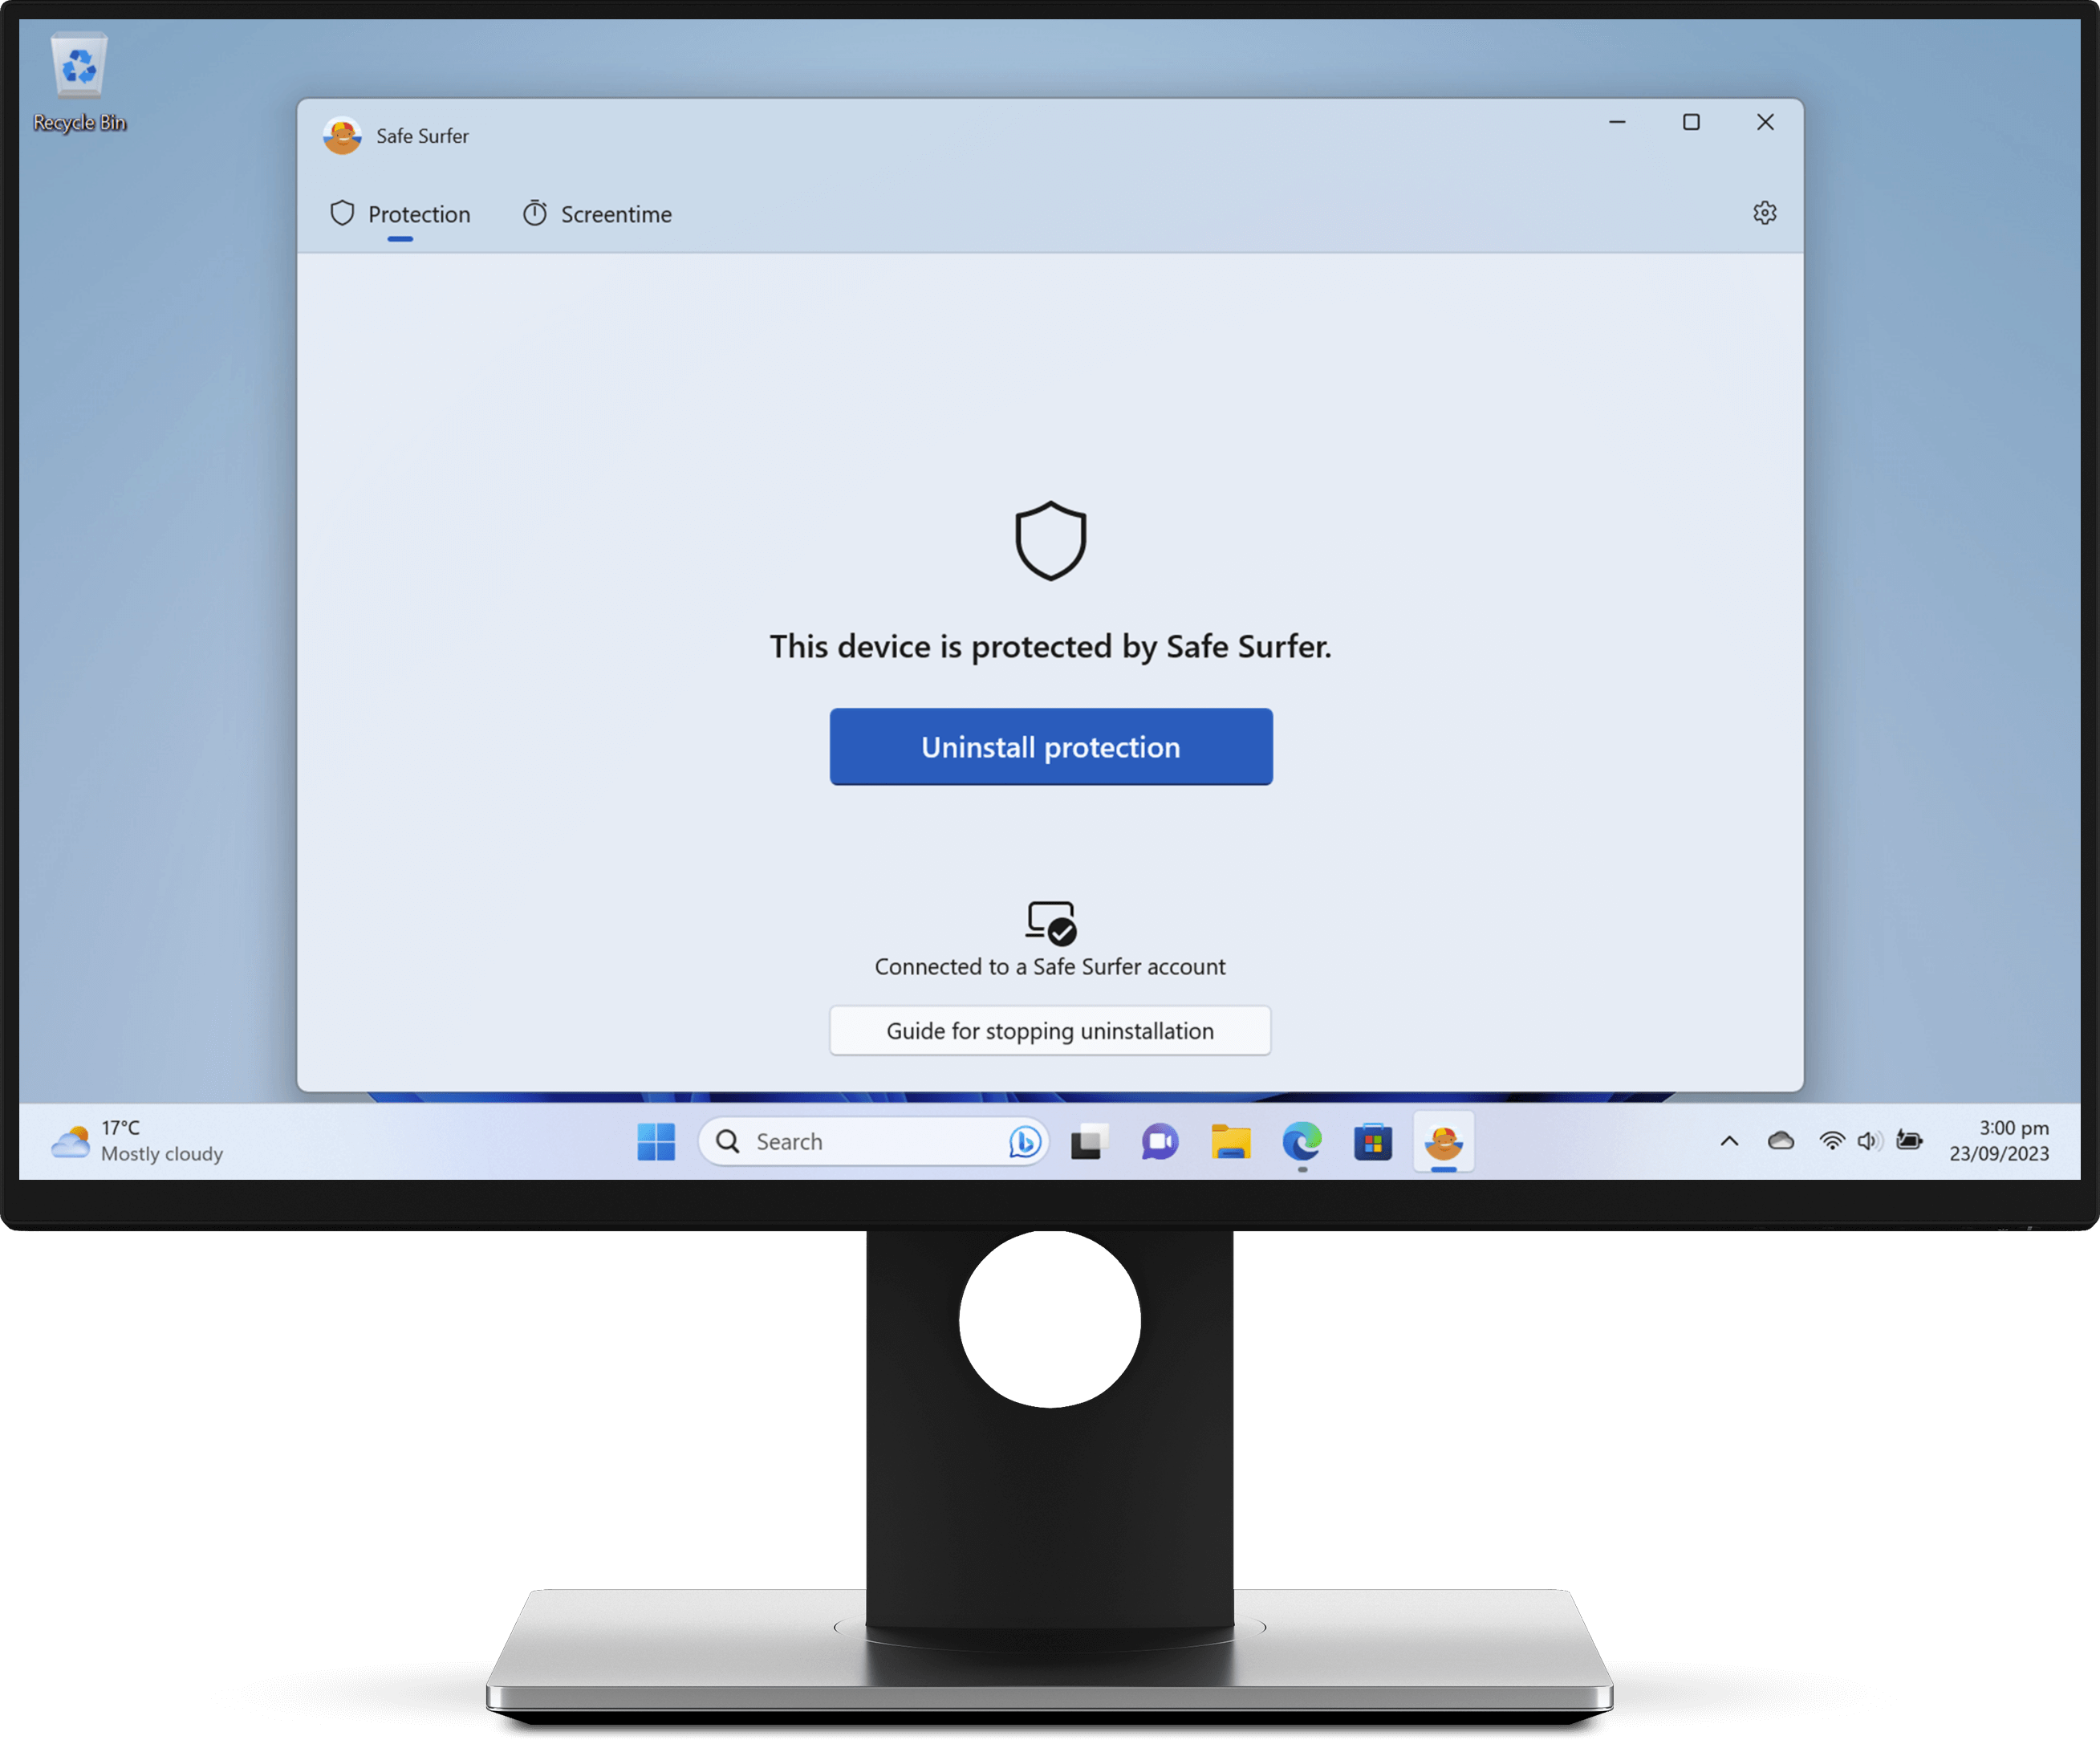
Great work! This device is now protected, but there are few more steps we need to take for the best experience.
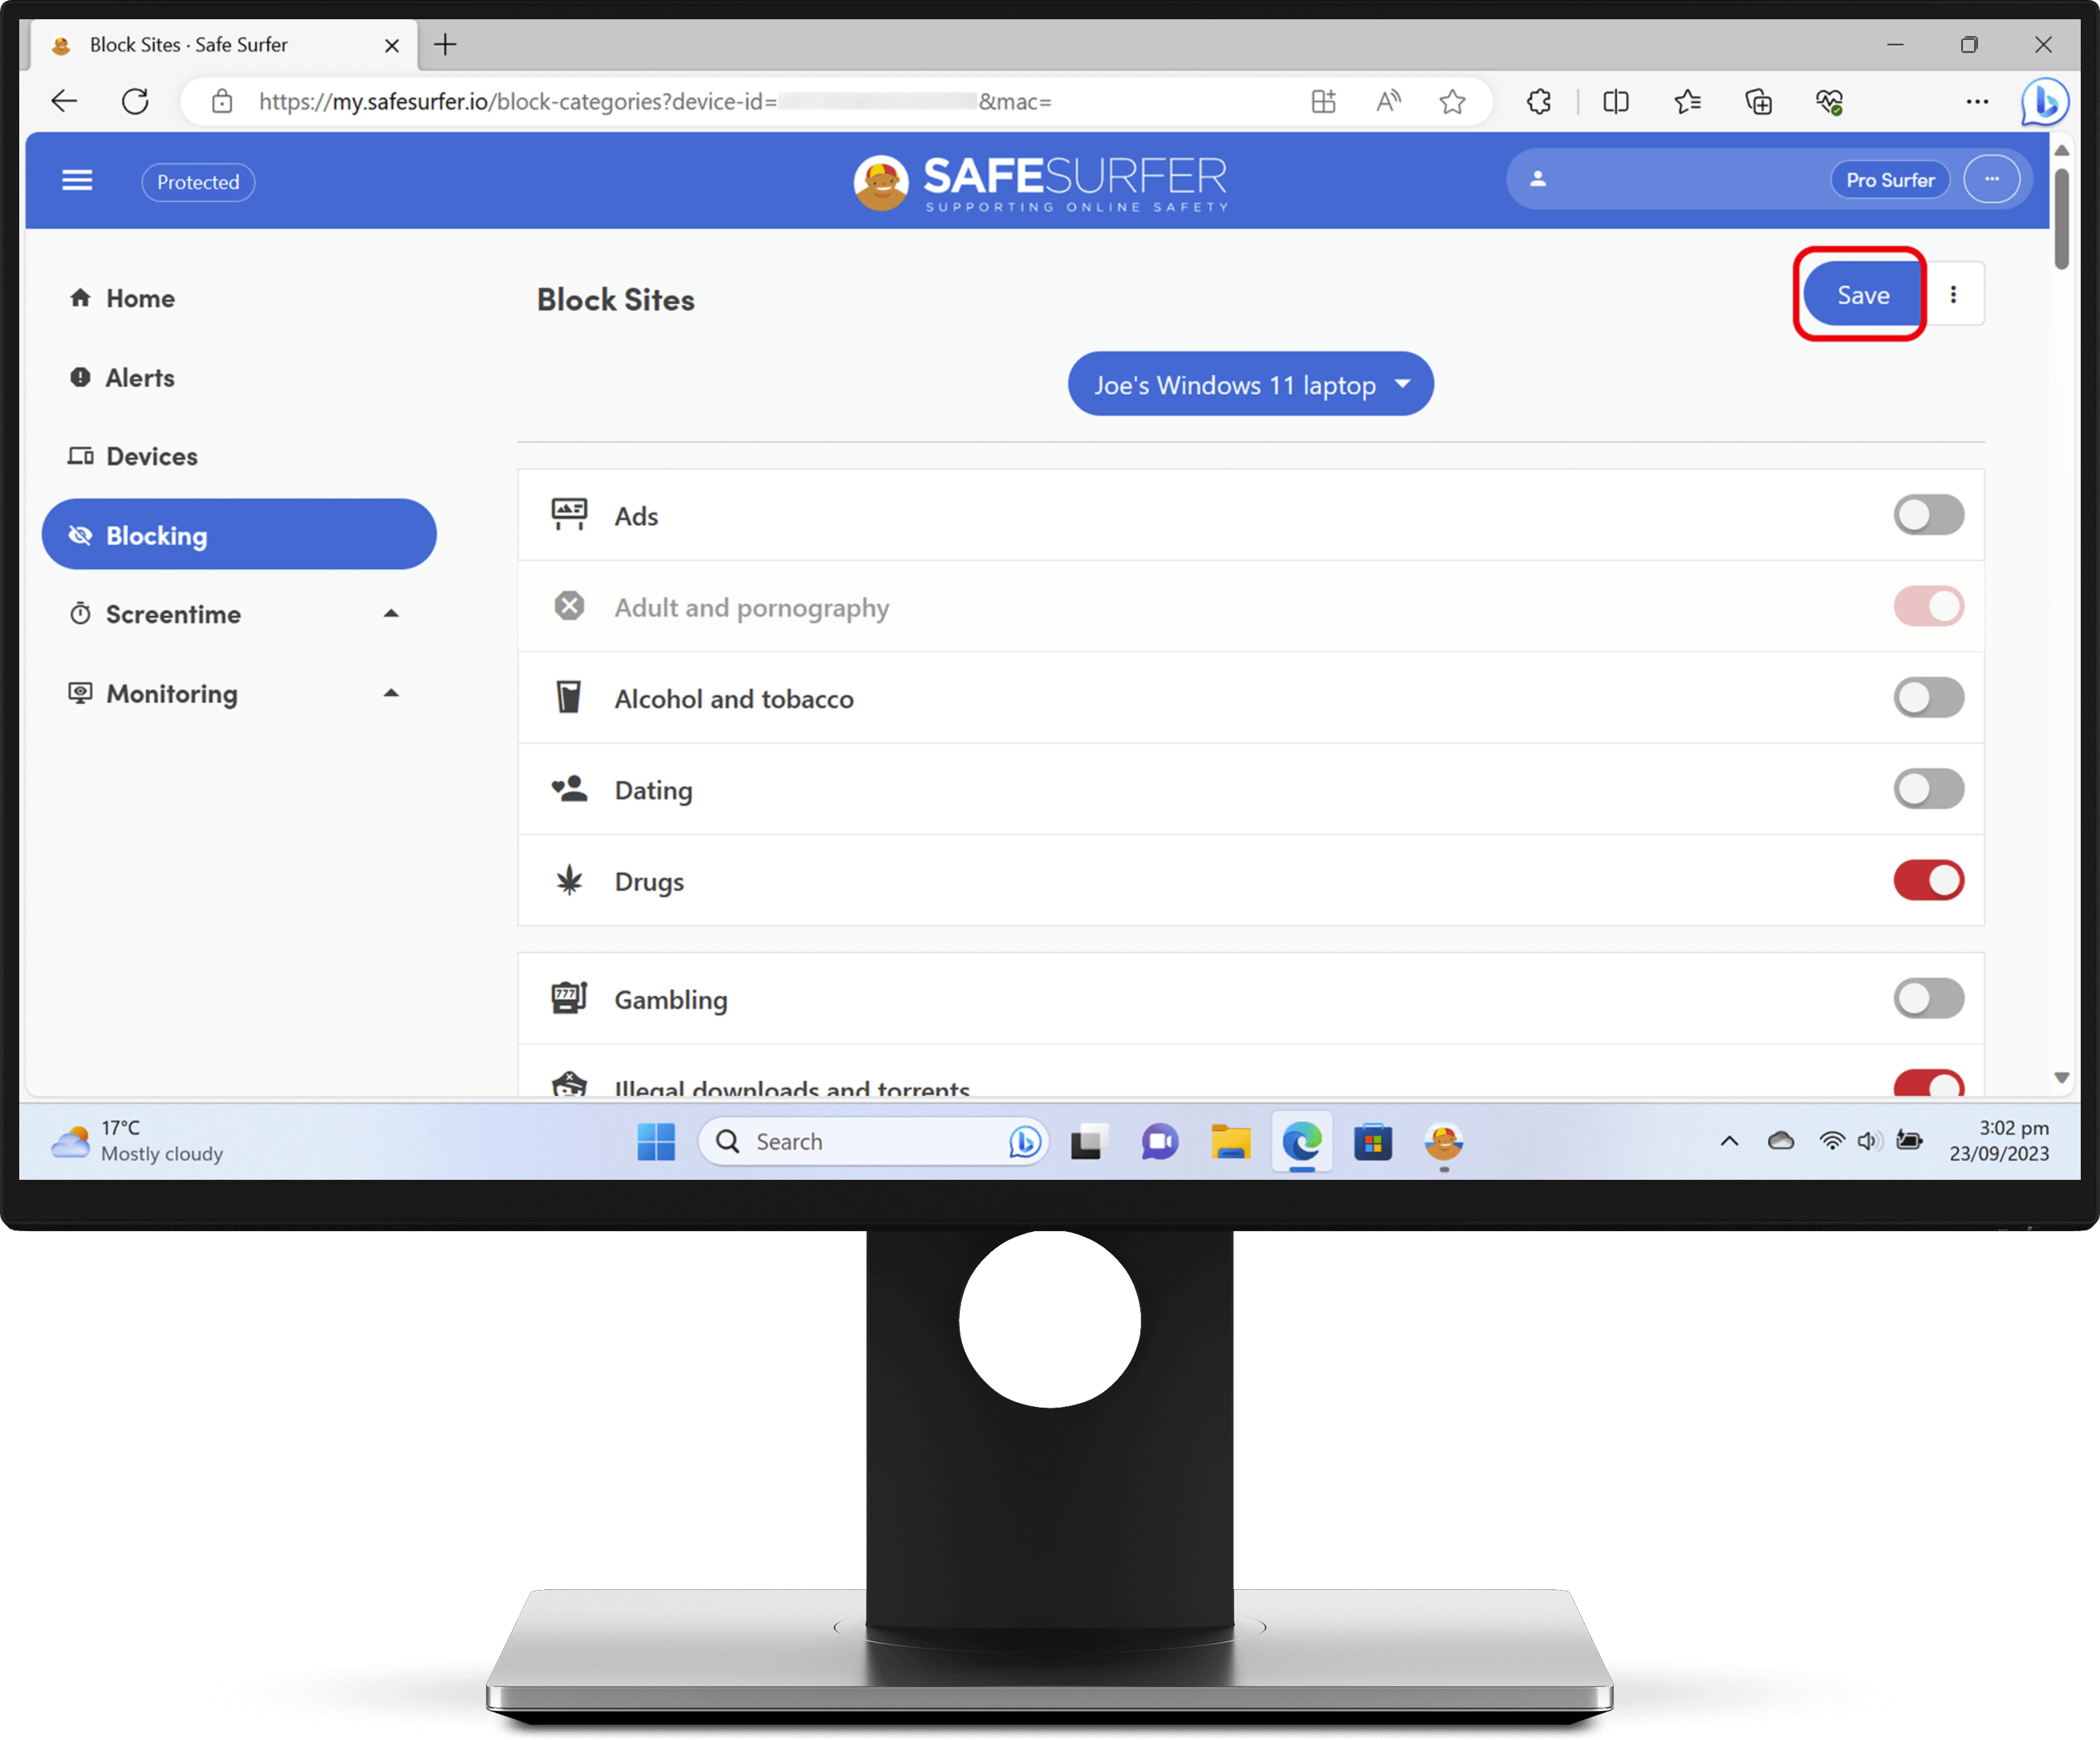
Back in the web browser app, you will now have a new device listing created for this device. Click the “Block sites” option.
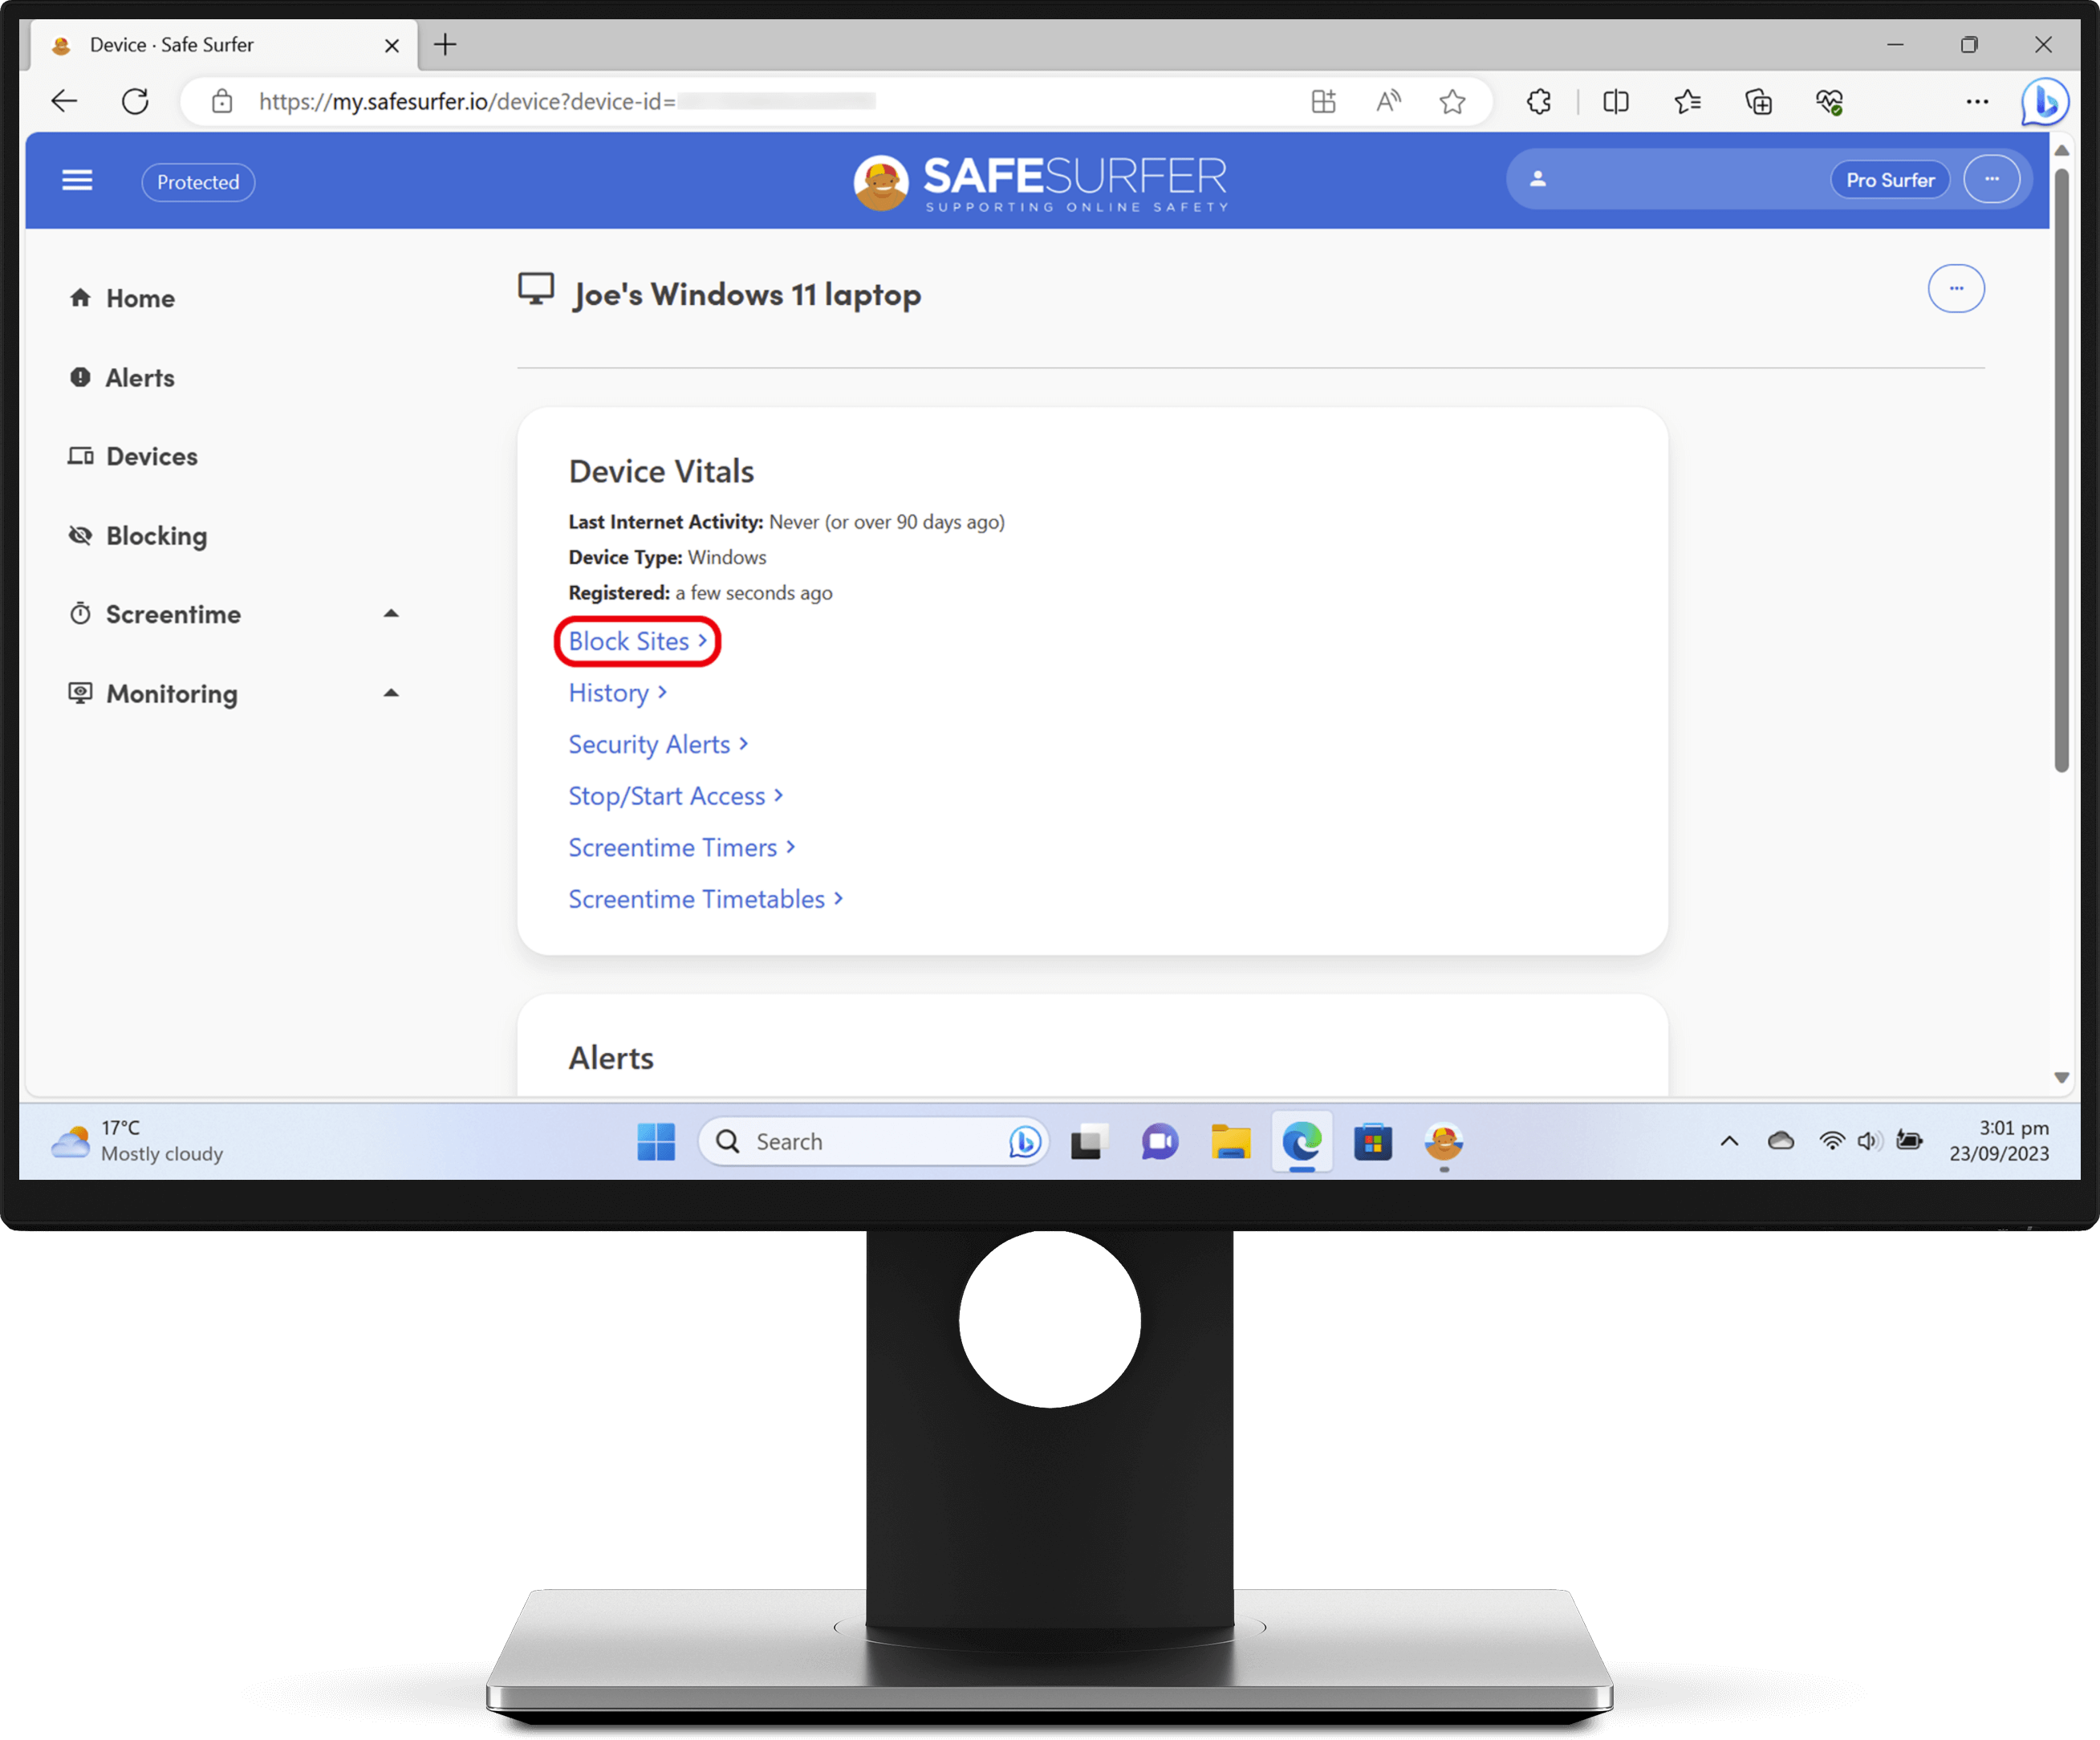
Click the switches to either block or unblock categories—grey means not blocked, and red means blocked. Once you’re done, click the Save button at the upper-right corner. You might need to scroll to the top of the list for the Save button to appear.
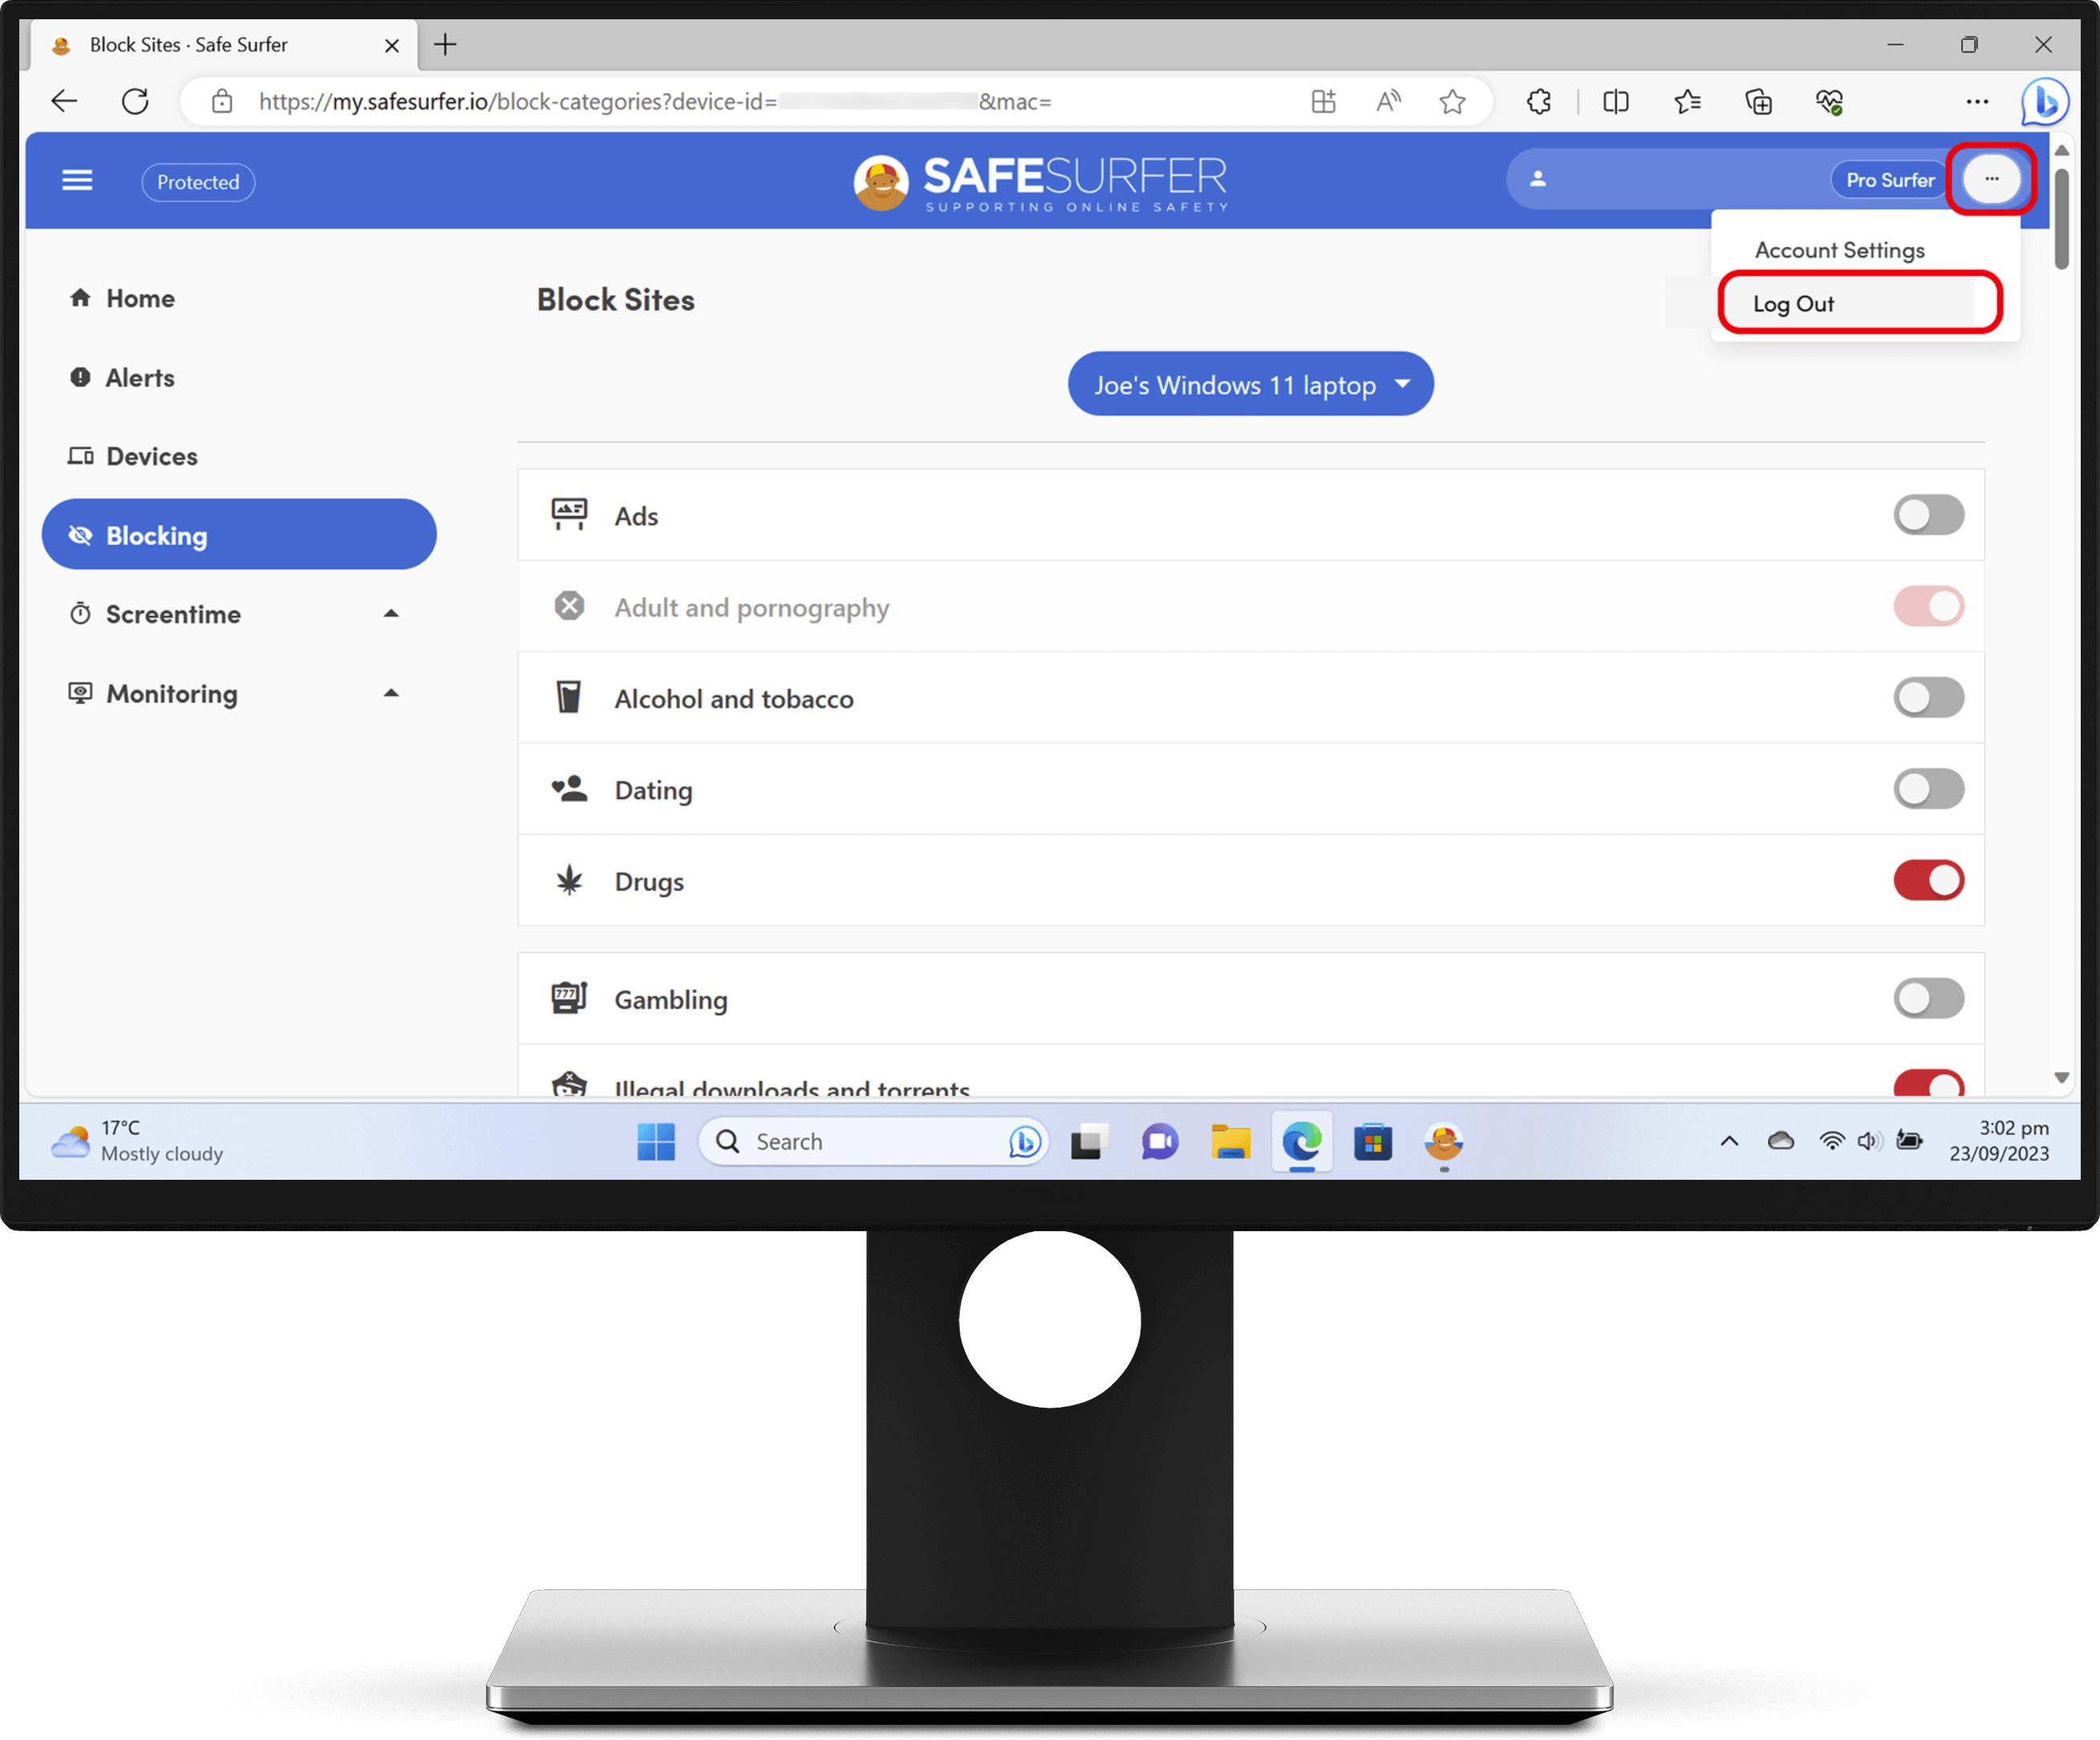
At the upper-right corner of the dashboard’s title bar, click the three dot icon, then click the Log Out button. You can now close the web browser app and restart the computer to immediately sync any changes made.
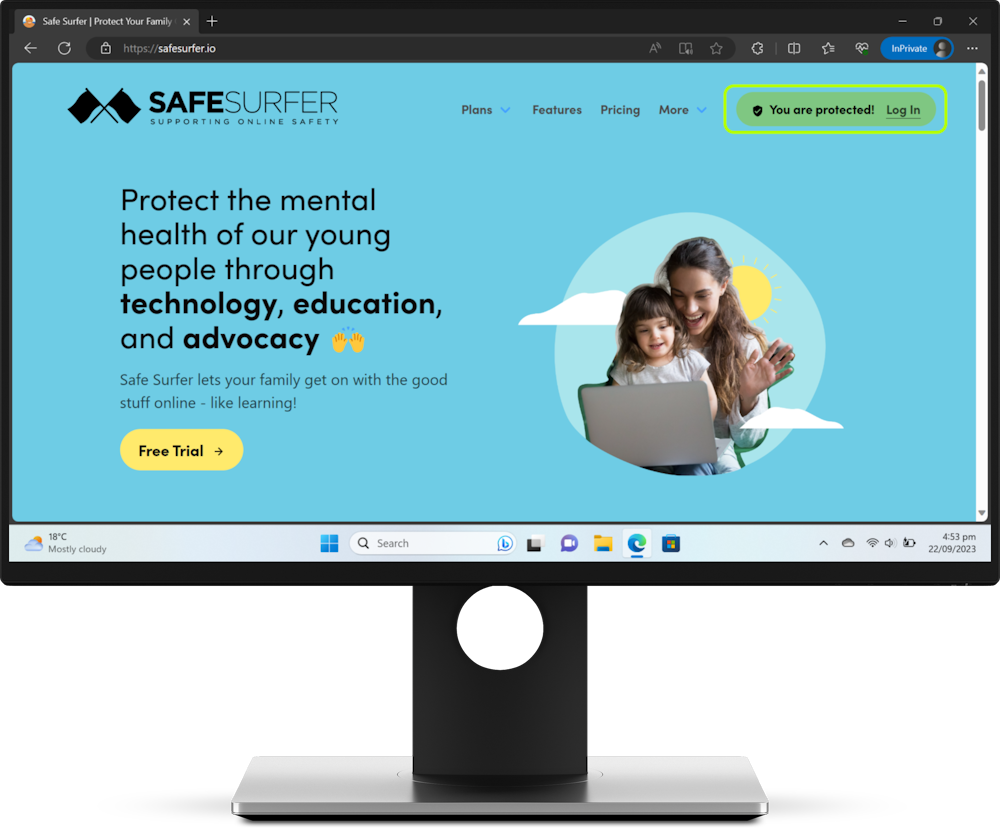
Step 2: Verify protection
Visit the Safe Surfer website to verify the protection installation. The protection bubble should report that this device is protected.
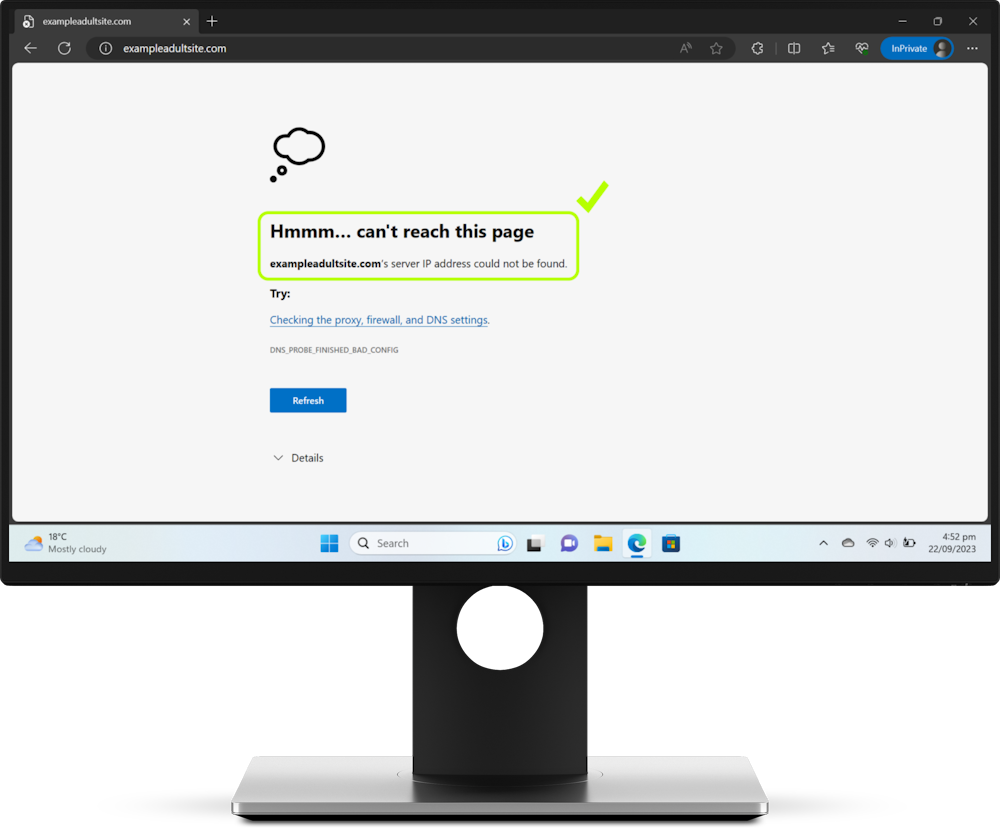
In addition, you can visit ExampleAdultSite.com to see blocking in action. This website should be blocked.
Step 3: Stop uninstallation
Click this link to be taken to our guide for stopping uninstallation.
Protection complete
Great work! This device is now fully protected. To start monitoring protected devices, visit our easy-to-use online dashboard.
If you have any other Windows 11 devices you would like to protect, simply start again from the top of the guide. If you would like to protect a different kind of device, visit our Guides page.
Disclaimer: Safe Surfer Limited is in no way associated with Microsoft Corporation.