It’s easy with Safe Surfer to install an effective porn blocker on a 2degrees FRITZ!Box modem. Along with protecting your privacy, we also use our own behind-the-scenes technology to block porn and other harmful online content. This guide will efficiently walk you through how to install protection and get started with our parental controls.
Pro tip: you can find the latest version of this guide on our help desk by clicking this link.
Step 1: Install DNS
Enter the IP address of the FRITZ!Box modem into the top search bar of a web browser (such as Google Chrome or Firefox).
- If you have a DSL (copper) connection, the IP address of your FRITZ!Box should be 192.168.178.1
- If you have a fibre connection, the IP address of your FRITZ!Box should be 192.168.188.1
- If neither of the above work, check the sticker on the bottom of the modem.

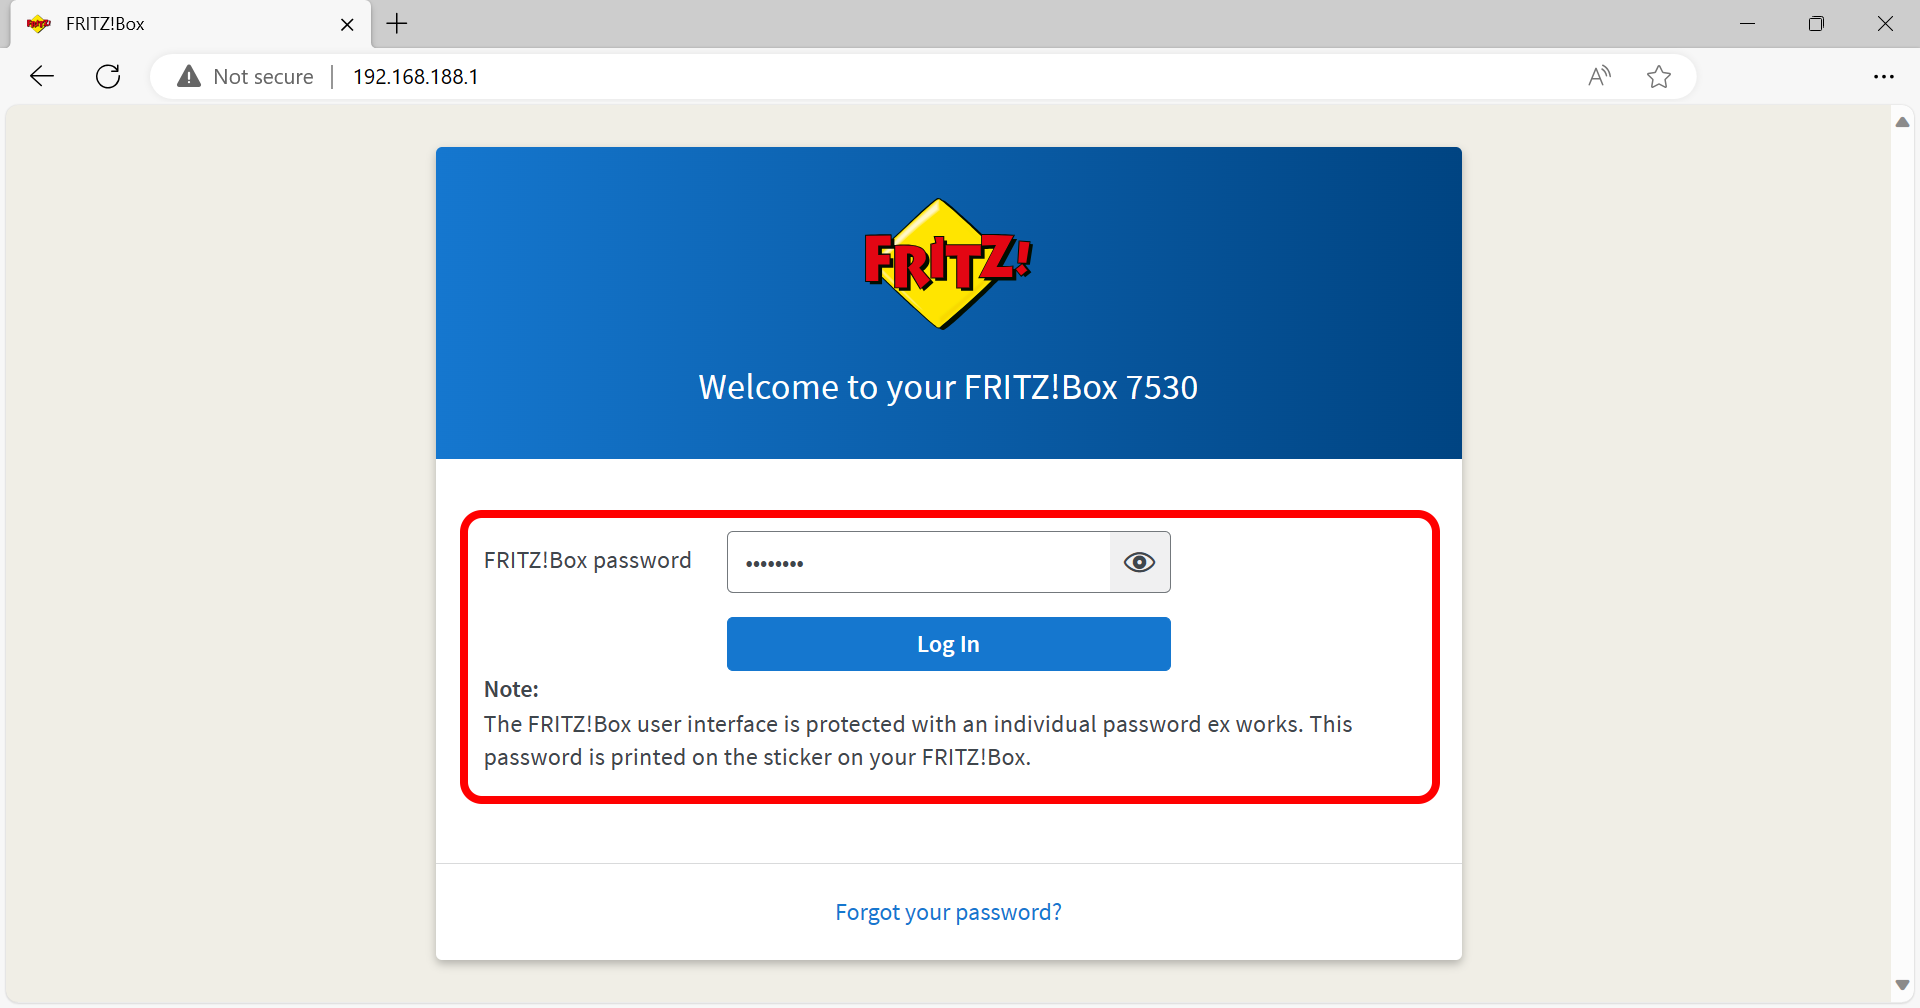
Enter your FRITZ!Box user interface password. This can sometimes be found on the bottom sticker of the modem (at the upper-right corner; this is different to the Wi-Fi password). If you’re not sure, click “Forgot your password?” and follow the instructions. If you’re still stuck, try contacting 2degrees Customer Support and mention that you are trying to access the FRITZ!Box user interface to change the DNS servers.
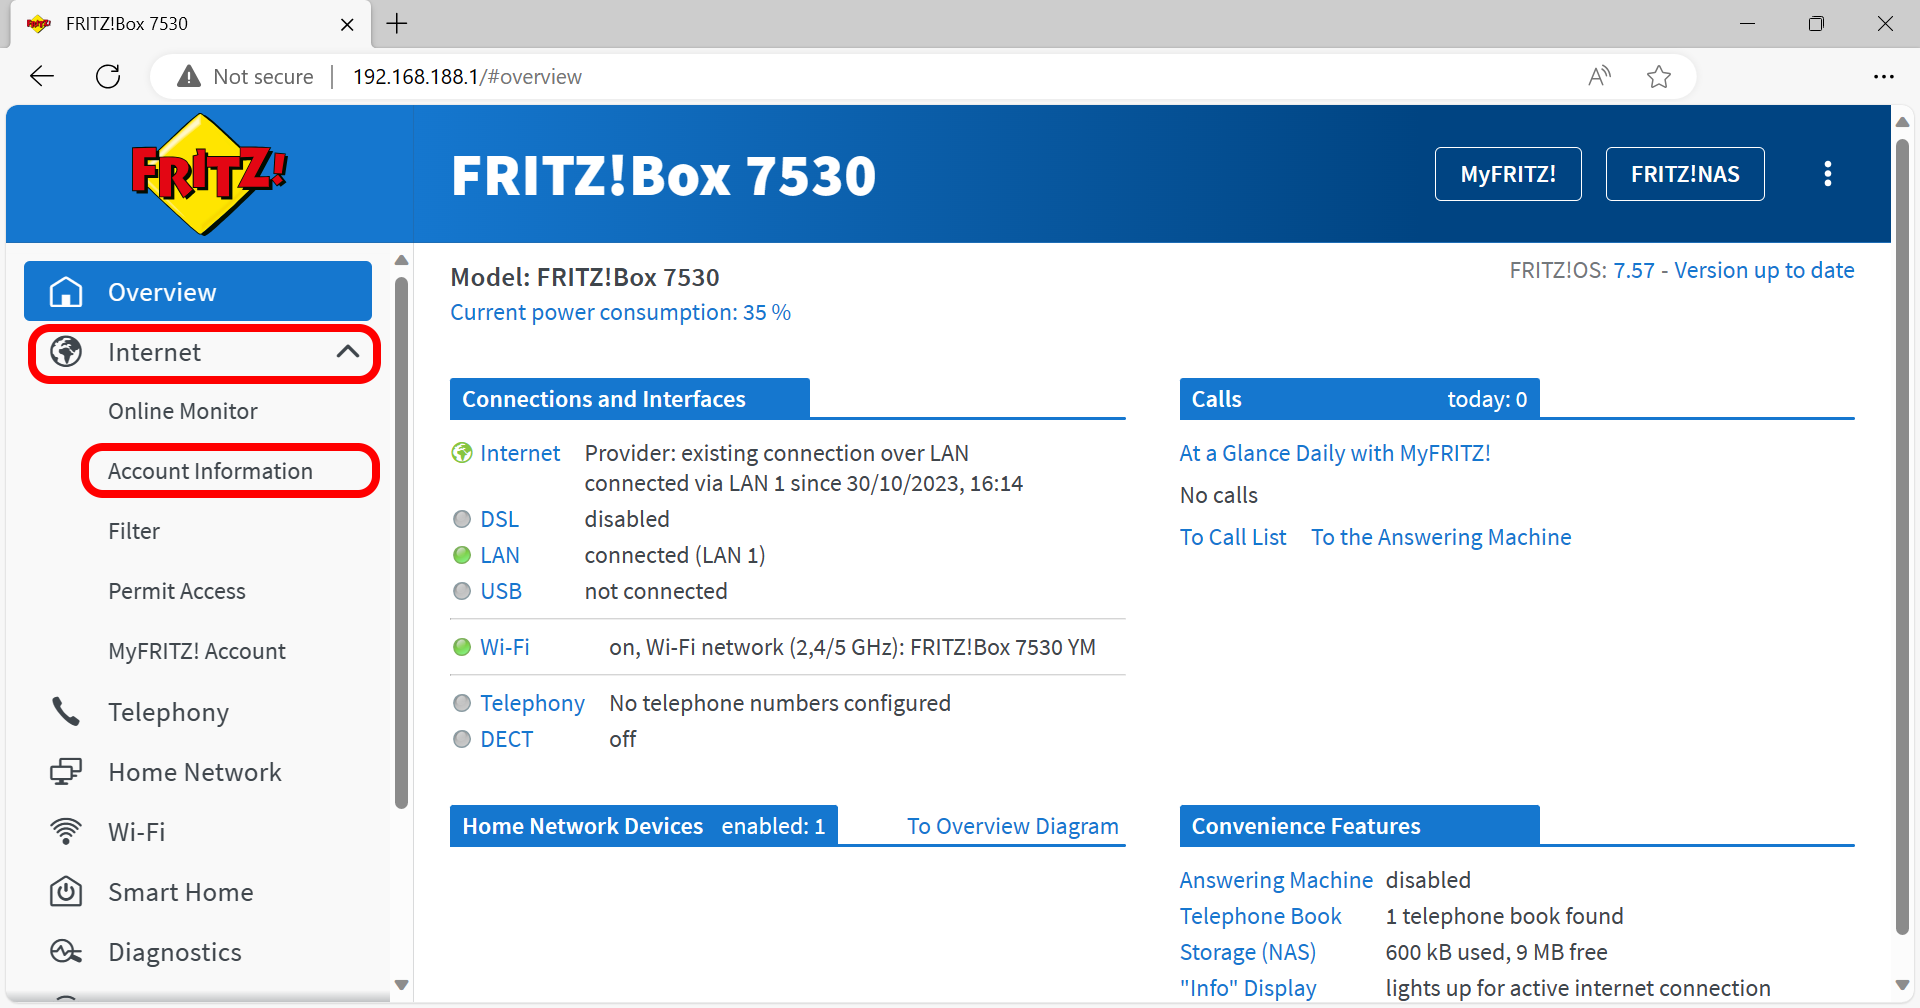
Once you have logged in to the user interface, click Internet > Account Information on the left-hand sidebar.
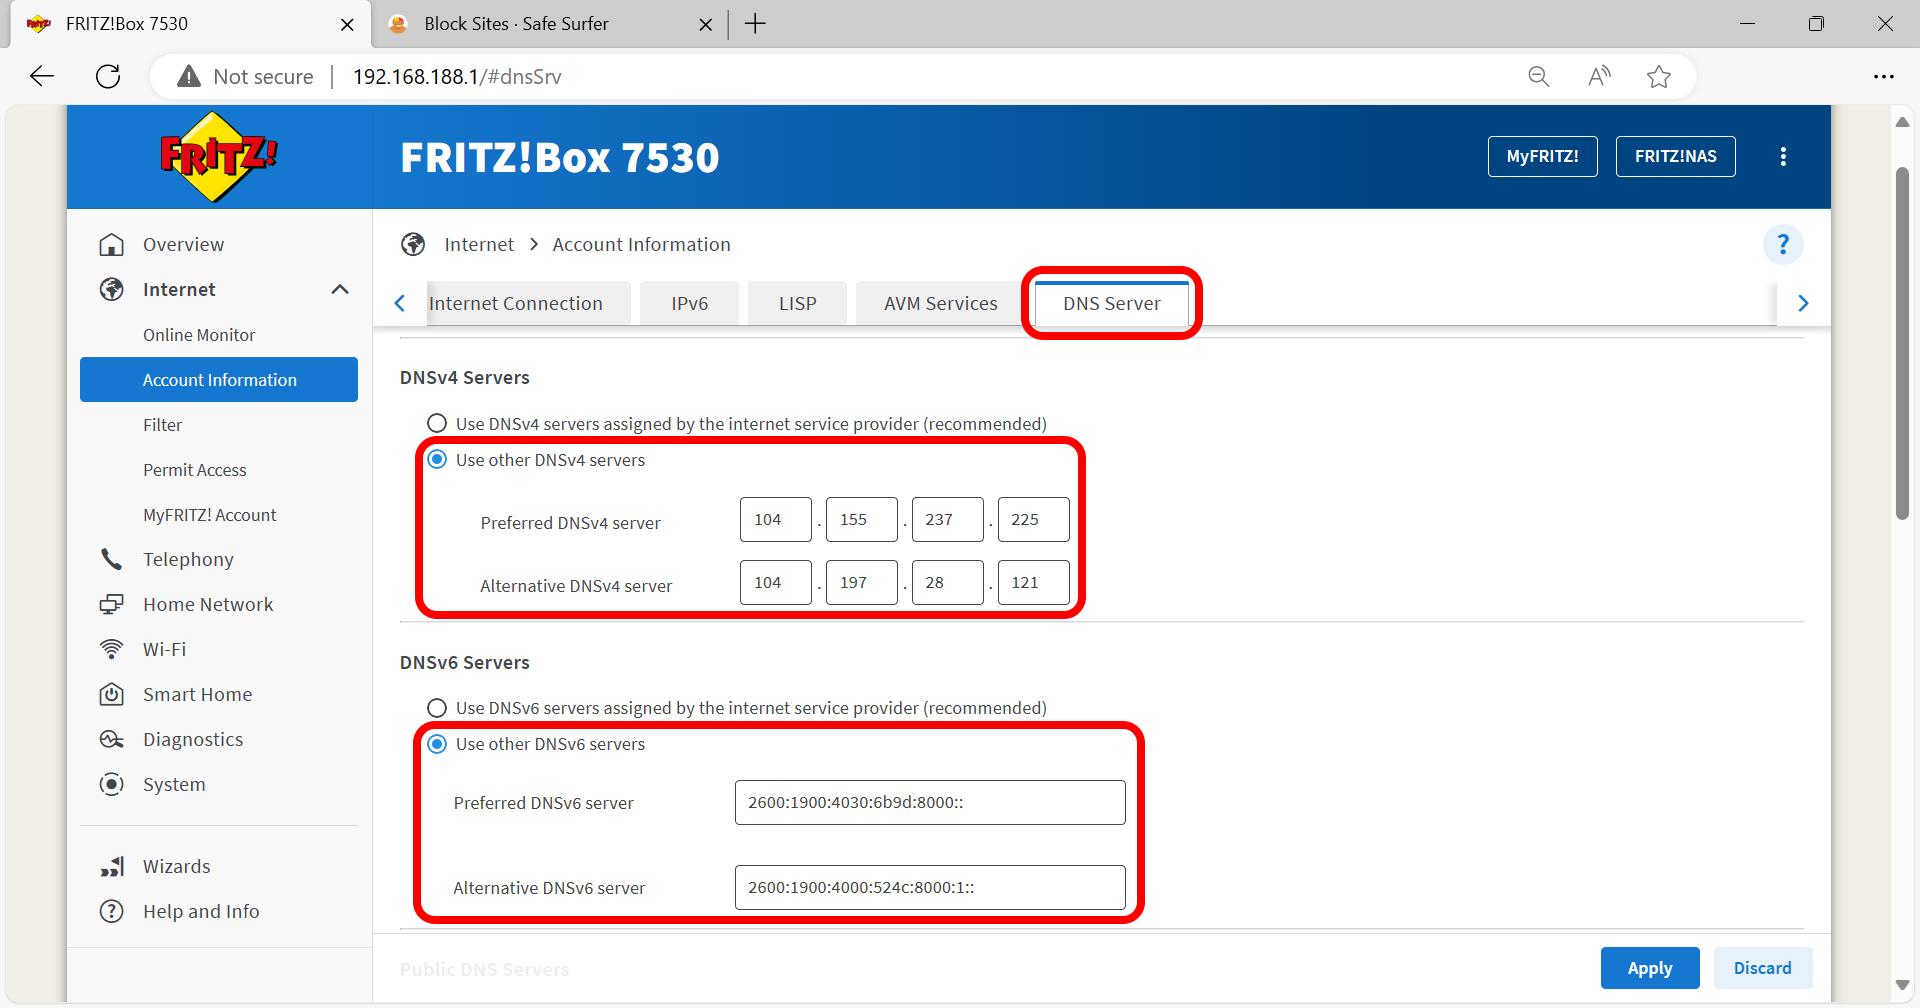
Click the DNS Server tab. Under DNSv4 Servers, click “Use other DNSv4 servers”.
- For “Preferred DNSv4 server”, enter 34.116.72.241
- For “Alternative DNSv4 server”, enter 4.150.168.57
Under DNSv6 Servers, click “Use other DNSv6 servers”.
- For “Preferred DNSv6 server”, copy and paste the following address into the text box: 2603:1030:7:7::3b
- For “Alternative DNSv6 server”, copy and paste the following address into the text box: 2600:1900:4030:6b9d:8000::
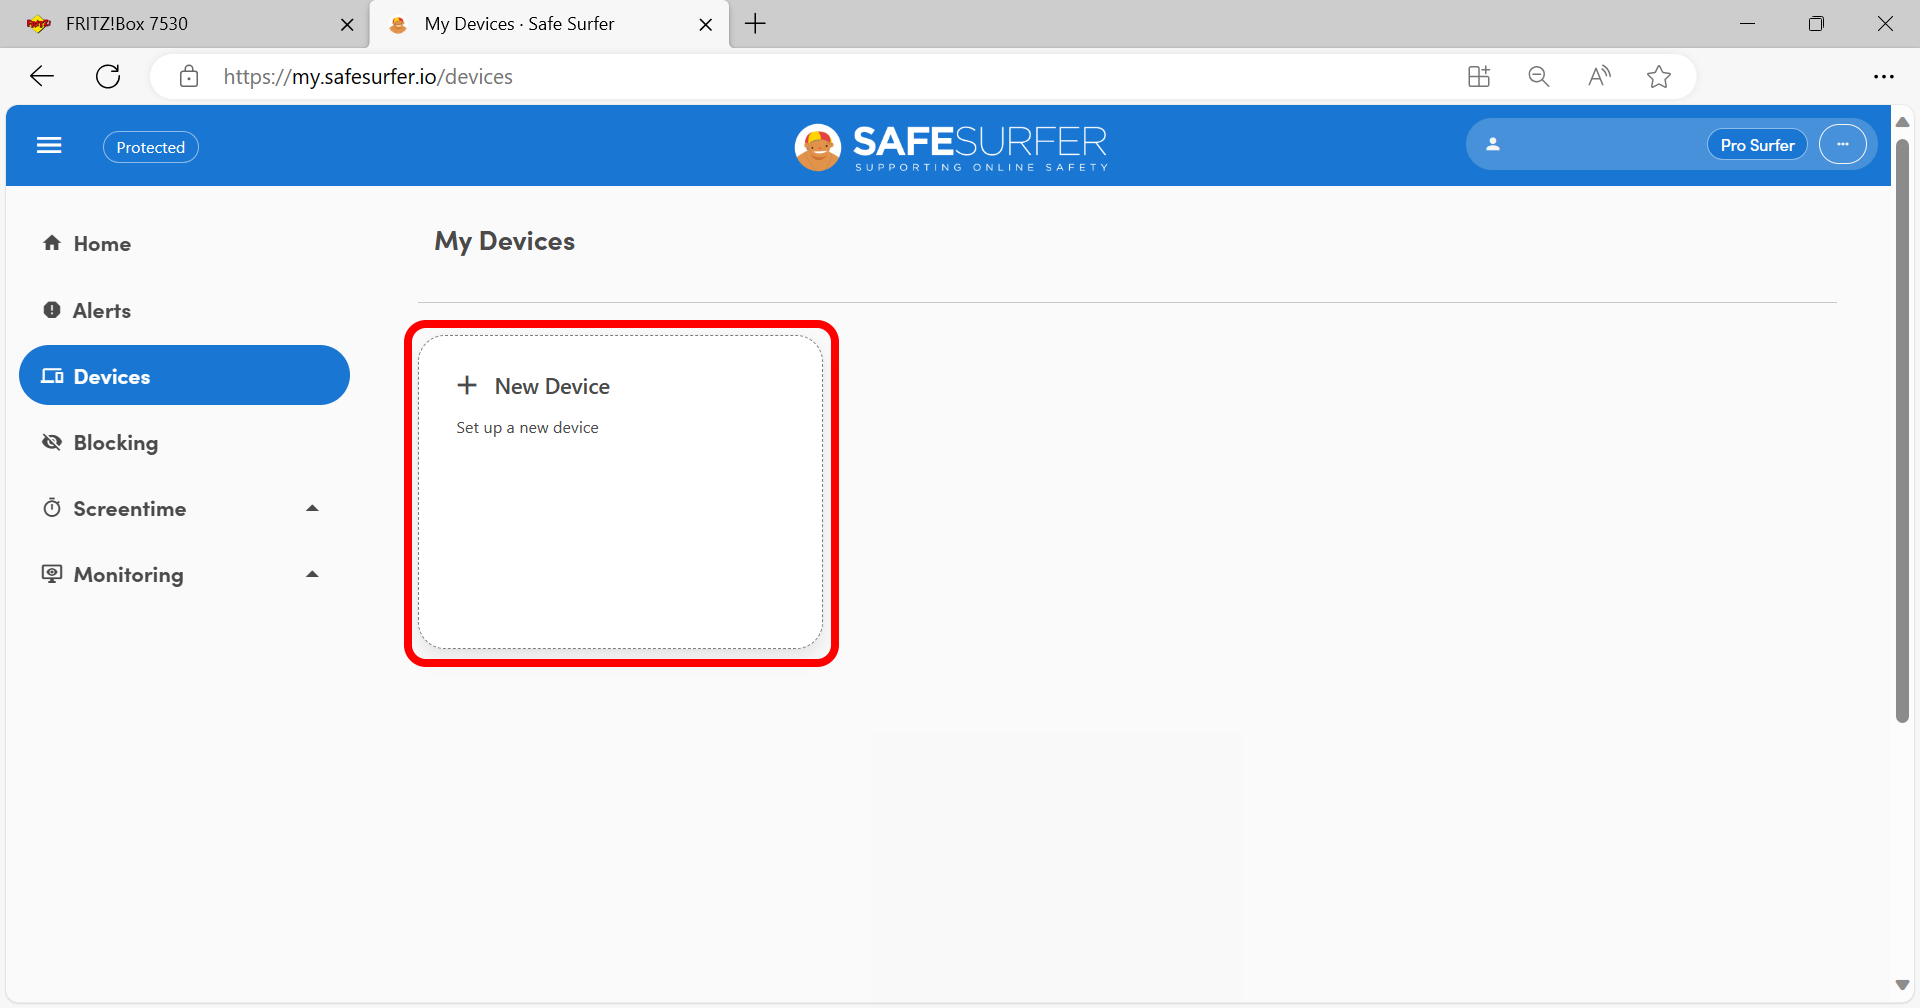
Open a new tab and visit the Safe Surfer dashboard. Click the Devices menu on the left-hand sidebar, then click the “+ New Device” button.
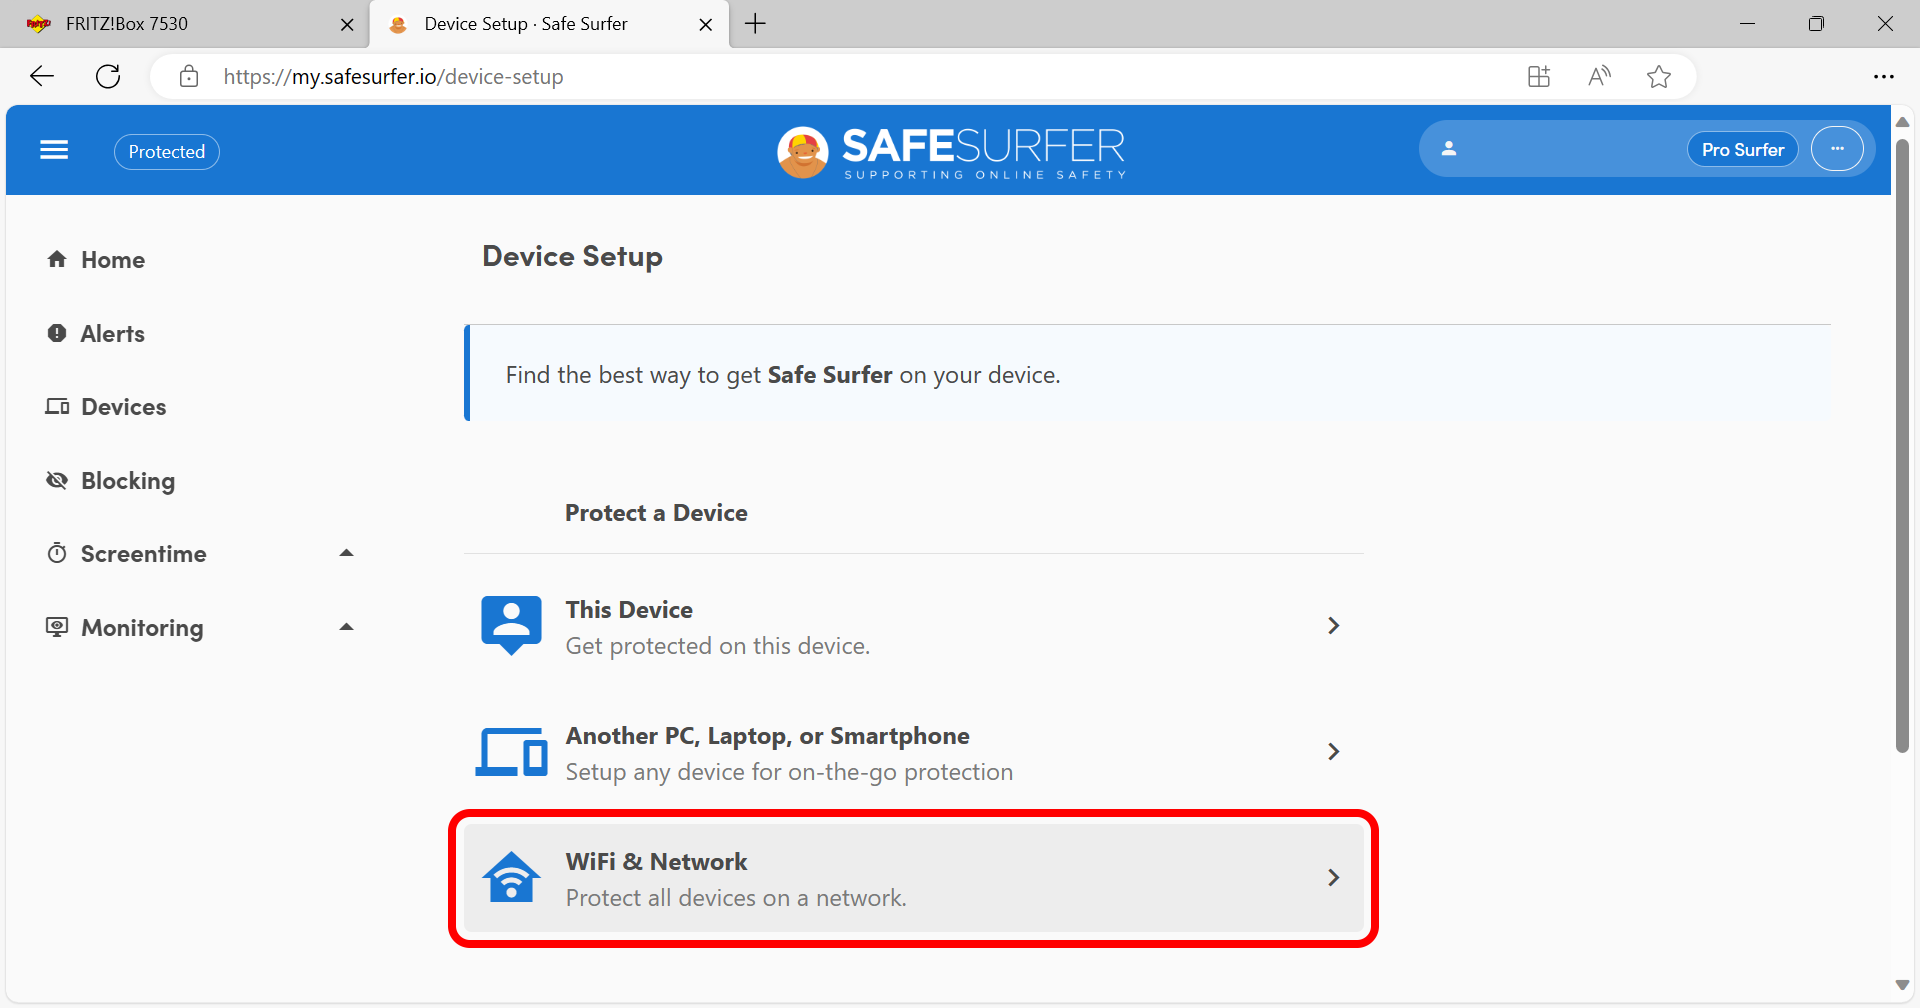
Click “Wi-Fi and network”.
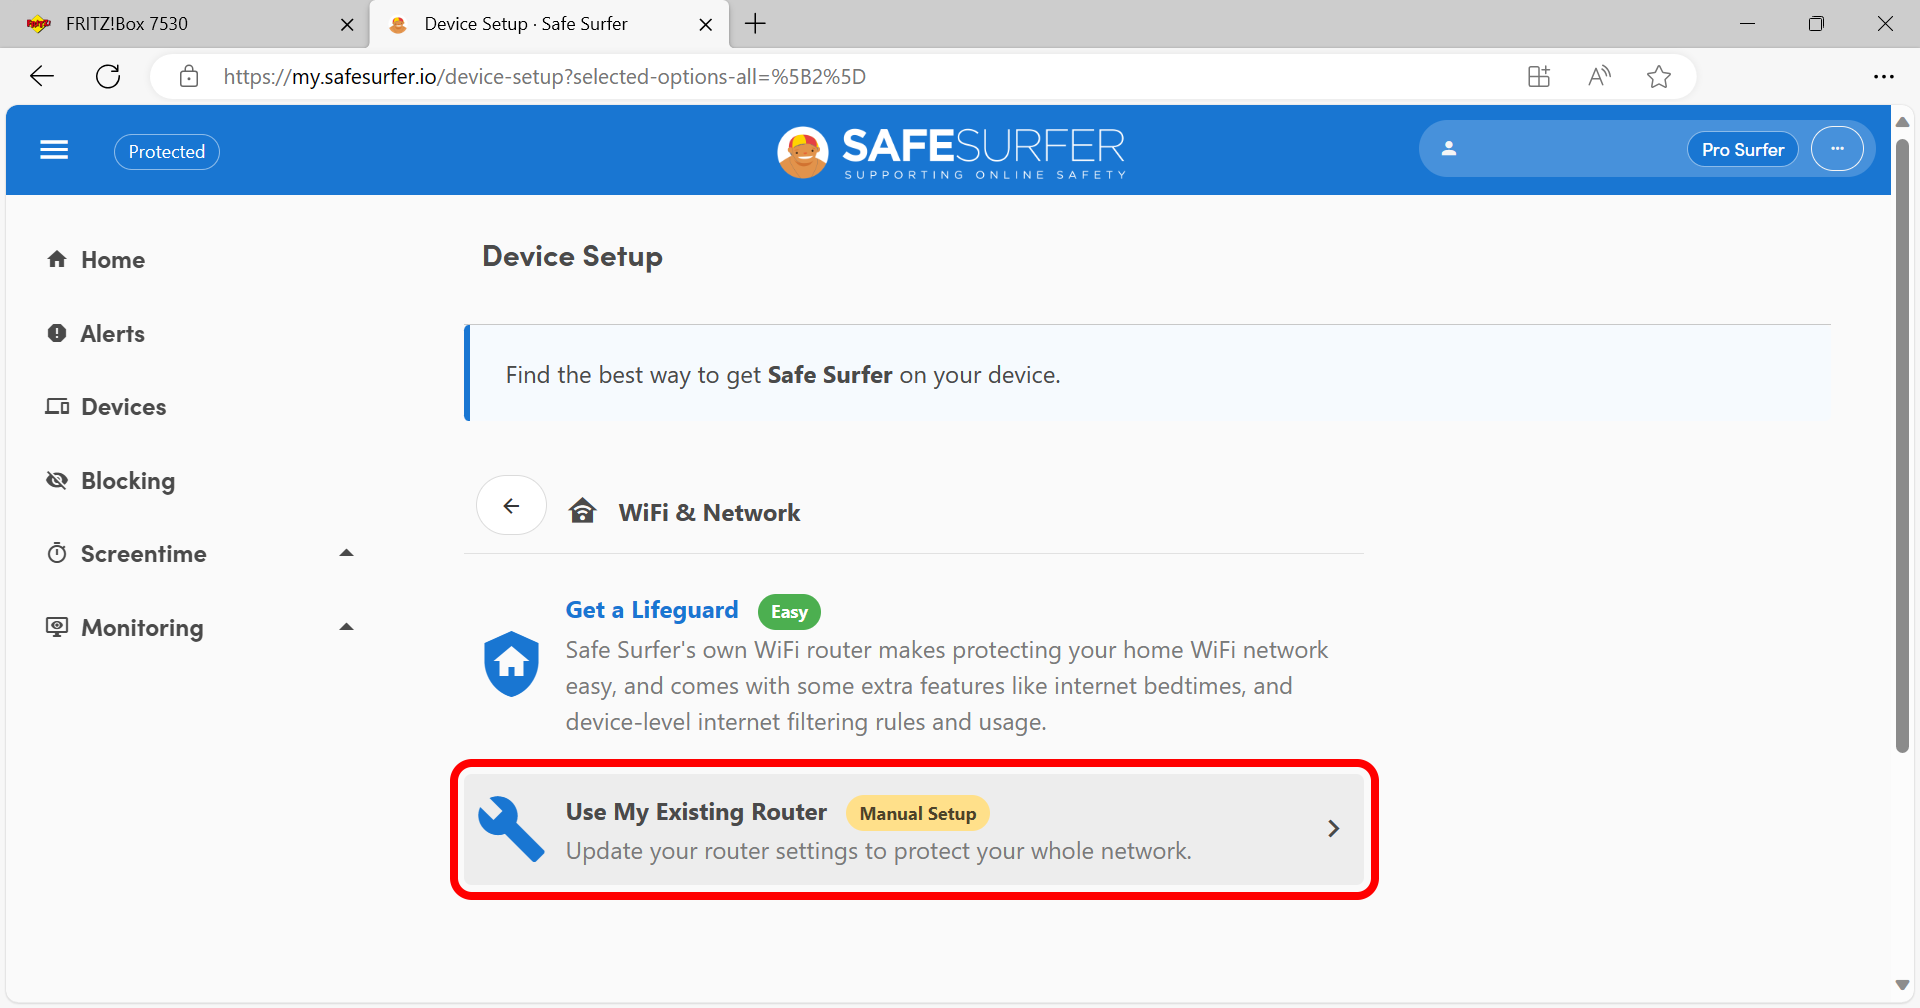
Click “Use my existing router”.
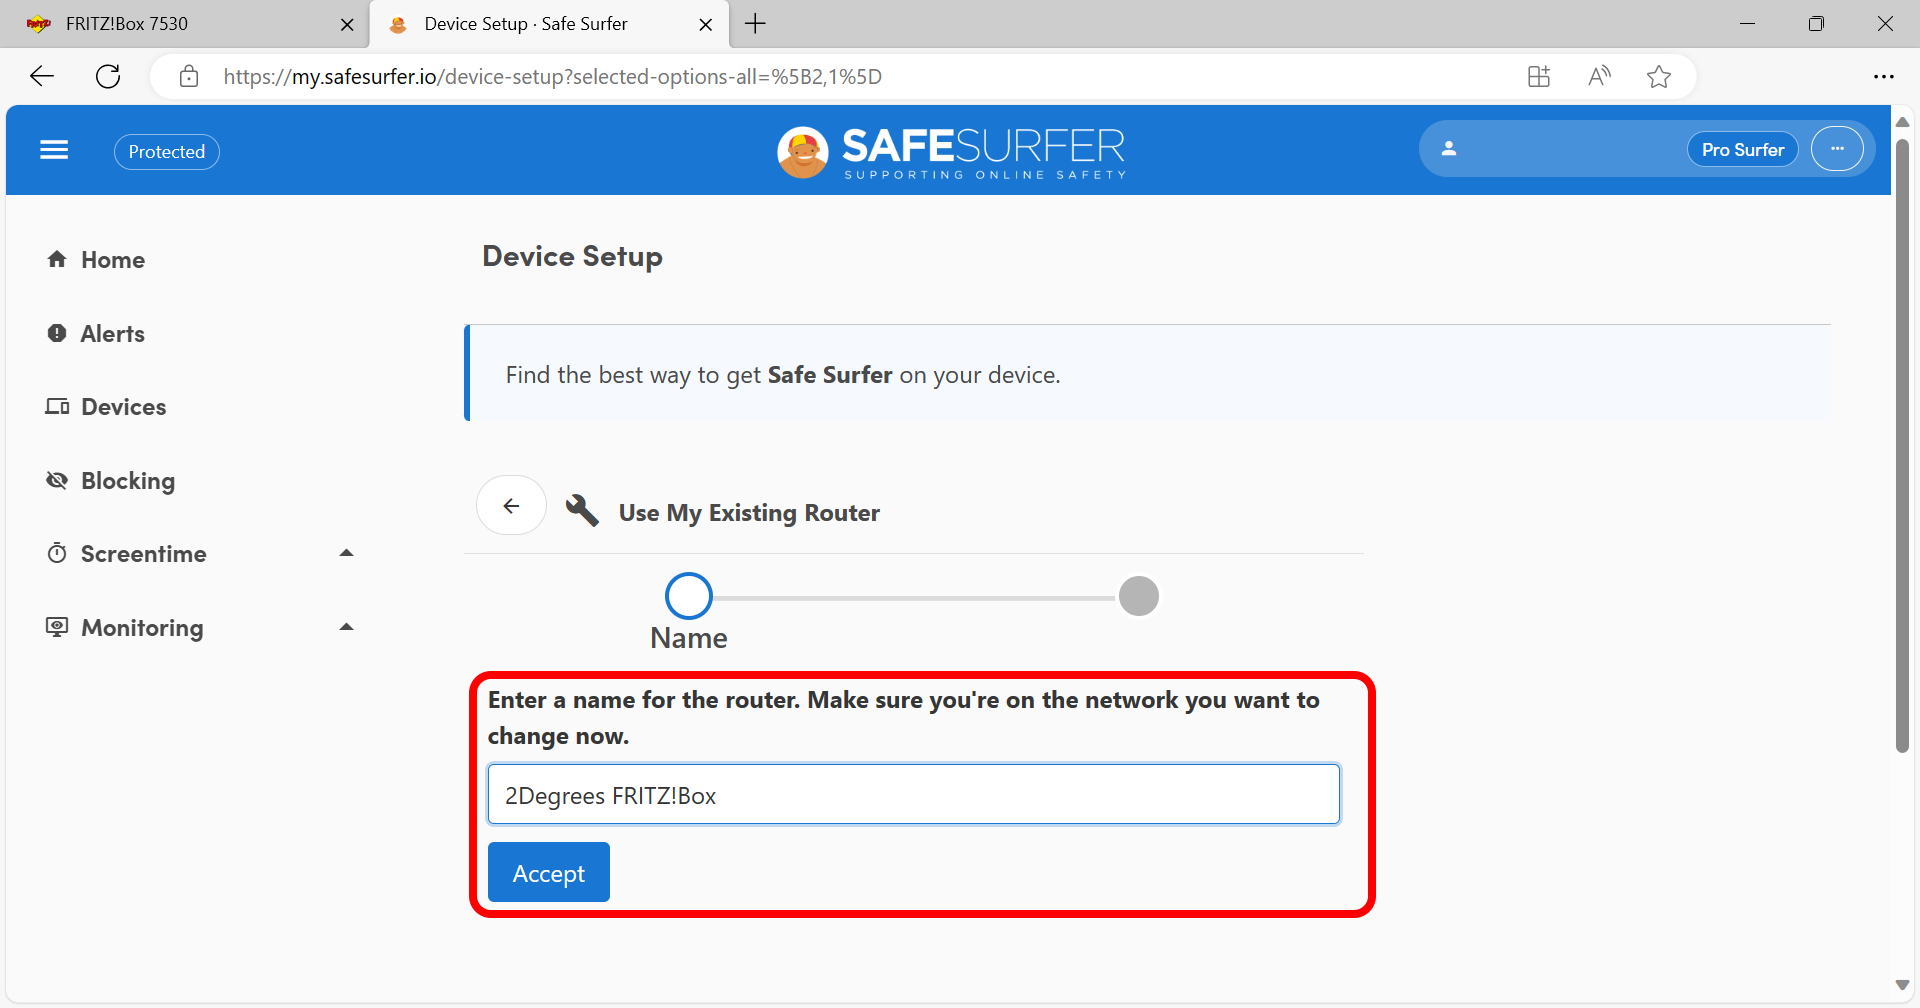
Enter a name, then click the Accept button.
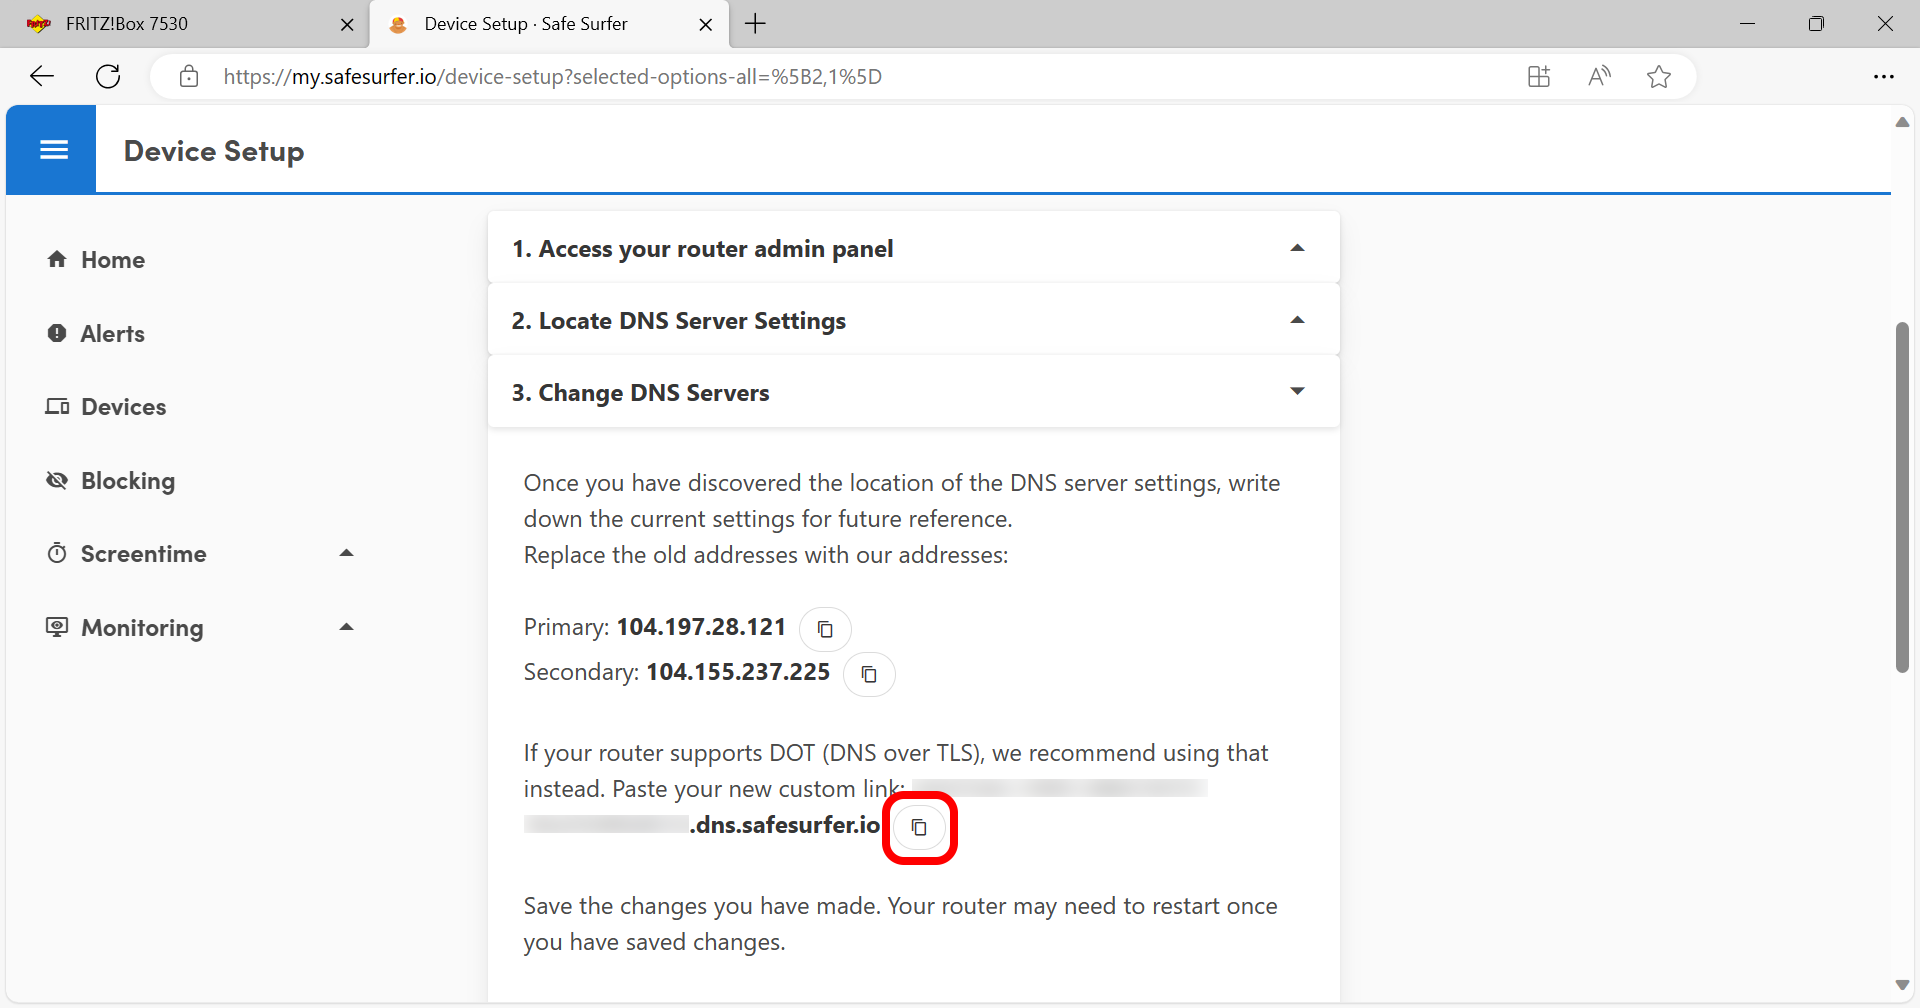
Click step 3, then click the copy button found next to the custom protection link.
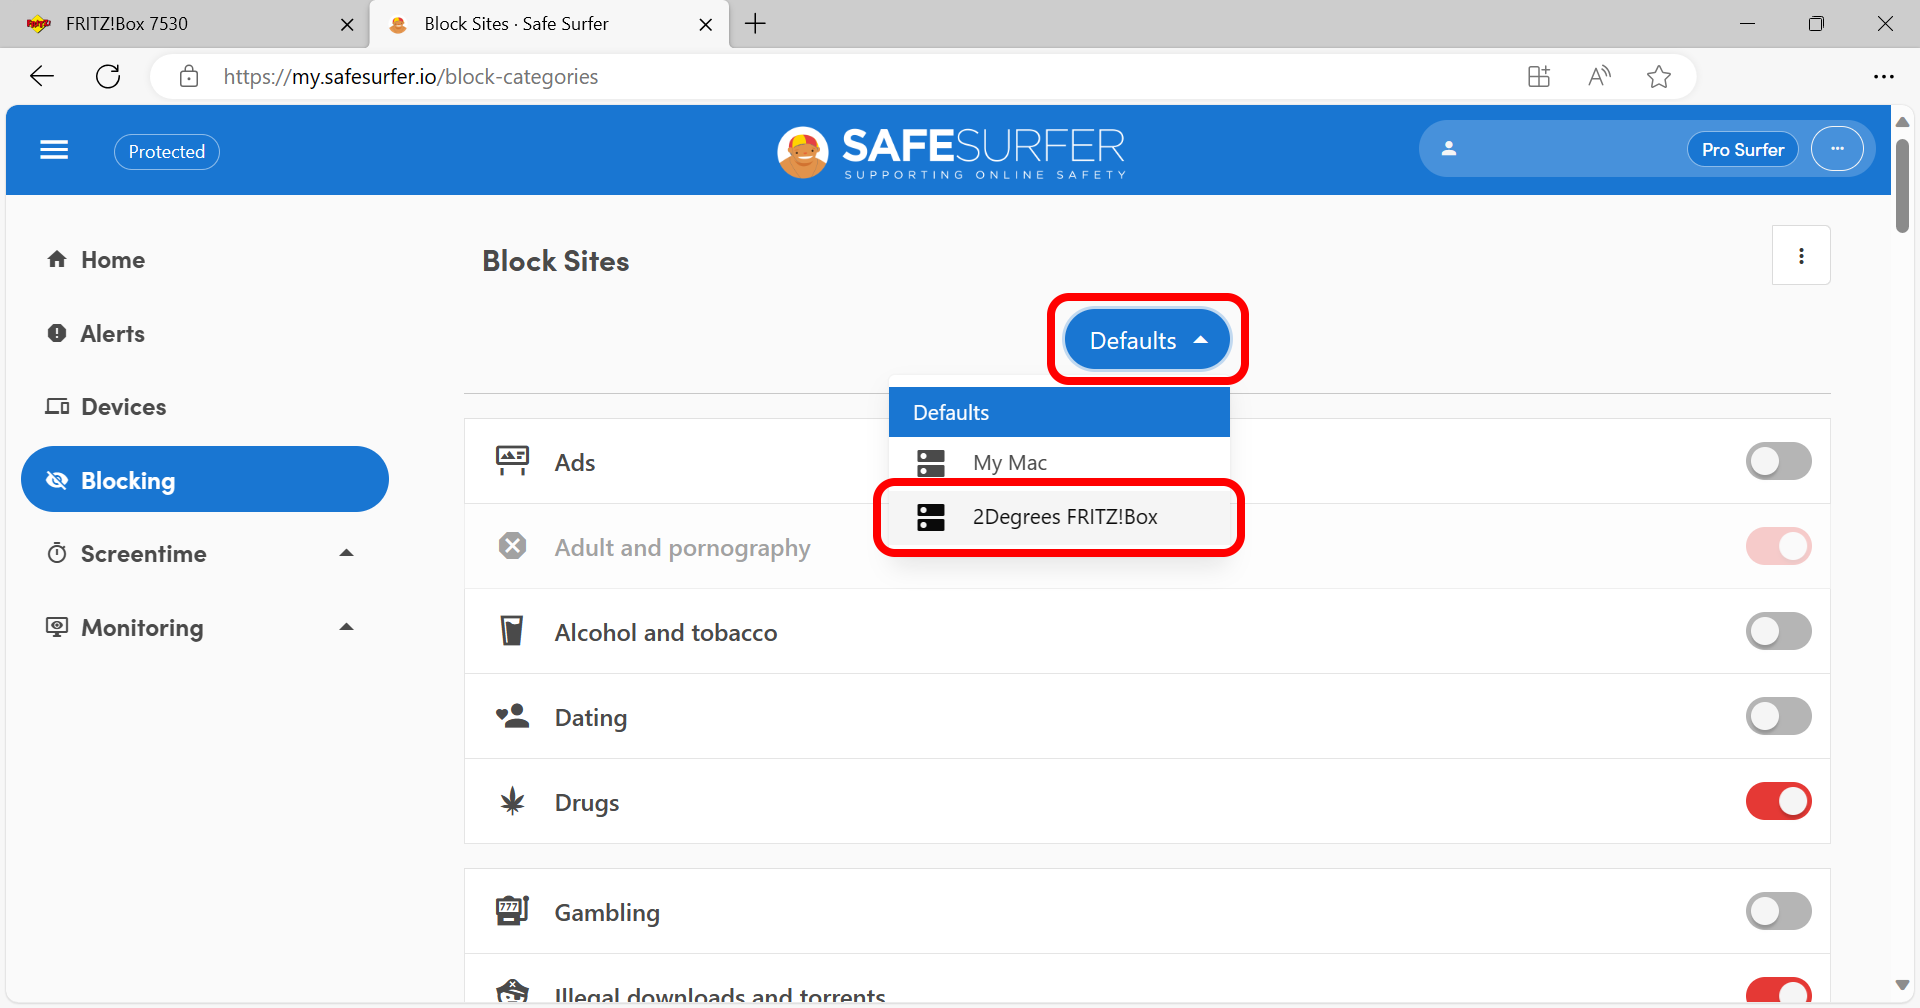
Click the Blocking menu on the left-hand sidebar. Click the blue bubble list, then select the FRITZ!Box modem device. You can now select categories that you would like to block.
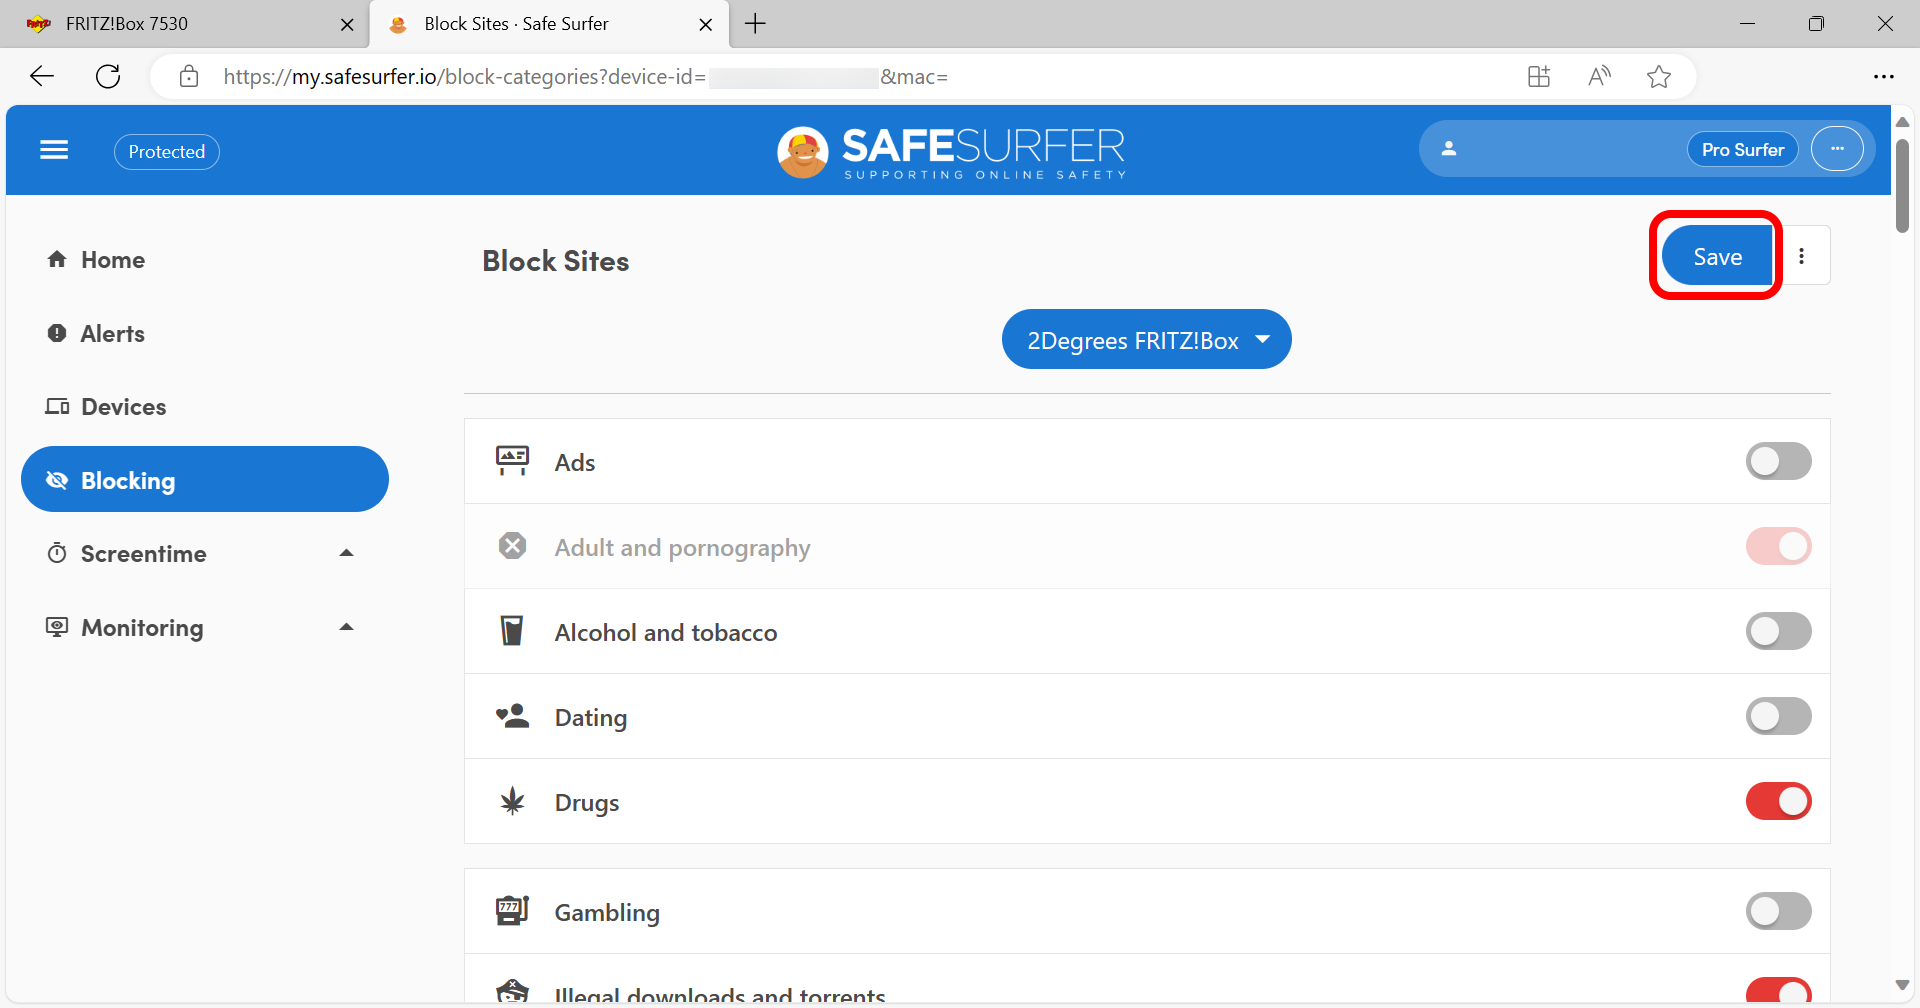
Once you have finished, click the Save button at the upper-right corner.
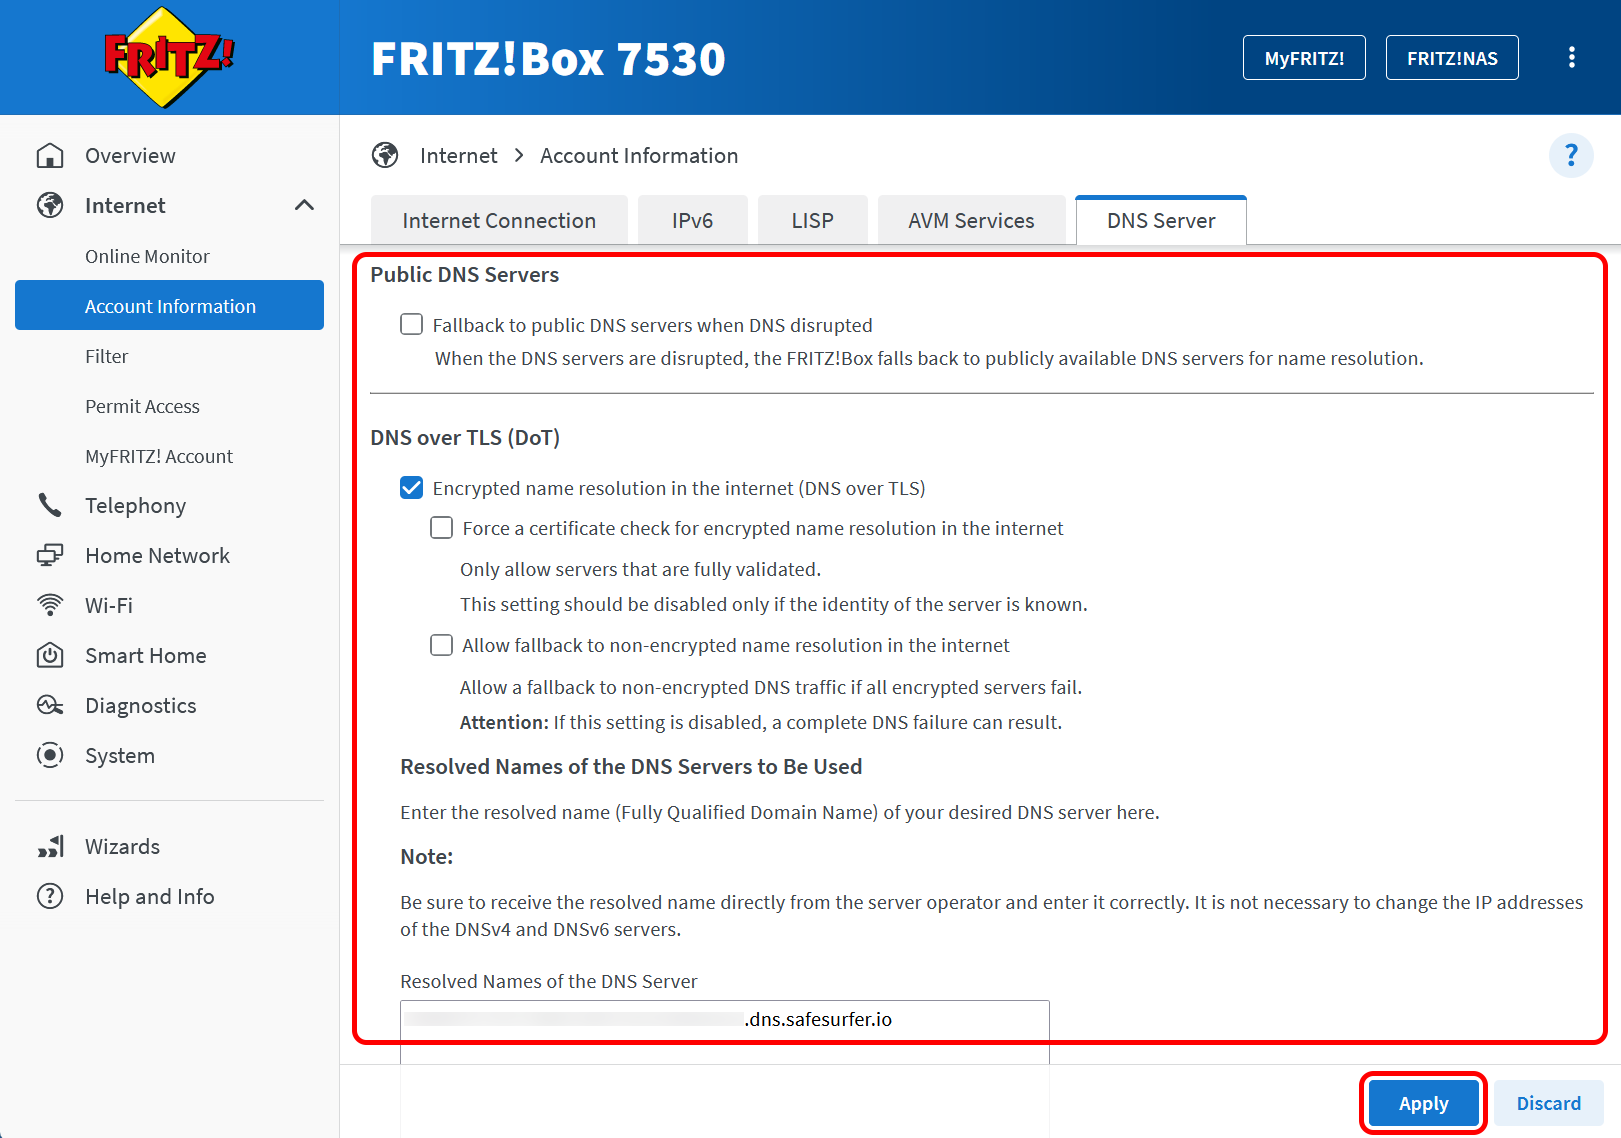
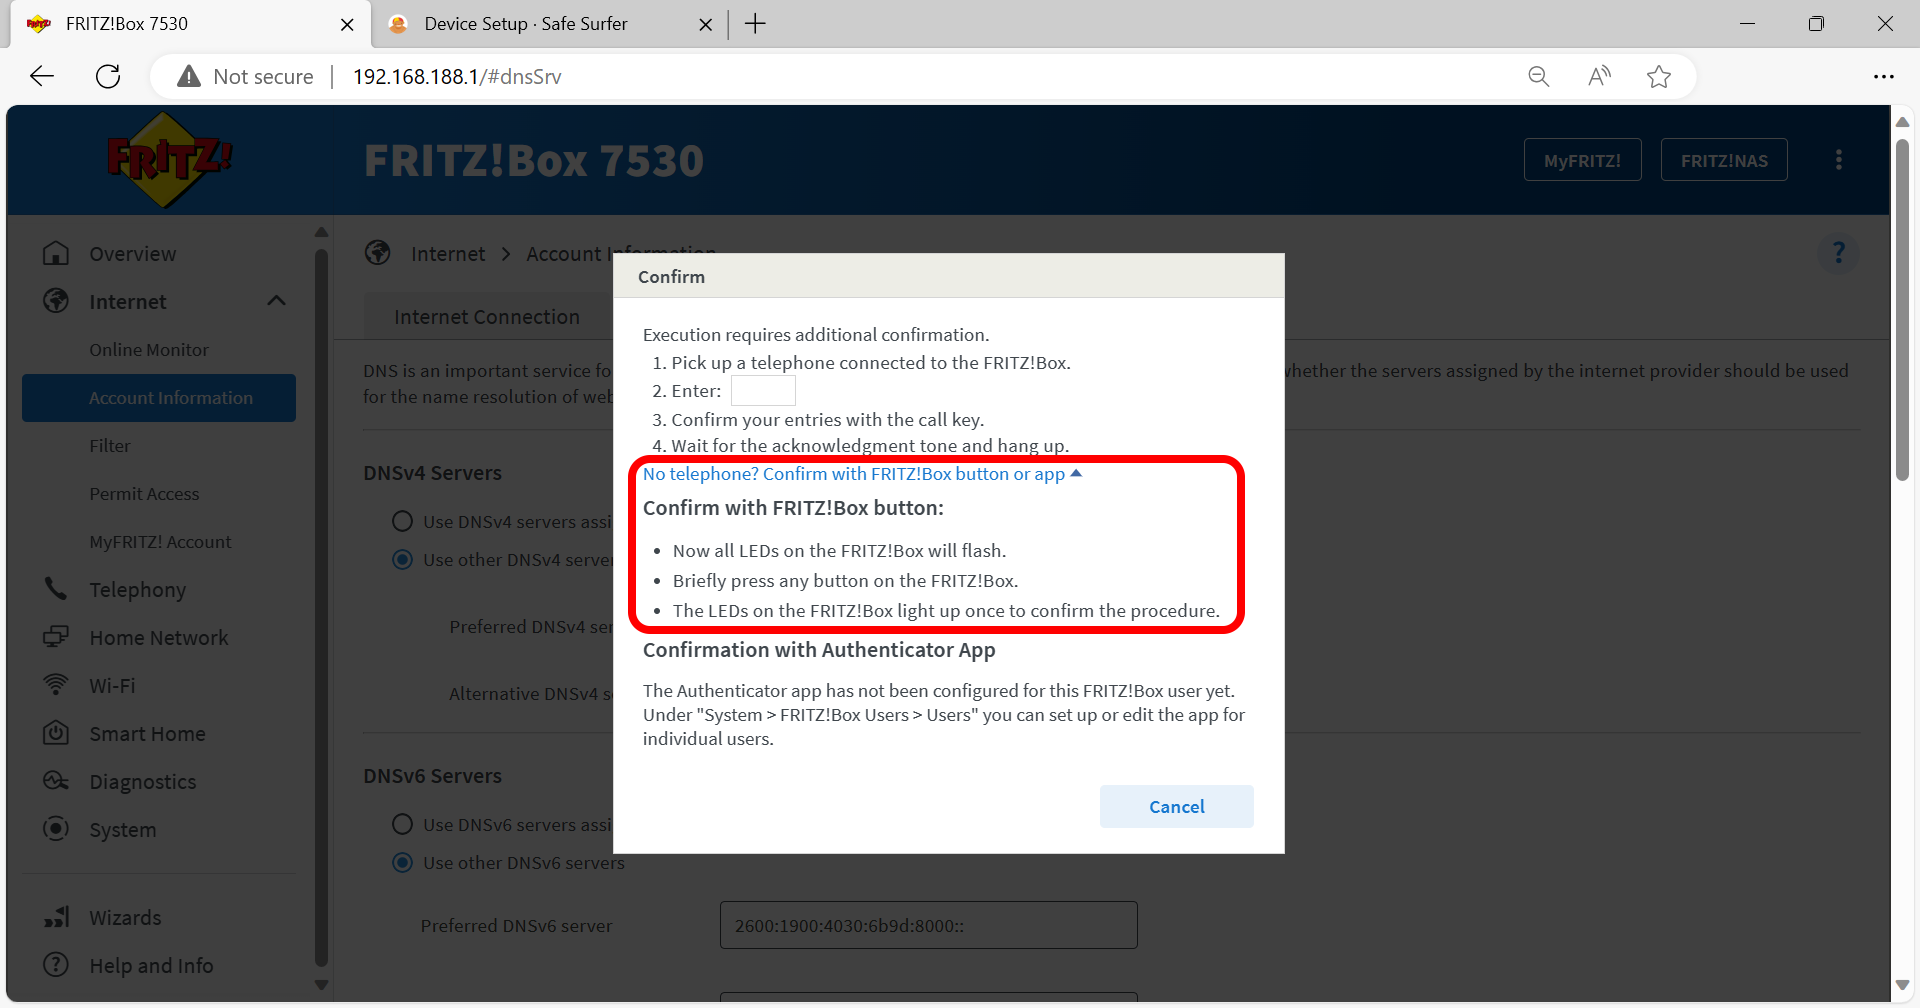
Back on the FRITZ!Box tab, scroll down and turn off the checkbox found next to “Fallback to public DNS servers when DNS disrupted”. Under the “DNS over TLS (DoT)” section, tick the option for “Encrypted name resolution in the internet (DNS over TLS)”, and turn off the checkboxes found next to both “Force a certificate check for encrypted name resolution in the internet” and “Allow fallback to non-encrypted name resolution in the internet”. Paste the protection link into the big text box at the bottom of the page. Click the Apply button at the lower-right corner.
Click the “No telephone?” option, then follow the instructions to save the changes. You will likely need to briefly press one of the flashing buttons found on the top of the FRITZ!Box.
Click the three-dot button found at the upper-right corner of the user interface, then click the Log Off option.

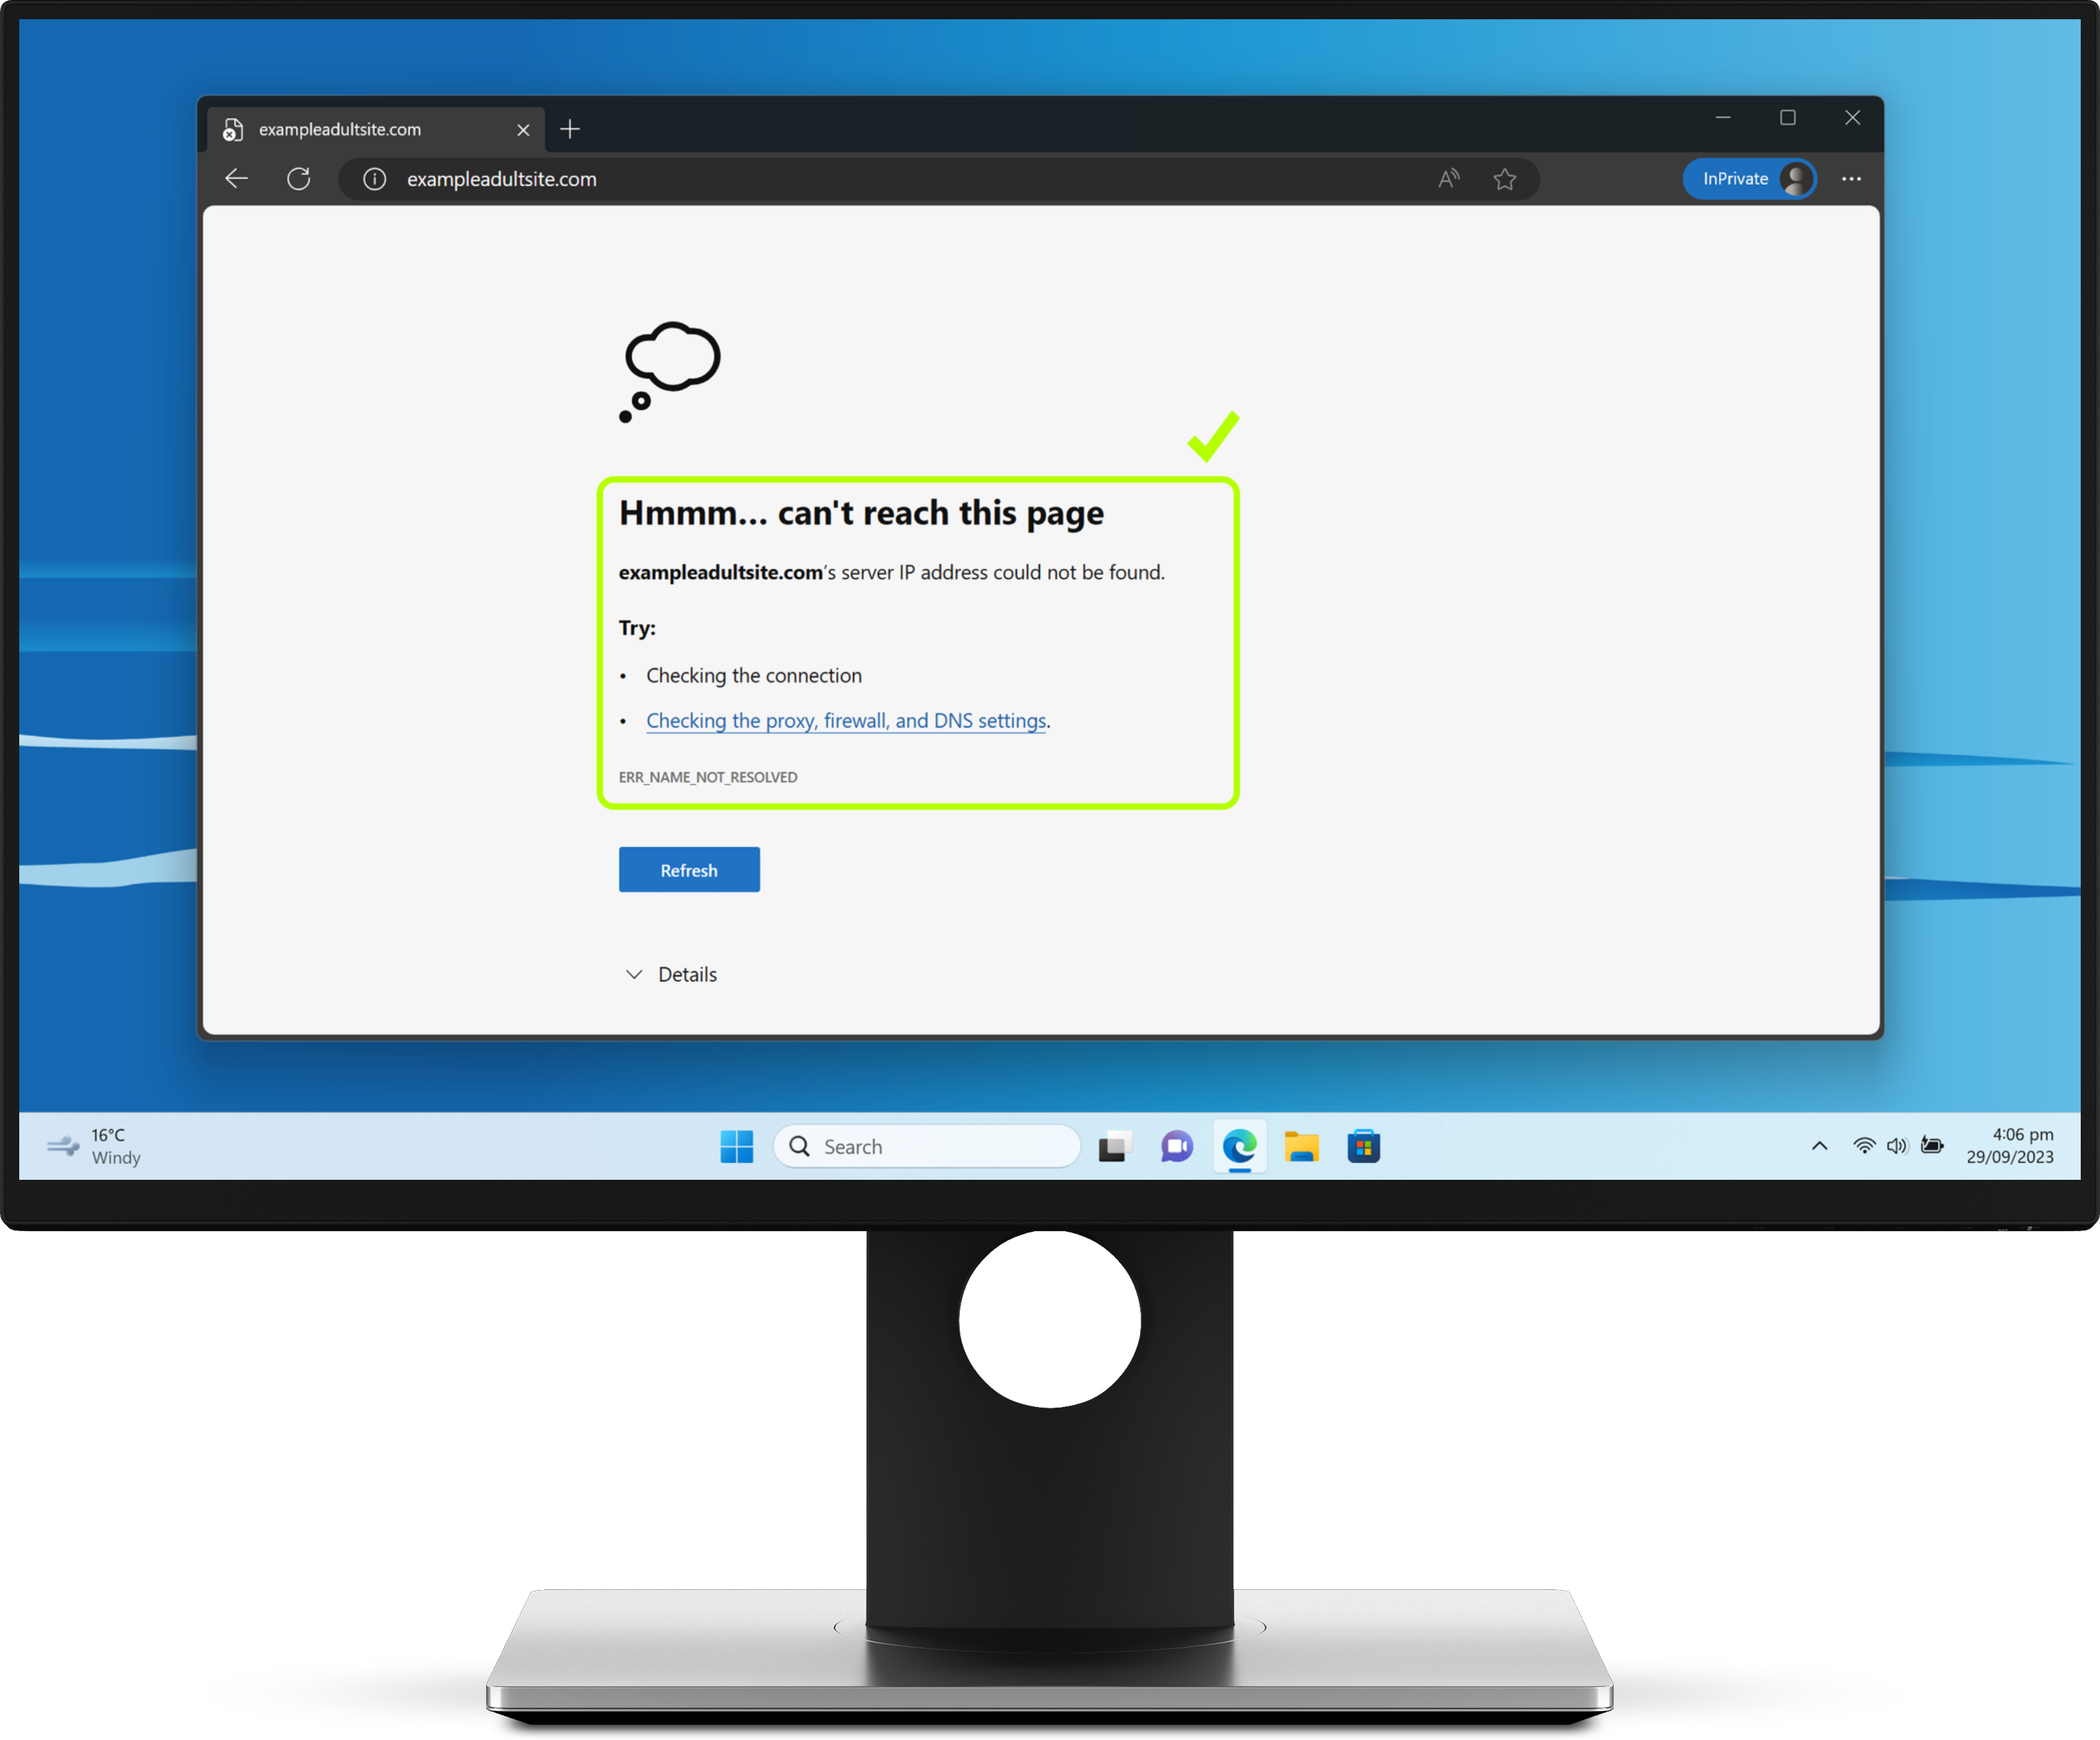
Step 2: Verify protection
Verify the protection installation by visiting ExampleAdultSite.com inside a web browser. This is a safe website designated for testing if pornographic websites are being blocked. This site should be blocked.
Protection complete
Great work! The devices connected to this home router should now be protected. Visit our easy-to-use online dashboard to start monitoring traffic and blocking content from our premium categories with an affordable Pro Surfer subscription.
If you would like to protect a different kind of device, visit our Guides page.
Disclaimer: Safe Surfer Limited is in no way associated with 2degrees New Zealand.